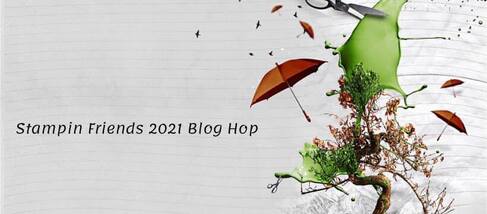
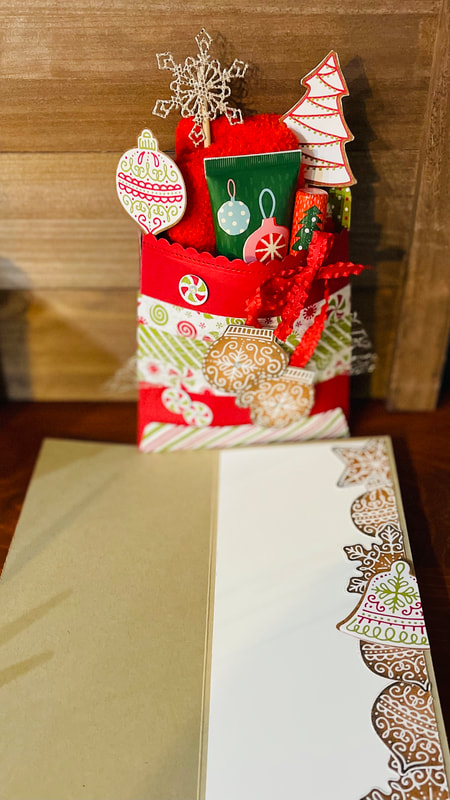
 Welcome to what is the last hop for Stampin Friends in 2021. But don’t worry we will be back with new projects in January 2022. For November hop we are Celebrating the Season wherever we are. I hope you can from Maureen Rauchfuss’s blog! Her projects are amazing. If not be sure to visit, And make sure you visit after mine. My projects use the suite from Stampin Up called Gingerbread and Peppermint. You can find this Suite in the Holiday Mini Catalog.  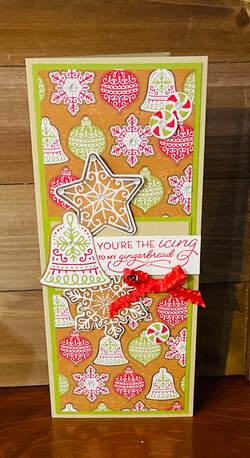 I decided to make a slimline card, I used Crumb Cake for the card base 8x9 1/4 score on the 8” side at 4. For the layers I used Old Olive 3 3/4x9 then I layered 2 pieces of DSP 3 3/4x 4 1/2. Adhere one to the top half of the old olive and one for the bottom half. You will have a piece of CS left from the crumb cake and old olive. Cut the old olive to 2x3 3/4 and layer the piece of crumb cake 1 3/4x3 3/8. I used the coordinating sides from the suite to cut the shapes from the DSP. I stamped the greeting in real red, Add the ruffled ribbon in a bow and added some rhinestones to finish it off. I also cut a few more shapes to line the inside of the card. See photo below.
I plan to add a gift card as well. I will add to a large cellophane bag and tie with a bow before giving as a gift to my son’s bus driver.
I hope you enjoyed my projects. Be sure to continue to Melissa Thomas's Blog. Her projects are beautiful.
Thanks for joining us today. I hope we inspired you to create! Happy Holidays and Happy Stampin Steph
8 Comments
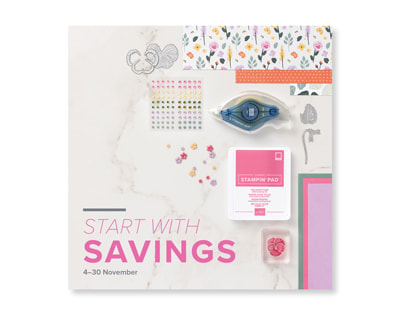
If you answered “yes” to any of the questions above, the Start with Savings promotion will provide you with an excellent opportunity to build your business! Instead of the standard $99 USD | $135 CAD Starter Kit—which is already a steal of a deal—aspiring demonstrators can snatch up a completely custom Starter Kit for only $75 USD | $100 CAD. What an absolutely unbeatable bargain for a box with a value of $125 USD | $165 CAD! There’s no better time than November for you to transition into the demonstrators you’ve dreamed of becoming. From 4–30 November, you’ll be able to start your Stampin’ Up! business strong—and with big savings! For all the ins and outs of this promotion, please contact me!
I look forward to hearing from you Happy Stampin Steph 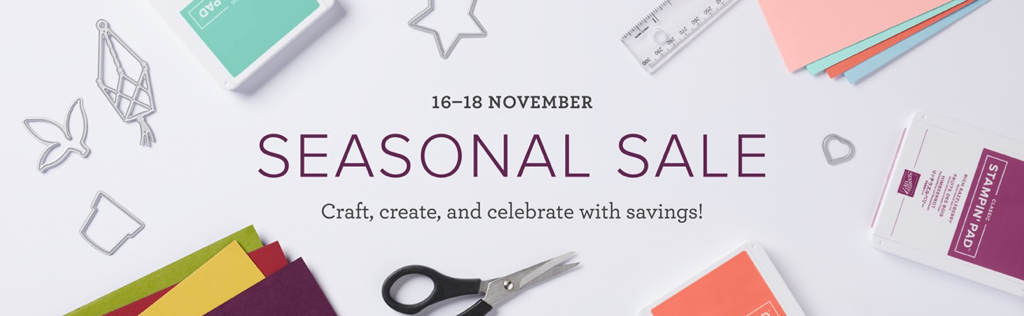 Fold, snip, layer, and stamp! During the Seasonal Sale, you can stock up and save 10% on cardstock, 15% on ink pads, and 20% on dies. Build up your collection of crafting basics—and prepare for another year of top-tier projects—with a steal of a deal on papercrafting products! Stay tuned for more details on this fun sale!!
Happy Stampin Steph 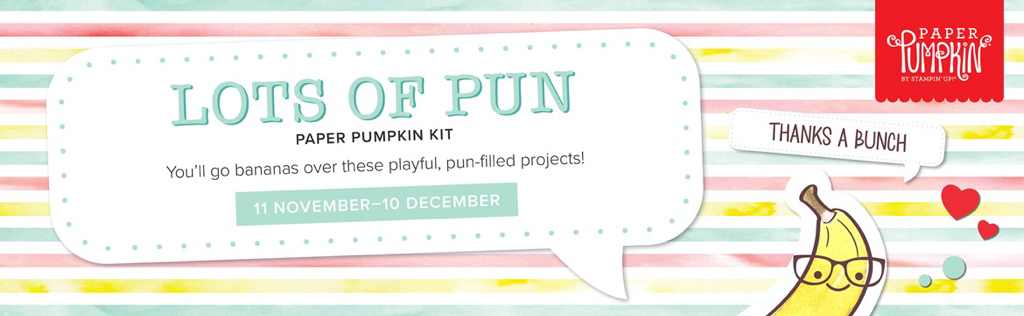 What’s not to “loaf” about a punny joke? It never hurts to have a little laughter, light-heartedness, and humor sprinkled into your schedule. If you’re a fan of fun, get a kick out of clever crafts, and can’t keep it together when you hear a classic knee-slapper, you’ll go bananas over this month’s cute ‘n’ quirky kit!
The Lots of Pun Paper Pumpkin Kit includes enough egg-citing elements to create nine cards and coordinating envelopes The Lots of Pun Paper Pumpkin Kit includes enough egg-citing elements to create nine cards and coordinating envelopes. From giddy gingham to splatters and stripes, this playful Paper Pumpkin kit features a fun and fresh look with one-of-a-kind patterns and designs! Egg-cellent for any occasion, reason, or season throughout the year, the kit’s pun-packed stamp set provides completely customizable characters for a very versatile crafting experience. Pair each stamp with its matching die-cut snack, then mix up the faces and accessories for an absolutely adorable accent! Pick up your friends and family with pun-filled projects. December’s delightful kit is sure to make ‘em smile! Fot kit details view my Paper Pumpkin page. Happy Stampin Steph 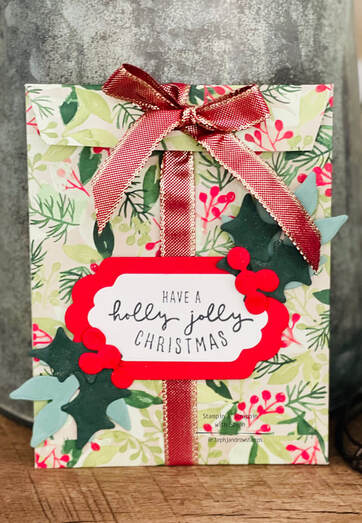 Today I am sharing a pocket envelope I made using the Painted Christmas Suite. It was so easy to make with minimal supplies, cutting & gluing! The Painted Christmas Suite is one of my favorite suites in the Stampin Up Holiday mini catalog. The suite is one of the larger ones featured, includes 2 stamp bundles (stamp sets and dies) ribbon, designer series paper and gold holly leaves. If you remember back a little while back, Stampin Up offered Painted Seasons and Painted Autumn; Painted Christmas is very similar in look. It's just so pretty and the designer series paper is very subtle to me but really makes an impact.
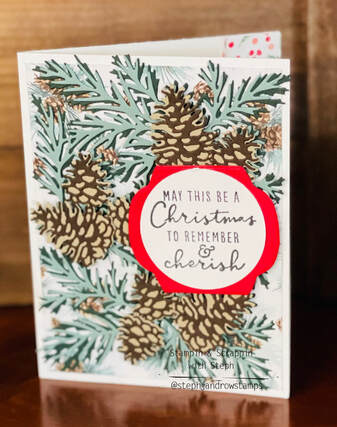
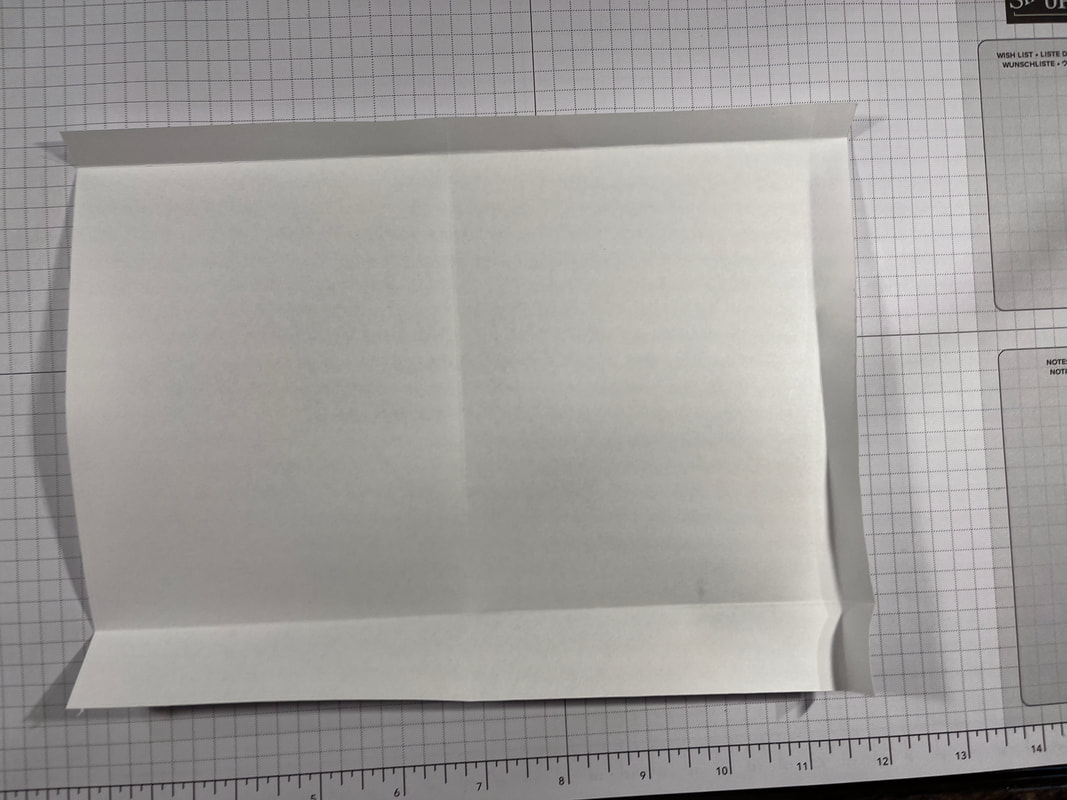 Below you can see i shaded in the areas that will need to be removed. 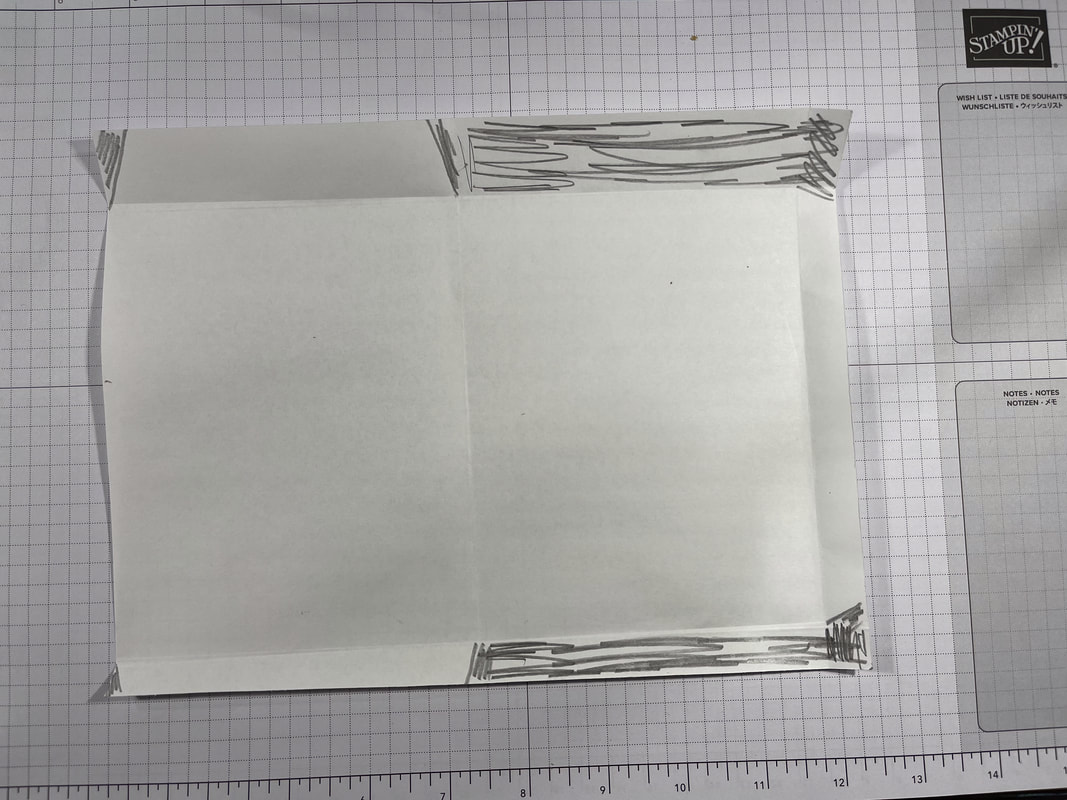 Now for the trimming. With the 1/2 score line to the right, you will need to remove the bottom section and top section from the 4 1/2 score line over to the end...refer to the photo below.  Flip over and add adhesive to the 1/2 section, fold in half and adhere that flap 1/2 section Fold up the bottom section and adhere it down. 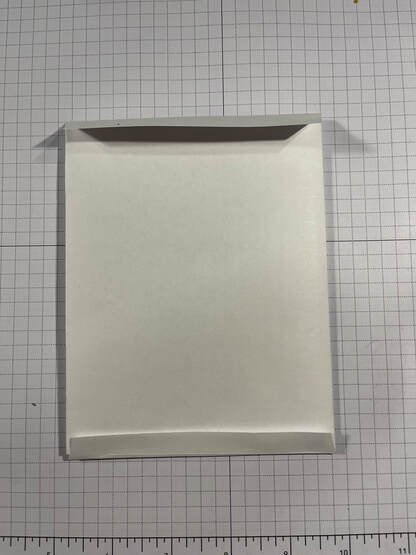 On the top flap, this is the 1" section, I used the little slit that is available in the Seasonal Labels dies. It creates a little opening on the DSP, perfect to feed the ribbon through. Load the pocket with a card or treat first. Wrap your ribbon around and thread up from the bottom into the slit. Tie into a bow. For the greeting, I used Real Red and Basic White cardstock, chose 2 label dies in different size from the Seasonal Labels die set and cut them out. I stamped the greeting from A Christmas to Remember stamp set. Using the same die set, I cut out different leaves and berries. I used a combo of Evening Evergreen, Soft Succulent and Real Red. Layered them around the greeting. 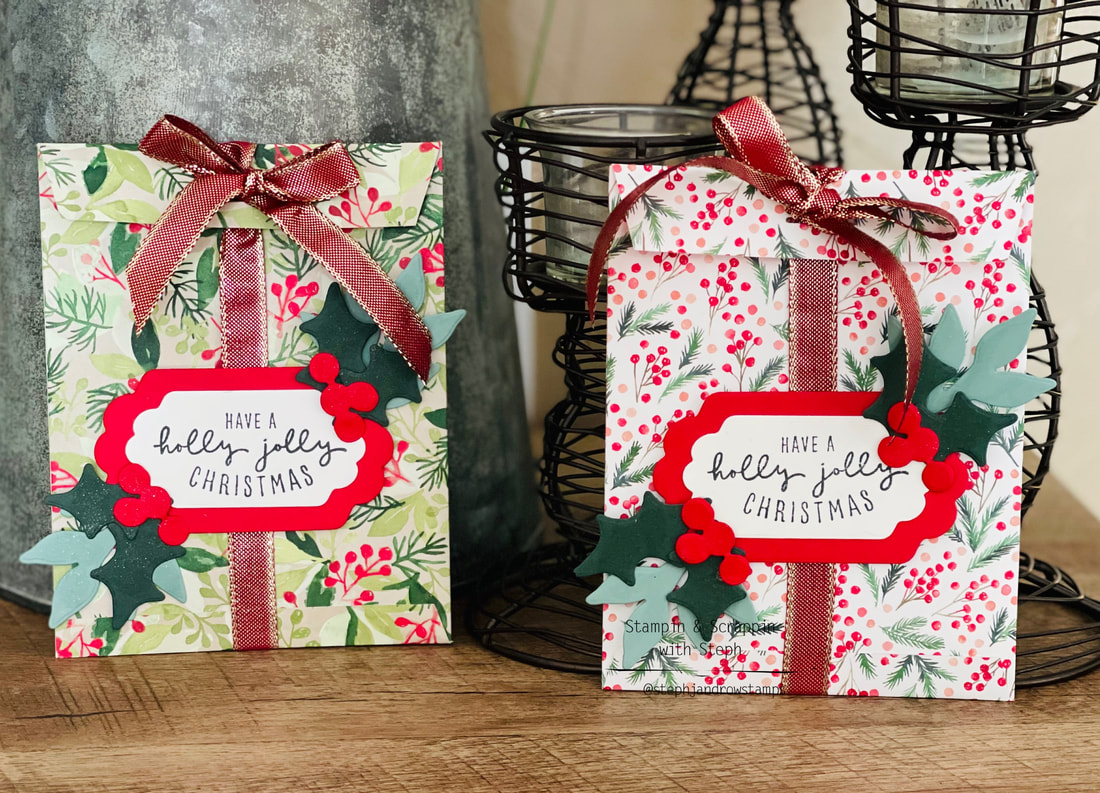
Cut out a 2" Basic White Circle.
Stamp the greeting from the A Christmas to Remember set on the Basic White circle To make the pine/pine cones Use the Christmas Pinecones dies. You will need 2 pieces of cardstock that measure 4x5 1/4 each- a lighter and darker shade I used Soft Succulent and Evening Evergreen Take the larger pine die and cut out with the Evening Evergreen Take the smaller pine die and cut out with the Soft Succulent adhere the Soft Succulent onto the Evening Evergreen piece Use a lighter shade for the bottom of the pinecones, I used Crumb Cake. I cut out 3 large and 5 small For the top layer, I used Early Espresso and cut out 3 large and 5 small. Adhere the Early Espresso pieces onto the Crumb Cake. Next add the pinecones onto the Evening Evergreen/Soft Succulent layers. You will see the large and small images of where the pinecones fit. So easy Add the pine layer to the card front and add the greeting on top using the dimensionals. Its such an easy card to make, the layers all come together quickly! I created a video to show you how to put it all together! To see how I made the Painted Christmas Pocket Envelope, view my video or blog post. Thanks so much for stopping by Happy Stampin Steph  Inspired Thoughts Bundle Inspiration is everywhere in the Inspired Thoughts Bundle. Any time you need to create a card—for any occasion—you’ll have exactly what you need in this bundle. The stamp set includes inside and outside greetings for a variety of occasions. Then cut out beautiful trees with the dies. You can embellish them in a variety of ways to suit the season or occasion. You will love having a bundle that can be put to use all year long! Happy Stampin Steph |

New 2023-2024 Stampin Up Annual Catalog


Kits Collection


Join today

Categories
All
Archives
January 2024
|
 RSS Feed