|
Welcome to April Stampin Friends Blog Hop. It's spring and the flowers are blooming our theme goes hand and hand with the season. May is just around the corner and here in the US we celebrate Mother's Day so it's only fitting our theme is All About Flowers. I hope you visiting my page from Barb Pfeffer's blog and make sure to continue on to Maureen Rauchfuss and be sure to leave a comment.
Are you interested in joining a blog and sharing your projects? Contact me for more information!
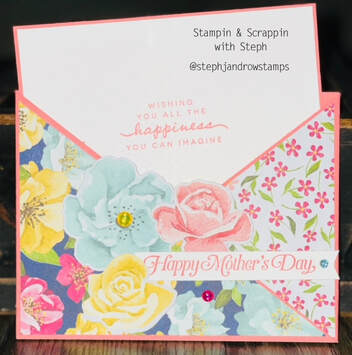
I decided to make a Mother's Day card. The card style I chose is a a fun fold called Criss Cross Pocket. But I like to call it an Envelope Pocket card, because that is what it looks like to me! It's such an easy card. I used the soon to be retiring Hues of Happiness Suite to make the card.
Here's how I made it: For the cardbase I used Flirty Flamingo cardstock and you need to cut two pieces 4 1/4 x 11 score the 11 side at 5 1/2. Then using your paper trimmer and cut one side of each panel on a diagonal from the top corner to the middle score at the bottom. When cutting the second piece of make sure the second sheet is cut so that it’s faces the other diagonal. Lay the pieces together so you have the 2 diagonal pieces lose. For the DSP, you need to create 2 triangles to fit ontop of the diagonal sections. DSP cut 4x5 1/4 on in half on the diagonal. Make sure you choose a DSP that has a pattern on both sides that you want to use. If you want the same pattern you will need to cut to pieces at 4x5 1/4 and cut 1 at a diagonal with the pattern you want to use facing up when you cut. Then the other 4x5 1/4 with the pattern you want to use facing upside down. This will allow you to have the same pattern cut opposite. Adhere the DSP to the front flaps of the cardbase. Then add adhesive to the bottom of each diagonal to creat the pocket. For the inside of the card inset you need Flirty Flamingo at 3 3/4 x 5 1/8 and then Basic White at 3 5/8x 5 The front of the card was so easy. Using the coordinating dies in the suite. Line up the flower dies with the flowers on the DSP and cut them out. I adhered them with dimensionals. And some glossy Gems. I realized as I was typing this out that I did not take pictures of making the card. So I will update this and add some assembly pictures to make it easier to follow. I hope you enjoyed the card I made for you today! Thanks for stopping by Happy Stampin Steph
5 Comments
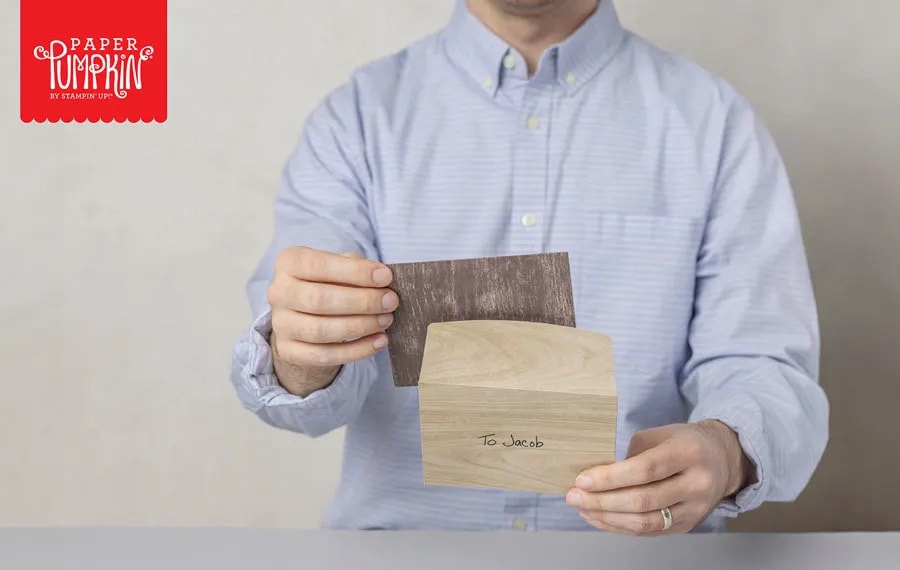
Say hello to mountain landscapes and new In Colors! This month’s kit features nine outdoors-themed cards in our new 2023–2025 In Colors plus exclusive FREE stickers. Want more? Get the cards & envelopes add-on (available 2 May while supplies last) and continue your creative adventure!
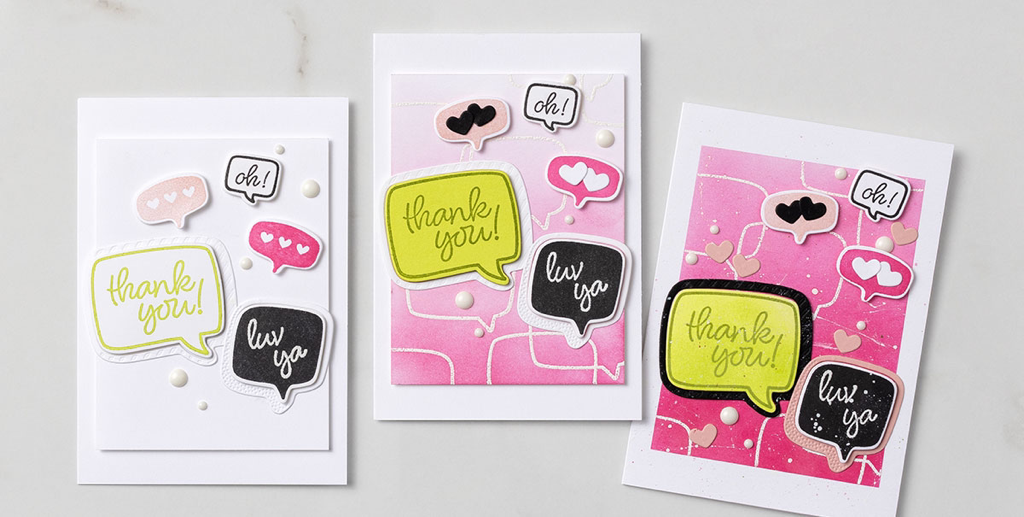
NEW IN COLORS This kit features outdoors-themed cards in our new 2023–2025 In Colors. It's a fun introduction to the new colors. Whether you're a current Paper Pumpkin subscriber or just starting out, you will love color, the outdoors, or both, this is a kit you'll want to get! FREE STICKERS! This kit includes a special bonus: FREE STICKERS! Look around and you’ll see stickers everywhere—on water bottles, laptops, coolers. And, of course, on pa per crafting projects! It’s an on-trend extra that youwill love. EXPLORING IN COLOR CARDS & ENVELOPES ADD-ONThis month, we’re offering a cards & envelopes add-on to keep the crafting adventure going! We’re sure you will love creating cards with the new In Colors and outdoorsy images, so we’re giving you opportunities to create even more. This add-on includes 18 cards, 6 each of 3 designs, plus 18 coordinating envelopes. This will give you lots of supplies to stay crafty and celebrate good friends and great adventures. The add-on is available starting 2 May while supplies last, so don’t wait! Contact me today Stephanie Stepping It Up: Conversation Bubbles Need fun card ideas for your friends or family? Something you could step up for more advanced look? Our playful Conversation Bubbles Bundle step-ups might be just the thing! The Conversation Bubbles stamp set is going to retire and is on saw now!!! So get it before it’s gone!!!! CASUAL To make the casual card, simply stamp the solid thought bubbles in your choice of ink (for this card, we used Jet Black StāzOn, Blushing Bride, and Polished Pink). After the ink is completely dry, stamp the sentiment or image inside the thought bubble with VersaMark ink. Sprinkle on some white embossing powder, shake off the excess, then heat set. PS We stamped the remaining thought bubbles in Parakeet Party and Jet Black StāzOn. So cute! AVID To make the background layer for the avid card, use the emboss-resist technique! First, stamp and heat emboss the thought bubbles using white embossing powder; then, use a Blending Brush to add ink over the top. To capture the ombre effect, apply the color in darker and darker layers, saving the deepest application of color for the bottom of the card. To remove the excess ink from the embossed areas, use a dry cloth. ARTFULLY AVID For our artfully avid version, take the ink blending up a notch by using Masking Paper and Blending Brushes to create a border around the outside edges. After inking and removing the Masking Paper strips, you’ll have a nice, crisp border. To make this card different from the avid sample, use the Blending Brushes to add even more ink and deepen the color as much as you can while retaining the ombre look. Add an ink splatter to finish. Gorgeous! Thanks for stopping by
Happy Stampin Steph |
Categories
All
Archives
May 2024
|

 RSS Feed