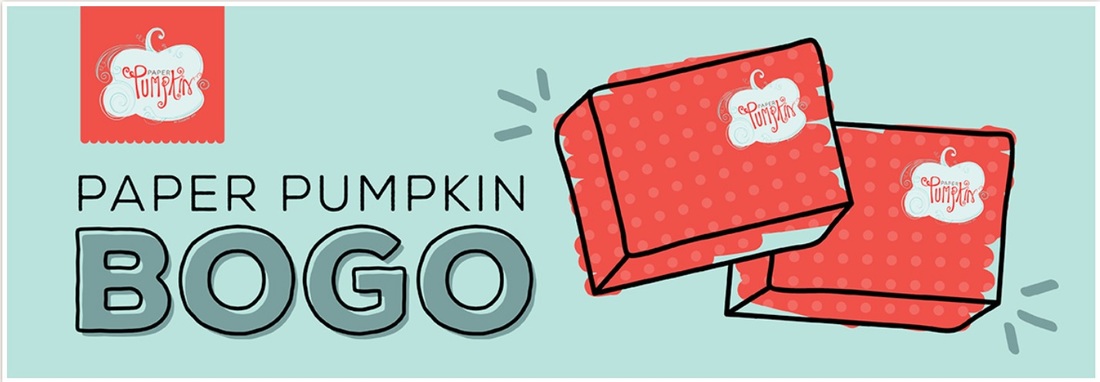
 Offer Details: When you use promo code “BOGO” at PaperPumpkin.com, you'll pay the regular price of $19.95 USD/$26.95 CAD and get your second month for FREE! I have two months to share this deal with as many people as possible. If you subscribe with the promo code between now and September 10, you will pay full price for the September kit and get the October kit free. If you subscribe between September 11 and October 10, their first kit will be the October kit and they will get the November kit free. The Fine Print:
Check out how adorable September's is!!!! And refill kits are available Happy Stampin Steph
0 Comments
 When we introduced the limited-time Thoughtful Branches Bundle on August 1, we said it would be available through August 31 or while supplies last. Well, happy day—there is still inventory available! We will continue to make the Thoughtful Branches Bundle available while we have supplies; once our inventory is depleted, this exclusive bundle will no longer be available, nor will it be offered in future publications.
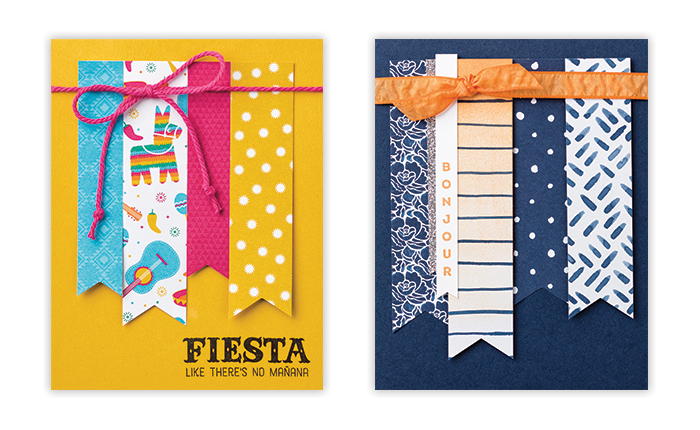
Please make sure to head to my website and get this amazing bundle while you still can!!! Happy Stampin Steph 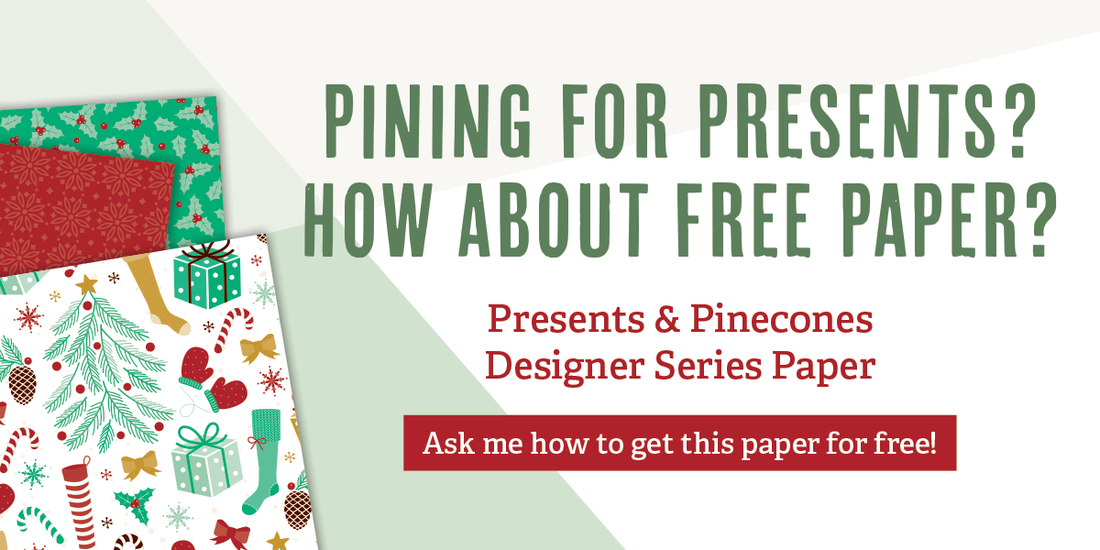 October 1 through 31 , you can buy three packages of Designer Series Paper and get one free! That’s great news since everyone can use more Designer Series Paper. This sale includes Designer Series Paper from both the annual catalog and the recently released holiday catalog (not including Specialty Designer Series Paper or Designer Series Paper Stacks). Download the flyer below to see which papers are part of this promotion. Use this Card Template to make cards like these
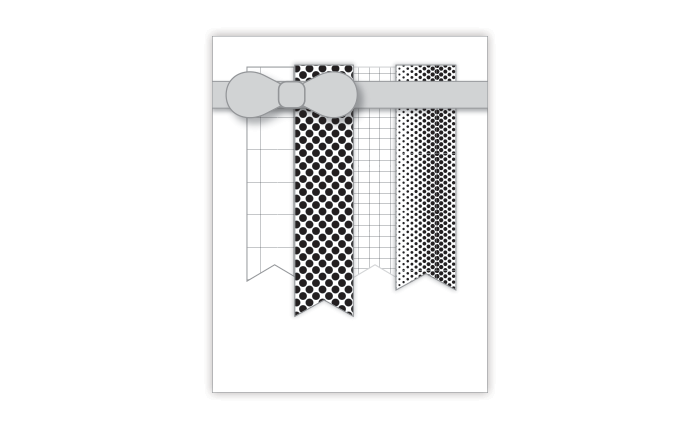
Use a variety of strips and cut the ends using the Triple Banner Punch, Banners Framelits or with a pair of scissors. Stamp a greeting and add a ribbon for a quick, attractive card that shows off any Designer Series Paper.
Contact me for more information
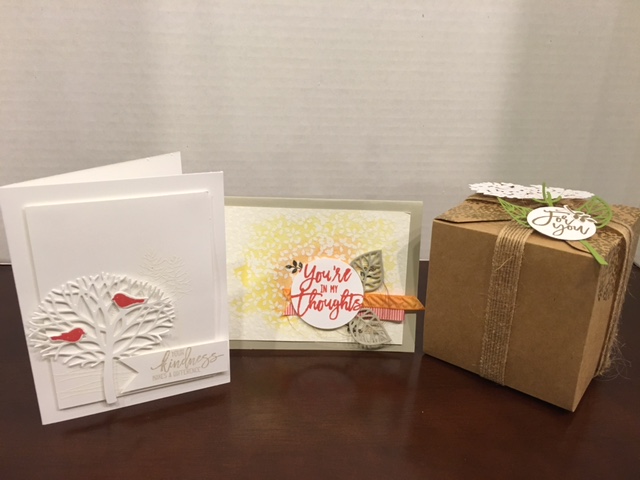
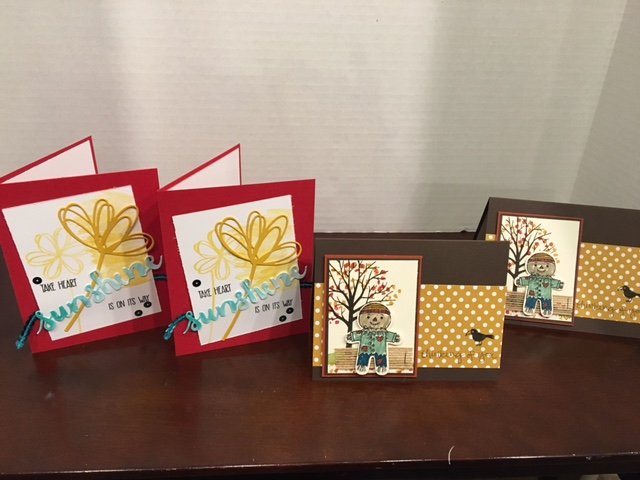
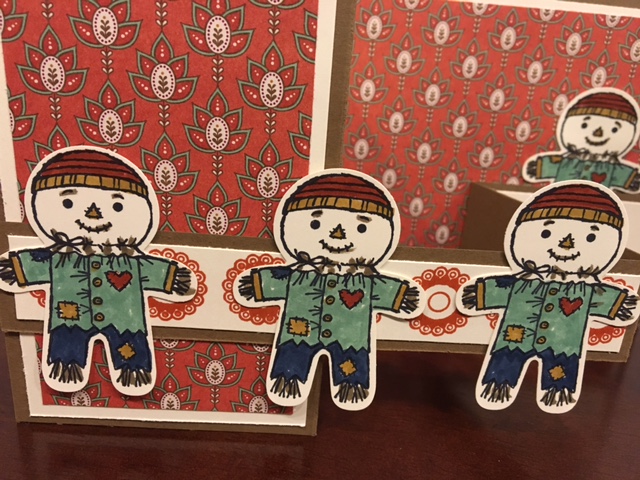
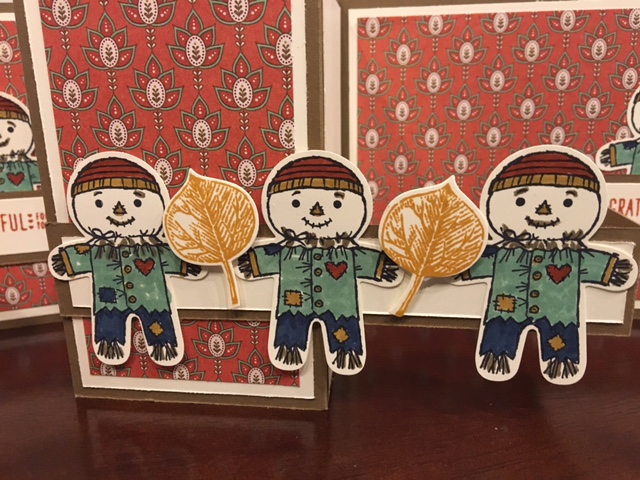
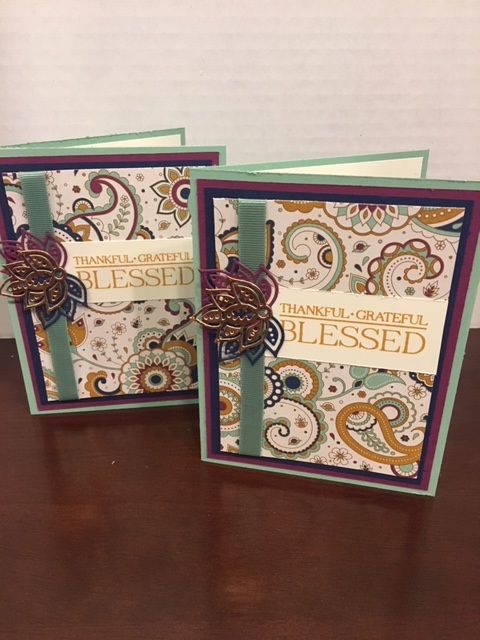
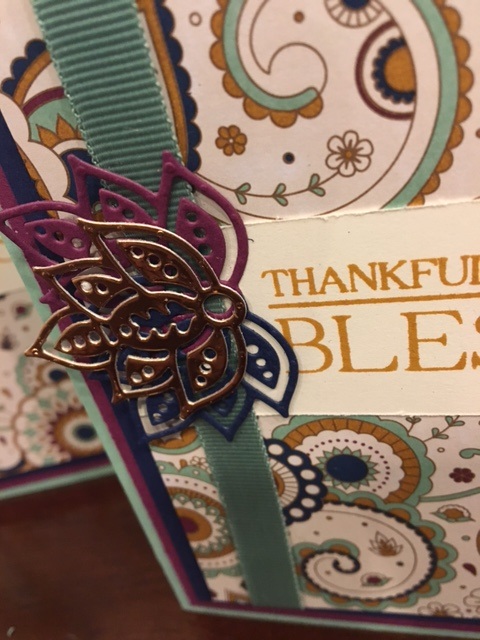
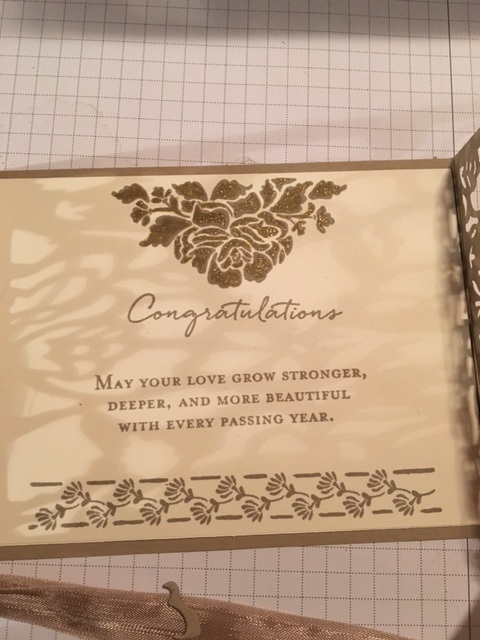
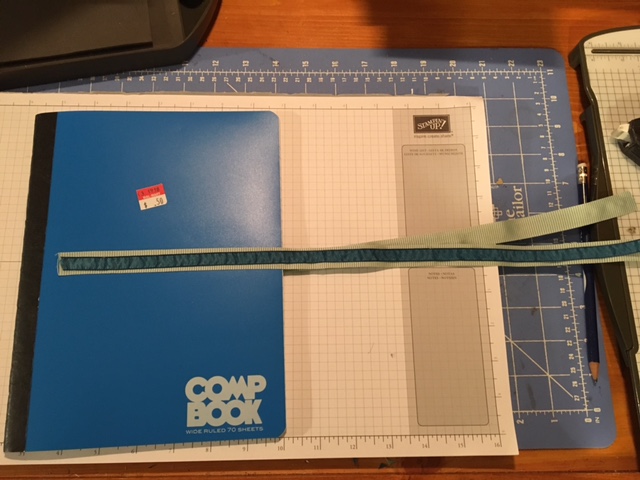
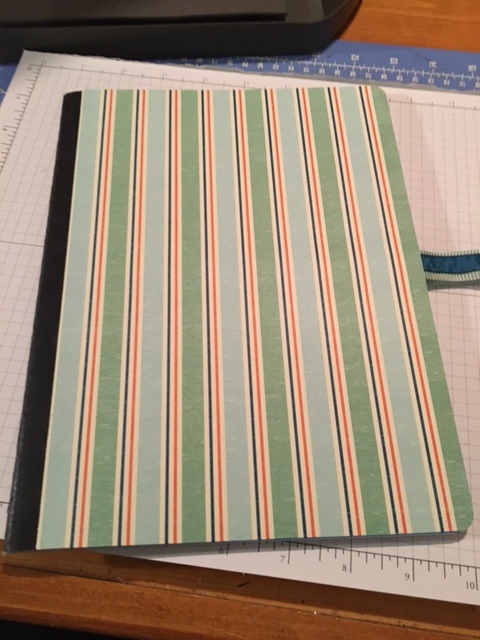
Happy Stampin Steph 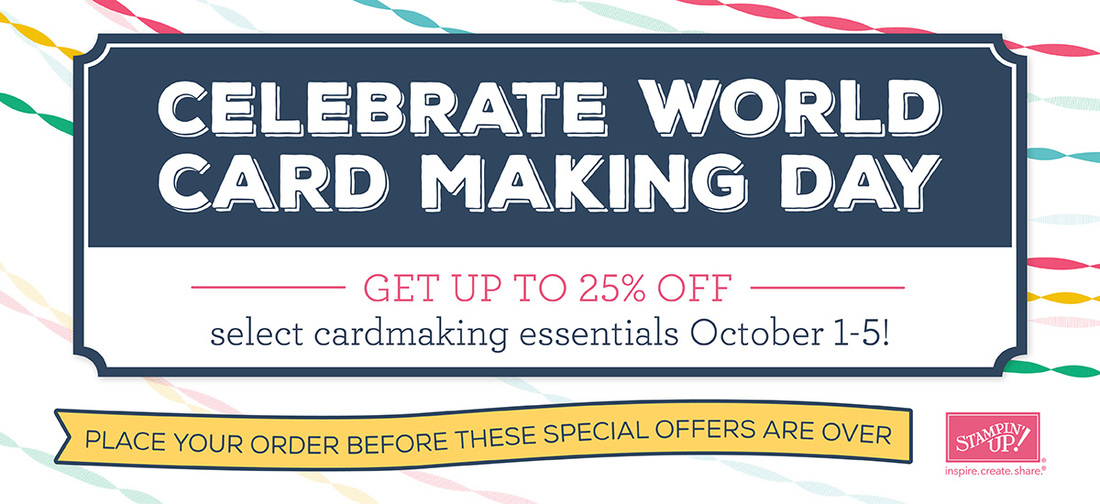 Do you remember the last time you received a card in the mail? In a sea of junk mail and bills, a card is a simple thing that really stands out to the person who receives it. Sending a card is a small gesture that shows just how much you care about that special someone in your life. With World Card Making Day coming up on October 1, celebrate by making and sending a handmade card to someone who could use a little recognition, love, or just a boost (which is anyone, really!). It’s also the perfect time to encourage others and inspire them to send cards on October 1 too! And in celebration of World Card Making Day, from October 1-5, you can save up to 25% on cardmaking essentials that can be used to share your love all year long! See flyer below. AND My Challenge for any of you that send me an email with your address, I will mail you card to celebrate World Card Making Day (U.S only). The card will be unsigned, so you can pay it forward, or keep it for yourself! I look forward to hearing from you Scroll down and fill out the contact section with you address or send me an email at [email protected] Happy Stampin Steph 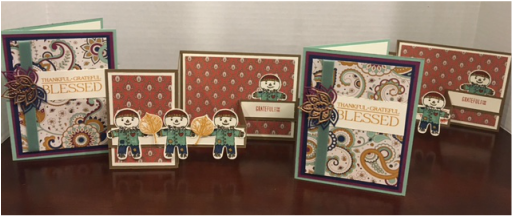 Today's cards were inspired by all the Double Z-Fold cards I've been seeing all over the web. Since all the cards I've come across were Christmas or Halloween, I decided to make a fall/thank you one. These cards will be made at my upcoming Card Club next week. I paired the Cookie Cutter Halloween with the new Paisleys & Petals DSP. I wasn't sure if I'd like this paper, but after putting all together, it really screams fall. There so many tutorials out there showing how to make the Double Z-fold cards. I started with a piece of cardstock cut to 4 1/4x11 and then scored at 5 1/2 and 2 3/4. I used Soft Suede. Then I cut another piece of cardstock to 1 x 11 and scored that 5 1/2 and 2 3/4. The layers are Very Vanilla 2 at 2 1/2x4 and 1 at 4 x 5 1/4. I cut 2 pieces of DSP to 2 1/4 x 3 3/4 and 3 3/4x5. I also cut Very Vanilla at 3/4 x 5 1/4 and 2 at 3/4 x 2 1/2. These strips go across the front of the 1x11 strip. I stamped 4 scarecrows colored them with matching colors to the DSP and punched them out with the Cookie Builder punch. I stamped the greeting from Acorny Thanks in Cajun Craze and then I stamped to small leaves in Delightful Dijon from the Vintage Leaves set and cut them out with the matching framelits. The second Z-fold card everything is the same, except I didn't make the leaves, instead I stamped a little posie, I think that's what it would be called from the Paisleys & Posies stamp set. HMMM not sure which I like better 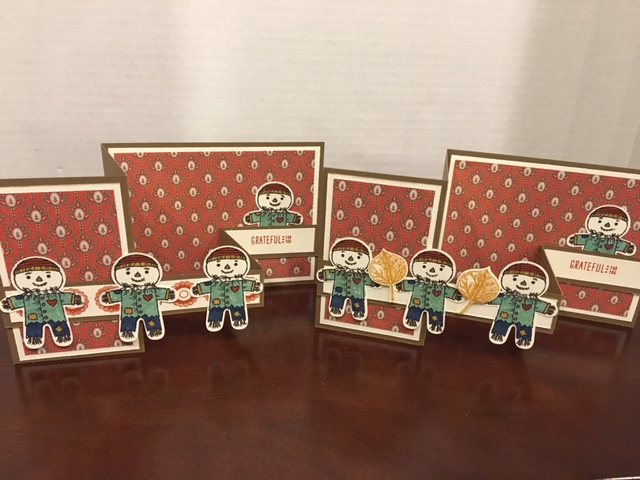 The Paisleys & Poises cards are just a simple layered card using a base of Mint Macaron, and the flower layers 1/4" smaller: Rich Razzleberry, Night of Navy and the Petals & Paisleys DSP. Before attaching the DSP I add a piece of the new Mint Macaron Ribbon fount in the Paisleys suite. I cut out 3 leaves from the Paisleys Framelits (Rich Razzleberry, Night of Navy) and wow Copper. It just adds a pop!!! The greeting is also from the Paisleys & Petals stamp set stamped in Delightful Dijon on Very Vanilla. Simple card but big WOW factor. Love it and I hope you do too!!! Happy Stampin Steph 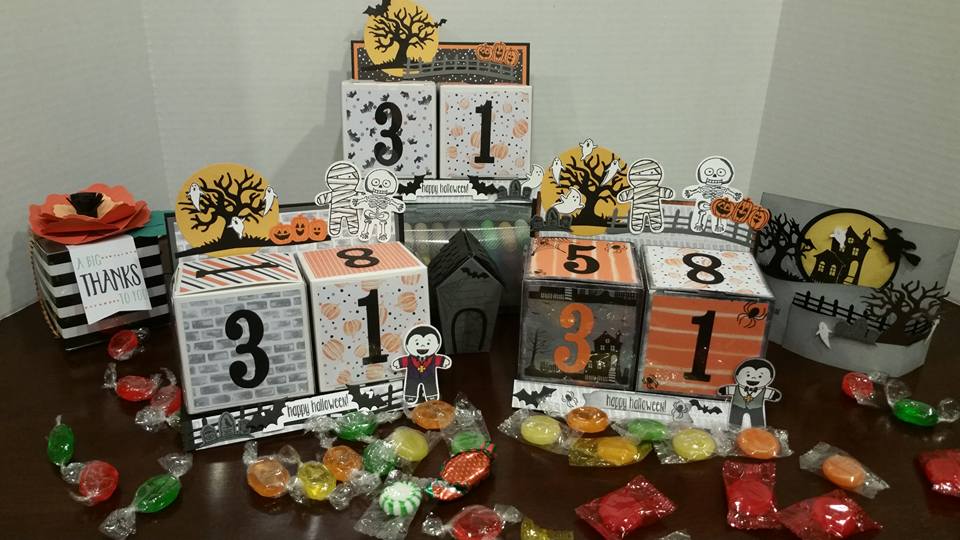 I came across a tutorial on how to make these supercute calendar countdowns on a Demonstrator Facebook Group. I saved the post with every intentional of making one. When I showed my friend, she was like lets make them! OMG I am so happy with the results. I made 2 one for myself and one for my mom. My friend made one for herself. We had fun decorating! While I stuck closer to the original design, my friend changed hers up a little. Either way they came out awesome!!! You can find the details on them measurements and assembly by visiting Melissa's Stouts website or clicking on Calendar Countdown. Not into Halloween, no worries, Melissa has a sample of one made for the holidays using the Candy Cane Lane suite from Stampin Up. This calendar doesn't have to be a countdown but it can easily be made with an everyday day theme to have displayed for a general monthly calendar. Love It Happy Stampin Steph 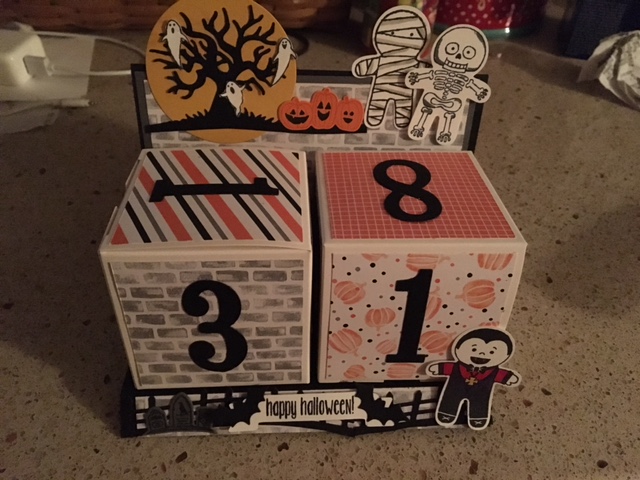 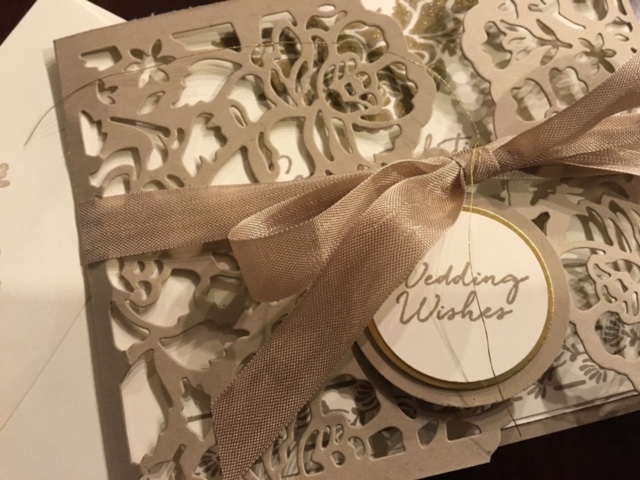 I recently had a wedding to attend for a very special couple. And I knew as soon as I saw this bundle in the Annual Catalog, that they were the perfect products to use! I decided to use Crumb Cake and Very Vanilla Cardstock. I chose these colors because the wedding invitation used similar colors as well. I was inspired by all the cards I saw on Pinterest. So you may have seen something like this already. It was a little tricky at first and too me a few attempts to get the card just right. I used a 4 1/4x 11 sheet of Crumb Cake cardstock on the left side I used the large floral thinlit and edge and made sure it was as close to the edge as possible when running through Big Shot. Then I used the small floral thinlit and edge on the right side, make sure I was cutting on the correct side (so when folding you see the rightside of the diecut).I cut a piece of Very Vanilla to 4 x 5 1/4 and centered it between the diecuts and adhere it down. Once I did that, I that folding the left and right sides in. There may be an easier way to do this, but that is what I did to create my card. I stamped the greetings and flower in Crumb Cake ink and lightly colored the flower with the Gold Wink of Stella. I also created a little tag to hang with Gold Floss. I just stamped and cut each layer with the circle punches. The Crumb Cake Seam Binding ribbon, is not retired, but it was perfect to use on this card. I hope you like it Thanks for stopping by Happy Stampin Steph 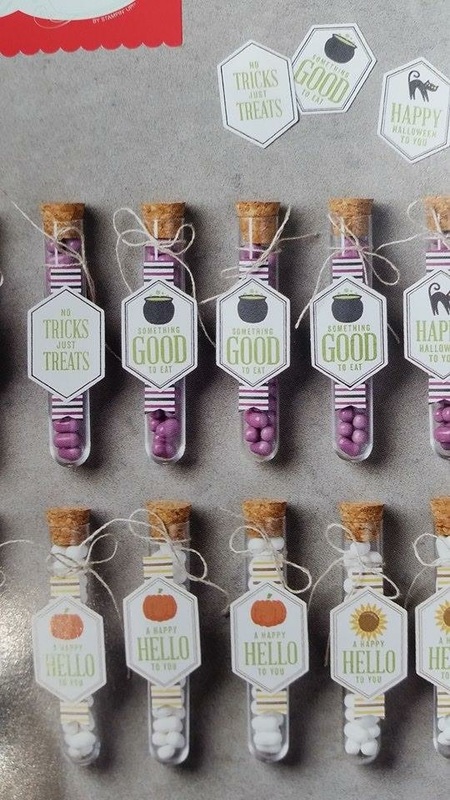 Above photo is a peak at the September Paper Pumpkin. How cute is this kit!!! I'm thinking I will need to order a few refills to do something for kids classes. Click here to see details on the Paper Pumpkin BOGO. Happy Stampin Steph   Welcome to our Stampin Friends September Back to School Blog Hop! I'm so excited that you have decided to stop by. We have 15 amazingly talented crafters this month. You are really going to love the projects shared this month! Be sure to follow along and check out everyone's blogs and fabulous projects. Make sure to leave a comment to be entered in the Blog Hop raffle. Read each blog, scroll to the end, and leave a comment with #SFSeptHop!! Each member and guest blogger, will randomly select a winner from our blog comments. We will then pool those together and randomly select the overall hop winner. I would love to hear some feedback and you will earn a chance to win some Blog Candy! Thank you for visiting my blog from Barbara Welch's site, and thank you for continuing with the Blog Hop. Enjoy my project and at the end click the NEXT button to continue to Kristen Bell's Blog. Didn't come from Barbara's blog?? That's ok, just click the PREVIOUS button or scroll to the end and click on Barbara's name to visit her blog.  Our guest hoppers this month are: Yolanda Dixon Barbara Welch Mandy Reedyk This month's projects were inspired by my oldest daughter, who is 12 1/2. She knows I always make a quick back to school treat and she asked me to make her something that wasn't so "kiddish"! OH BOY!!! Where did my baby go??? She told me she likes all my goodies, but wanted something she can bring to school and have her friends, really, really want it too!!! Well, I get it, she's a pre-teen, fitting in is so important! But hmmm a few more years of her enjoying the little things would be OK too!!!! 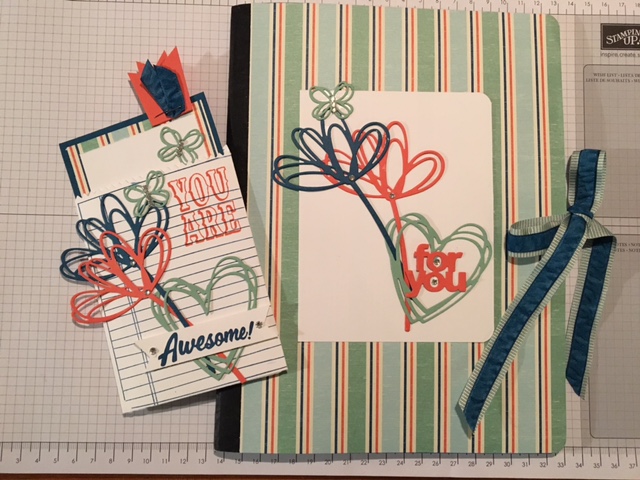
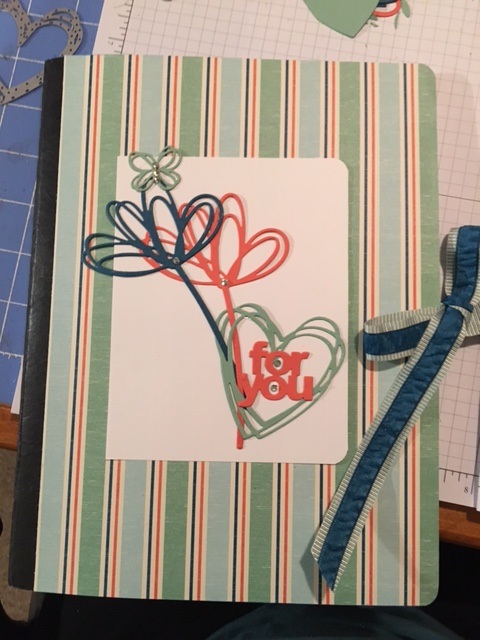
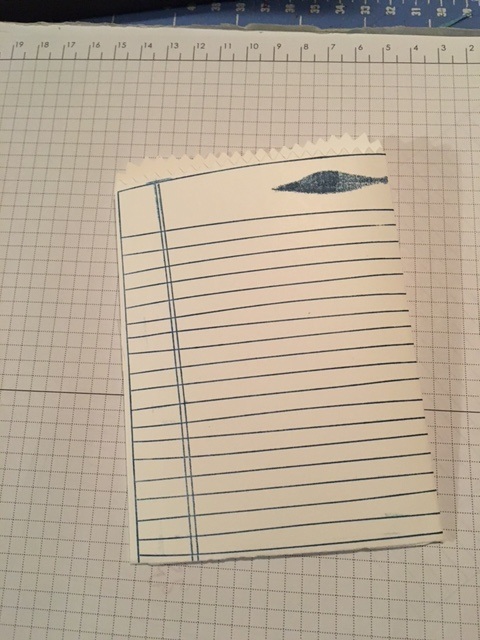
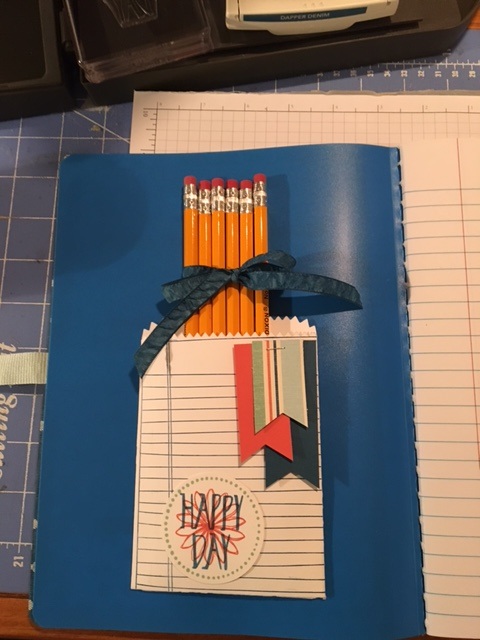
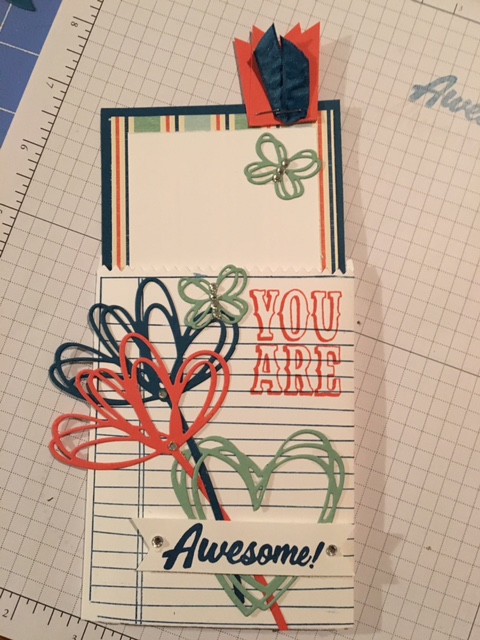
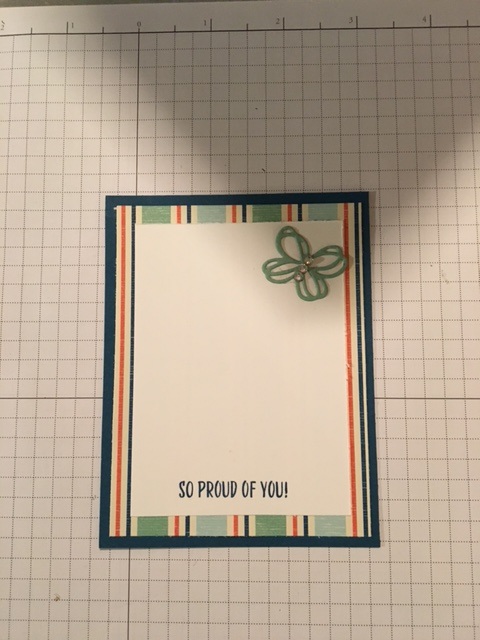
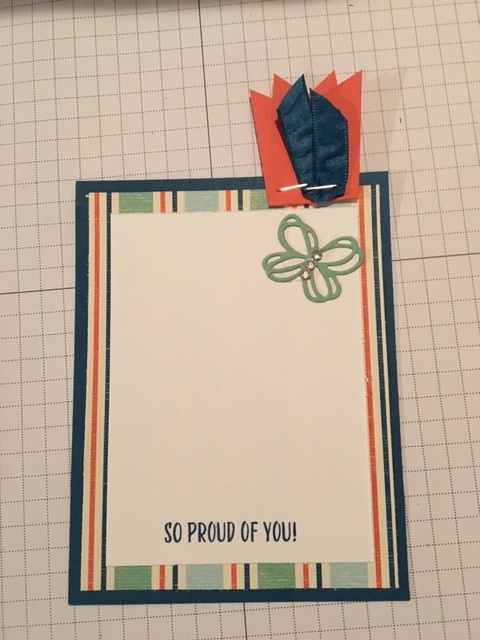
I decided to make a little pocket for the inside of the notebook to hold pens/pencils or notes. I just love the Mini Treat Bag Thinlits and Writing Notes stamp. Perfect! I cut 2 sets of the mini treat bags in Whisper White. I stamped the Writing Notes with Dapper Denim. I am making two treat bags, one that will be the pocket for the notebook and one that will be my daughter's card. Don't you just hate when you stamp and everything is perfect except for a smudge ahhh. Well I decided to cover the smudge rather than starting over! I used the colors in the DSP which were Dapper Denim, Calypso Coral and Mint Macaroon. I cut a few 1" strips and used the Triple Banner Punch to flag the ends. Stapled them to the treat bag. I grabbed a handful of pencils and tied them together with the Dapper Denim Ruched Ribbon. The pocket looked a little bare, so I used the Perfectly Wrapped stamp set. Stamped the circle, flower and sentiment and punched it out with the 2" circle punch! Now for the cover; I decided to use the Sunshine Wishes Thinlits, I cut out a few flowers, hearts and butterflies. The "for you" is from the Mini Treat Bag Thinlits. I also doubled each flower/heart and butterfly to use on her card, as well, so I wouldn't have to do it later. Finished off the front with some Basic Rhinestones. Love it!!!!
I really love how the projects came out! Best of all I had a very happy 12 1/2 year old! I hope you enjoyed them too. Thanks for joining me in the Blog Hop Happy Stampin Steph  Make sure to leave a comment to be entered in the Blog Hop raffle. Read each blog, scroll to the end, and leave a comment with #SFSeptHop!! Each member and guest blogger, will randomly select a winner from our blog comments. We will then pool those together and randomly select the overall hop winner. I would love to hear some feedback and you will earn a chance to win some Blog Candy! Click on the NEXT button to visit Kristen Bell's blog and continue in the Hop!  Below is a list of everyone who participated in the hop this month:
 Look at these amazing cards??? I often get asked where I come up with my ideas. Inspiration is everywhere. I rely alot on the catalogs for ideas as well as Pinterest. Sometimes I need to see something used. And then I create my own. Othertimes, I come across ideas that are awesome and well, why would I need to change anything. That was the case for this week's cards. I typically host my Card Club every other week. But this month I had 2 weeks back to back because of school starting, so I would continue with my bi-weekly schedule. The Sunshine Wishes cards, came right from page 97 in the Annual Catalog. Simple to make but full of detail! The Cookie Cutter Halloween cards (new set in the Holiday Catalog) were CASED from Pinterest and Splitcoaststampers by Diane Hughes. I just loved everything about this card and decided to not change a thing!!! Would you like to learn how to make them?? Make sure you come by my Card Club. I am offering 2 dates (one evening and one morning) for your convenience. September 13th at 7pm or September 14th at 9am. Pick whichever date works for you!!! Be sure to RSVP by Monday the 12th. Check out my Facebook page or my Stampin UP website for event details. Need a catalog? Please contact me and I'll be sure to send you one. Happy Stampin Steph |


Categories
All
Archives
May 2024
|
||||||||


 RSS Feed