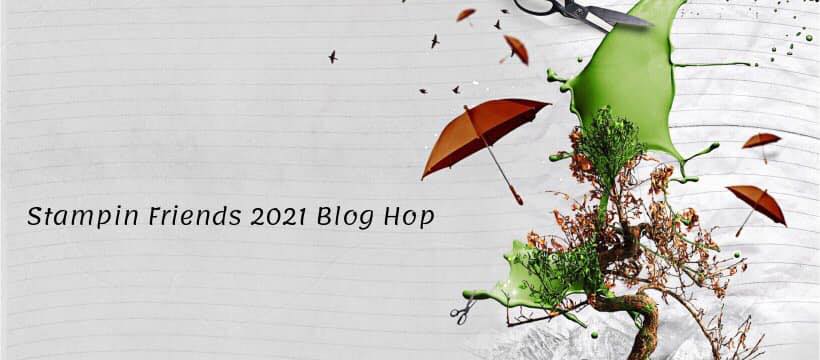
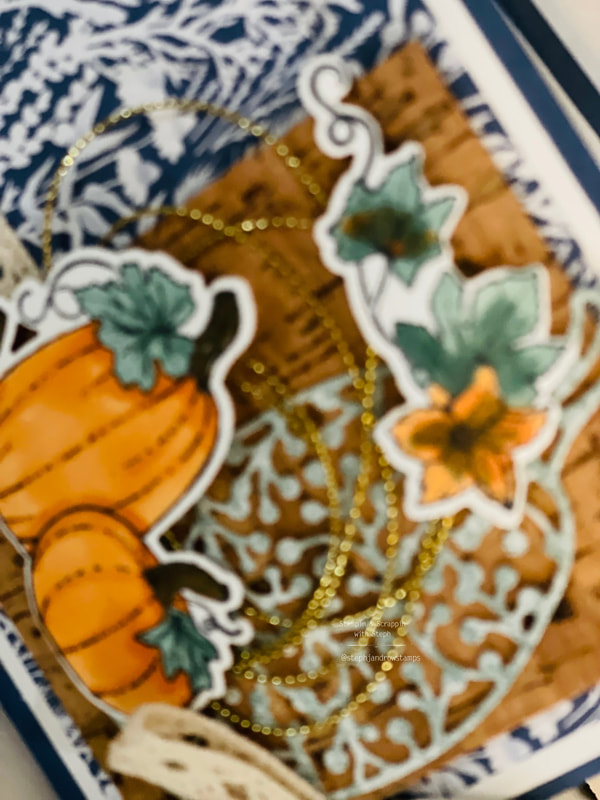
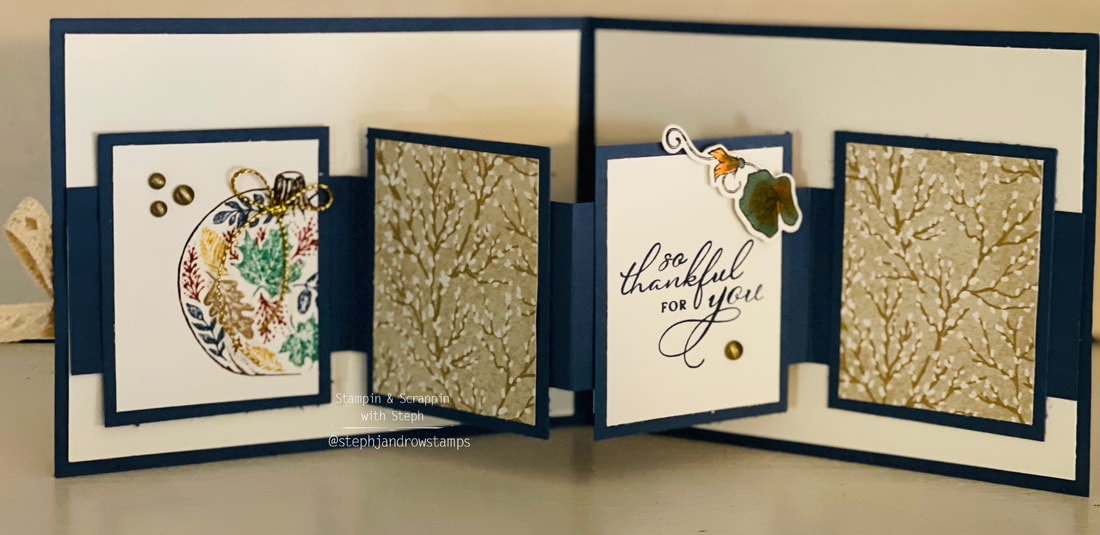
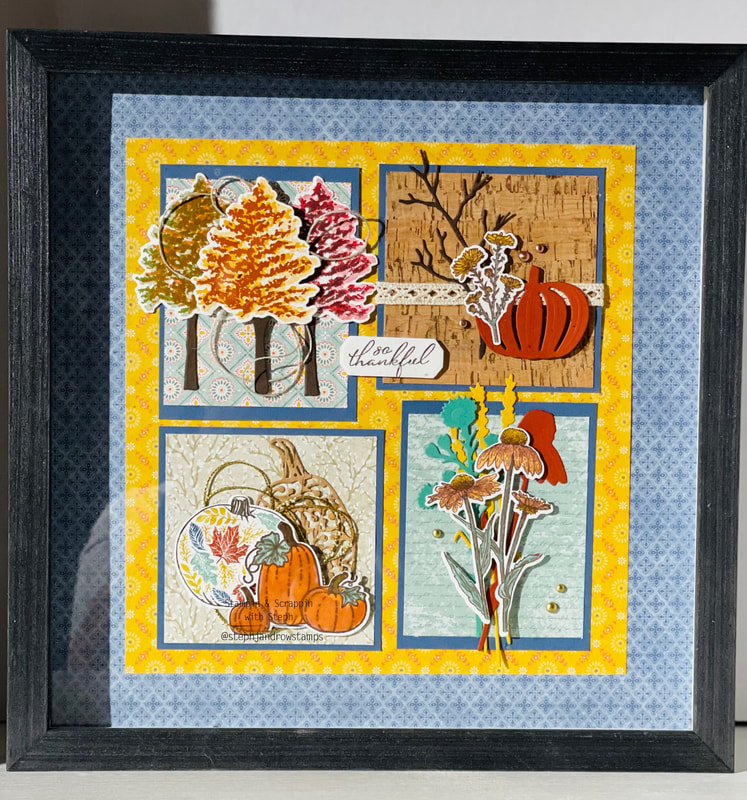
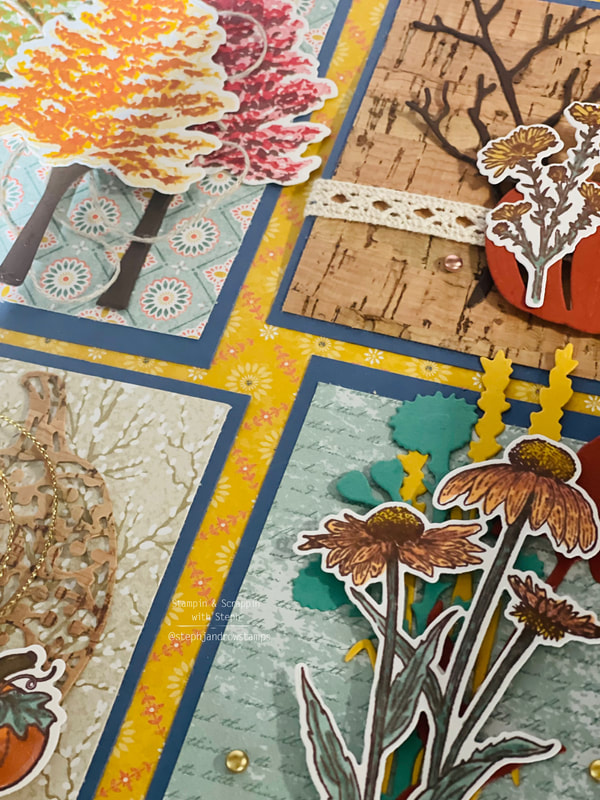
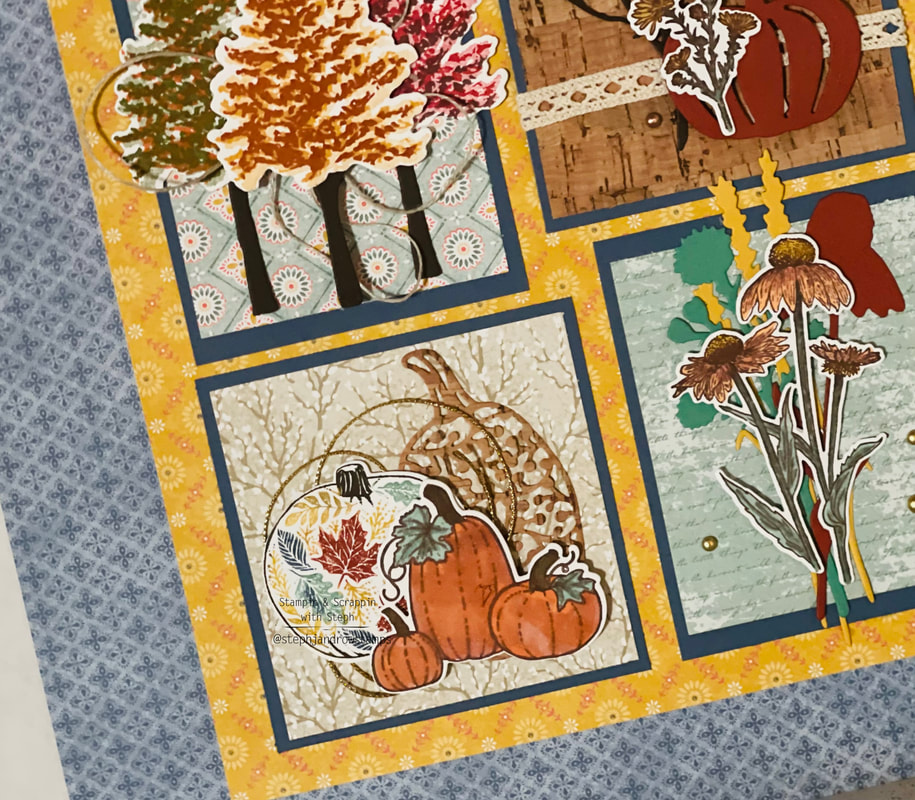
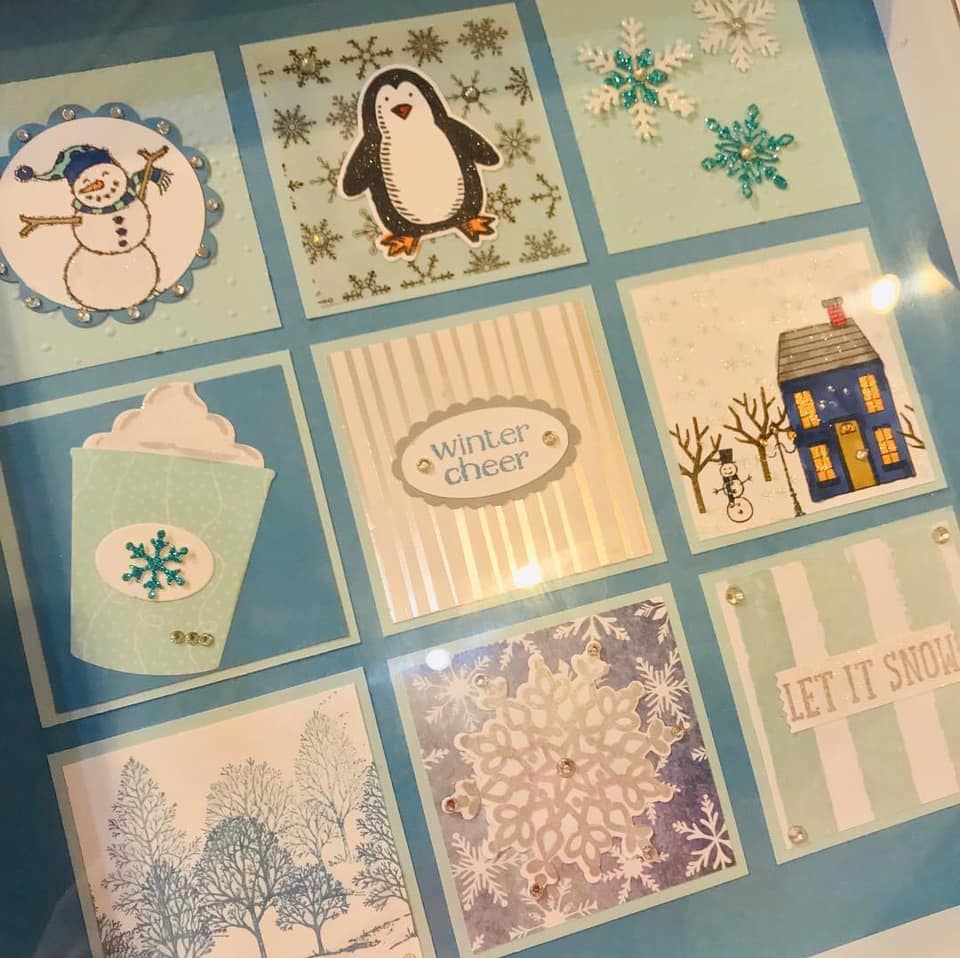
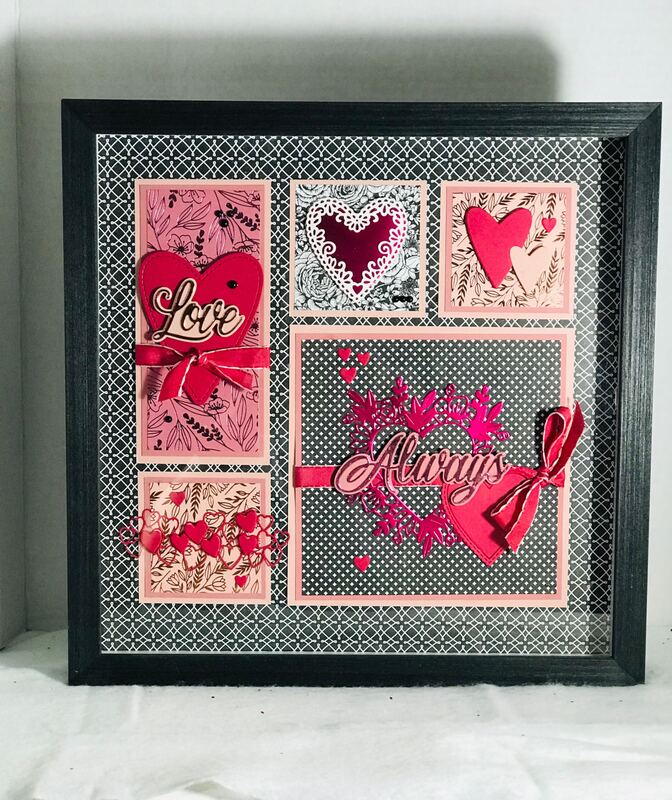
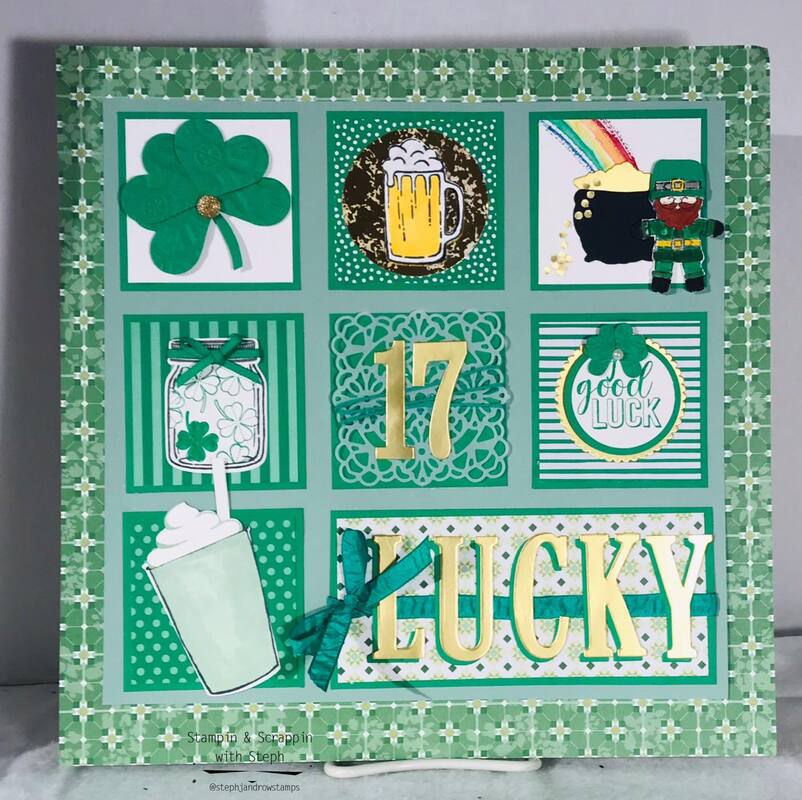
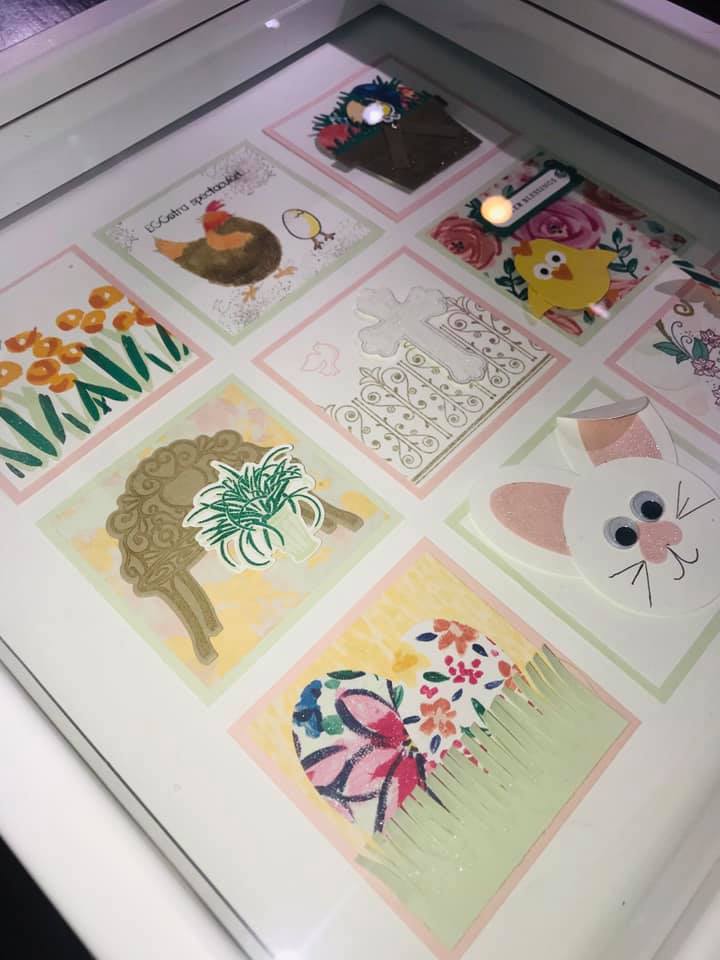
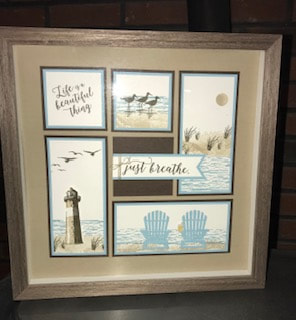
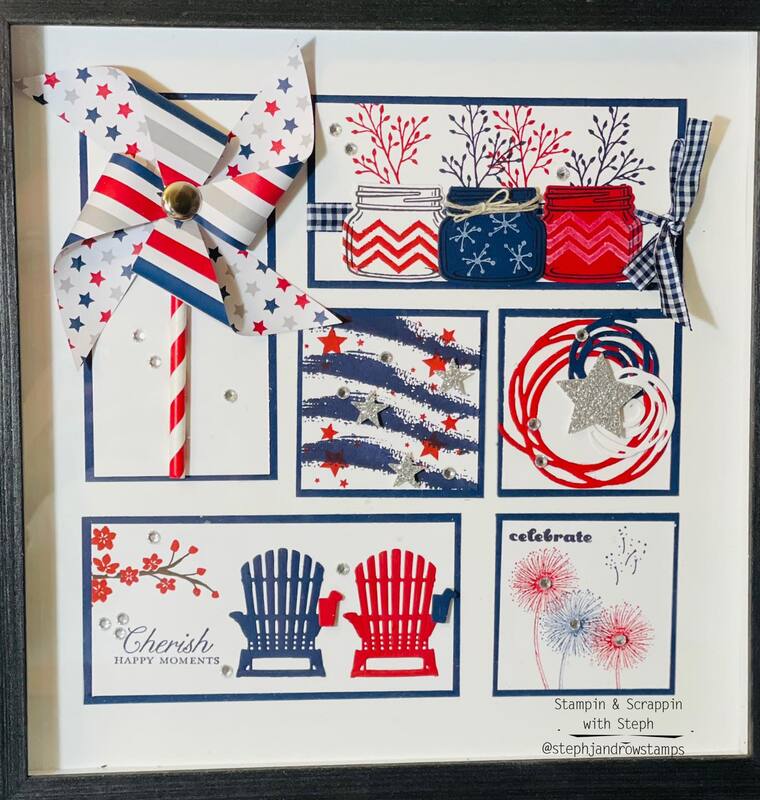
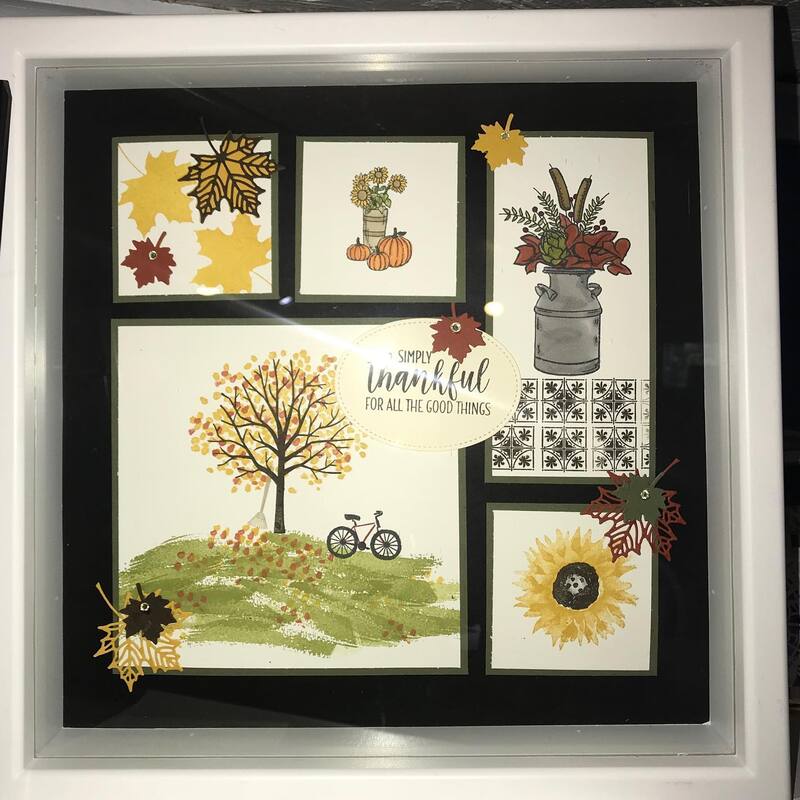
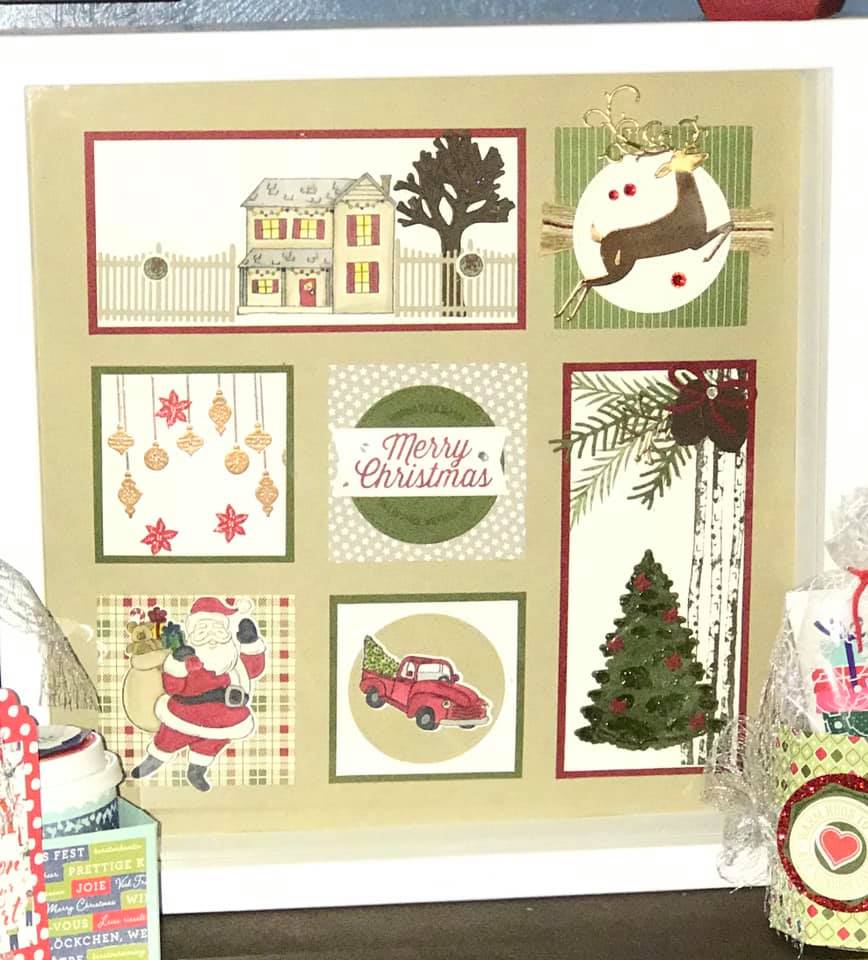
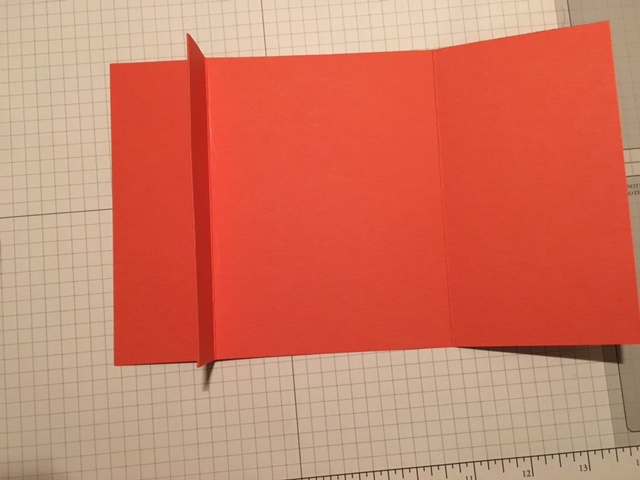
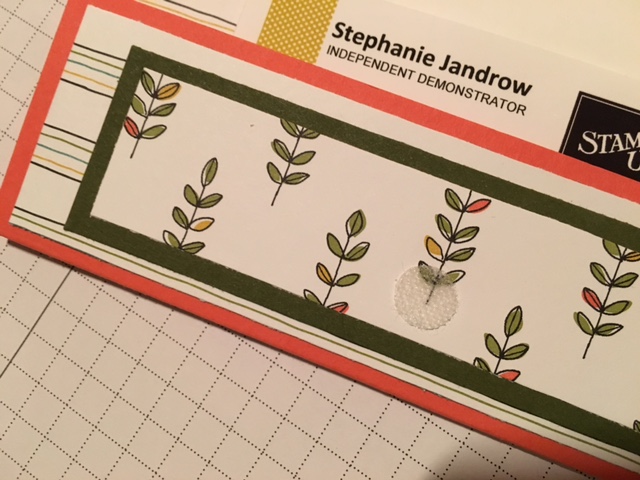
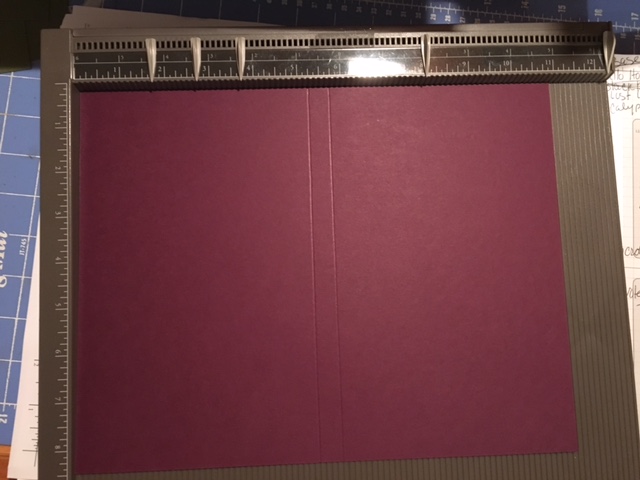
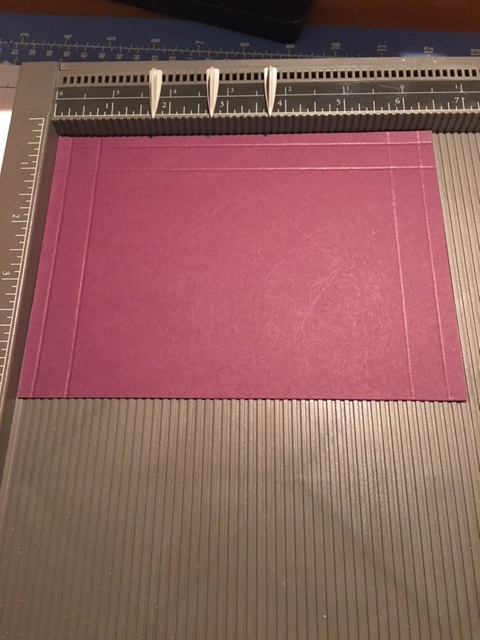
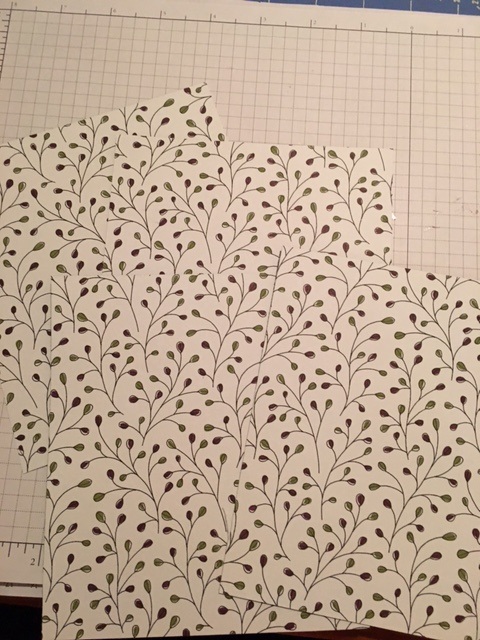
 Welcome to our October Stampin Friends Blog Hop!!! I am super excited to share my projects. Our theme this month is 'Give Thanks'! I hope you follow and hop along with us. If you came from Maureen Rauchfuss's blog, thank you for continuing and be sure to hop to Teri Pocock’s blog after viewing mine!! Let's hop right in! I am just so excited about my projects...did I say that already?? Awhile back, when I still had in-home classes and tables at craft fairs, I had created a workshop for seasonal 12x12 Samplers! It was a big hit! I then continued on to make several holiday samplers (Valentine's, Easter, 4th of July, Halloween and Christmas, and most recently I was ask to make custom monthly samplers for wonderful customer, who wanted to be able to change her Sampler frame monthly!! Now after a few years of having my original ones displayed, I decided to update my fall one to a "thankful" one. I have included a copy of the samplers I have made at the very end of the blog post. I create a Fun-Fold card to match. I will be giving this as a gift to my mother who just is now displaying a sampler I made. 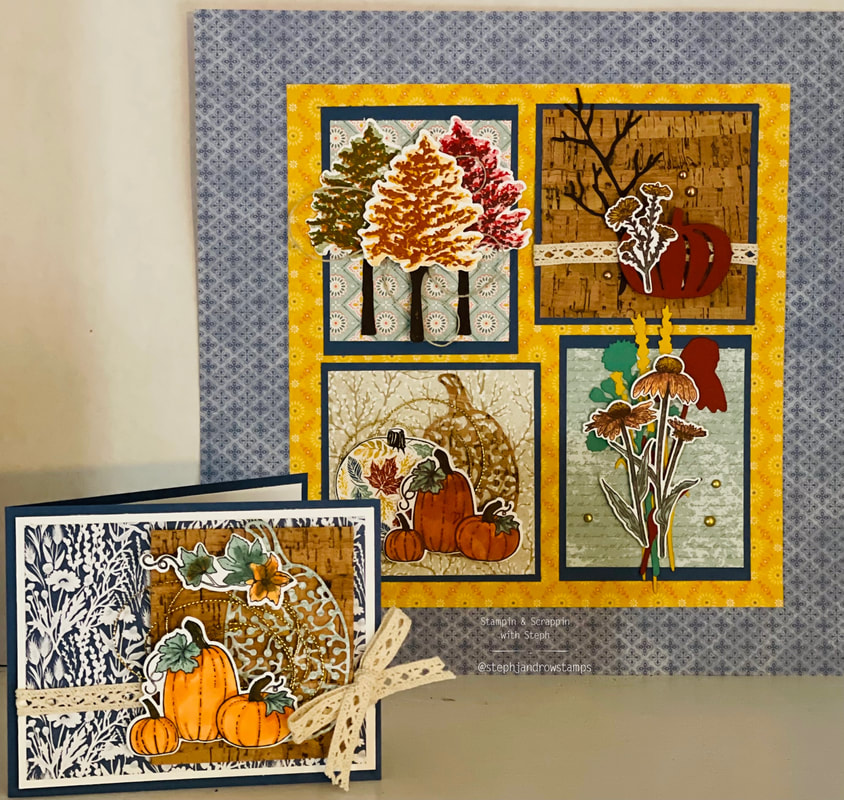 I absolutely love fall, it's my favorite season, I truly enjoy when the weather gets cooler and the leaves change. I used the Stampin UP Harvest Meadow Suite and Pretty Pumpkins Bundle for my projects. 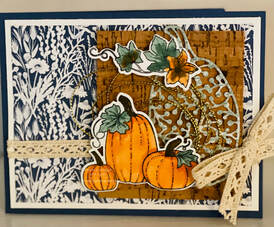 The card is a 'W' Fun-Fold Card. It looks like a W when the card is opened! It is SO easy to make. You will need the following: Cardbase: Misty Moonlight 8 1/2x11 cardstock, cut at 4 1/2x11 score on the 11' side at 5 1/2 Misty Moonlight 1 3/4x11 strip score on the 11' side at 2 3/4, 5 1/2 & 8 1/4 Misty Moonlight (4) at 2 1/4x2 3/4 Basic white (3) at 4 x 5 1/4 and (2) at 2x2 1/2 Harvest Meadow DSP 3 3/4x5 and (2) at 2x2 1/2 Cork Specialty Paper 3x 3/12 Attach the 3 3/4x5 piece of DSP to the Basic White layer, before adhering to the cardbase, be sure to wrap the Diamond Weave Ribbon and tie and bow on the side. I used the Pretty Pumpkins set to stamp the pumpkins. I used the Pumpkin Pie and Just Jade Stampin Blends to color them and cut them out with the Dies. I added some loops of the Gold Cording in-between the pumpkin layers. For the inside of the card, attach the 4 x 5 1/4 Basic White to each side of the cardbase. Fold the 1 3/4 strip, accordion fold, and attach at each edge of the basic white. See Photo Below. Attach the 2 smaller DSP pieces to the Misty Moonlight. Stamp on the Basic Whiteand then attach to the Misty Moonlight I created a video below, to show how to assemble the card!
I hope you enjoyed the projects I have made for October's Stampin Friends Blog Hop! Be sure to leave a comment, I'd love to hear from you! Don't forget to subscribe as well! Continue to Teri Pocock’s blog Thanks for joining me Happy Stampin Steph Below is a list of our Blog Hop Participants!
6 Comments
 I am excited to share with you October's Stampin Friends Blog Hop! The leaves are turning colors and the air is getting cooler! I just love the fall! Today is a beautiful sunny day with ble skies! It helped inspire me to be creative! This month's theme is Thanks, Thankful, Thank You! So basically anything Thanks. I hope you are following along with our blog hop and you came from Jean Beaulieu's blog! I just love her projects, didn't you?? Be sure to continue to Anne Marie Hile's blog and make sure to leave comments so we know you visited!! 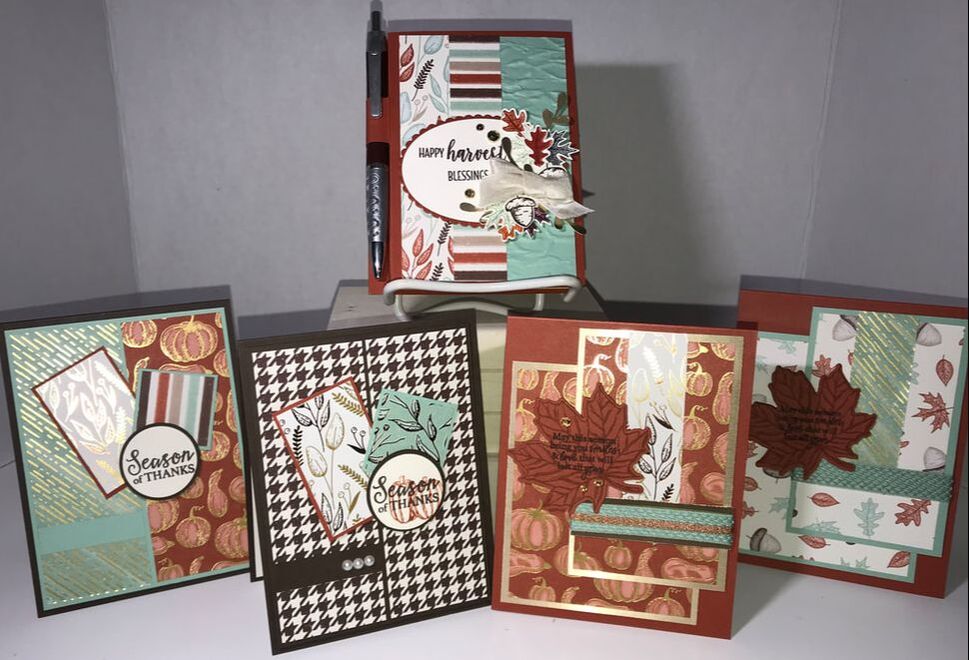 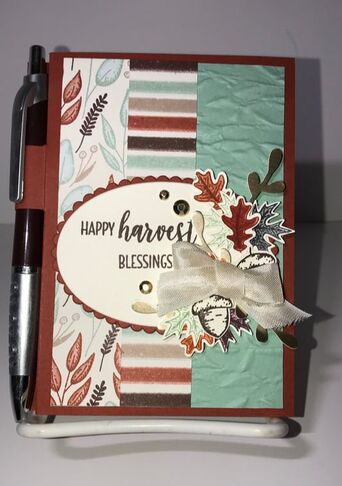 Many of you may have heard about World Card Making Day! This is a huge day for paper crafters all over the world. We strive to make as many cards as possible. But most importantly MAIL many cards! I had planned a quick online event to demonstrate the cards I would be working on. And.......technology had a different agenda for me. I started off with many technical issues and had to restart my Facebook Live - so needless to say an hour turned into 2. I wanted to thank the participants that rejoined with words of encouragement for me. So I made this cute little notepad holder using the Gilded Autumn Suite! I found a the little pack of notepads at the Dollar Tree. They come in a variety of different colors. Originaly, I just measured the cardstock to wrap over the notepad. But I felt like it was missing that finished looked. The clock was ticking to finish before the weekend. So I searched and searched and came across this YouTube video from Kitchen Table Stamper and it was perfect! She even used the same notepads from the Dollar Tree. It's the perfect size and her directions include the pen/pencil holder. I used the coordinating colors from the designer series paper. Cajun Craze as my cover. Next I layered Mint Macaron embossed with Old World Paper 3D Embossing Folder and added 2 strips DSP from the Gilded Autumn Speciality Designer Series Paper. I stamped the leaves and acorns with Cajun Craze, Early Espresso and Mint Macaron ink from the Beautiful Autumn Bundle. The greeting I used is from the Country Home stamp set and I stamped it on Very Vanilla cut out using the Layering Ovals dies. I'm so happy how the notepad cover came out! I have already hand delivered to my viewers that were local and they loved them!!! 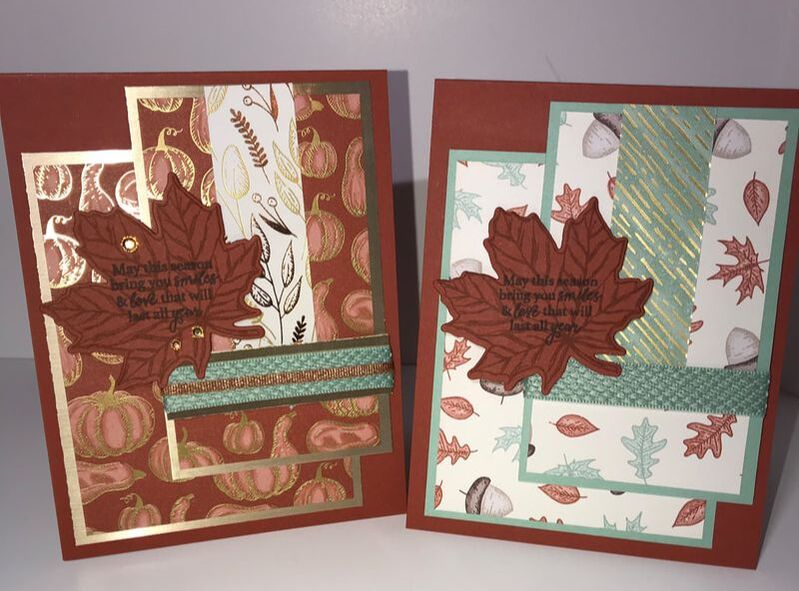 Whenever I make cards, whether it's for a hop, challenge, order or event if I am in a need of a specific card, I always make 2. It's been a habit ever since the first Stampin Up event I eever attended. I normally only show 1 card since there's no need for both, especially if I make them the same. And we only need to share a card and a project for the Blog Hop. But today I am not just showing you 1 or 2. I am showing you 4 cards! I was on a role and I just kept going! I said "Why Not!" For the cards above, they were so easy to make. And I used up some smaller pieces of DSP from the pack....which I sometimes, never know what to do with! For both cards, I used the same layout and Cajun Craze as the base. I scored the cardstock on the 11" side to 5 1/2" then on the 8 1/2" side, I cut at 4 1/4". My layers are as follows: Cardstock 4 1/2" x 3 1/2" Layer 4 1/4" x 3 1/4" Cardstock 4 1/2" x 2 3/4" Layer 4 1/4" x 2 1/2" Layer 3"' x1" Layer 3/4" x 2 3/4" (on the left card wrap with the Basket Weave and Metallic Ribbon Combo Pack) on the right, just the basket weave ribbon. I stamped the leave on Cajun Crazy, using Cajun Craze ink and then stamped the greeting with Early Espresso. The images are from the Gather Together Bundle. These cards were fun to make and I liked that I tried a slight stepped up version on the left. #stampinup #gildedautumnsuite #stampinandscrappinwithsteph #msscardchallenge22 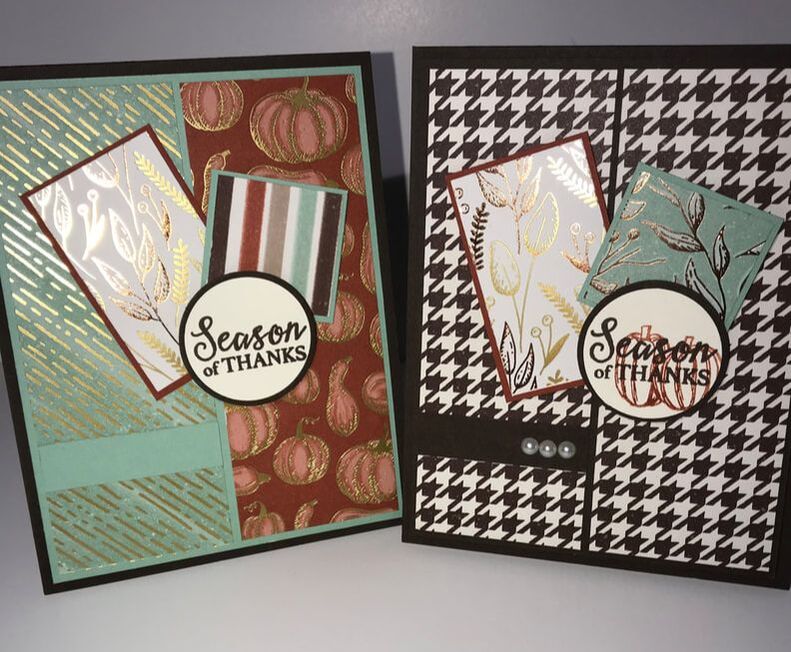 These 2 cards are also made using the Gilded Autumn Designer Series Paper! I am going to be sad with this paper is gone! It's just so pretty! The cardbase is cut the same as the previous cards and I used Early Espresso! The card on the left has Mint Macaron and Cajun Craze and the card on the right, is Early Espresso with Cajun Craze and Mint Macaron. To make the card: Cardstock 4" x 5 1/4" Layer 1 7/8" x 5 1/16" (you need 2) Cardstock 2 1/2"x 1 1/2" Layer 2 3/8 1 3/8" Cardstock 1 1/2" x 1 1/2" Layer 1 3/8" x 1 3/8: Circles 1 1/2" and I 3/8" Cardstock strip 1/2" x 1 7/8" So easy to assemble!! Simple layers! #stampinup #gildedautumnsuite #stampinandscrappinwithsteph #msscardchallenge23 I hope you enjoyed the projects I have shared with you for this month's Blog Hop! Be sure to leave a comment and 1 lucky person will receive the notepad cover! Continie to Anne Marie Hile's hop and see what amazing projects she is sharing this month! Thanks for joining me Happy Stampin! Steph Below is a list of participants in this month's blog hop
Some fun cards going in the mail today using the Stampin Up Share Sunshine PDF download and the It Starts with Art retired suite. The Share Sunshine PDF Download has ended and we are happy to announce that the proceeds for this digital stamp set totaled $218,196. 100% of these proceeds will be donated to COVID-19 response funds benefitting frontline workers and vulnerable communities! Thank you to everyone who purchased this download!!!
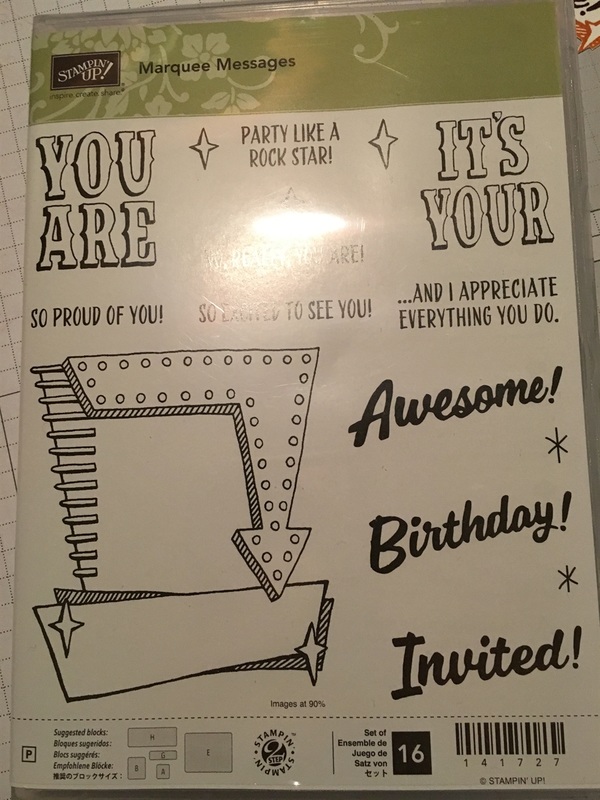
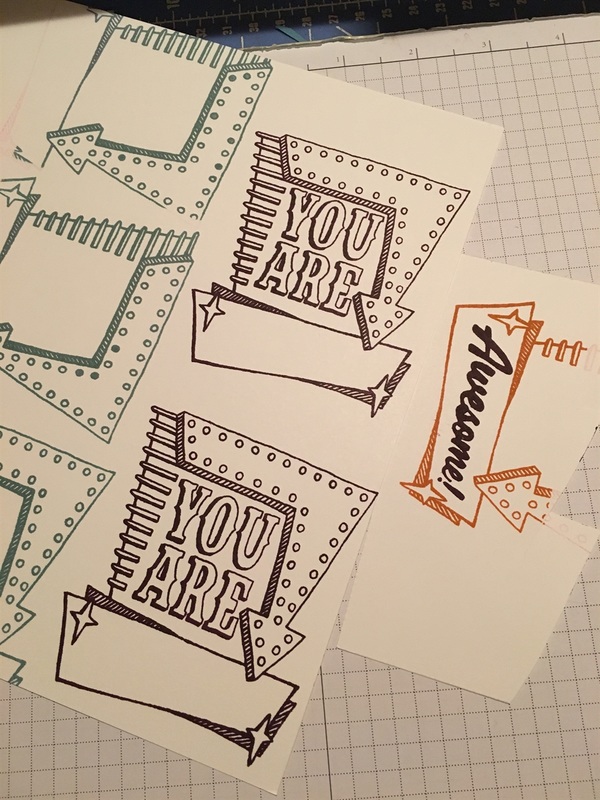
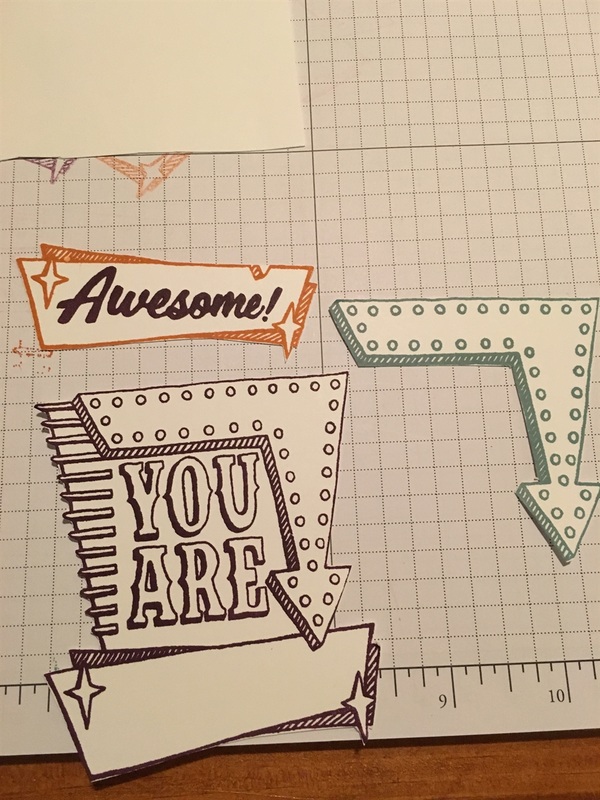
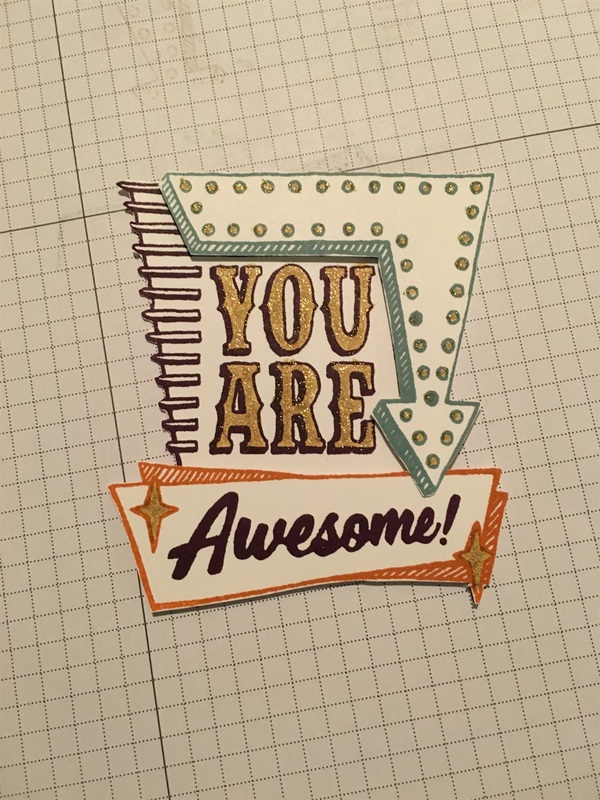
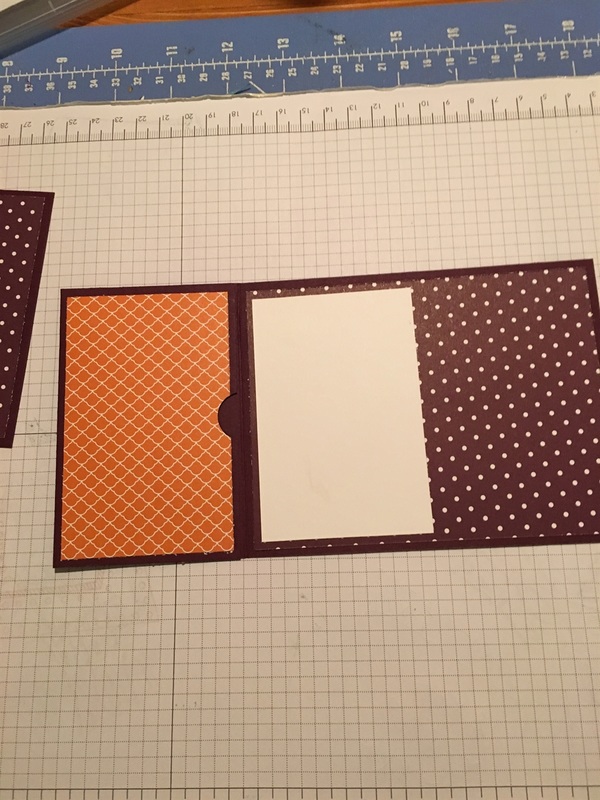
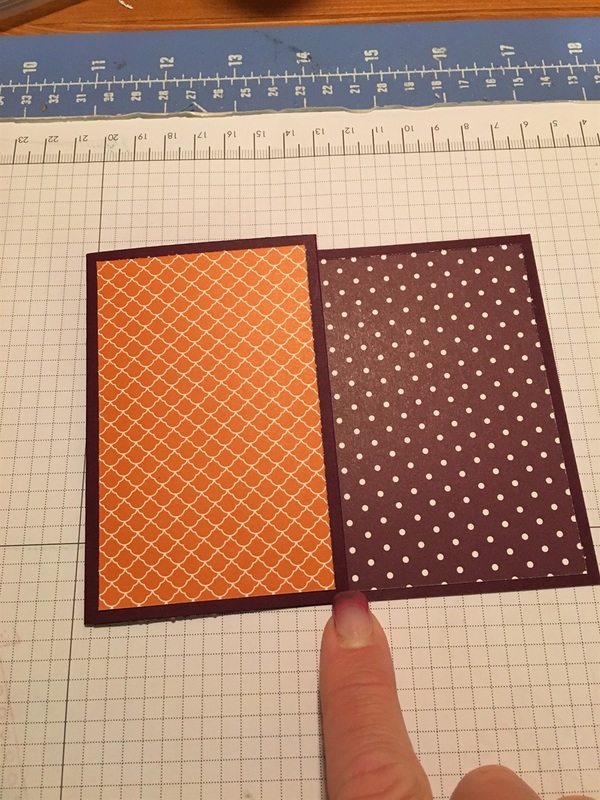
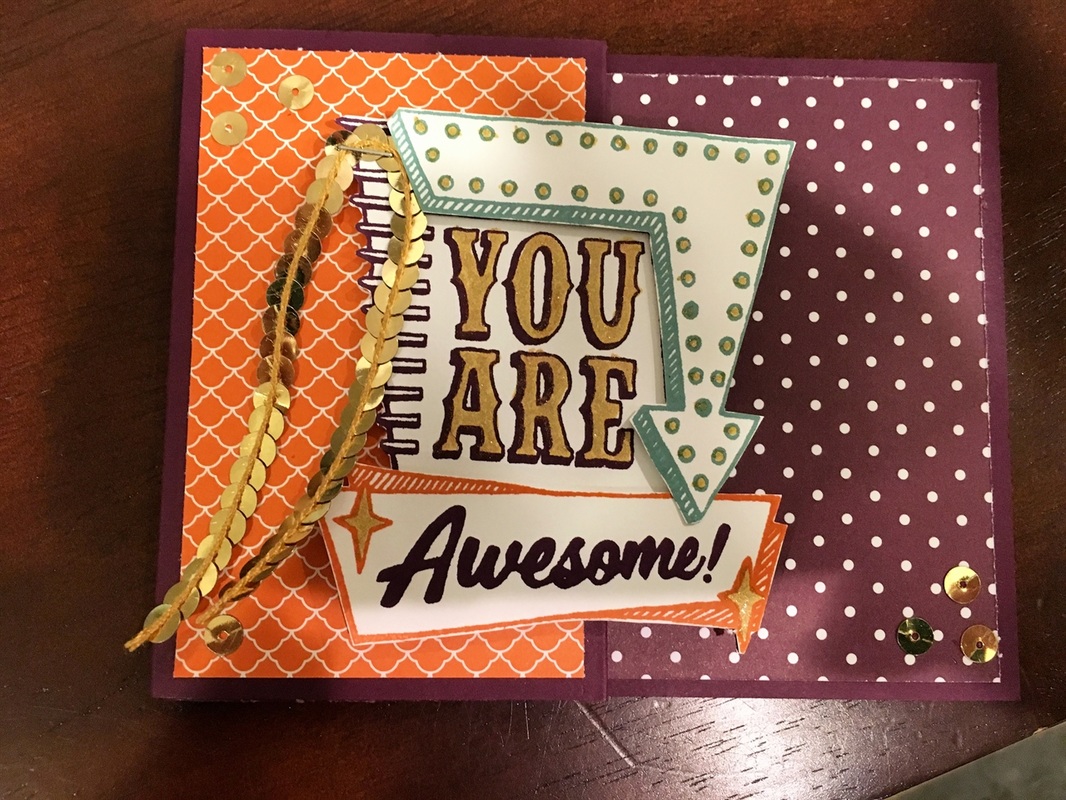
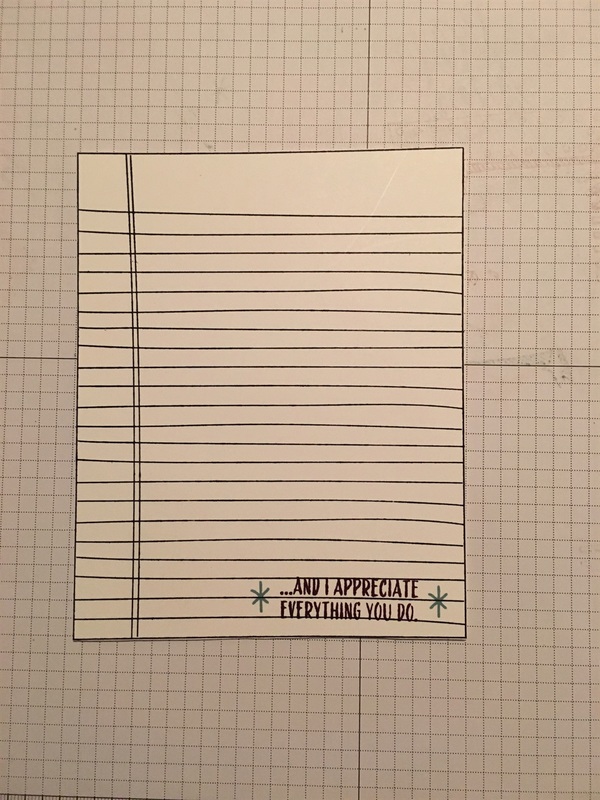
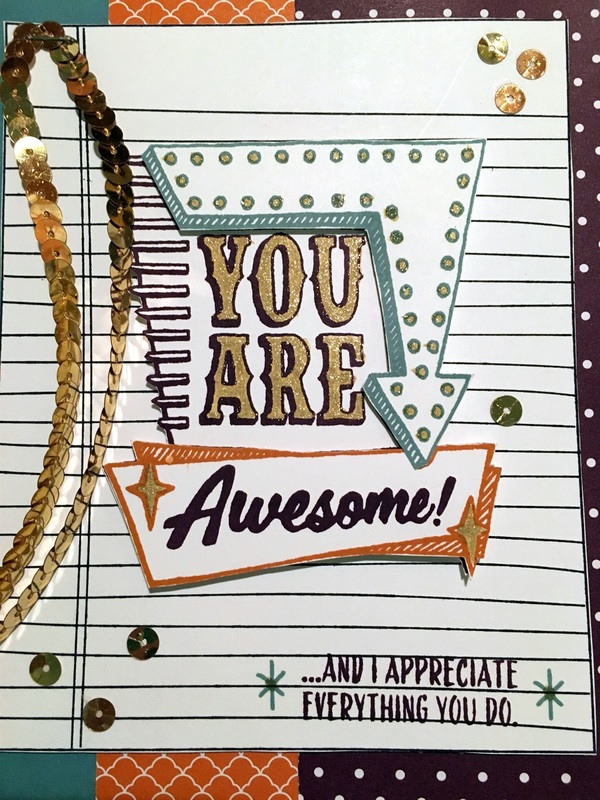
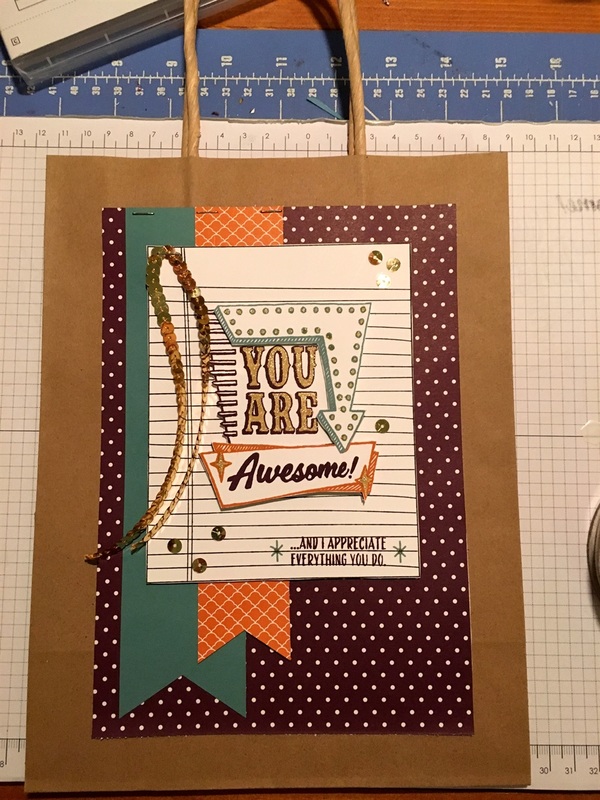
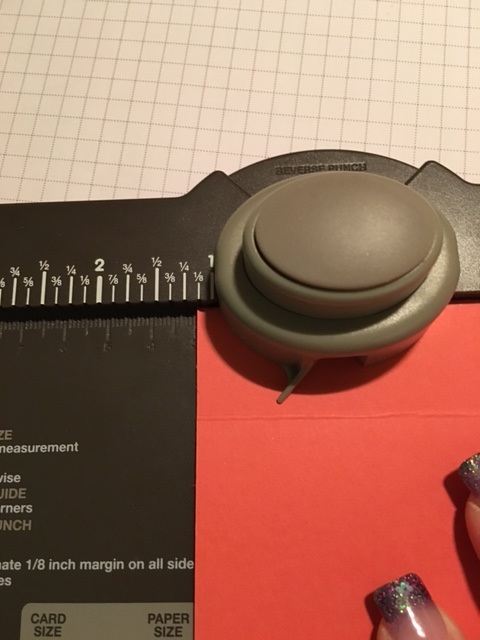
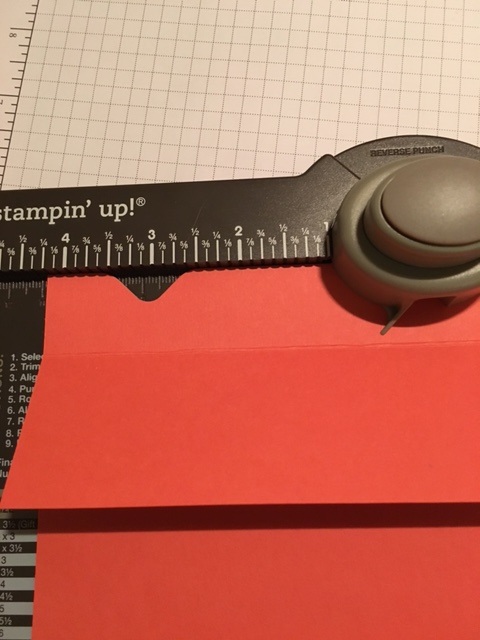
These cards were super easy to use. I used a combination of colors for my cardbases, Blushing Bride, Coastal Cabana, Crushed Curry and Island Indigo which measure 5 1/2x8 1/2 scored at 4 1/4 then fold in half. The DSP is now retired but was from the It Starts with Art Suite. The DSP measures 4x5 1/4 I printed out the pages of the PDF on whisper white and cut of the greetings using the Stitched Rectangles and Layering Ovals. I then stamped and cut of the images and colored them with coordinating Stampin Blends!!!! #stampinup #sharesunshine #stampinandscrappinwithsteph @stephjandrowstamps Thanks for stopping by Happy Stampin Steph  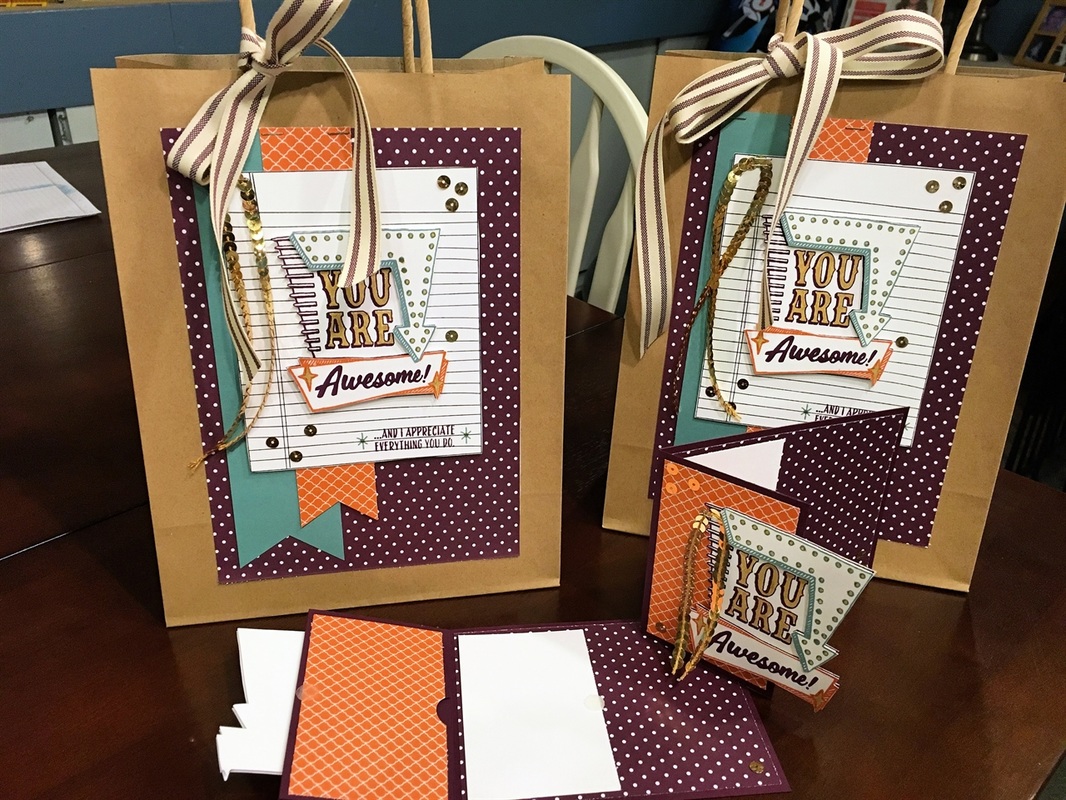 Welcome to our Stampin Friends No Rules June Blog Hop! We have 13 amazingly talented crafters this month. So much fun to be had by all when you follow along and check out everyone's blogs and fabulous projects. Make sure to leave a comment to be entered in the Blog Hop raffle. Read each blog, scroll to the end, and leave a comment with #SFJuneHop!! Each member and guest blogger, will randomly select a winner from our blog comments. We will then pool those together and randomly select the overall hop winner. I would love to hear some feedback and you will earn a chance to win some Blog Candy! Thank you for visiting my blog from Kirsteen Gill's site, and thank you for continuing with the Blog Hop. Enjoy my project and at the end click the NEXT button to continue to Kathie Rotti's blog. Didn't come from Kirsteen's blog?? That's ok, just click the PREVIOUS button towards the bottom of the blog or scroll to the end and click on Kirsteen's name to visit her blog.  This month I decided on a gift bag/gift card set. Fits into the no rules theme because when I decided on my project for the blog, I wasn't thinking, and had chosen the retired 2014-2016 In Colors. My thought was to use up some supplies I had on hand...but oops because typically I only use current products for my blog projects. Now, these projects are so versatile and can certainly be adapted to any papers/colors you have on hand! Let's begin. I decided on the new Marquee Messages stamp set. Love it!!! So fun to use! Since the projects I made were 2 bags and 2 gift cards holders. I stamped the images 4 times in each color. Clean the stamp in between colors. I started with the lightest color, I stamped the Lost Lagoon first, focusing mostly on the arrow section, then since I only need the bottom of the stamp in Tangelo Twist, I stamped closer to edge of the paper and last was Blackberry Bliss, I needed the whole image. Then I cut the images out. I layered onto the Blackberry Bliss using dimensionals. Finished them off with the Gold Wink of Stella. To make the gift card holder, you need a piece of cardstock measuring 4 1/4 x 11. Score on the 11" side to 5 1/2 and 2 3/4. Fold over and only adhere the outside edges, to make a pocket for the gift card and punch a notch using the 3/4" circle punch. See 5th & 6th photos. I decorated the pocket using a piece of DSP that measures 2 1/2x4. The inside piece of DSP measures 5 1/4x4. You could use a piece of white if you prefer to have more area to right on. I used the same DSP on the outside front section. I stapled a strip of gold sequins onto the Marquee and only added dimensionals on the left edge so you can lift open the giftcard. Then I glued on a few sequins here and there to finish it off. To keep the gift card closed I added a little velcro dot. The giftbag was pretty simple. I grabbed the bags at the Dollar Tree. I stamped the Writing Notes stamp using the Basic Black onto Whisper White. Then cut out around it. I also stamped the greeting at the bottom in Blackberry Bliss and 2 stars in Lost Lagoon. I used the same DSP and cut a piece that's 6 x8 1/2 and another at 1 1/2x8. I also cut a piece of Lost Lagoon to 2 x 8 1/2. I punched the ends of the 2 strips using the Triple Banner Punch. I stapled the strips to the DSP and then attached to the bag with Fast Fuse. I also stapled the gold sequins to the top corner of the Writing Notes. I added the Marquee image with the dimensionals. And again finished off with sequins here and there. Last but not least I added the bow with the Blackberry Bliss canvas ribbon. I hope you enjoyed my projects. Please leave a comment with #SFJuneHop and be sure to click next to visit Kathie's Blog. Thanks for stopping by Happy Stampin Steph  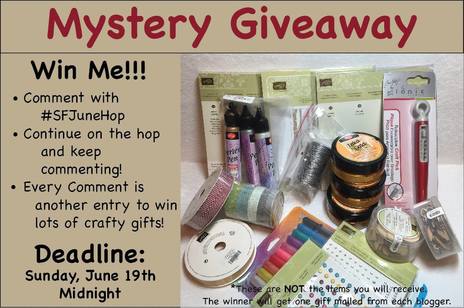 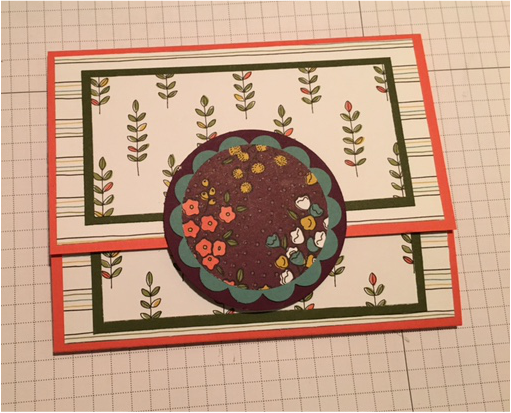 Day 5 - Last but not least. To end Teacher Week I decided to stick with a gift card. Perfect, the teachers can use the card for themselves. I came across this Giftcard Card while I was scrolling through Pinterest. The original design was from Lea Denton of The Crafty Spark. Her design uses measurements for a sheet of A4 paper. I modified it to work for a standard sheet of 8 1/2x11 cardstock in the US. You could use a sheet of 12x12 and use Lea's measurements if you preferred. You can view Lea's design here. So I started with a sheet of Calypso Coral 8 1/2x11 cardstock and cut it to 5 1/2x11. I used my Simply Scored Scoring tool. Place the 11" side at the top and score at 1 3/4, 2 3/4, 3 3/4 and 8. 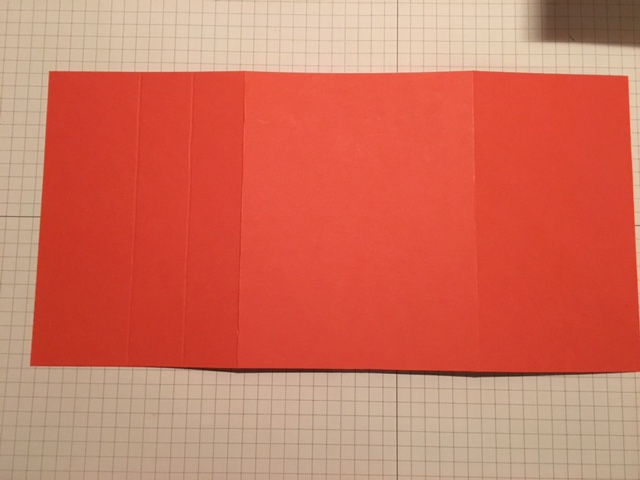 Fold on the score lines. Except on the 2 3/4 score line you are going to fold it in the opposite direction. 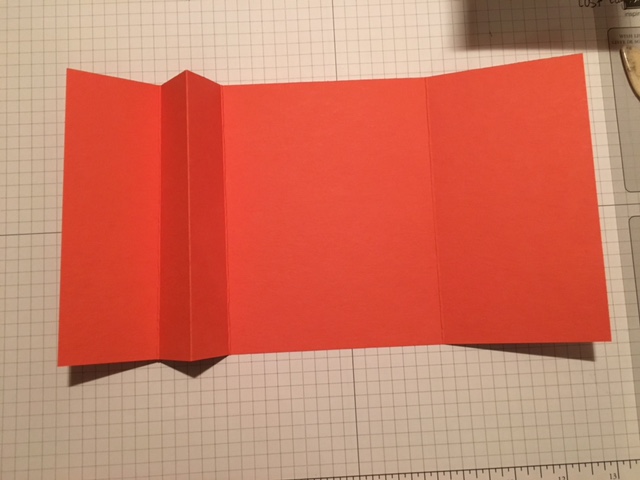 Then you will need to turn over you paper and add a strip of adhesive at the 1 3/4 score line. Make sure to add adhesive as close to the score line as possible. You will seal this together at the 3 3/4 score. Turn it over, this section will become the pocket to hold the giftcard. To make the giftcard pocket, you will need to use the Envelope Punch Board. You will not be scoring, just creating the 2 notches. Take the section you just glued (folded side up) and line up the left side at 1 1/8" and punch. Move it over to 4 1/4" and punch again. Boom that's done. Next, with your trimmer, line up the edge of the pocket (the side that's folded) and trim off just a smidge to open the pocket. Don't go too far down. You want to make sure there is enough to hold the gift card in. 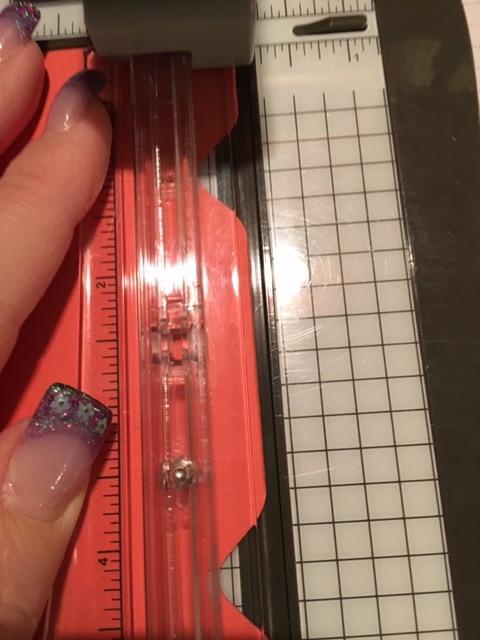 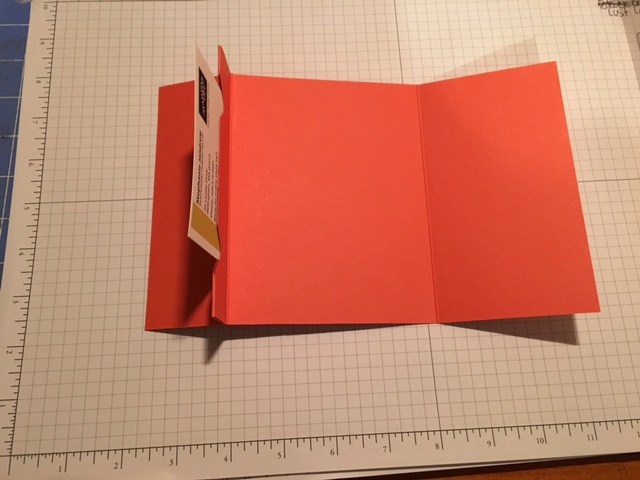 Ok, lets decorate. I had enough of the Wildflower Fields DSP to finish up the week. Yeah I like when that happens. Now I am no longer sitting on retired paper I am wondering what I'll do with it. Starting with the inside. I layered the DSP Inside top flap DSP: 5 1/4 x 2 3/4 CS: 4 1/2x 2 1/4 DSP: 4 1/4x2 Inside: DSP: 5 1/4 x 4 CS: 3 1/8x3 1/8 WW: 3x3 Inside Bottom Flap DSP: 5 1/4 x 1 1/2 CS: 4 1/2x1 1/4 DSP: 4 1/4x 1 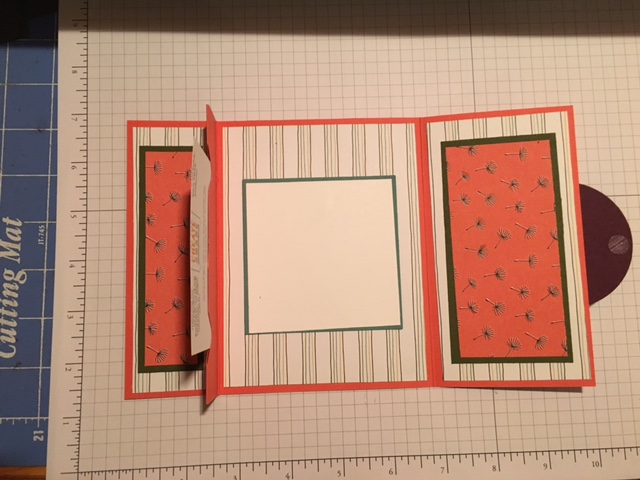 Now for the outside of the card: Same process except you do not need to decorate the middle section since this becomes the back of the card Outside top flap DSP: 5 1/4 x 2 3/4 CS: 4 1/2x 2 1/4 DSP: 4 1/4x2 Outside Bottom Flap DSP: 5 1/4 x 1 1/2 CS: 4 1/2x1 1/4 DSP: 4 1/4x 1 The I used contrasting colors from the DSP pack to make the closure. Punch a 2 1/2 circle in Blackberry Bliss Punch a 2 3/8 scallop circle in Lost Lagoon Punch a 2" circle with the DSP in a different pattern. Adhere on the front only at the top half. We will add Velcro to keep the card shut. So what I did was added both the top and bottom pieces of Velcro onto the back of the circle. Then close the card, and press, the bottom part of the Velcro will stick to the card. Just add giftcard and it's all done. Love it!!
Hope you enjoy this week's projects. Feel free to contact me with any questions! Happy Stampin Steph 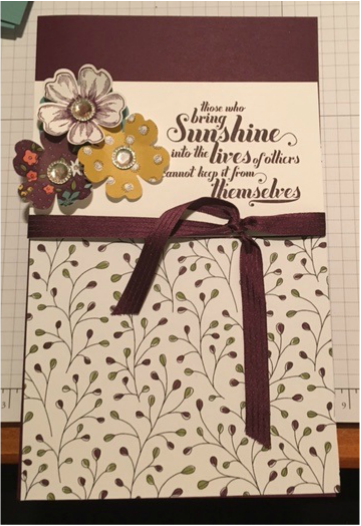 Day 4 - Notepad Holder I decided to make a notebook holder for day 4. It's my go to quick gift. Super easy! I feel like you can never have enough notebooks around. I used Blackberry Bliss Cardstock as the base of the holder. You can make 1 notebook holder out of a sheet of cardstock. I'm this particular one, I added a pocket on the inside. You can choose to skip to save paper too. The holder is sooo easy. Take a piece a 8 1/2x11, Take your Simply Scored Scoring tool, with the 11" side at the top score at 5 1/4 & 5 3/4 Boom folder is done. Fold on the score lines and add the notepad to inside right. I used little legal pads I found at Wal-Mart. I think they are like 5x8. To make the pocket, you will need a piece of cardstock that measures 4 3/4 x 6 1/2. Easy - score at 1/2" & 3/4" on three of the sides. You will need to fold on all the score lines. Then cut out the corners you don't need that section. The 1/2 section when folded, will be the section that adheres to holder and the 1/4" will be your sides. Hope this makes sense. Tear n Tape to adhere the pocket down.  To decorate the holder. I cut a strip of DSP that measure 1x5. I glued this onto the top of the notebook to hide that binding. Plus it gives the inside a little extra touch. 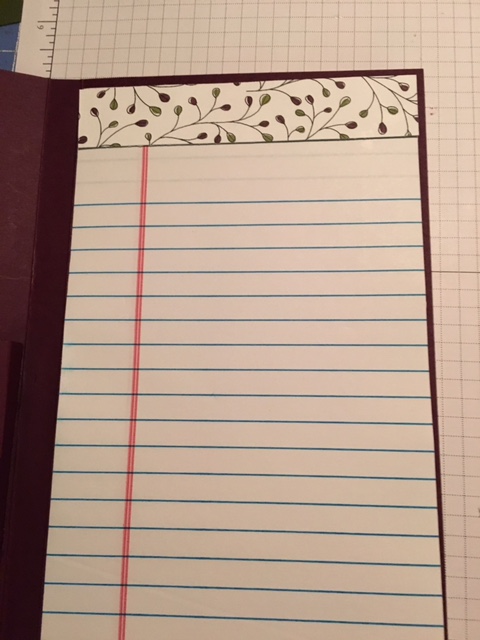 I cut a piece of DSP to 5 1/4x6 and glued it onto the front of the holder. I then cut a piece of Whisper White to 2 7/8x5 1/4.I stamped the saying from the Feel Goods stamp set in Blackberry Bliss. Then I tied a knot around the white in the Blackbery Bliss Stitched Satin ribbon. I then glued it onto the front of the holder overlapping the DSP allowing the Blackberry Bliss cardstock to still show at the top. I stamped a flower from Flower Shop in Blackberry Bliss and punched it with the Pansy Punch. I then punched 3 more flowers with the Pansy Punch using scraps of DSP and Lost Lagoon Cardstock . I added a Iced Rhinestone to the center of the flowers and then layered them onto the front of the holder. 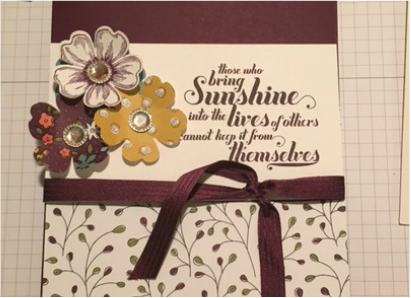 Just love it. I love that no matter how many times I make this notebook holder, it comes out looking so different!!!! Perfect for teachers right!!! Like I said in the beginning I was 100% on the Wildflower Fields DSP but, have truly come to love the colors as I worked to create these gifts. I enjoy working to coordinate as well. It makes me happy when the guess work is taking out of the equation and I can create at ease. Got to love Stampin Up!!!! 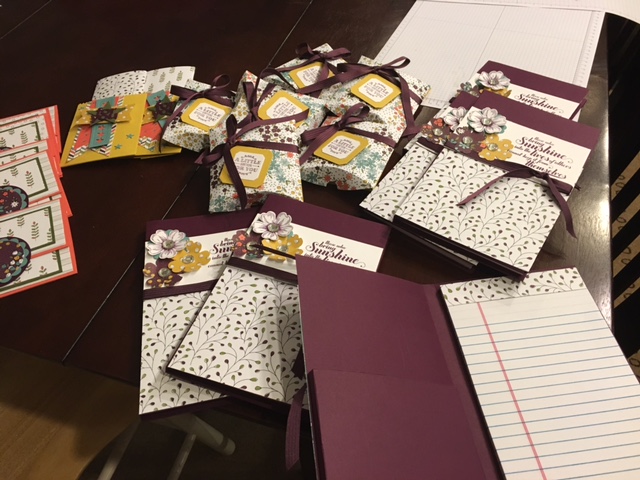 Check in tomorrow and see what I made for the 5th a final day of Teacher Appreciation week.
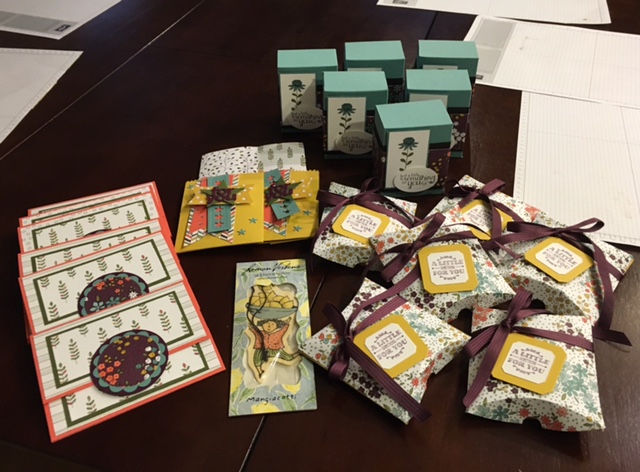
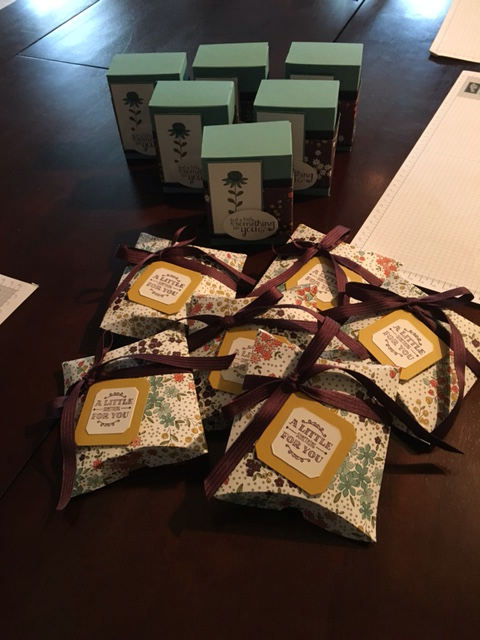
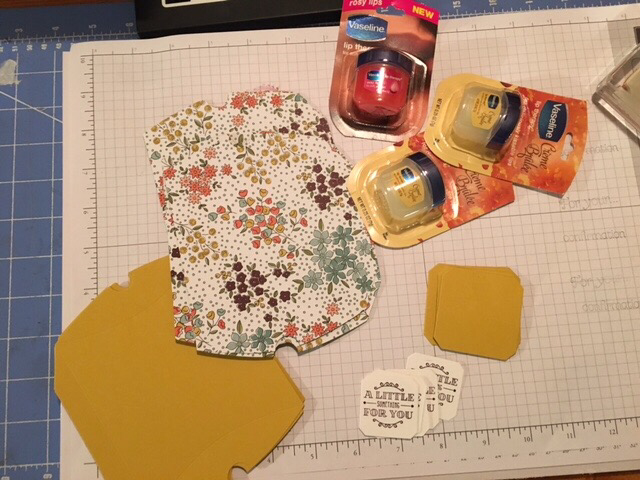
I am so happy with the results. Thanks for taking a look Happy Stampin Steph 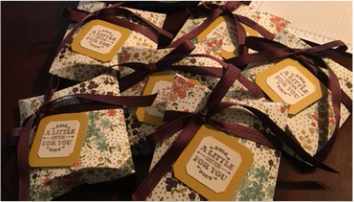 Day 3 of Teacher Appreciation Week. Today's project is a little lip balm packaged in a pillow box. As mentioned in Day 1, I did use a little bit of retired product to use things up. This project was fairly simple. I cut a piece of Hello Honey cardstock out using the Square Pillow Box Framelits (retired from Stampin Up).I repeated the step and cut out a second piece using the Wildflower Fields DSP. I stamped the A Little Something for You in Blackberry Bliss and cut it out using the framelits provided in the Square Pillow Box. I cut the larger one in Hello Honey and layered together. I assembled the box and tied a bow using a piece of Blackberry Bliss striped satin ribbon (retired) around. I attached the saying just under the bow. Like a said EASY. I found this little Vaseline Lip Balms at Walmart in Health and Beauty where the rest of the Vaseline is sold. The idea of this project came from a similar gift given to me by my Upline's, Upline Barbara Lash. She gave me a pillow box with the Vaseline Lip Balm in it. I thought it was sooo adorable. I couldn't wait to make it to give out too. Come back tomorrow to see Day 4 Happy Stampin Steph  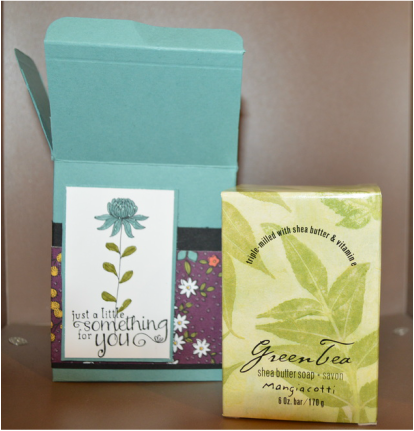 Day 2 - Soap Box You can read about the Soap Box by referencing my original blog post here. As mentioned, in my original blog post, I found a box tutorial by Pootles Papercraft. You can watch her video here to see how to make the box. I used Lost Lagoon Cardstock as the base of the box and the belly band is basic black and the Wildflower Fields Designer Series Paper. I stamp the flower from Flowering Fields (which was from Sale-a-bration and is now retired) with Archival Black ink and colored it using Lost Lagoon and Old Olive. I stamped the verse from the Num Num stamp set. I finished the flowers by adding a touch of Wink of Stella glitter. In the photos below, left photo shows Days 1, 2 & 3 and the right photo shows Days 1, 2, 3 & 4. I am still working on Day 4 So my delay in a little planning may result in me not having a photo of everything together. But I'll try to it at least post 1 of each as a group. I have to say I am really enjoying putting these projects together. I love how everything ties together!!!! Have a great week? Happy Stampin 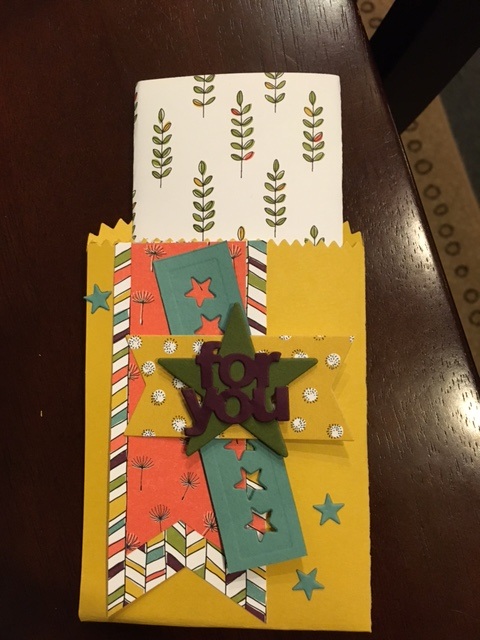 This week is Teacher Appreciation. Each day this week, the kids can bring in a little treat for their teacher. Our PTO supplied a quick suggestion of flowers, wear favorite color, bring a favorite snack, write a note or poem and a gift card. Plus we have a big luncheon on Friday and take over recess duties. Well, I had been working on year end gifts for the teachers, trying to get a jumpstart. I realized the gifts I was putting together for end of year could possibly work for each day this week. I quickly switched gears and made sure I had enough for each teacher. Although they aren't the suggestions, I feel that the teachers will be ok without receiving 20 of the same things. My kids can still right a little note to go along with the gifts too. When I originally started the projects, I had decided that I wanted to use the soon-to-be retiring 2014-2016 In Colors. And well, the Wildflower Fields I had from Sale-A-Bration matches perfectly. Now keep in mind I did use some retired products. These type of gifts are perfect to use up anything I have sitting on hand and clear some space for new stuff, right???? Since, I was originally going to put this items altogether in a gift bag, to hand at once, I wanted them to match. But since I separated them out...you may not mind using different papers. Day 1 - We brought in a Lemon Verbena Air Freshener - smells so fresh YUM. Like the soap, featured in Day 2, the air freshener is also from Mangiacotti, which is made in Attleboro, MA. I blogged about the soap back in March so Day 2 will reference that post again. MAN these gifts smell so delicious, too!! This was super easy to make, so I'm not going to make a tutorial. I used the Mini Treatbag Framelits from Stampin Up. Don't have the framelits? You can use another type of bag, like these Kraft Bags (these have a low inventory status) or these Sketched Dots Bags and just added the decorations, Really anytype of bag will do! The colors I used in this project was Hello Honey for the treatbag, the star strip is in Lost Lagoon, Star in Mossy Meadow and 'for you' in Blackberry Bliss are cut from dies included the Mini Treatbag Framelits. I wrapped the air freshener with a piece of the DSP to coordinate it. Wala Day 1 project done. Stop by tomorrow to see Day 2. Happy Stampin Steph  |

New 2023-2024 Stampin Up Annual Catalog


Kits Collection


Join today

Categories
All
Archives
January 2024
|


 RSS Feed