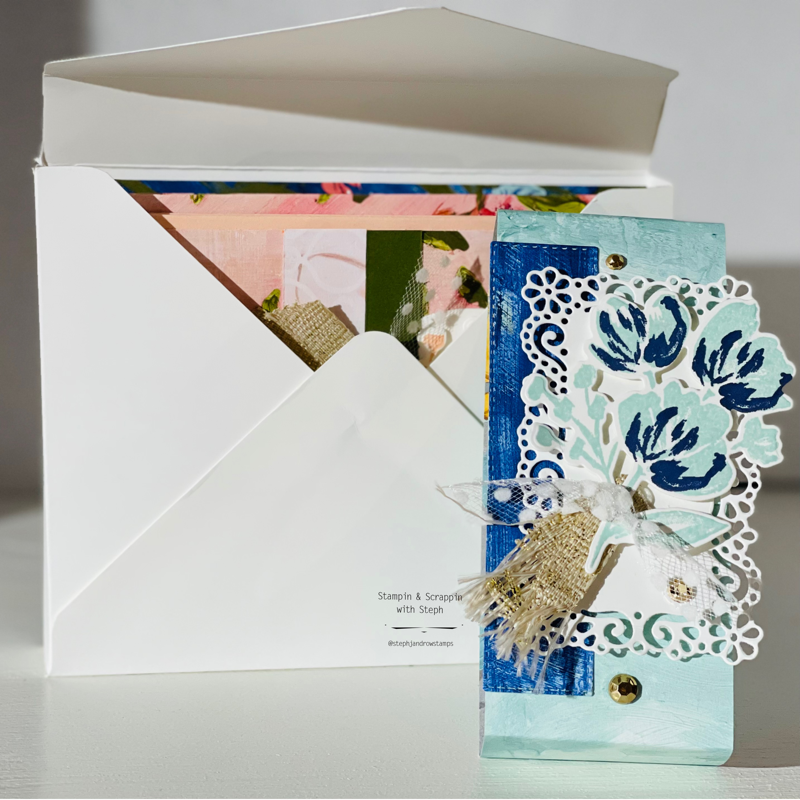
 2021 is just moving along quickly and here is Massachusetts spring is underway. The sunshine and warm air feel amazing!! The beauty of the trees and flowers blooming is breathtaking! And this month's blog hop is perfect for springtime! So lets celebrate spring with some beautiful flowers, sunshine and happiness! I hope you joined me from Jean Beaulieu's blog and after viewing mine, be sure to continue on to Melissa Thomas's Blog. And if you get lost along the way, there is a list of hoppers at the end of the blog. 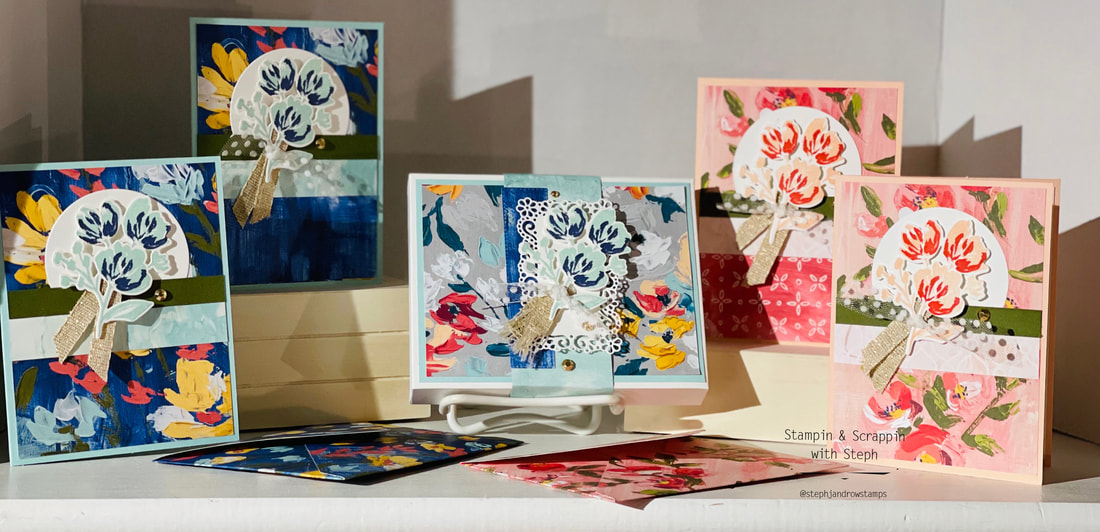 Because Mother's Day is around the corner here in the US, I chose to create projects that focus on that. I choice to omit any greetings so the cards can be used anyway the recipients want! You may recognize this design from a previous blog post that I used the In Good Taste Suite. Here, I used the Fine Art Floral DSP, which sadly will retire, but the Gold ribbon, Art Gallery stamp set and Floral Gallery Dies will carryover to the new annual catalog. Suites and bundles do not carryover. So don't wait, grab the Fine Art Floral DSP and Art Gallery Bundle (10% savings) while you can. I have used this set here and there, but...I will admit, it sort of intimidated me! I am so happy I gave it another go!!! I LOVE how my projects came out!!! What do you think?? For the envelope box, I used Basic White and then layered Pool Party and the Fine Art Flower DSP. The Bellyband is 2x12 and is also the DSP. The white layers is cut from the Ornate Frames. The flowers were first stamped in Pool Party, then Night of Navy. I added a piece of Fine Art Gold Ribbon and frayed the ends. I also tied a knot using the Polka Dot Tulle Ribbon. 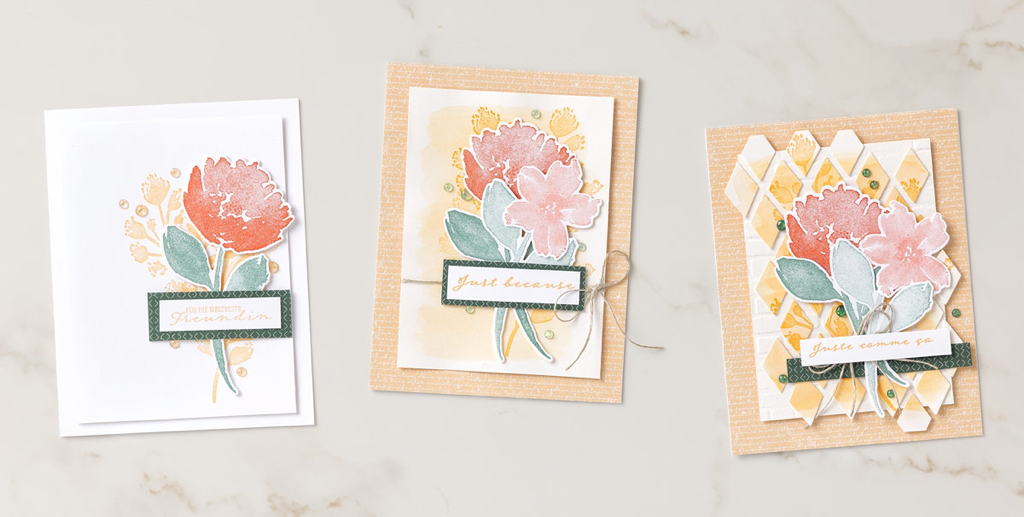
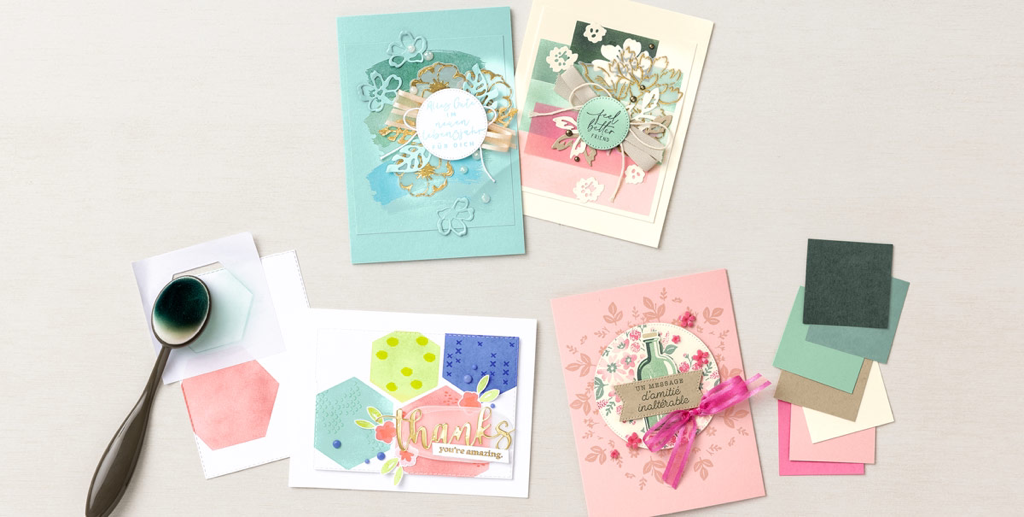
I made 4 cards to include in the box. They were each created the same way and I used Pool Party and Petal Petal as the cardbases. For 2 of the cards, I skipped the 1 3/4x4 layer and allowed the DSP to show. And then the other 2 cards I did used that layer in a different DSP pattern. I am not sure which I love more the Pool Party or the Petal Pink. DSP 4x5 1/4 Strip 1/2x4 Strip 3/4x4 Circle 2 3/4 Layer 1 3/4x4 My FAVORITE part of making this project is, I decided to make the matching envelopes! Why I do not do this more often is a mystery to me!!!!
I hope you enjoyed my projects this month!! Be sure to contunue on the hop! Happy Stampin Steph #stampinup #fineartfloral #envelopepunchboard #mss2021cardchallenge15 #stampinandscrappinwithsteph Below is a list of hop participants this month!
4 Comments
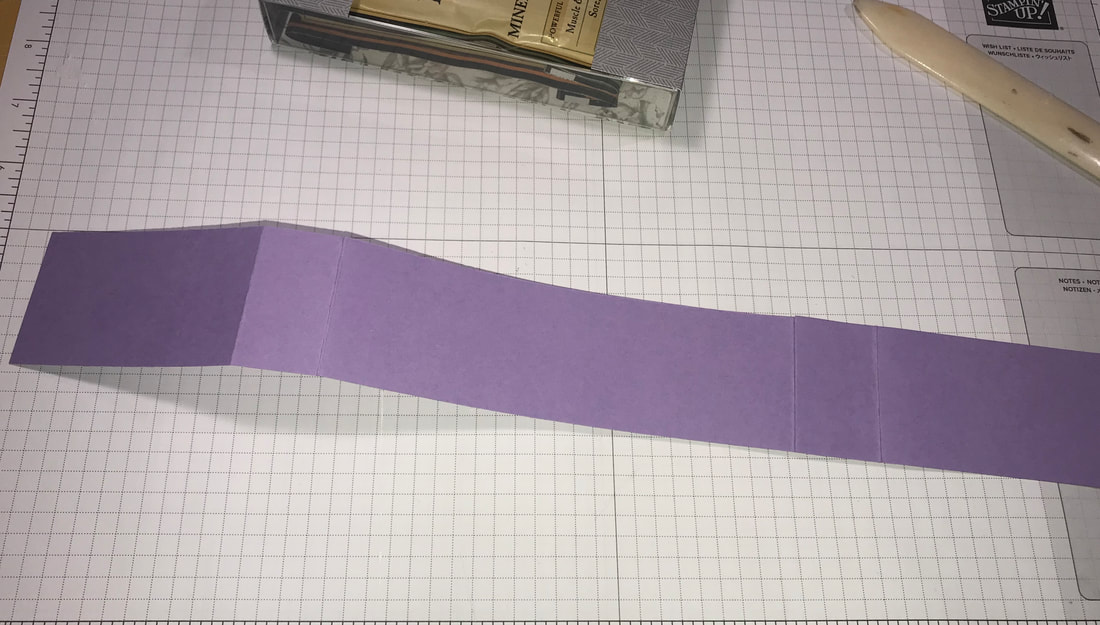
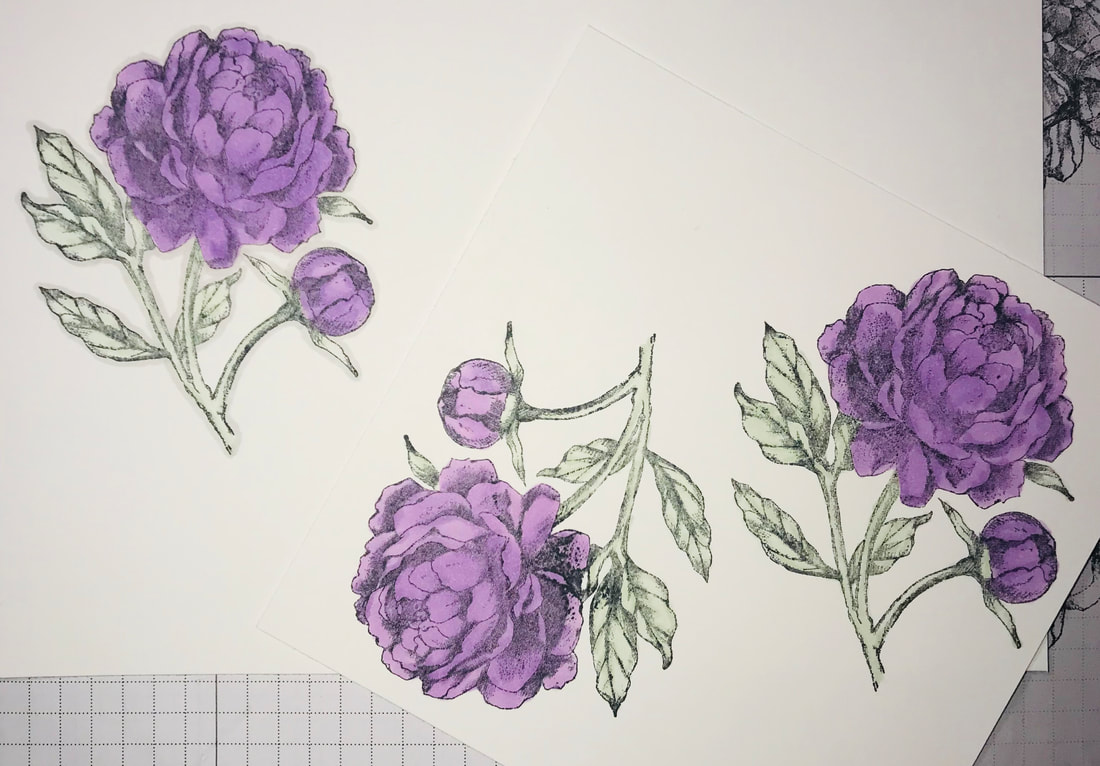
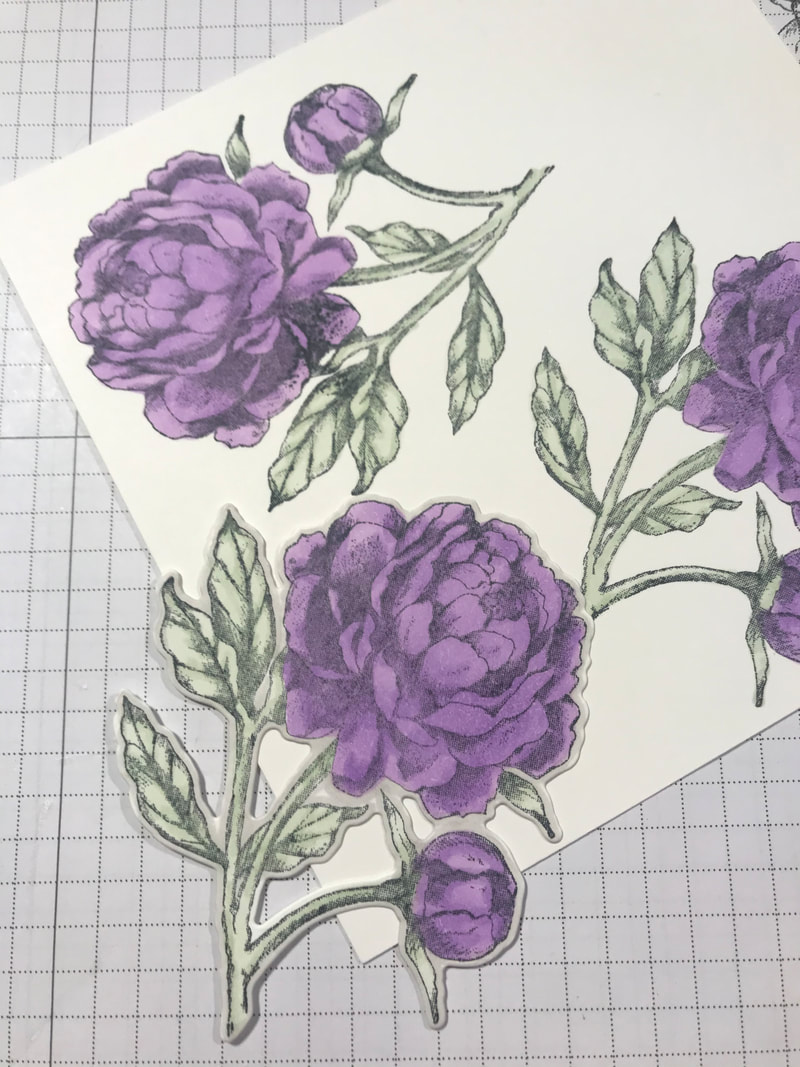
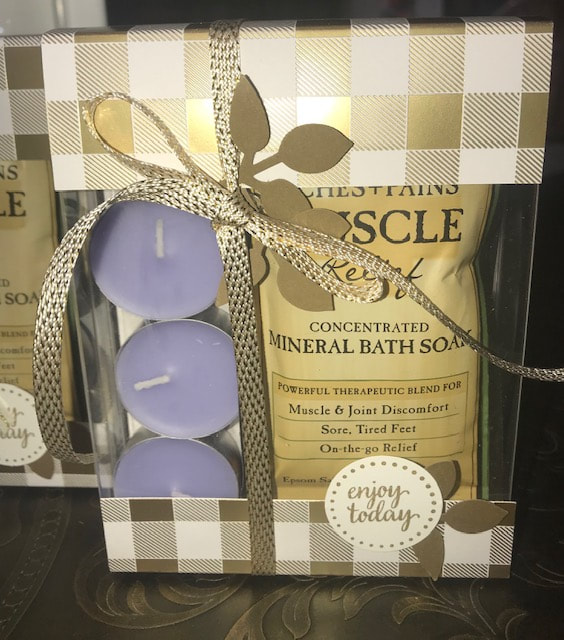
 Thank you for joining me for another month of Stampin Friends Blog Hop! We have a jam pack hop this month with so many talented papercrafters!!! August theme is Well WIshes. I think this theme is great for saying "Hi" to friends & family and sharing some well wishes. Letting them know we are thinking about them even during this crazy times! I hope you came from Kim Lamos Blog and be sure to continue to Jo Blackman's Blog, their projects were really amazing! If you missed someone along the way, you can find a list of all hop participants at the end of my projects. 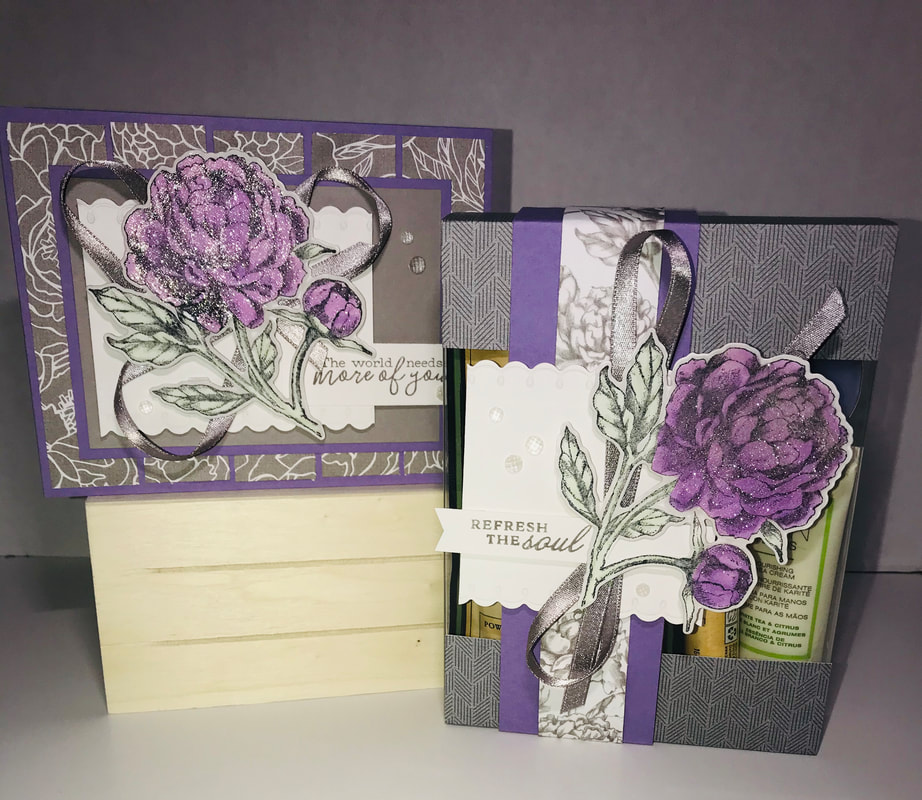 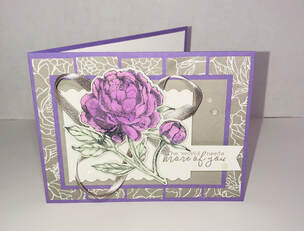 First, I will share my card with you! I was inspired by a card challenge to use a cardsketch. I will share that sketch so you can see the measurements! I used the Prized Peony Stamp Suite, stamp set, matching dies, elegant faceted gems, ribbon and DSP. The cardbase is Highland Heather and Gray Granite layers. I stamp the flower in black ink, nut stamped off once, as I didn't want the black to be so dark. Then I colored the flower using the light and dark Highland Heather and Soft Seafoam Stampin Blends. Before adhering the flower with dimensionals, I added a swirl of the Gray Granite Shimmer Ribbon and finished off with the Elegant Faceted Gems. And last but not least I went over the flower with Wink of Stella. Below is a picture of the cardsketch I used, it includes the measurements for this card! #msscardchallenge15 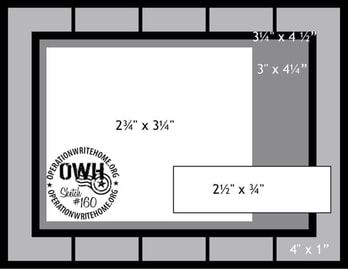 For my project, I decided to revist I project I put together for a vendor event. I really love this and have used a version of it many times for quick gift giving! My girls like to give treats and gift cards for gives and this comes together quickly to give a fun gift to friends. So for this, I choice some bath soaks, lavender candles, hand cream and a lip balm. You can use anything really to build this pampering package! After I made it my daughters said I should have added some facemasks.....maybe for the next set! I used acetate card boxes to hold everything. Now, Stampin Up does sell them, but they aren't wide enough! I found the perfect size on Amazon. I have fun decorating the box and it depends on what I put inside that drives my mood. I used the same colors and started with the Peony Garden DSP. I love that one side was a more solid pattern and then the opposite was a Gray Granit Floral. Although most of the paper is covered by the products inside, I like that there was a "background" to the box. Now I could have just cut the DSP to fit inside the box, but I like the wrapped look. 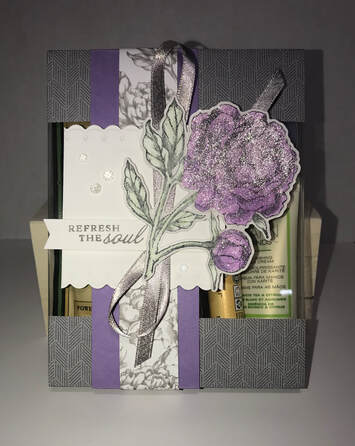 To make the wrap, I used a piece of DSP that measures 4 1/2"x10 1/2" you can see in the third picture below, how I wrap the paper on cover just the ends. I use glue dots on the corners to secure in place. You can just use the belly band to hold the wrap in place, but the glue dots prevents the edges of the paper from curling up. Then I cut 2 pieces of cardstock1 7/8"x11" and 1 7/8"x 4 7/8". I gently wrap the longest piece around the box, crease were the paper would fold and then determine where it will end, then adhere the shorther piece on. I use my bone folder to make a crisp line where the paper folds. And then wrap it around the box and adhere the 2 ends together. For the DSP, I just cut a 1" strip and adhered it to the cardstock as I wrapped it around. Now you can cut 2 pieces of DSP so it wraps completely, but I knew that part would be covered. So I just used 1. I cut a piece of Whisper White cardstock to 3x3 and then used the edgelit in the Peony dies and trimmed the edges off 2 sides of the square, just enough to cut the edge off. I used dimesionals to adhere the white CS to the band. The flower was made the same way I made for the card and I added the ribbon and gems to match. I love it! So simple yet so elegant! What do you think??? I hope you enjoyed these projects, be sure to leave me a comment and continue to Jo Blackman's blog. Thanks for hopping with me Happy Stampin Steph Below is a list of all Blog Hop Participant;
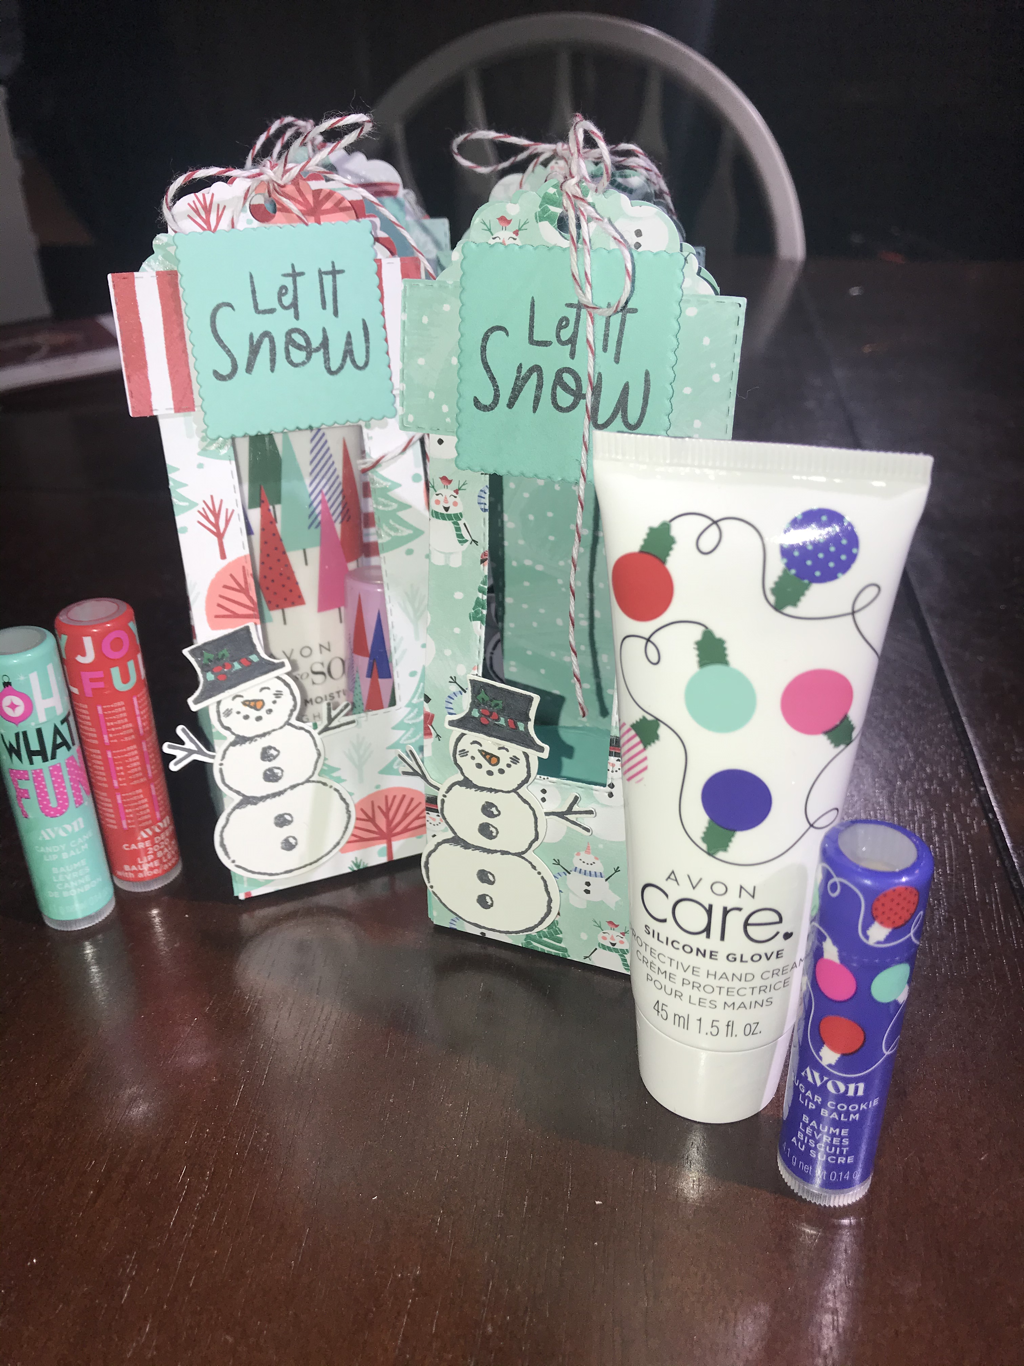 A project that I love to make for the holidays is a lotion & chapstick holder! Passed years I have made a gift bag holder with a cut out in the front for a window so you can see the content. Even tho I really like the gift bag, I decided to change it up a little this year. The reason being, I am involved in a Holiday Pop-Up shopping event again this year and this will be the 3rd time I will be displaying my projects for sale. So I figured for those repeat attendees that I am so gracious for!!!! I decided I needed a fresh look!
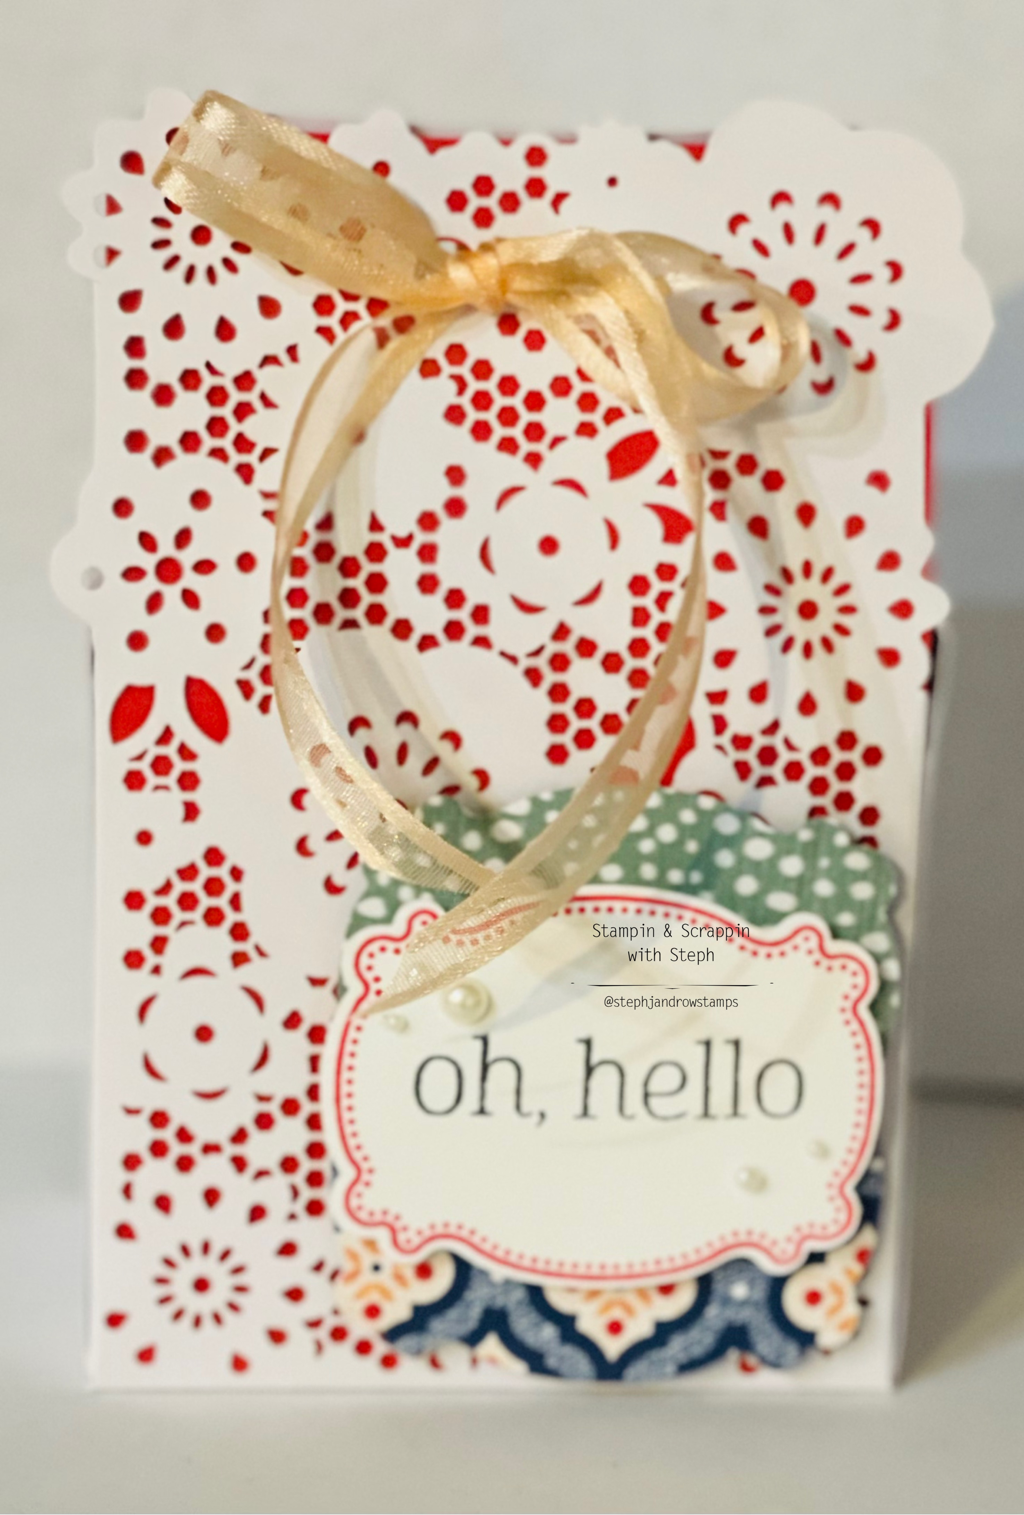
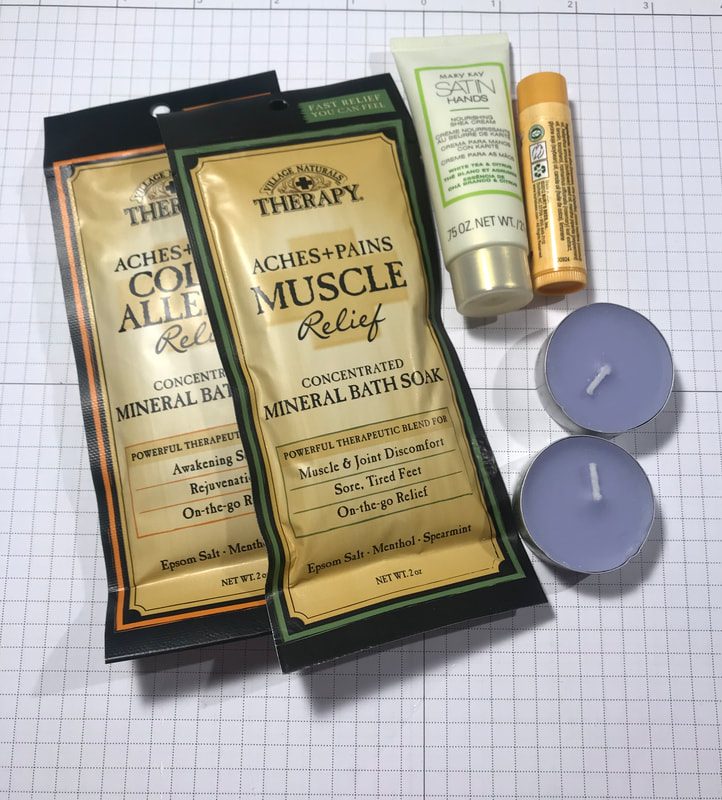
After a few failed attempts on my own, I came across a post on Pinterest and I really liked her project. I adjust it to be just a tad wider so that the lotion and chapsticks would fit without pushing against the paper edges. Unfortunately, I did not pin the post and I am having trouble locating it at the moment. SO I will keep looking and definitely update when I come across it! I want to make sure I give credit to the creator as well!! The DSP and stamp image I used is from Stampin' Up's new Let it Snow suite. The stamp set is called Snowman Season and there is also a Snowman Builder punch that coordinates with one of the stamps. I made 2 of each paper design for a total of 8 holders. I used the cut out from the window as a backing to the greeting and had the reverse side of the paper displayed. For the window opening you could use a window sheet. But I cut a piece of transparency. You can find these at an office supply store. I feel they work just as well and you get more for your money! I plan to put these into a cellophane bag and finish it off with a little tag that includes the contents for easy shopping. I hope you like it! Thanks for stopping by! Happy Stampin Steph 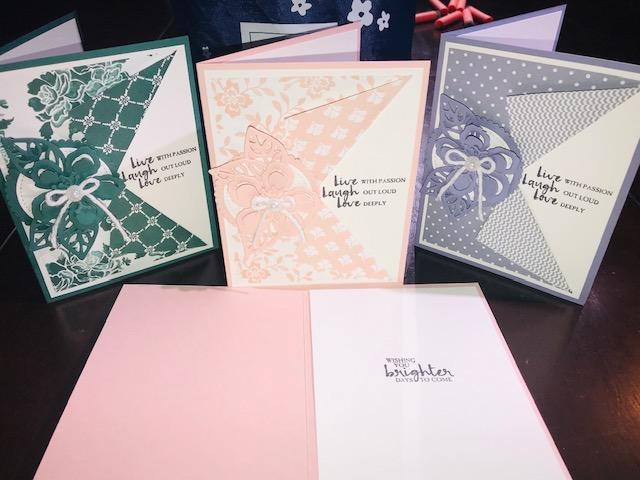 I am very honored to be a part of something amazing. A wonderful friend of mine is putting together Chemo Care packages that will be donated to a local cancer center. I offered to make the cards they will include in each kit. These are the cards I will be designing to donate! Below I have included the original Facebook Post. If you are interested in being a sponsor and donate a kit, please contact me for more details! Thank you so much and Happy Stampin Steph I am so excited for this collaboration with one of my best friends, we both know loss to cancer way to well, as many of you have, too. 💕 In honor of so many loved ones and the warriors that are fighting each and every day please consider sponsoring a Chemo Care Package. A collaborative effort between Amanda Matthews, ThirtyOne Gifts and my R+F team, “Team Hustle & Heart” every Chemo Care Package will be donated to the Dana-Farber/Brigham and Women's Cancer Center at Milford Regional Medical Center. If you are interested in sponsoring a package please let me know. Each ThirtyOne caddy will be filled with R+F Essentials Moisturizer, Essentials Lip Shield, hard candies, fuzzy socks, other necessities, and cards from the amazing Stampin & Scrappin with Steph. — with Steph Jandrow, Amanda Matthews and Craig Leger. 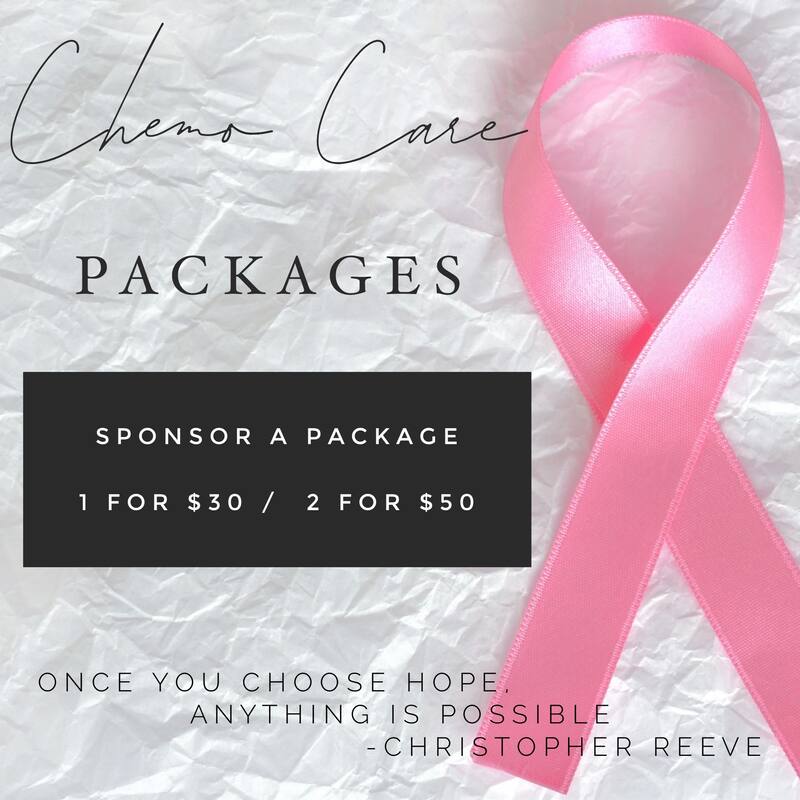 The holiday season is almost upon us and we will soon find ourselves scrambling to find the perfect gifts for our family & friends. Let me take away some of the stress and provide you with a fun event as you create fun gift packaging. Not only will your family/friends be excited to open their gifts....they will be super impressed that you created the packaging! I do the hard part...the cutting and preparation. You do the fun part...putting it all together! We will be creating a variety of Holiday Gift Tags, Gift Boxes/Bags and Money/Gift Card Holders. A total of 24 projects! Yes, 24.....10 bags/boxes, 4 money holders, 4 gift card holders and 6 gift tags! (Stampin Up designer paper may vary from what is shown based on current product availability) Come on by December 1 at 9am! Workshop fee is $30 this includes all the precut materials to complete each project. You may also add on additional projects please contact me for details. Can't make? Contact me about my to go option! To secure your seat, please register and pay at https://www.paypal.me/StephanieJandrow Stay up-to-date with event information by RSVP'ing to the Facebook Event. Click here to view the event. I look forward to seeing you Happy Stampin Steph 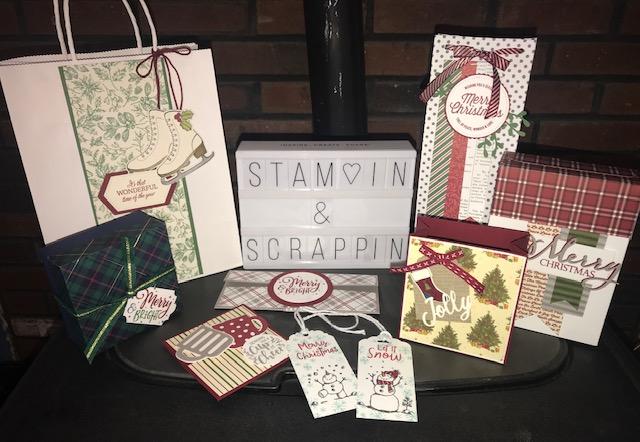 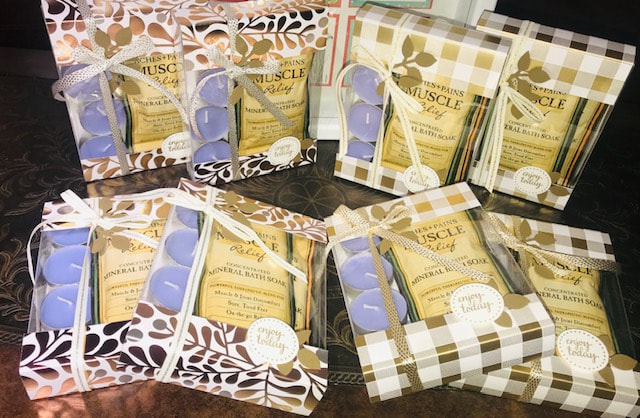 With Teacher Appreciation being celebrated and the end of the school year around the corner, it's time to think about what to give! Most of the time I plan a gift card! I feel the teachers really appreciate that, and they can choose what ever they really need or want rather than receiving 20 novelty gifts that they may not have use for year after year! But I like to dress it up! Recently, I had the opportunity to display my projects at a Spring Pop-Up shop event. I worked on several projects for Mother's Day, Spring/Summer and Father's Day, I am hoping to post so more as the days go by. But this is the spa set I put together!
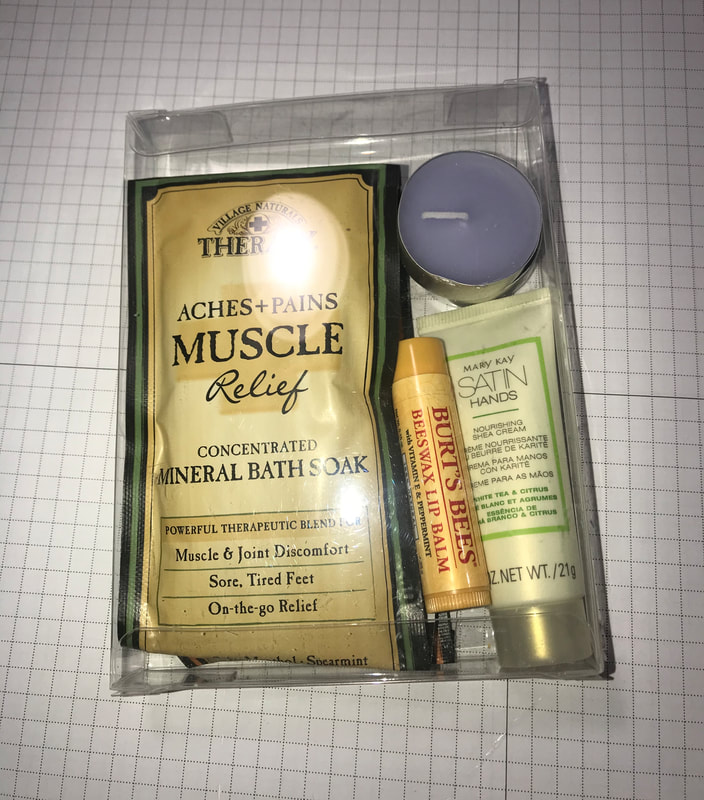
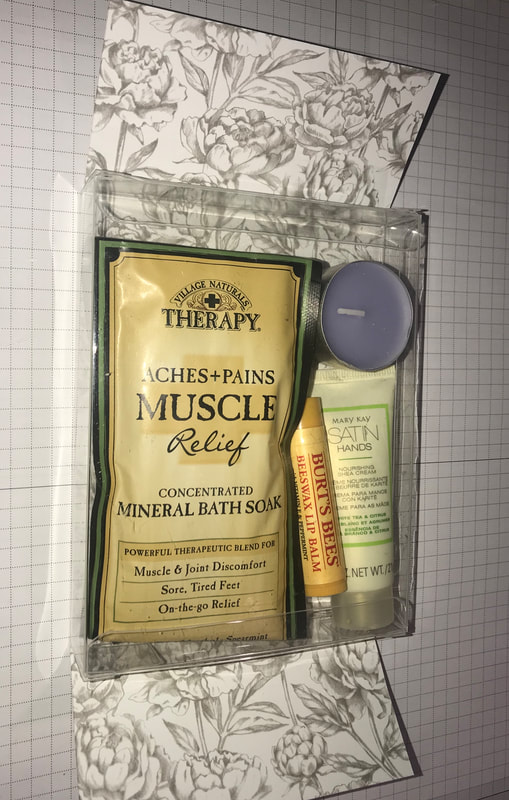
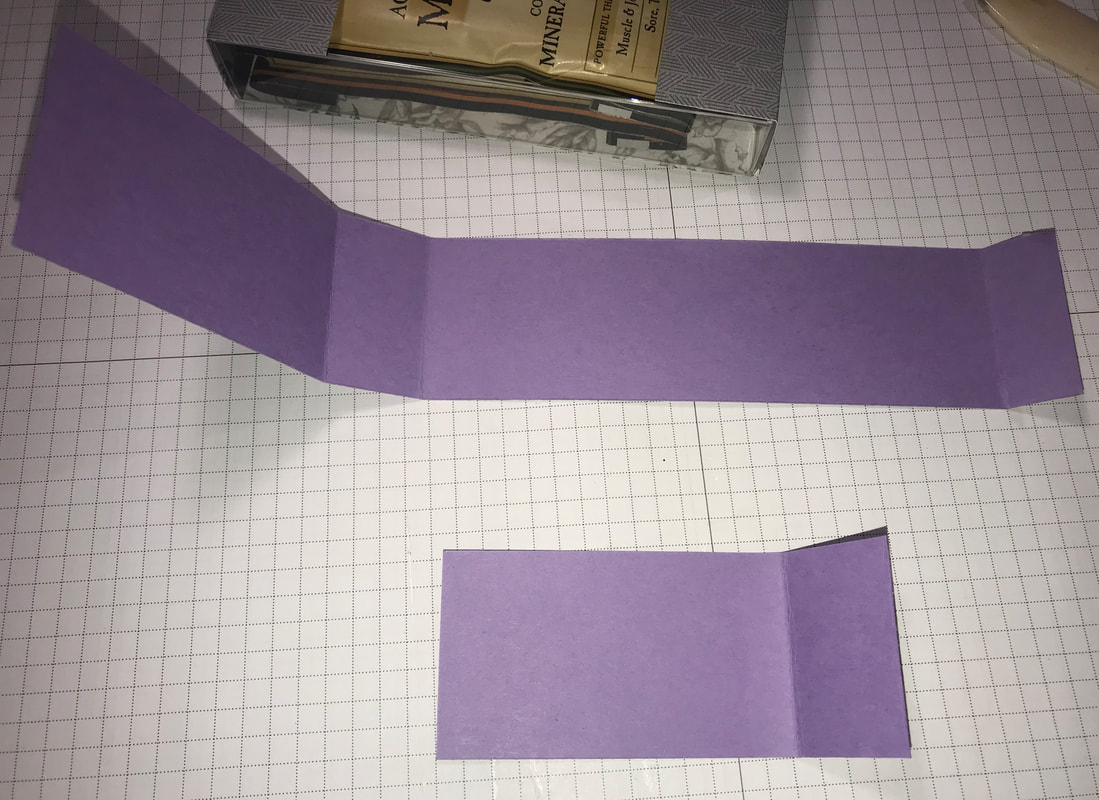
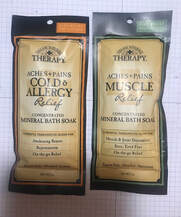 I found the boxes, lavender tealights and 2 types of bath soaks on Amazon. I was able to plan my project, order the supplies and have them here in a day! PERFECT! They are the perfect sizes for this project. And...teachers are their feet all day and dealing with germs! The definitely need some relaxation!!! Acetate Boxes Lavender Tealights Cold & Allergy Relief Aches & Pain Muscle Relief To make the wrap of the box, you will need a piece of paper 4 1/2"x10 1/2" and you will score on the 10 1/2" side at 1", 2 1/8", 8 1/8" and 9 1/8". I used a little bit of adhesive to hold the paper in place as I wrapped it around the box. Make sure you add your candles and soaks to the box before wrapping. The paper I used is called Year of Cheer Specialty Designer Series. It's now retired! Are you like me, I buy paper and I have to save it until I find the perfect project to use it on??? I felt this project was just right! I added the leaves from the Leaf Punch in Soft Suede, greeting from the Eastern Beauty stamp set was stamped in Soft Suede and then punched out with a 1 1/4" circle punch. Then finally I wrapped the box with a piece of Metallic gold or silver ribbon. The ribbon was about 30" long but you can probably go a little bit shorter, depending on the size of the bow you'd like to finish with. I am very pleased with this project and so happy have come across it! I feel like with a project like this, the possibilities are endless on what they can be used for!!! What do you think?? Feel free to leave a comment! Thanks for stopping by Happy Stampin Steph  I enjoyed making the Accordion Organizer for an upcoming shopping event...I didn't stop there. I made a slightly smaller version for notecards. Stampin Up sells a set of notecards and envelopes so I just used those. If you saw my post on the Accordion file, then the concept is the same. I just adjusted the paper size and score lines to accommodate the smaller envelopes. You can read all about it and get the full directions here. To make the folder, you will need 4 Stampin Up notecards and envelopes, DSP & 1 piece of paper that measures 5 1/2"x9 1/2". On the 9 1/2" side, score at 2", 2 1/4", 6", 6 1/4" & 9" Fold and burnish all score lines. Take the 9" score line and fold it opposite and glue it down. You will need DSP in the following sizes: 1-5 1/4"x1 3/4" outside flap 1-5 1/4"x2 1/2" inside flap 1-5 1/4"x3 3/8" back I find it easier to add the dsp before I assemble the folder. From this point on, you can follow the directions from the Accordion Folder here. Just use 4 envelopes instead of 8 I decorated the notecards using the Lots of Love Stamp set and used scraps of paper from the Whole Lot of Lovely DSP 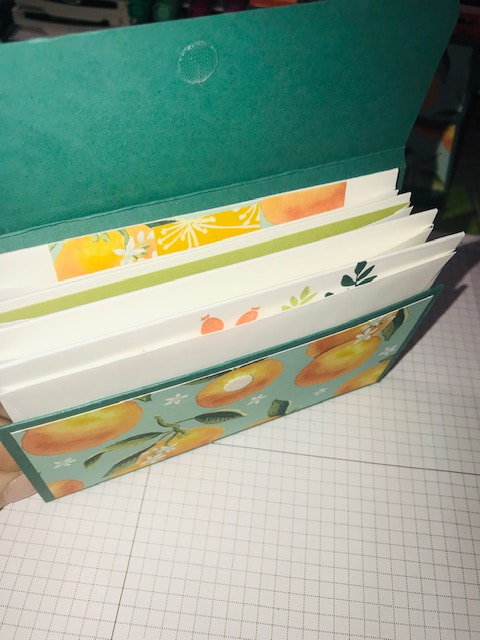 And each card has a little pocket of it's own. After the cards are gone, you can use this for receipts, coupons, embellishments etc whatever you wish
I hope you enjoyed this project. Thanks for checking it out Happy Stampin Steph 
Oh My Goodness! Wasn't Barbara Welch's projects amazing! Barbara is so talented! It's very exciting to follow after her in our Blog Hop!
This month, I am sharing a really fun, and super easy, gift giving project! For this month's hop, we have a Thanksgiving Theme. My project is more of a Fall/Winter Survival kit. As we head into the colder months, it's fun to give a little pick-me-up or someone who might be feeling a little down or under the weather. And well, there is just so many items you could add to this kit. So before I get started, we have 13 crafters this month (including myself) so be sure to check out everyone's blog. Leave a comment about what you LOVED about my projects and include #SFbloghop2017 on your comment! And we will choose 1 lucky winner at the end!! Scroll down to see the blog hop prize!!! Sue Lovejoy was the the winner of last months hop! Congratulations! If you get lost along the way or not sure whose blogs you may have missed, a full list of participants are at the end of my post. 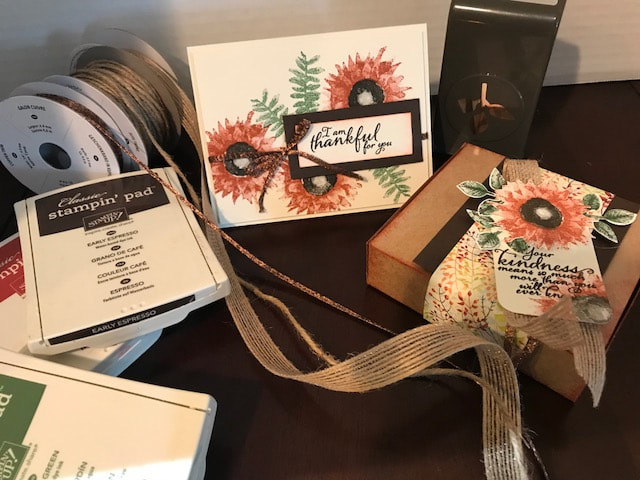
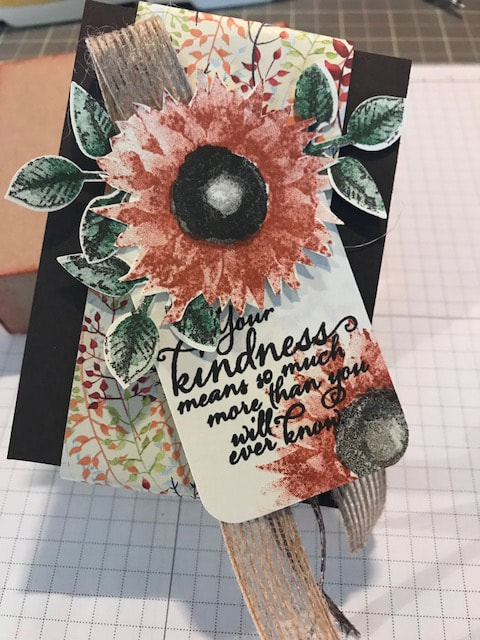
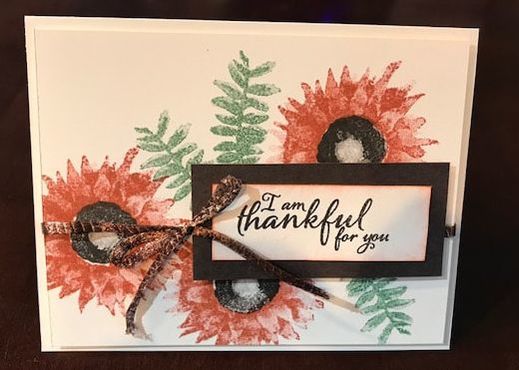
Stampin' Up's Painted Harvest Suite has been one of my favorite line of products in the Holiday Catalog!!! The images on the Painted Autumn DSP is just amazing! The designs just pop off the paper! My projects feature products from this suite! I used Very Vanilla and Early Espresso cardstock along with Early Espresso, Cajun Craze and Garden Green Ink pads. I knew I wanted to put together a little pick me up kit. I included a hand sanitizer, a couple packs of herbal tea, candy and a lip balm. I thought great I will use the new pizza boxes only to realize it was too small!! So I made my own box. 
I will admit, I typically can not come up with the measurements to make a box to save my life! But this time I was focused and figured it out! I am sure there are many boxes like mine...but I designed this size specifically for my contents.
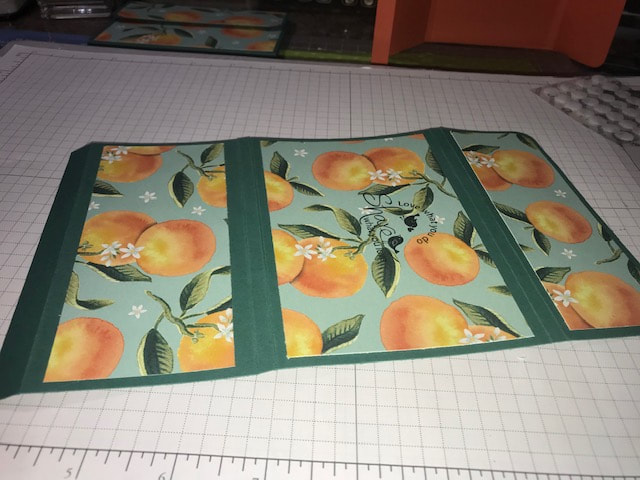
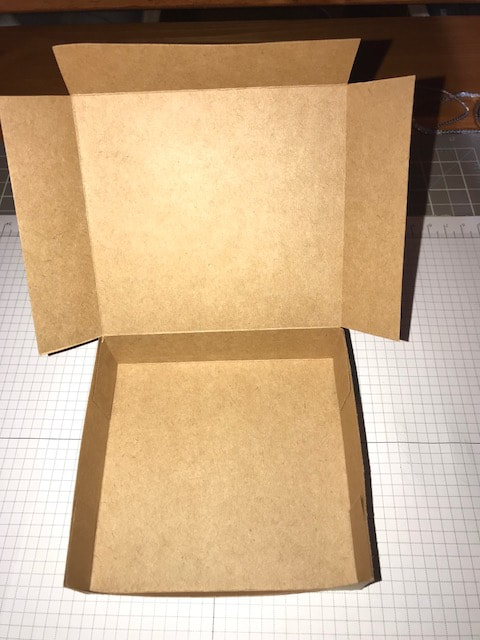
So, what do you need? A piece of cardstock that measures 7x12. I used kraft paper because of the color and weight! With the 12" side horizontal, score at 1 1/4, 5 1/2, 6 3/4 and 11. Turn the paper so the 7" side is on top and score at 1 1/4 & 5 3/4. As you can see on the picture to the left, you will need to fold and burnish your score lines. You will notice there is one end that is a 1" fold and the other end isa 1 1/4". The 1" end will be your lid.
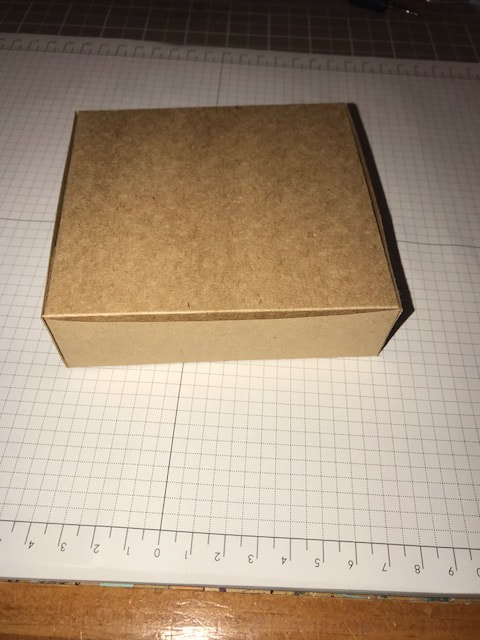
It will tuck in when the box is closed so it won't matter that it is 1/4 shorter. Remove the 2 outer edges from the 1" edge. Cut up on your score lines and add adhesive to the outside of your flaps. And assemble the bottom of your box. Tuck the lid closed. See pictures below.
I sponged the edges of the box in Cajun Craze just to add color. To keep the box closed, although it will stay closed without it, I made a simple belly band to go around.
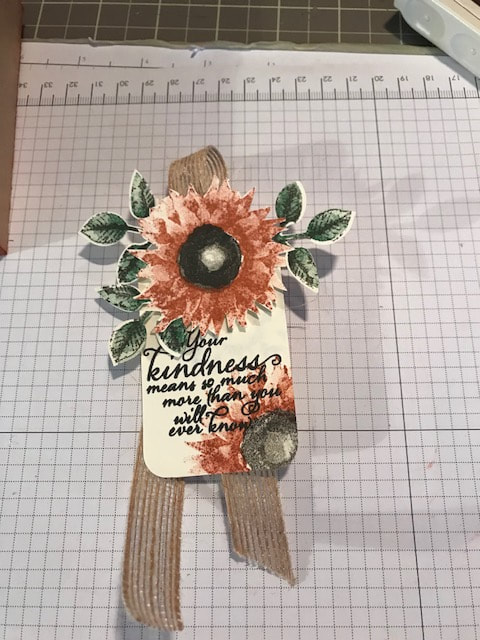
I cut a piece of DSP 2x12 and added a piece of cardstock that was 3x4 under it. I stamped the flower in Cajun Craze, I stamped of before stampin each layer of the image. I fussy-cut the flower out. Then I stamped 3 leaves in Garden Green and added the veins in Early Espresso, punched them out with the Leaf Punch. Cut a 2" strip of Very Vanilla for the tag. Trim it to the length you want. I repeated the flower at the end of the tag and rounded the corners. I used a piece of 5/8 Burlap Ribbon and Copper Trim to sit behind the tag before adhering to the belly band.
The thankful sentiment is stamped on a piece of Very Vanilla that measure 1x2 1/2, layered on a piece of Early Espresso that measures 1 1/2x3. Adhere to the card with dimensionals.
And there you have it. My projects for the Thanksgiving Blog Hop by Stampin Friends. I hope you Loved it. 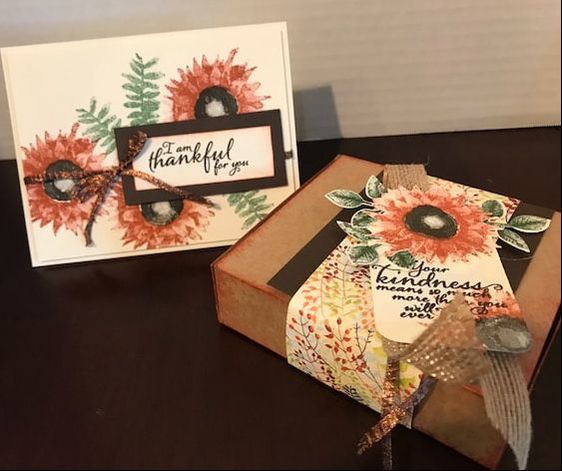
Be sure to leave a comment telling me what you LOVED about my projects and include #SFbloghop2017 and you will be entered for your chance to winner the Many Merry Star Simply Created Kit. WOW how amazing is that??
Thanks so much for joining us! I hope you had a great time! Happy Stampin Steph 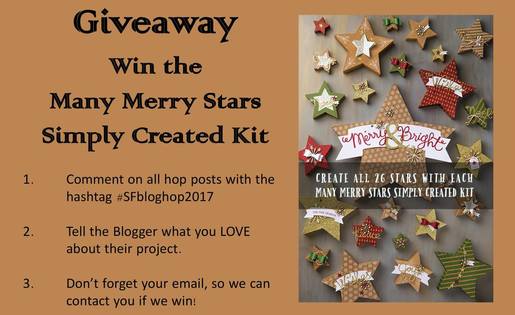
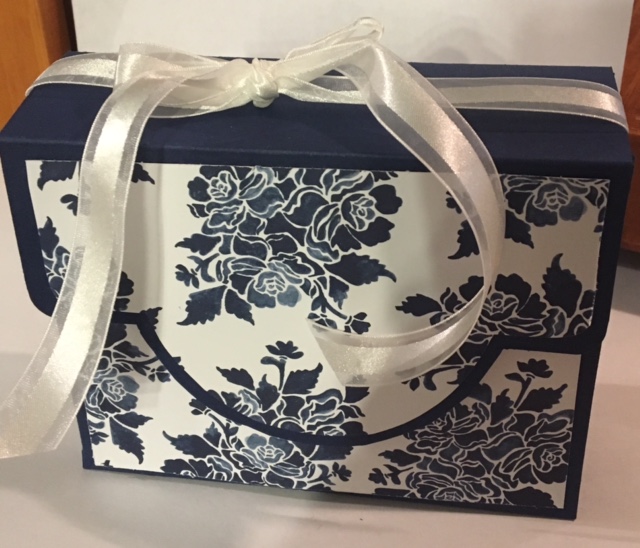
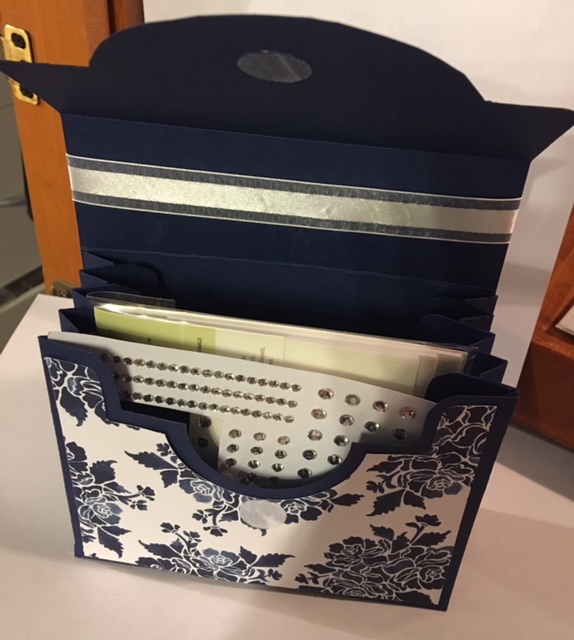
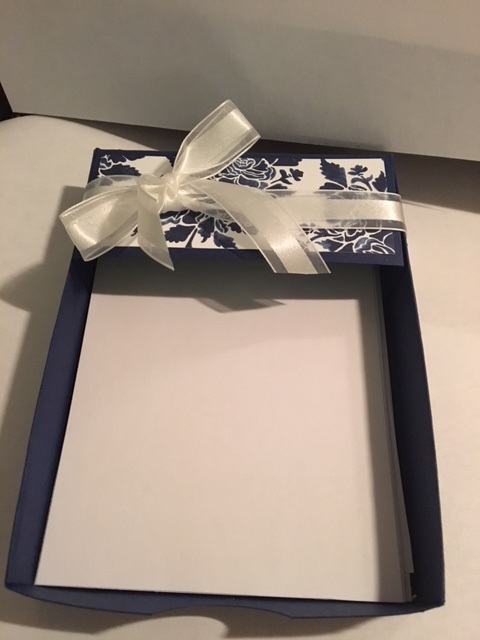
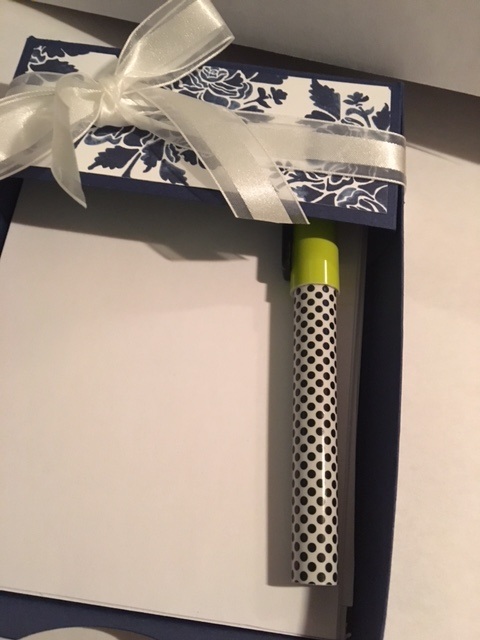
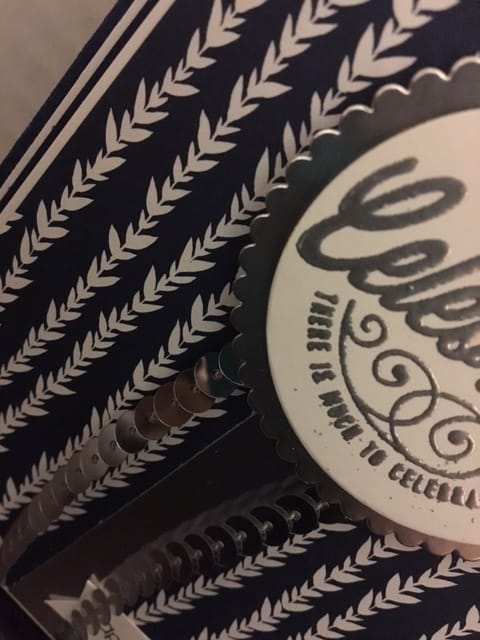
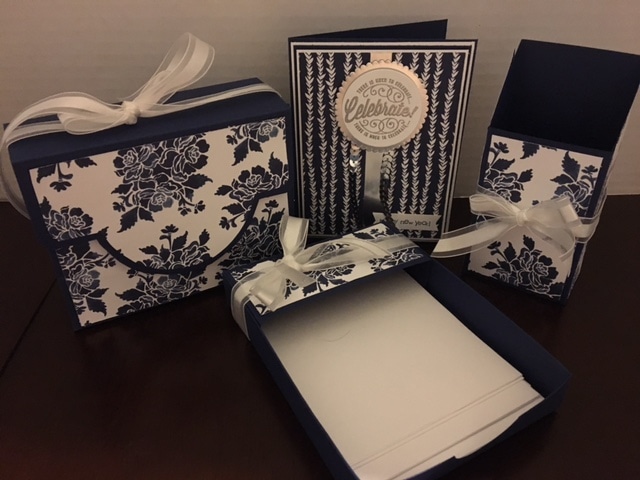  Welcome to our Stampin Friends December New Year Celebrations! I'm so excited that you have decided to stop by. You are really going to love the projects shared this month! We have 10 amazingly talented crafters participating in this month's hop, so be sure to follow along and check out everyone's blogs and fabulous projects. What's a Blog Hop without some Blog Candy?? Make sure to leave a comment to be entered in the Blog Hop raffle. Read each blog, scroll to the end, and leave a comment with #SFDECHop!! Each member and guest blogger, will randomly select a winner from our blog comments. We will then pool those together and randomly select the overall hop winner. I would love to hear some feedback and you will earn a chance to win some Blog Candy! Thank you for visiting my blog from Twila Davis's site, and thank you for continuing with the Blog Hop. Take a minute or two to enjoy my project and at the end click the NEXT button to continue to Lynn Streifert's Blog! Didn't come from Twila's blog?? That's ok, just click the PREVIOUS button or scroll to the end and click on Twila's name to visit her blog.  When I think of New Years, a few things come to mine; RESOLUTIONS, LOSING WEIGHT, and GETTING ORGANIZED. Sadly sometimes, I feel like this just has become a vicious cycle every year!!! So I picked the lesser of the two evils to deal with first! Getting organized. For the most part, at my home, everything has it's place. But my crafting desk takes a beating from time to time so I wanted to have a few items I can use year round that will not only serve a purpose but look nice enough to be on display. And well, since we are still dealing with the holidays, I decided to make my first set as a New Year's gift for my mom's office. Normally I try to give a little tutorial of what I am making but I can not take credit for the design of these projects! The first 2 parts of my desk set comes from Papertrey Ink. There is alot of different templates that can purchased for about $5. I happened to buy these several years and I honestly, I do not remember if I every made them. The first one I made was called Card Couture. I decided to use Night of Navy as my base and the Floral Boutique DSP from the Stampin Up Annual Catalog. I must admit I buy DSP and never use it. Like I am afraid to not have it on hand!!! What if I need it...meanwhile catalogs change things retire I buy new DSP and whala another viscous cycle. So one of my resolutions is to use up product. So finally I broke open the DSP pack and it's sooo pretty. I personaly am not someone that navigates towards blue or flowers, but it's a pretty pack and not overpowering. I followed the directions and printed the templates directly onto the Cardstock. This makes cutting out the pieces so much EASIER. Assembled as instructed. My thought for use at my desk is for Dimensionals, Rhinestones, Pearls those sort of thing that do not have packaging to them once they are opened. And since these are items I frequently use. They will be neatly close at hand. The next item in the desk set is called the Desktop Organizer, as I mentioned before, it's also a download from Papertrey Ink. This was super easy to make. I will use it for paper. I am always searching for a quick piece of scrap paper to write down notes or measurements. The finished project is 4 1/2 x 6 x 1. It's a great size. You could fit a few greeting cards and envelopes in this. And give it as a cardset gift!! It's also a great item to have at a vendor fair!!! And the last, but not least item included in my desk set is this super easy Pen/Pencil holder. And I will be using it to hold my scissors. The scissors seem tall in this and honestly I think it's just the angle the picture is taken. This project was actually designed by Sam Donaldson at PootlesPapercraft, she has a huge amount of videos on YouTube! Amazing!! I have said it before and I'll say it again!!! Why recreated the wheel? When there are so many wonderful projects out there!!!! 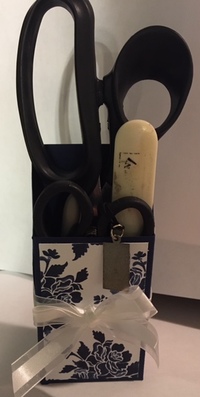 And what's a gift set without a card??? Incomplete!! So I kept the card as a matching item! The cardbase is in Night of Navy with a layer of Whisper White, then Night of Navy, all 1/8" smaller than the previous, attached with Snail. The next set of mats are also 1/8" smaller, Whisper White then DSP, attached to the card with Dimensionals. I cut a 1/2" strip of SIlver foil and stuck in onto the DSP with Snail. I used The Stampin Up stamp set called Here's to Cheers. Embossed it Silver. I used the Layering Circles Framelits to cut out the greeting and the Silver Foil paper. A long strand of Silver sequins, folded I half then stapled to the scalloped circle. I attached the greeting on the scallop circle with Dimensionals, and then onto the card with Dimensionals. I use the Teeny Tiny Wishes stamp set and stampled the Happy New Year greeting in Night of Navy. Cut then ends out using the Triple Banner Punch. A super easy card with lots of Style!!! 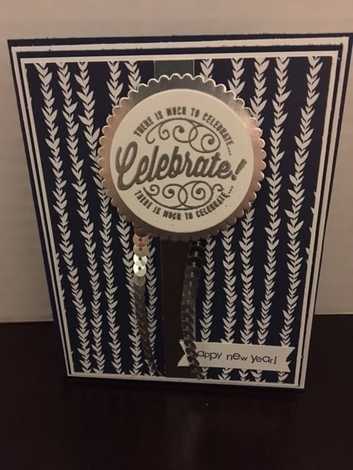 Thanks so much for joining me in the hop! I hope you like what you see! Feel free to contact me with any questions or if you have interested in any of the products used!! Please remember to leave a comment with #SFDecHop and click on the NEXT button to visit Lynn's Blog!! Happy Stampin Happy Holidays & Happy New Year Steph   Here's as list of all the crafters who were part of this month's hop incase you get lost along the way or have just started. Copy and paste the link! 1. Kirsteen Gill - http://www.creatinwithkirsteen.com/home/stampin-friends-december-hop
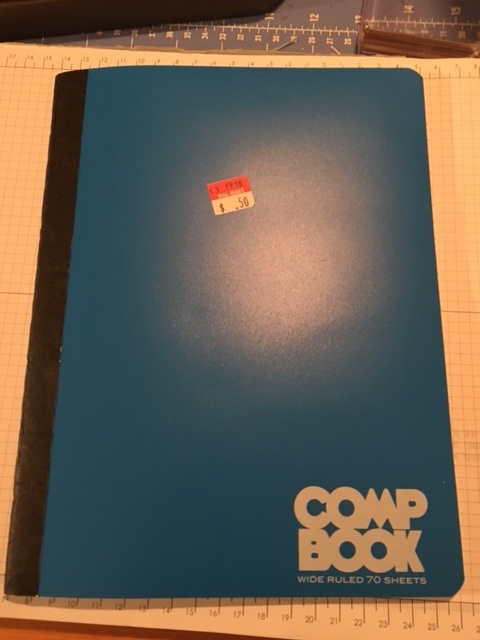
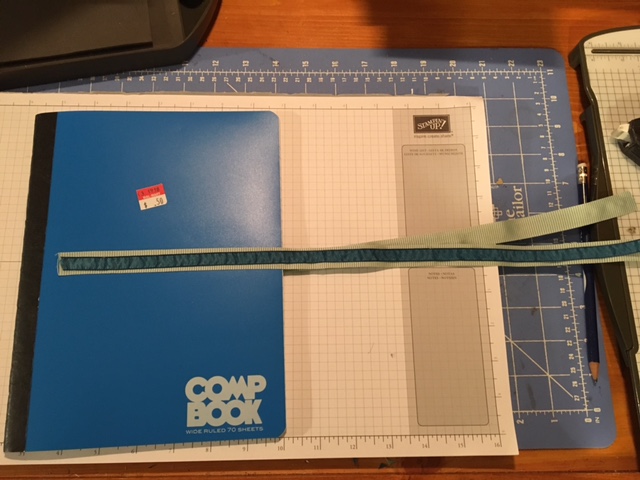
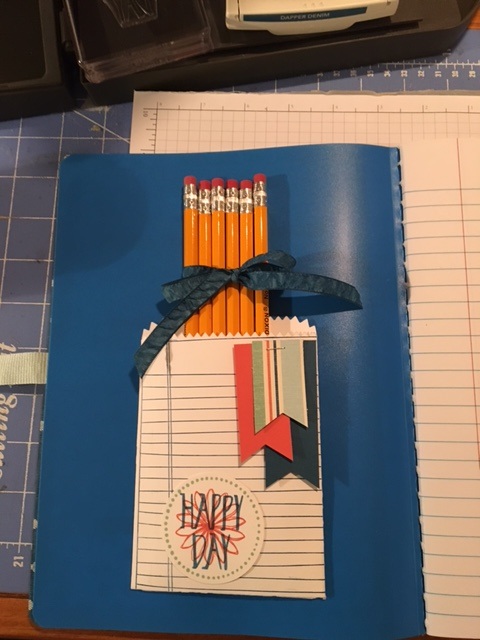
2. Carolina Evans - http://studioevans.blogspot.com/2016/12/stampin-friends-december-blog-hop-new.html 3. Twila Davis - http://stampalittlelonger.blogspot.com/2016/12/stampin-friends-december-blog-hop-new.html 4. Steph Jandrow - http://stampinandscrappinwithsteph.weebly.com/home/stampin-friends-new-year-celebrations-blog-hop 5. Lynn Streifert- https://lynnzcrafters.com/2016/12/15/stampin-friends-new-year-celebrations/ 6. Maureen Rauchfuss - http://crazystampinglady.blogspot.com/2016/12/stampin-friends-december-hop-new-year.html 7. Cindy Slack Waldroff- http://stampingindixie.blogspot.com/2016/12/two-thousand-what-Stamping-friends-bloghop.html 8. Kim Lamos- http://pinkzebrapapercreations.blogspot.com/2016/12/stampin-friends-blog-hop-december.html 9. Barbara Welch - http://creativestampinspot.blogspot.com/2016/12/stampin-friends-new-year-celebrations.html 10. Melissa Thomas- http://seatoseastampin.weebly.com/blog/stampin-friends-new-year-celebrations   Welcome to our Stampin Friends September Back to School Blog Hop! I'm so excited that you have decided to stop by. We have 15 amazingly talented crafters this month. You are really going to love the projects shared this month! Be sure to follow along and check out everyone's blogs and fabulous projects. Make sure to leave a comment to be entered in the Blog Hop raffle. Read each blog, scroll to the end, and leave a comment with #SFSeptHop!! Each member and guest blogger, will randomly select a winner from our blog comments. We will then pool those together and randomly select the overall hop winner. I would love to hear some feedback and you will earn a chance to win some Blog Candy! Thank you for visiting my blog from Barbara Welch's site, and thank you for continuing with the Blog Hop. Enjoy my project and at the end click the NEXT button to continue to Kristen Bell's Blog. Didn't come from Barbara's blog?? That's ok, just click the PREVIOUS button or scroll to the end and click on Barbara's name to visit her blog.  Our guest hoppers this month are: Yolanda Dixon Barbara Welch Mandy Reedyk This month's projects were inspired by my oldest daughter, who is 12 1/2. She knows I always make a quick back to school treat and she asked me to make her something that wasn't so "kiddish"! OH BOY!!! Where did my baby go??? She told me she likes all my goodies, but wanted something she can bring to school and have her friends, really, really want it too!!! Well, I get it, she's a pre-teen, fitting in is so important! But hmmm a few more years of her enjoying the little things would be OK too!!!! 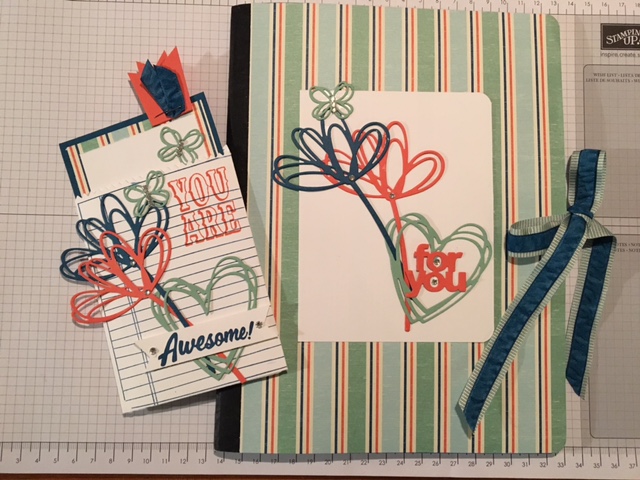
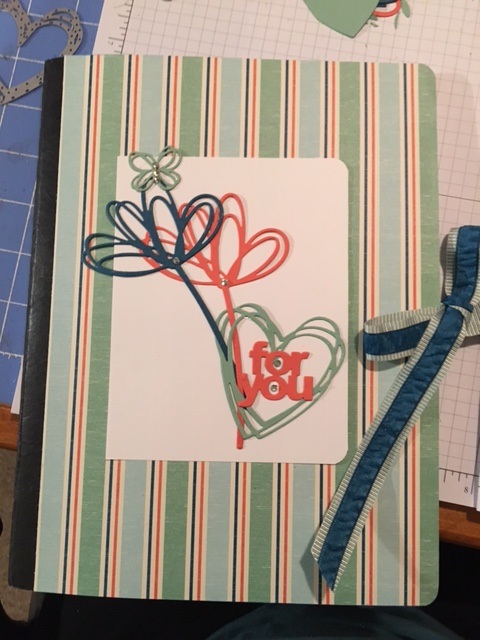
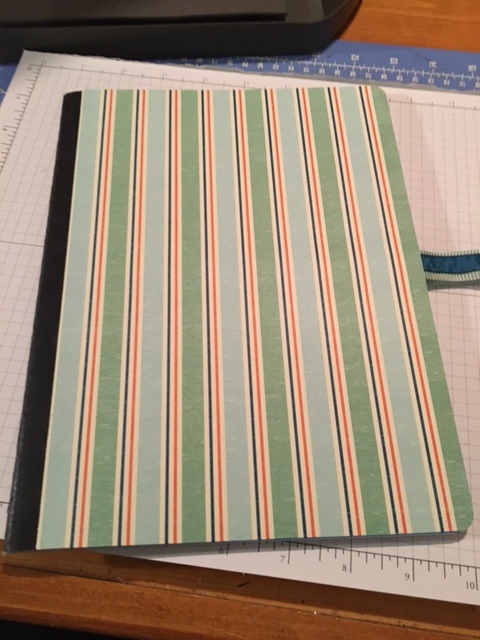
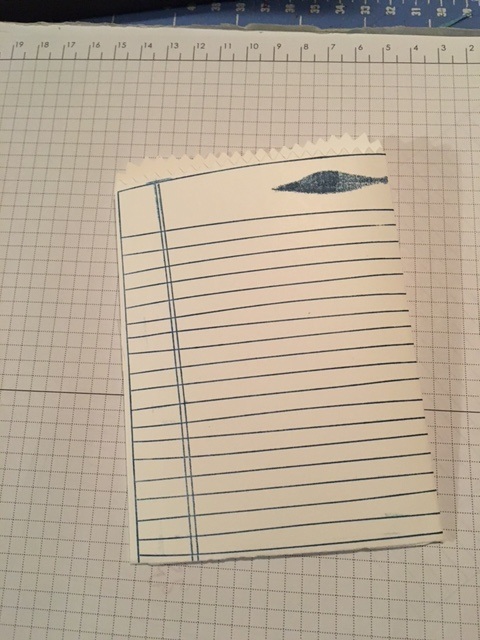
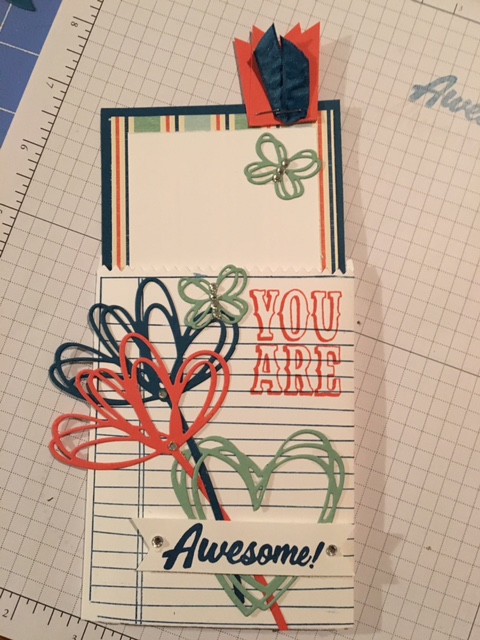
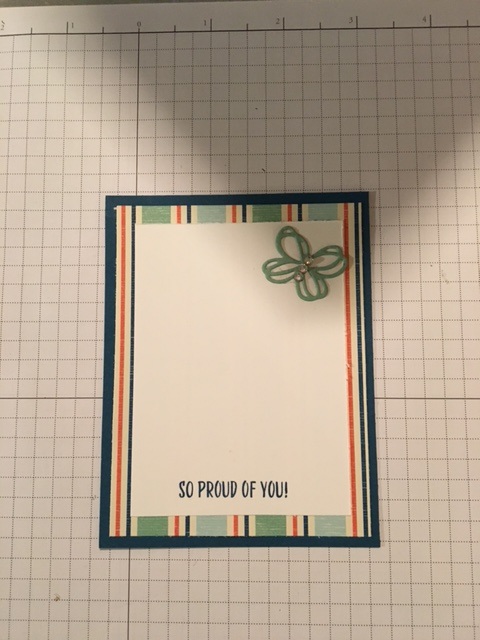
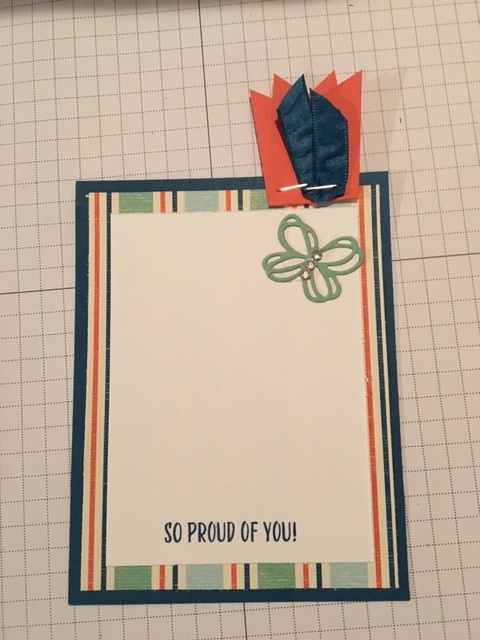
I decided to make a little pocket for the inside of the notebook to hold pens/pencils or notes. I just love the Mini Treat Bag Thinlits and Writing Notes stamp. Perfect! I cut 2 sets of the mini treat bags in Whisper White. I stamped the Writing Notes with Dapper Denim. I am making two treat bags, one that will be the pocket for the notebook and one that will be my daughter's card. Don't you just hate when you stamp and everything is perfect except for a smudge ahhh. Well I decided to cover the smudge rather than starting over! I used the colors in the DSP which were Dapper Denim, Calypso Coral and Mint Macaroon. I cut a few 1" strips and used the Triple Banner Punch to flag the ends. Stapled them to the treat bag. I grabbed a handful of pencils and tied them together with the Dapper Denim Ruched Ribbon. The pocket looked a little bare, so I used the Perfectly Wrapped stamp set. Stamped the circle, flower and sentiment and punched it out with the 2" circle punch! Now for the cover; I decided to use the Sunshine Wishes Thinlits, I cut out a few flowers, hearts and butterflies. The "for you" is from the Mini Treat Bag Thinlits. I also doubled each flower/heart and butterfly to use on her card, as well, so I wouldn't have to do it later. Finished off the front with some Basic Rhinestones. Love it!!!!
I really love how the projects came out! Best of all I had a very happy 12 1/2 year old! I hope you enjoyed them too. Thanks for joining me in the Blog Hop Happy Stampin Steph  Make sure to leave a comment to be entered in the Blog Hop raffle. Read each blog, scroll to the end, and leave a comment with #SFSeptHop!! Each member and guest blogger, will randomly select a winner from our blog comments. We will then pool those together and randomly select the overall hop winner. I would love to hear some feedback and you will earn a chance to win some Blog Candy! Click on the NEXT button to visit Kristen Bell's blog and continue in the Hop!  Below is a list of everyone who participated in the hop this month:
|

New 2023-2024 Stampin Up Annual Catalog


Kits Collection


Join today

Categories
All
Archives
January 2024
|


 RSS Feed