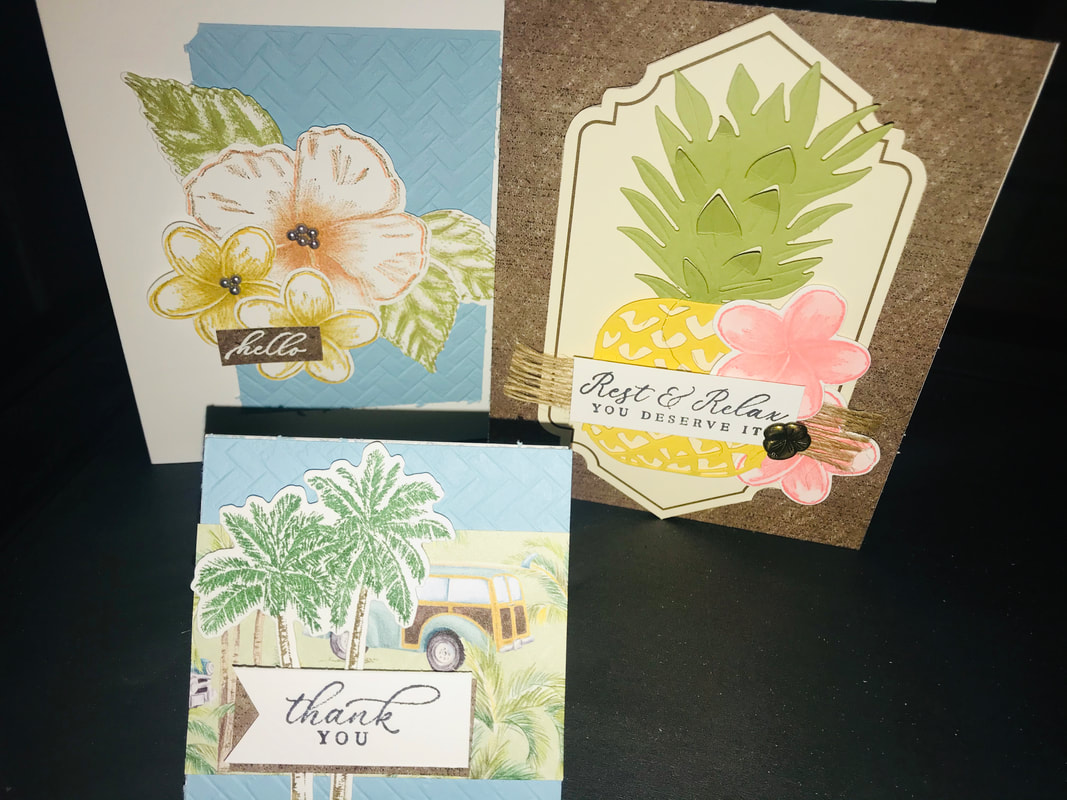
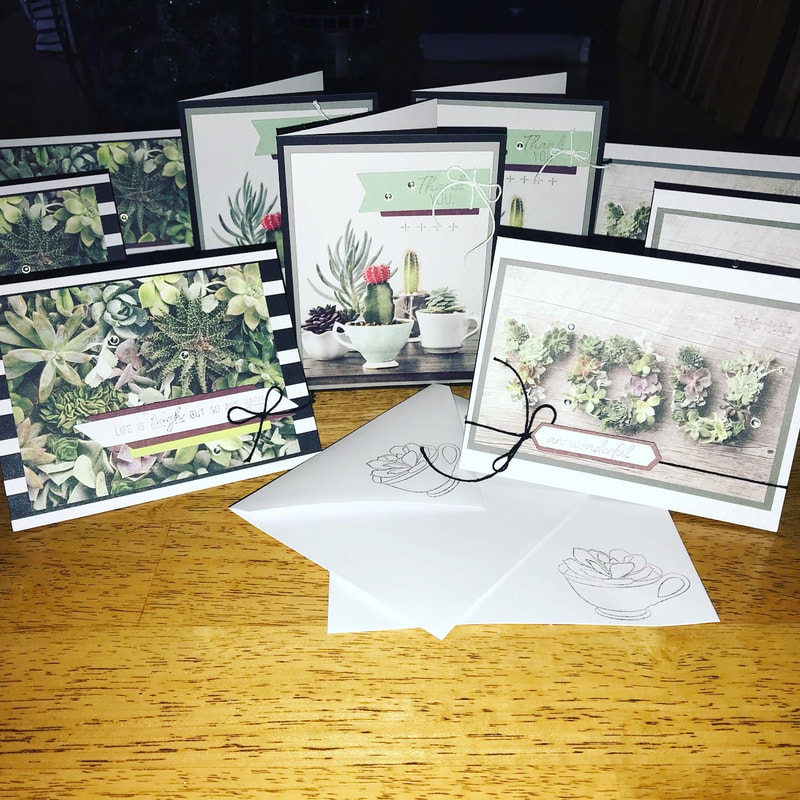
 Today's cards feature the beautiful tropical images from the Tropical Oasis Suite. This suite is available in the Stampin Up Seasonal Catalog on pages 38-40. The Timeless Tropical Products can be purchased together as one big suite, as a bundle or individually!
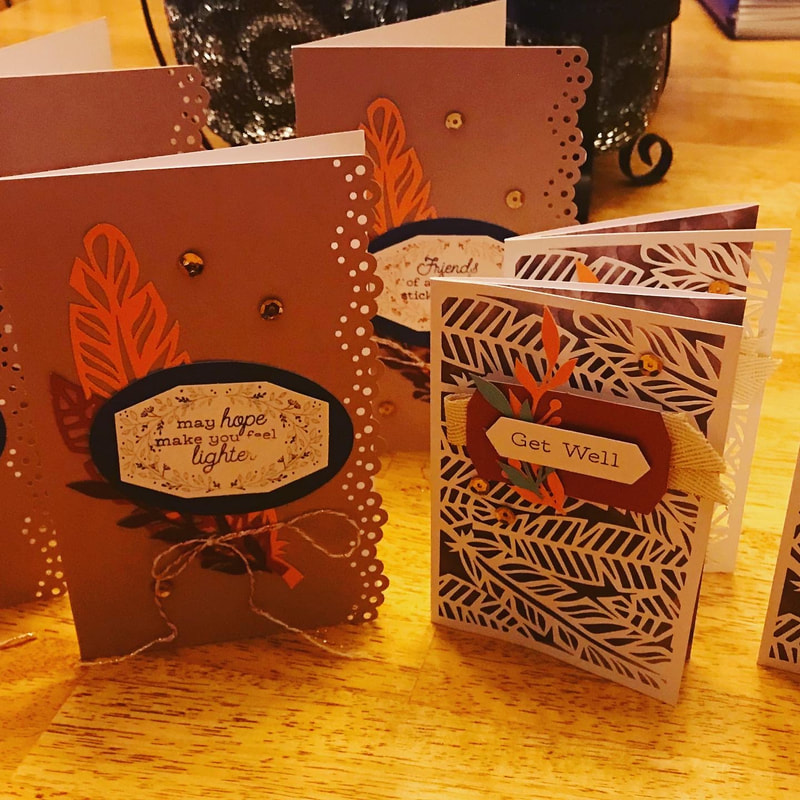
As you've heard me say multiple times in my posts, my goal has been to stay busy during the day when the kids are doing school work and to do that I plan to stay crafting. Catching up with old projects and creating new. Today was a bit of a challenge, kids weren't feeling the homework and well, I wasn't feeling the kids complaints haha, so as I set out to work on this set, I had a hard time. The thoughts weren't coming together..... I flipped through the catalog and came across the cards on page 40. Loved them and I needed to make them and so I did. So here are the cards, pretty close to the images but slightly different. The big cards are both our standard size 4 1/4"x5 1/2" and the small card is 3x3. All cards have Whisper White Base. On the hello card, I embossed Balmy Blue with the Coastal Weave 3D folder. The flowers and leaves in the top left, were all stamped in Soft Suede and then I stamped over with Grapefruit Grove (large flower) Daffodil Delight (2 small flowers) and Pear Pizzazz on the leaves. Cut them out with the dies. For the Pineapple card, the label shape is actually a predesigned image from the Tropical Oasis Memories & More pack and I cut the label out. I stamped the flowers in Flirty Flamingo, then colored first with the Dark Flirty Flamingo Blends and then the Light Flirty Flamingo Blends. And finally the Thank You card, is like I mentioned, 3x3, I embossed a 3x3 of Balmy Blue, cut a strip of DSP that showed the card, I used my marker, Pear Pizzazz and Soft Suede for the palm trees and added the flagged paper for the greeting, super easy to do. To find all the products in this suite, click here. What do you think? Share what your making, I'd love to see, and take a look at my previous post for a weekly card challenge. Thanks for stopping by Happy Stampin Steph
0 Comments
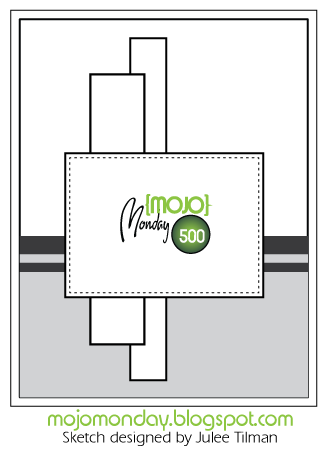 If you have been following, me, you know I've been trying to keep busy at home while helping my kiddos with their school work. Some days have been much more challenging than others and I'm sure my battles with working though a home school routine etc. is minimal to what others may be facing! But nonetheless...like I said just trying to keep busy...so last week I posted that I worked on past Paper Pumpkin kits and today, I've tried to be a little more creative. With that said, I posted a challenge to all my peers in my up-lines' group to stay crafting. I am extending this challenge to you! I will post a card sketch to follow on Mondays and then by Friday we can share what we made?? My only request is that you use all Stampin Up, but it can be whatever you have on hand!! On Friday you can post your card on this blog post or my facebook page. Please post on your, your personal page or blogs and mine if you’d like! My facebook page is: https://www.facebook.com/stephjandrowstamps/ Please use the following hashtag when and wherever you share your card so that it will be easily identified as part of this challenge. #msscardchallenge1 And, mail the card to someone...anyone...and spread the joy! I am not going to create a prize drawing, I want this to be fun and to keep us busy and our minds off of these crazy times...I know this doesn't change anything but it doesn't hurt. Use up what you have on hand, no need to shop. The first card challenge sketch is in the picture above!!! I can't wait to see what you make Stay healthy Stay safe Happy Stampin Steph 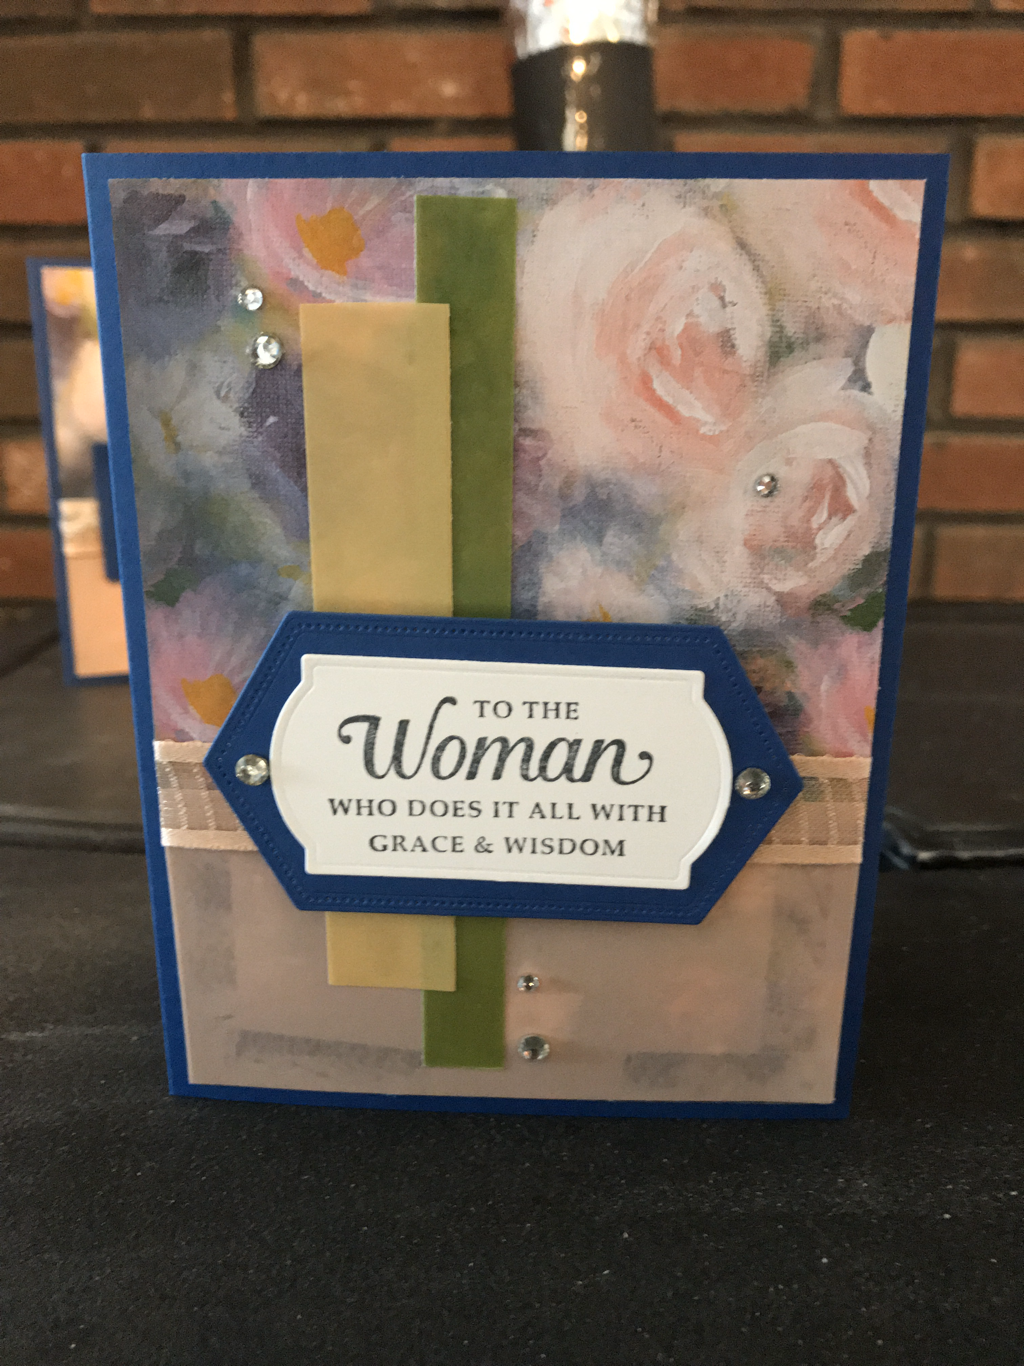 On Monday I had set a challenge to make a card from a template and post on Friday. Here is the card I made. I used the stamp set Strong & Beautiful, Perennial Essence DSP and Perennial Essence Vellum. Be on the lookout on Monday -April 6 for the next challenge
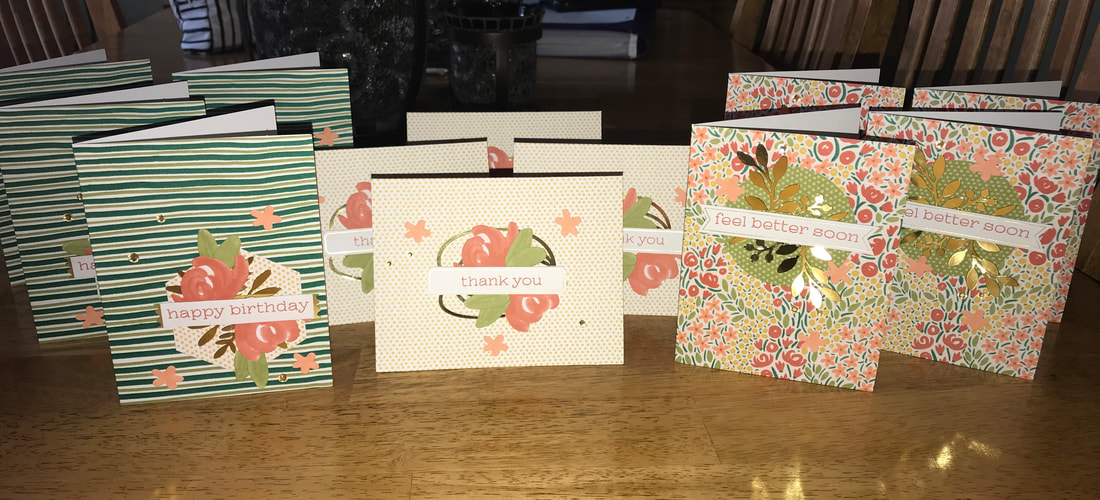
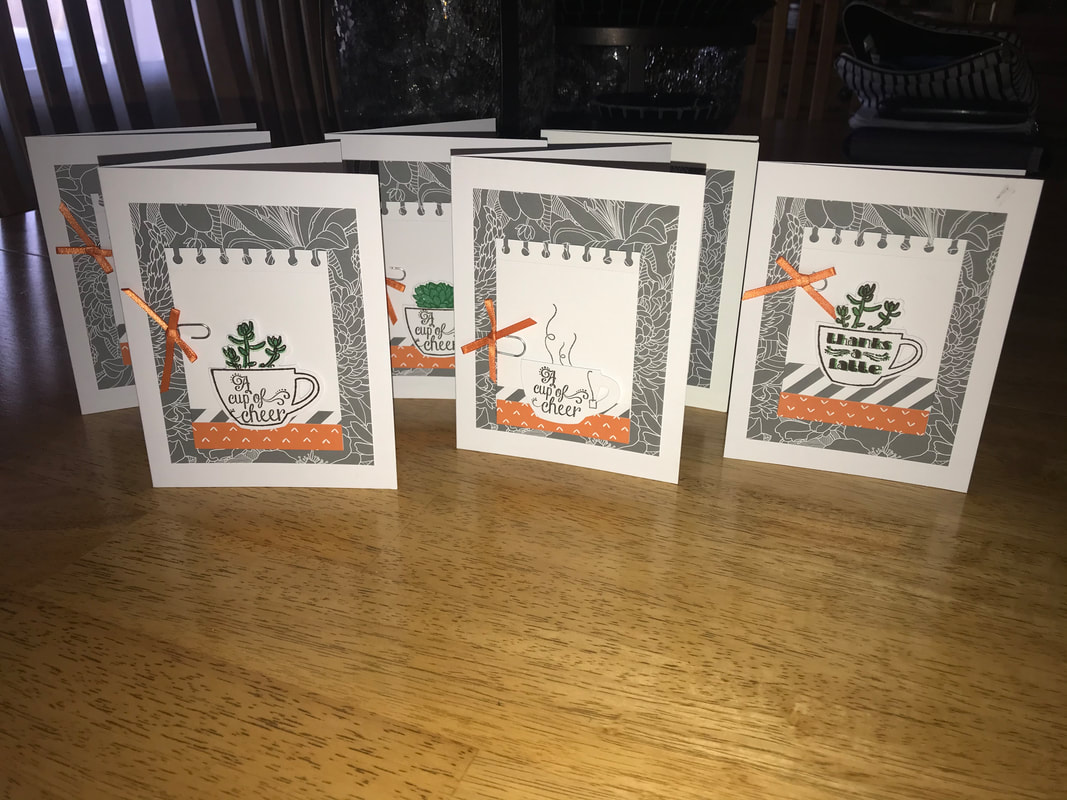
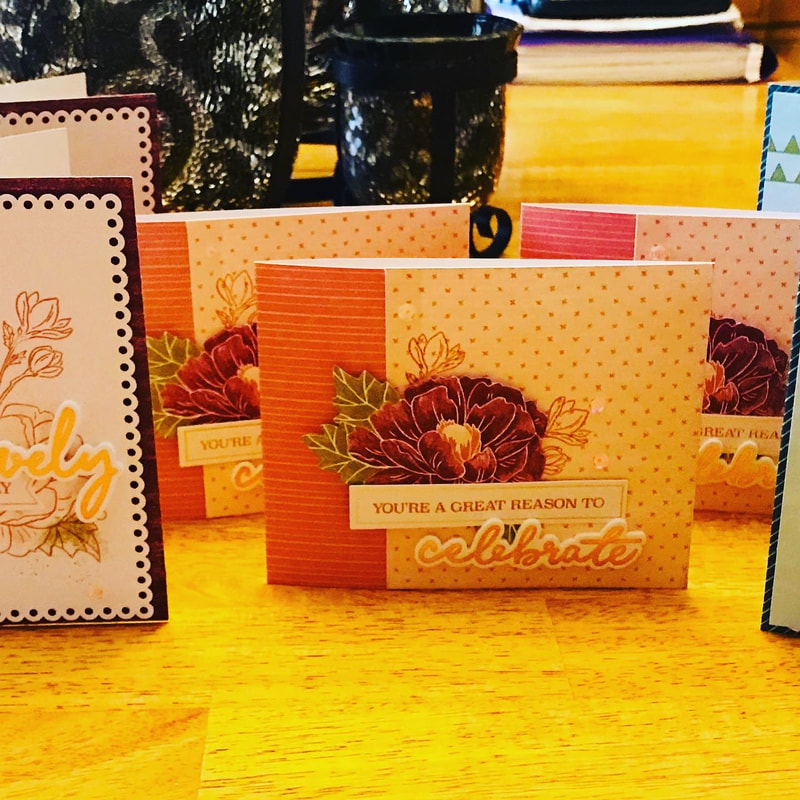
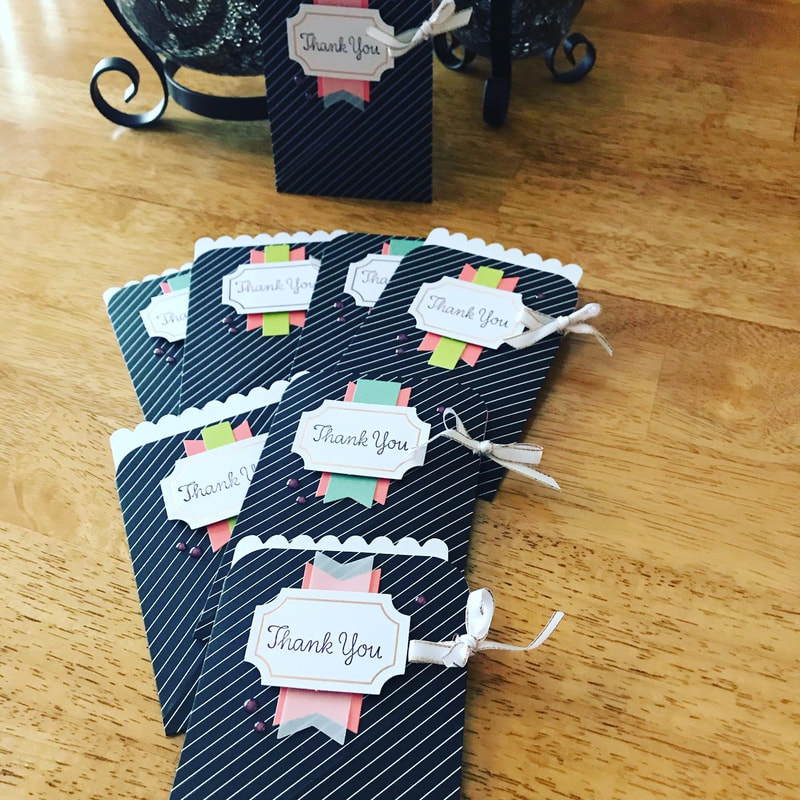
 We’re in the last stretch of our annual Sale-A-Bration promotion, and we’ve added even more fantastic products for you to earn! You can view the new items below or click here to visit the Sale-A-bration page on my website. But don't wait, we have just 5 more days before Sale-A-Bration ends Thanks for stopping by Happy Stampin Steph What projects have you been working on??? Me, I"ve been working on Paper Pumpkin and a few other projects. Many of you that follow me on Instagram or Facebook have already viewed my posts where I show my progress catching up with all the Paper Pumpkin kits I have on hand! A of this morning, I have caught up with all the card kits, what I have left are what I call the project kits, the kits that contain a holiday project or gift bag/box or another type of 3-d project to complete. I purposely left those for another time. Right now, I don't have the space to store anything complete or actually have a use for these types of projects. So basically here is what I started with......31 kits. I completed 12 card kits and gave 2 away. What remains is the 17 project kits...that I will definitely have to keep in my to use whether it be for a gift or part of another project when I hold classes etc. So I'd say being a subscriber since 2013, I really didn't have that many in retrospect! Ha, right??? Now, you may say to yourself, why are you subscribing and paying for something that just sits there... well for many reasons;
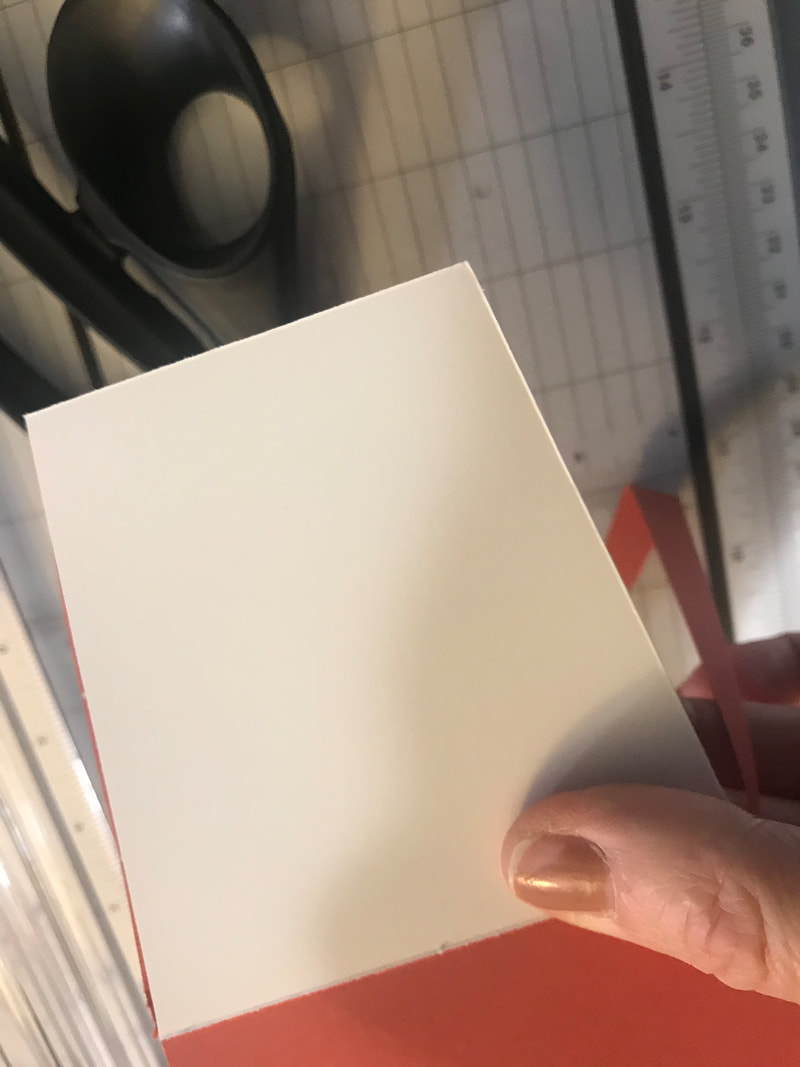
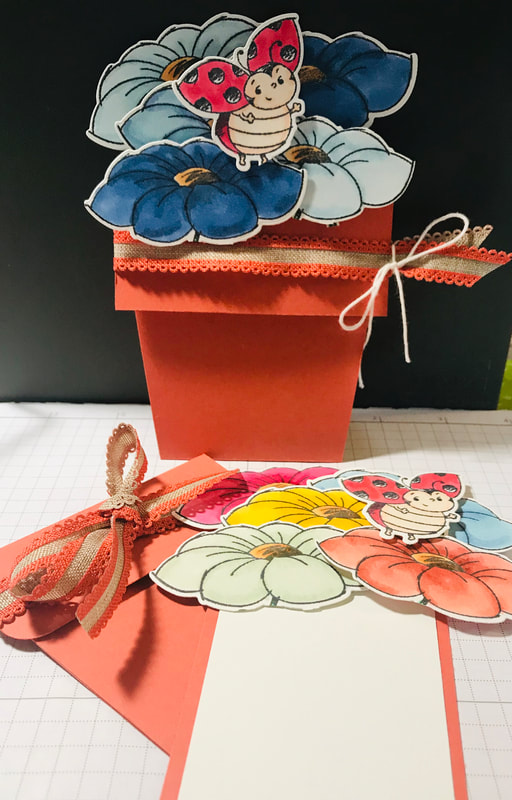
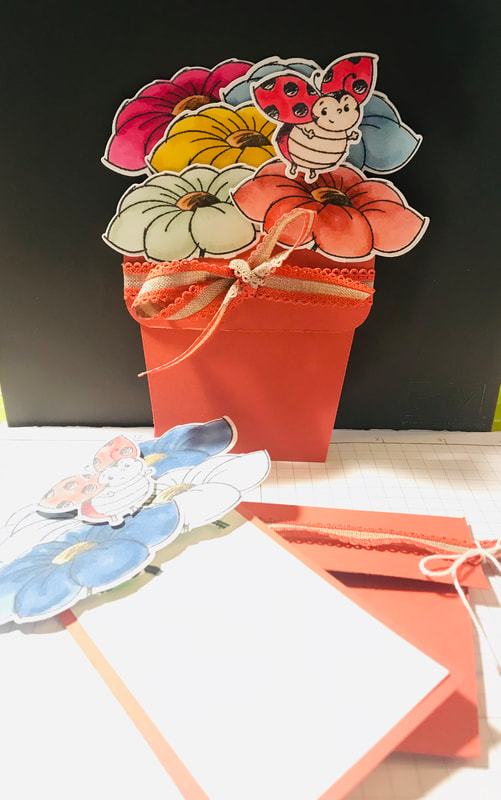
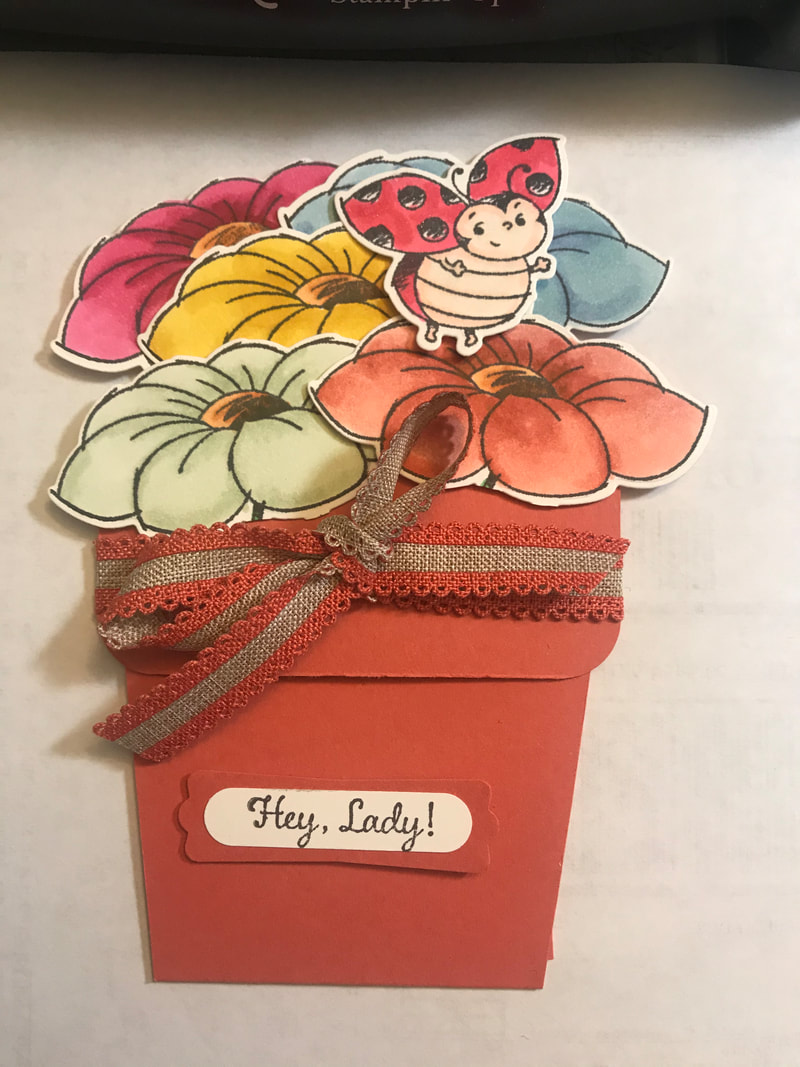
If you have ever wanted to craft etc and just don't know where to start, Paper Pumpkin may be just want you need! I can help you! Contact me or click here to view Paper Pumpkin. 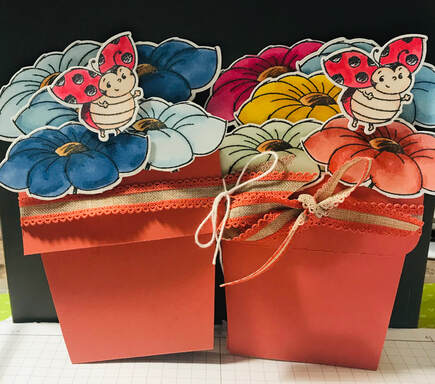 Hello everyone, and welcome! I have this adorable flowerpot pocket-card to share with you! I was so easy to make. This card features the Sale-A-Bration's Little Ladybug hostess stamp set from Stampin Up...Get the adorable Little Ladybug Host Stamp Set FREE when you host a qualifying party or place a personal order totaling $300 or more during our Sale-A-Bration promotion (January 3–March 31, 2020). Visit my website link here to see all the products I used to make this card, it makes shopping so easy! To make the card you need to pieces of cardstock one that measure 3 1/2"x9", UPDATE: after making the first card, I changed my cardbase measurements to 3 1/2"x8 1/2" and one that measures 2 1/2"x4 1/2". You will also need a piece of white that measures 2 1/4"x4 1/4" and more to stamp your images on. I used Terracotta Tile Cardstock...how perfect is this color for a flower pot??!! Score the card at 3 1/2' and 7". 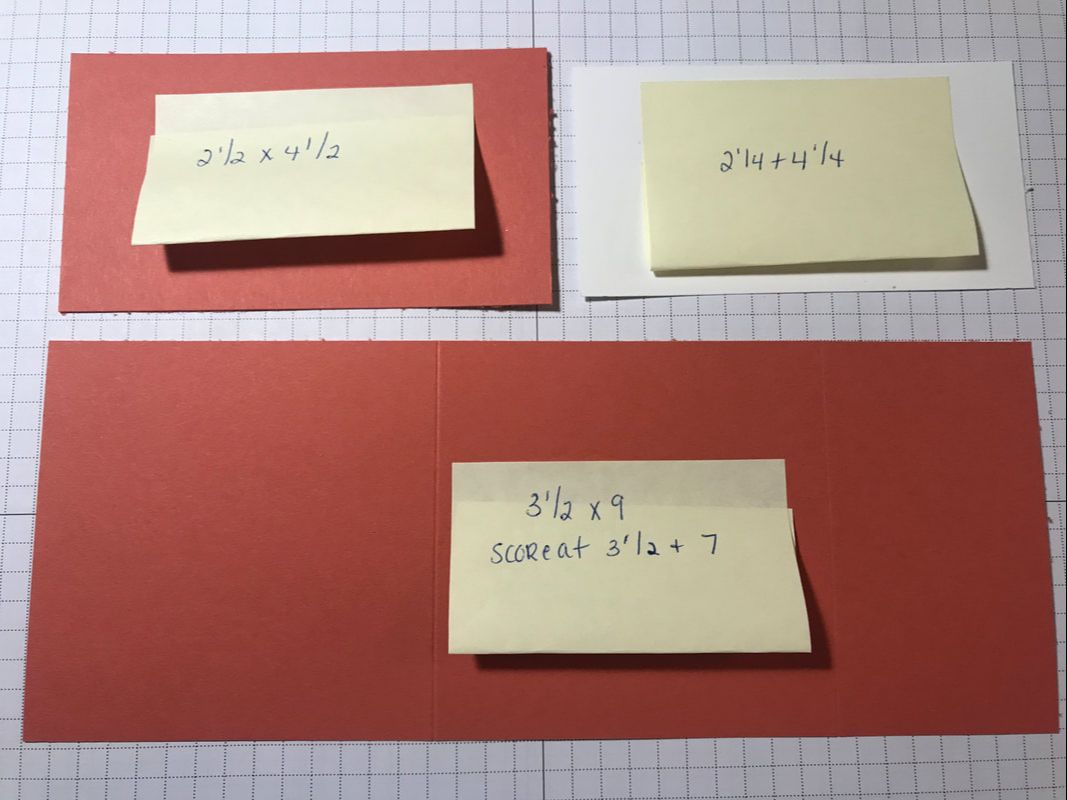 Fold the paper in an accordion fold. Fold the 3 1/2" score line in one direction and the 7" score line in the opposite direction. See picture below. By folding this way, it creates a pocket and a flap. The flap will be the rim of the flower pot. Now, when I took this picture with the old measurements, the flap to me was too wide, so what I ended up doing is trimming 1/2" off. You could choose to leave the original measurements and use a decorative border punch or edglit die. But I decided 1/2" off and I rounded the corners on the second card I made. 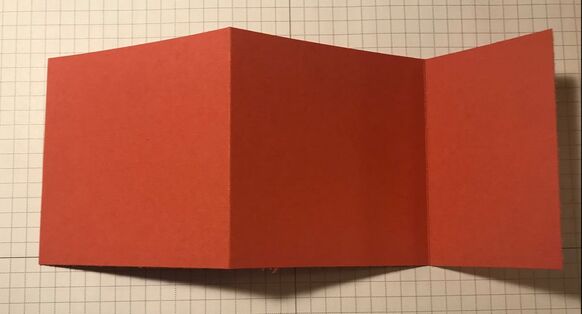 To cut the shape of the flowerpot, create a template, or if your comfortable enough just place on your trimmer and make the cuts. What I did was take a scrap of cardstock, you can use chipboard also, and cut to 3 1/2"x3 1/2", place it on the trimmer with the top edge in the cutting track and the bottom edge at 1/2". Cut. Turn over and do the same thing. The with the card folded and the flap up, lay the template ontop and cut through both pieces of cardstock at the same time. This will cut the cardbase into the shape of the flowerpot. Super easy. So now it's basically assembling the card, there is no adhesive, when the card is folding and the front flap is down, you can tie a ribbon or twine around, this will keep the card closed. Adhere the whisper white layer onto the Terracotta piece. This is your insert. I stamped 5 flowers and 1 ladybug. for my original card, I colored using the Stampin Blends in different blues, the hard part, is deciding how you wanted to arrange the flowers. Adhere them onto the insert. I made sure that a couple of flowers would hang over the edge. I had originally stamped the flowers and colored the stems, but once I started assembling, the stems were hidden and unnecessary in the front, so I ended up trimming them off. For the second card, I used different colors of Stampin Blends, and I rounded the corners of the flap and tied a forward facing bow. Either way I love the cards and so happy with how they came out. What do you think??
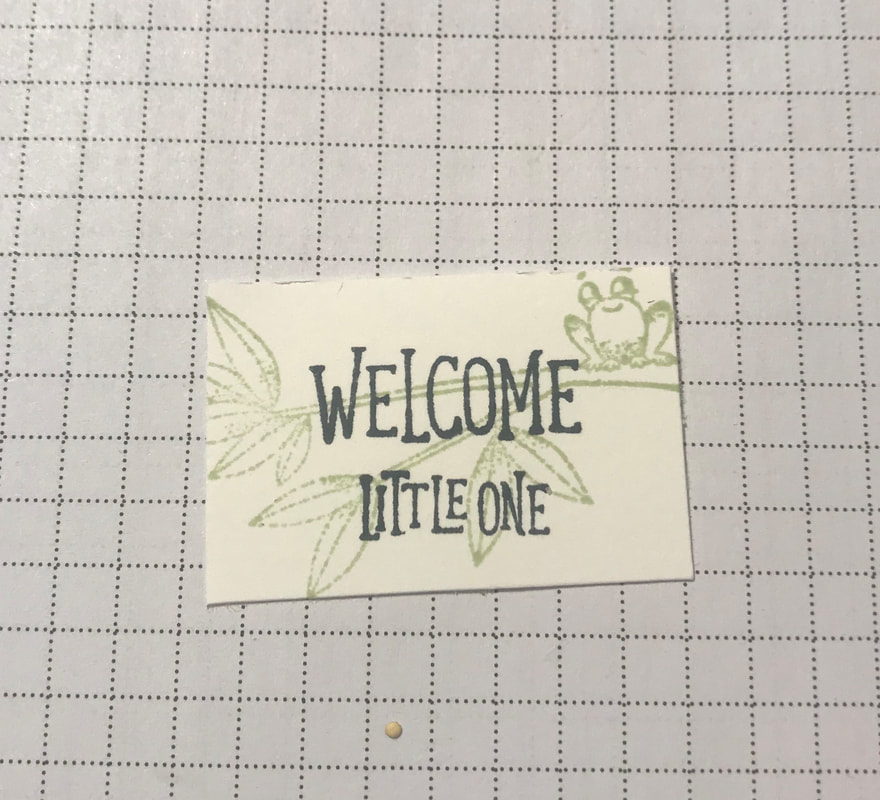
At lastly, I felt a greeting was needed, but I struggled with what I wanted to use, below is a few I tried. Thanks for much for stopping by and learning about this fun card. Remember you can check out my site and see all the products I used! And best part, it's all set to be added to your cart and you will be on your way to earn the Little Ladybug hostess set.
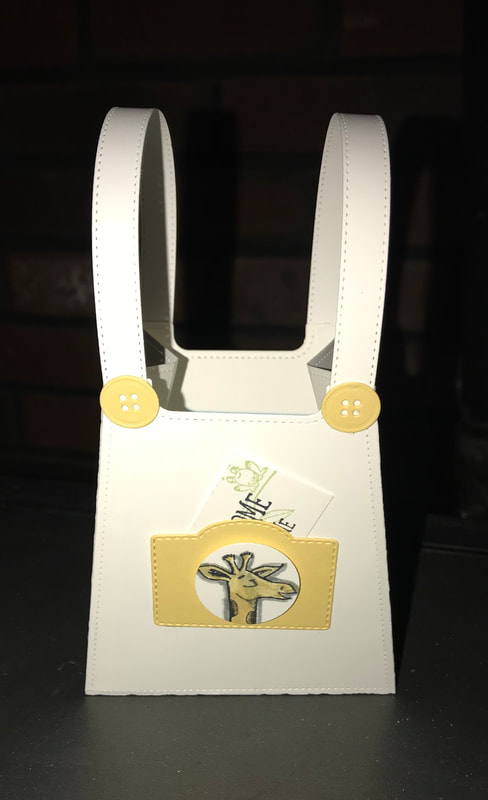
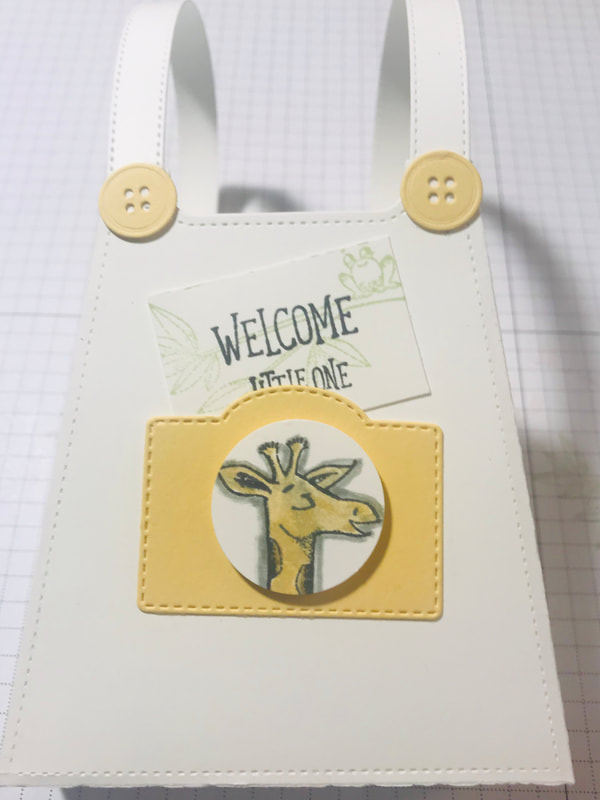
Enjoy and be sure to share all that you create too! Stay safe & healthy Happy Stampin Steph 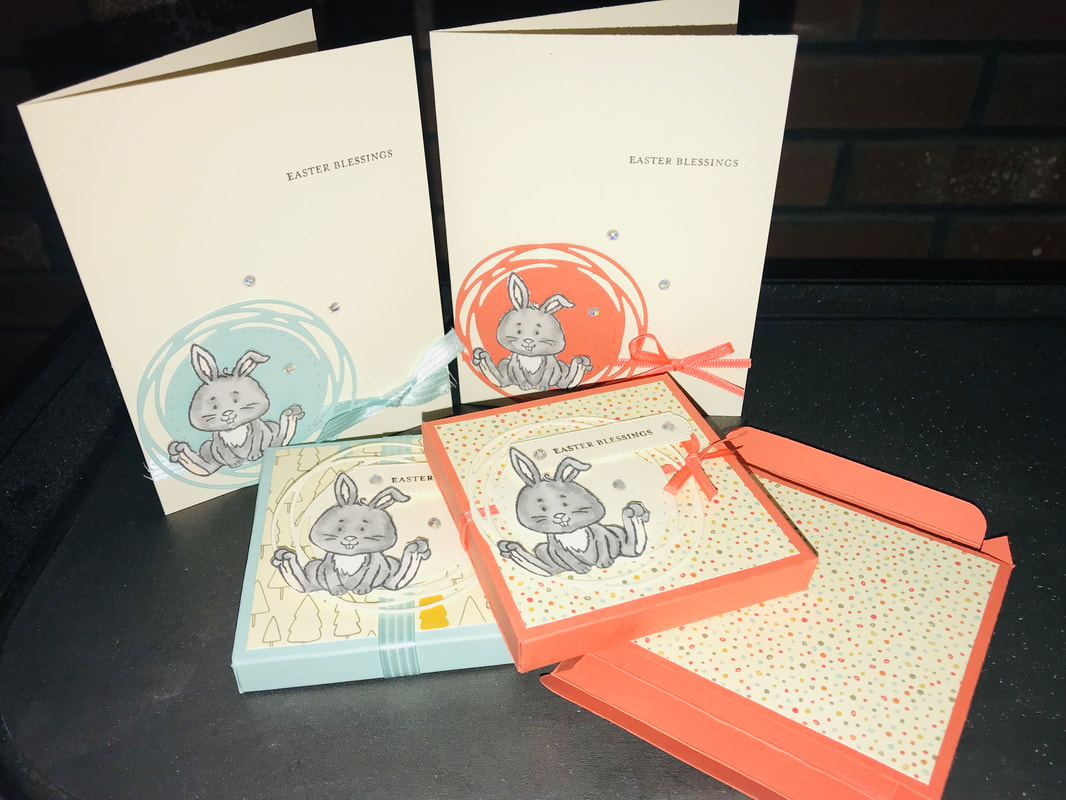 It's been a minute since I had a chance to use my computer. Since schools have shifted to home-school mode, my kiddos have had to share the computer to complete their work. I've been trying to complete some projects here and there and find ways to stay connected with all of you! Not sure how our upcoming holidays will be celebrate. Maybe via Face time to our families! Which could, be an interesting event!!! I made these super cute cards with a matching fold-flat box. Its a thin box, can hold little treats, money, gift cards or notecards! I used all Stampin Up products Pool Party and Calypso Coral, the Welcome Easter, Itty Bitty Greetings Stamp Sets, Painted Labels and All Dressed UP dies. The DSP and ribbons are retired. You can check out the following link and see all the supplies used for this project. Learn how to get our own kit and if you purchase any or all of the supplies, I will send you a set of directions to make the projects!!!
What are you working on??? Please share I'd love to see! Stay inspired and busy helps, don't you think??? Happy Stampin Steph  Welcome to the March Stampin Friends Blog Hop!! This month's hop is so much fun! We will be sharing projects that feature Congratulations, Graduations, Brides and Babies projects. Be sure to hop along and visit everyone's blogs, if you get lost, be sure to scroll down to the end of each blog to find a list of hoppers. I hope you came from Ann Marie Hile, didn't you just love her projects?? So great! After you view my blog, be sure to leave a comment!!! And then continue to Barbara Welch. If you are not sure whose blogs you have visited, you can find a list of hoppers at the bottom of each blog! 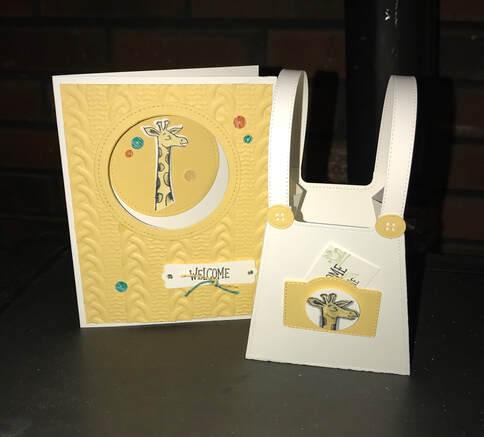
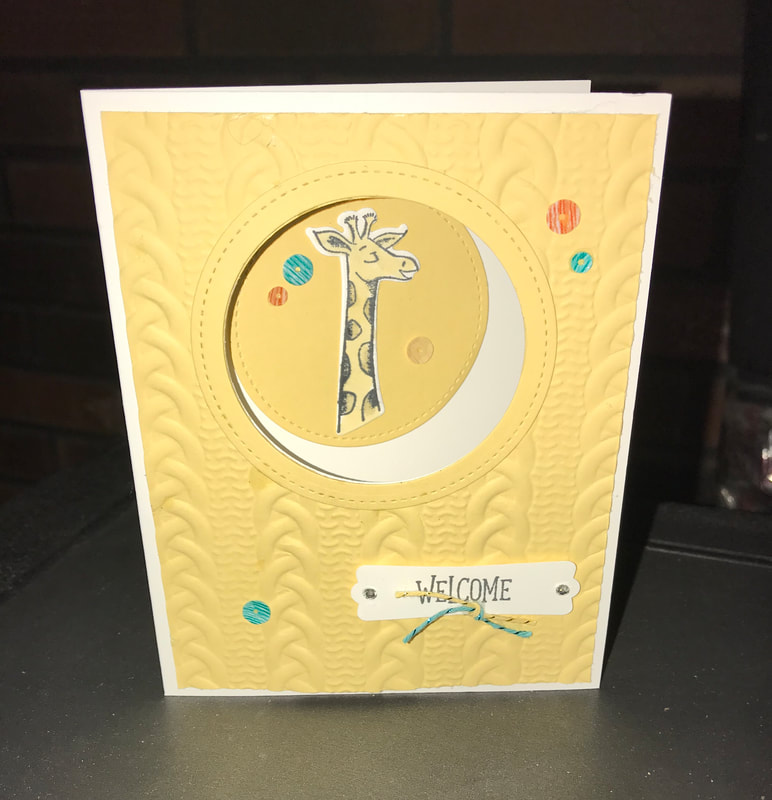
I used the stamp set by Stampin Up called Animal Outing. It's just so cute! I stamped, colored and cut out the giraffe. Created the window on the card and then embossed using a cable knit embossing folder. To make the opening on the card, I used a stitched circle die. and cut the layer first, then I centered the layer onto the cardbase, be sure the card is opened before cutting or yu will cut both sides, then cut out the circle. You can use the circle cut from the layer for the inside of the card. To created the circle border, I used a separate piece of paper, cut the small circle first and then aligned a larger circle over the cut part and that will create the ring the will fit perfectly on the card! Added some sequins and bakers twine and this card is done.
I hope you enjoyed my projects, I thank you for stopping by. Be sure to leave a comment and visit Barbara's blog!
Happy Stampin Steph
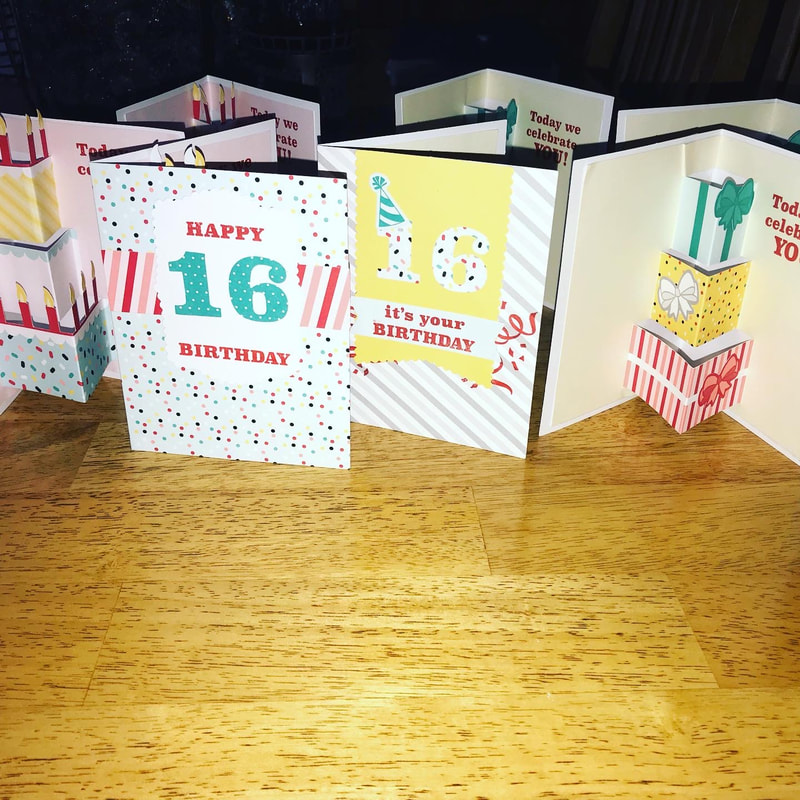
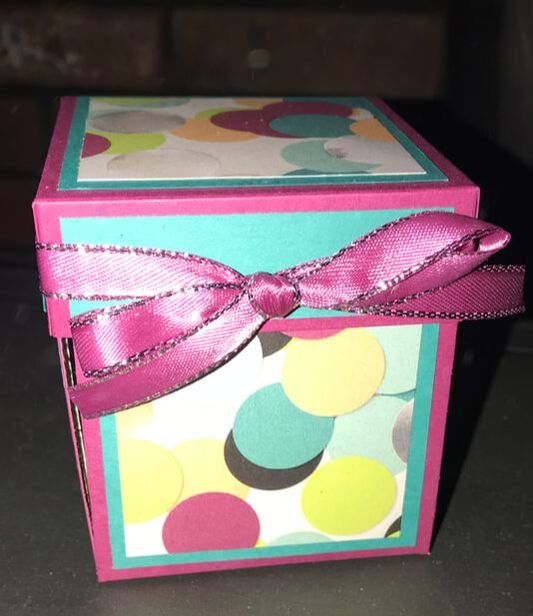
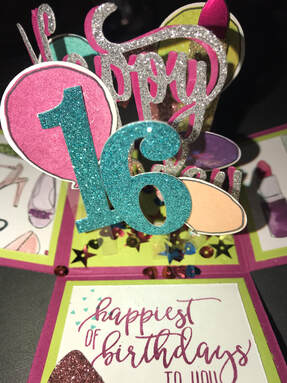
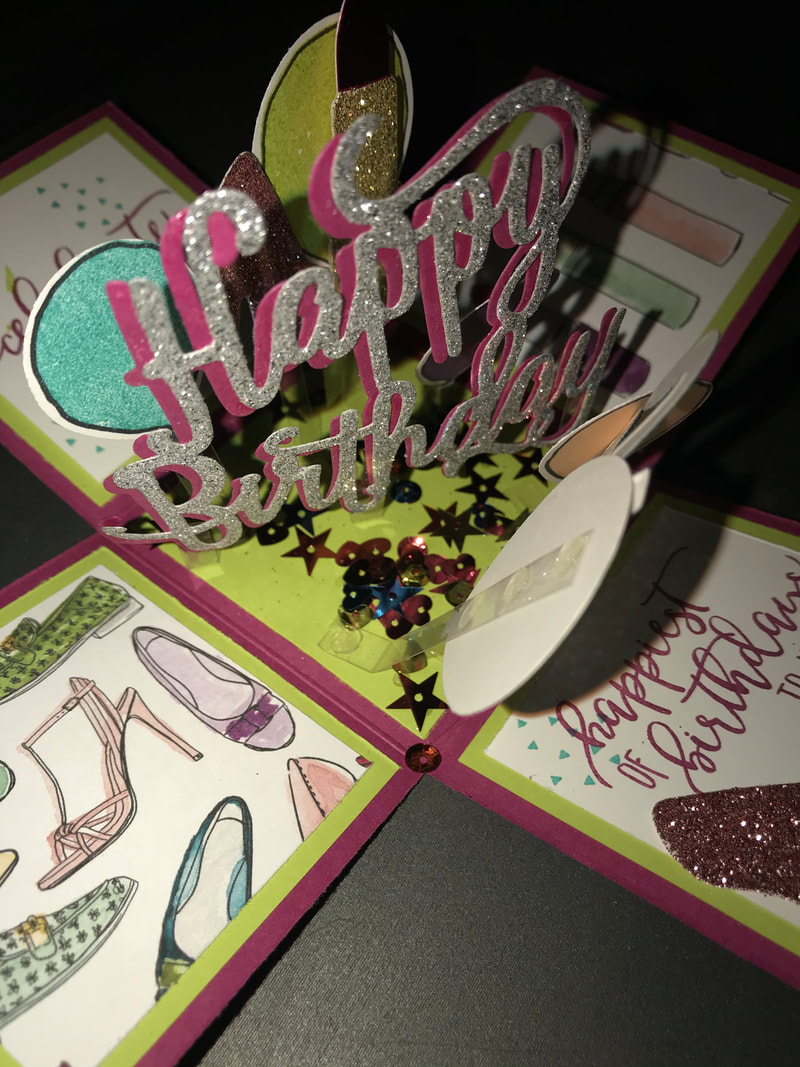
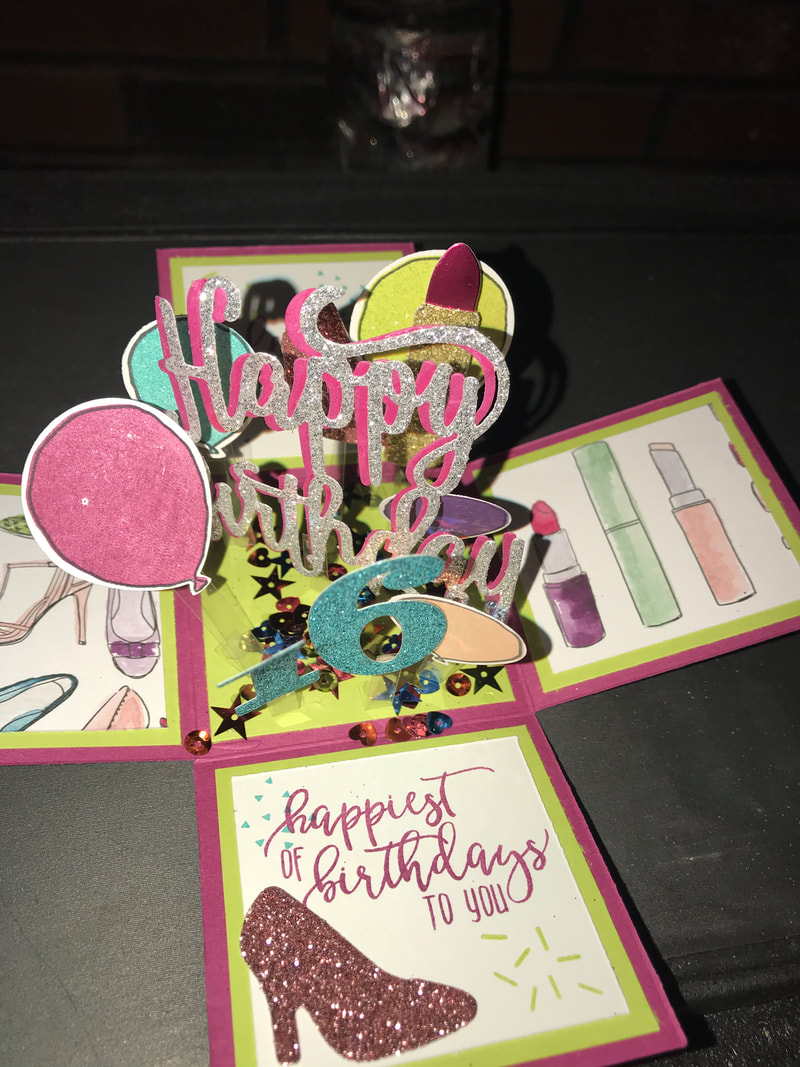
I am so excited to share with you my special project. My oldest daughter turn 16 yesterday and I really wanted to make a fun card capturing her personality! I have always wanted to make an explosion box but honestly, I have been really intimidated by it!!! Well this was the perfect time to give it a whirl!! I was inspired by a pin on Pinterest showing the box. So I will give credit to CindyLeeBeeDesigns! I do not know why I was so scared to make this in the past, it really came together quite easily. So to make this box, you need 2 pieces of cardstock, one that measures 4 7/8x4 7/8 and one that measures 8 1/4x8 1/4. For complete measurements see below: For my project I used a combination of Stampin Up's Berry Burst, Lemon Lime Twist (both retired) and Bermuda Bay cardstock. For the DSP I used Stampin Up's Picture Perfect and To make the lid use the 47/8x4 7/8 square in Berry Burst and score in 1″ on all four sides Layer the top and sides of the lid with DSP, cardstock or both I used a Bermuda Bay square that measures 2 5/8x2 5/8 and then a layer of DSP that is 2 3/8x2 3/8. On the sides of the box use 4 pieces of cardstock that measure 3/4x2 5/8 And just like Cindy's sample I also used the Stampin Up's Berry Burst 3/8″ Metallic Edged around the sides and finished with a bow. To make the box, I also used Berry Burst Cardstock cut to 8 1/4x8 1/4. Score at 2 3/4 on all 4 sides. Fold the score lines and then cut the 4 corners out. See Image below or refer to Cindy's directions on Pinterest. To create the layers I also used Bermuda Bay Cardstock and DSP. Cut Bermuda Bay to 4 pieces that measure 2 1/2x2 1/2 and then cut the DSP to 4 pieces that measure 2 1/4x2 1/4 and adhere on the outside box. For the layers inside the box I used Lemon Lime Cardstock. I cut 5 pieces that measure 2 1/2x2 1/2 and then 2 pieces of whipser white cardstock that measure 2 1/4x2 1/4x: (5) 2-/1/2″ squares, DSP on two sides with cookie, hats: (2) 2-1/4″ squares, (2) Whisper White 2-1/4″ squares 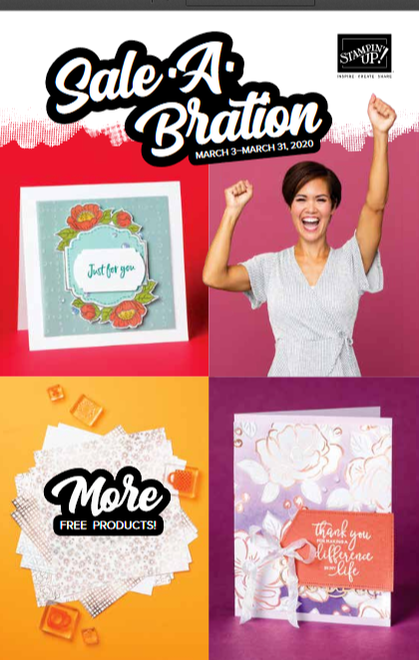 Sale-A-Bration is about to get better with more amazing products! Today is the day you get to start ordering the fabulous second release products for Sale-A-Bration 2020!
Included in the Sale-A-Bration Second Release are three awesome stamp sets and two packs of beautiful Designer Series Paper. Sale-a-bration proucts are available, while supplies last, through March 31, 2020. So don't wait, because you have more free choices when you spend $50 with me at Stampin' Up! Click on the image above to view the new Sale-A-Bration products available. Be sure to contact me today to place your order. Order visit my website and shop at your convenience 24/7! Happy Shopping Steph 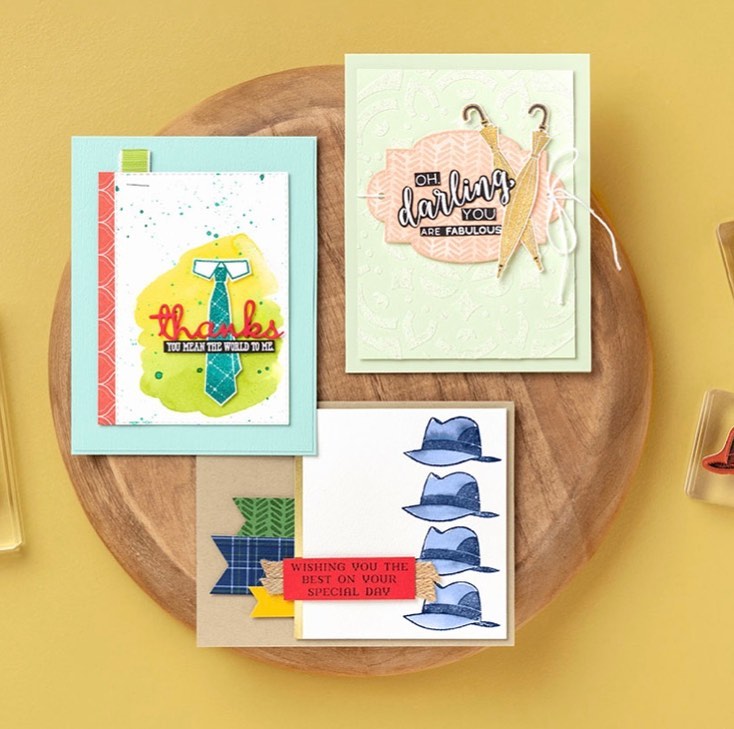 WELL DRESSED FOR SALE-A-BRATION
Did you know that when you shop you earn FREE Sale-A-Bration products. There are so many ways to score big during Sale-A-Bration! Our second release of goodies is out and you don’t want to miss this!! Our new Well Dressed Stamp Set (item 152300)—a Level 1 Sale-A-Bration item—features a retro 40s vibe and is perfect for anyone who likes distinctive, masculine stamp sets. It’s great for Father’s Day, birthdays—or just to make that handsome guy in your life feel loved. Contact me to get yours today!! Happy Stampin Steph |


Categories
All
Archives
May 2024
|


 RSS Feed