 Hi, these summer months have been keeping my creativity flowing...I only wish there was enough time in the day to make all the projects swirling in my head!
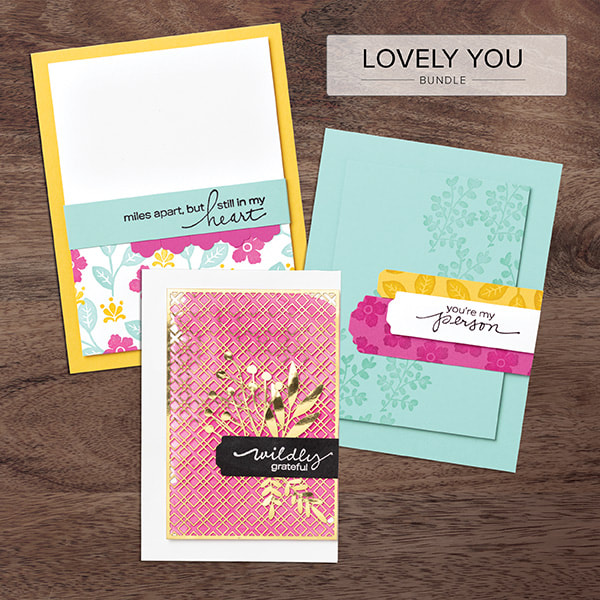
I wanted to share with you a classic pair of coordinating products I’ve been using lately: the Lovely You Bundle! This bundle includes the Lovely You Stamp Set and the Lovely Labels Pick a Punch. When purchased together with the special bundle item number, the 18-piece cling stamp set and six-punch tool are available at a 10% discount! My favorite element of the Lovely You Bundle is the six-punch tool. With it, you can punch two designs in three different widths (with cardstock of any length). This exclusive tool allows for efficient crafting, easy coordination, and endless creative possibilities! I’d love to see what you create with the Lovely You Bundle. Let me know if you’re interested in giving it a try! I’d be happy to help you with your order. Add-on my card kit for $15 +shipping and you will off and creating in no time! And to find more information this offer check out details here. Happy Stampin Steph
0 Comments
 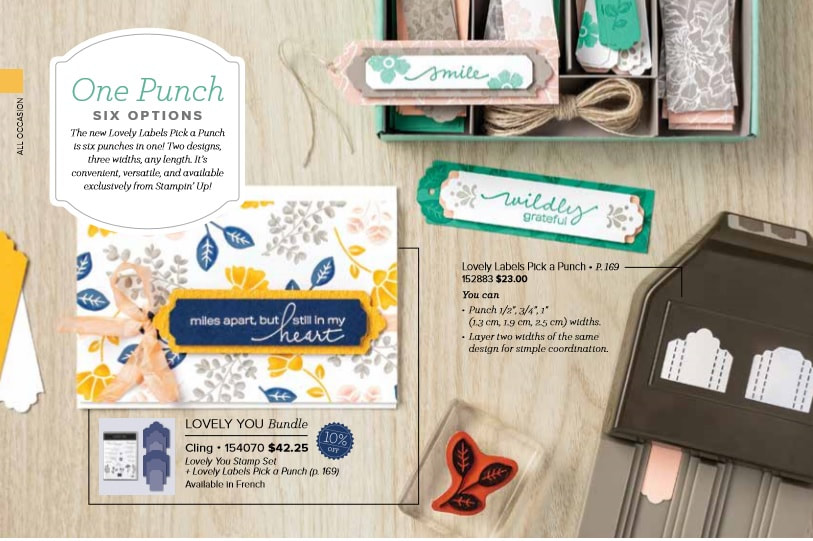 Check out this new punch called Lovely Labels Pick a Punch! You get 6 punches in 1. Amazing!!! Choose the size paper and punch away. The punch can be purchased separately or as a bundle with the Lovely You Stamp Set and that includes a 10% savings! See the video below explaining how to use the punch! Happy Stampin Steph 
Thank your for joining the June Stampin Friends BLOG HOP, where we are celebrating the first day of summer! We have an amazing Hop for you this month!!!
Be sure to follow each blogger to see all 12 of the awesome projects that have been created and shared for you! If you get lost a long the way, there is a list of participants at the bottom of each of the blogs! Since today is the first day of summer and school is almost over, I decided to make some teacher gifts! All of my projects use current Stampin Up products! I hope you enjoy what I have planned for you!
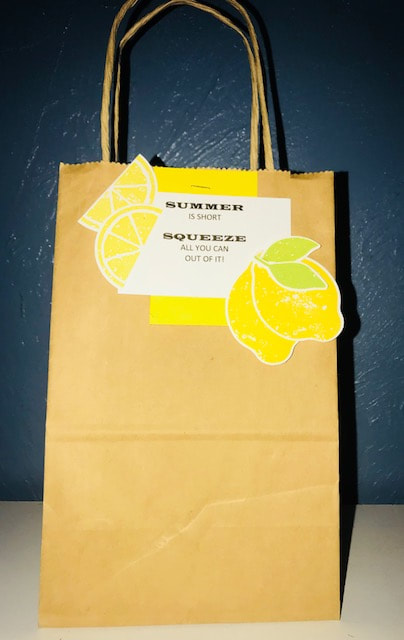
My projects theme was from a Lemon Verbena car air freshener I came across from a local store. I was very excited to see the Lemon Zest was carried over to the new annual catalog. So it was a perfect fit for this month's hop.
The projects use some new and returning products. My color choice was the New In Colors Pineapple Punch, Grapefruit Grove and Call Me Clover; 2017-2018 In Color Lemon Lime Twist. Stamp sets are returning Lemon Zest and Daisy Delight. My First project is a large clothespin. I found them at AC Moore, pretty inexpensive. I cut the cardstock to 1 1x2 x 6 1/8, embossed with the Layered Leaves Dynamic Embossing Folder. I stamped, punched and layered 3 daisies and finished the center with a Faceted Gem. I added a few strands of the Gold Mini Sequins Trim. The books mark is 2x4 1/2. I found the sentiment online and printed it out on Whisper White. They can use the bookmark or keep it display in the clothespin. Finished with the Pineapple Punch Grossgrain ribbon and a bow made from Linen Thread. 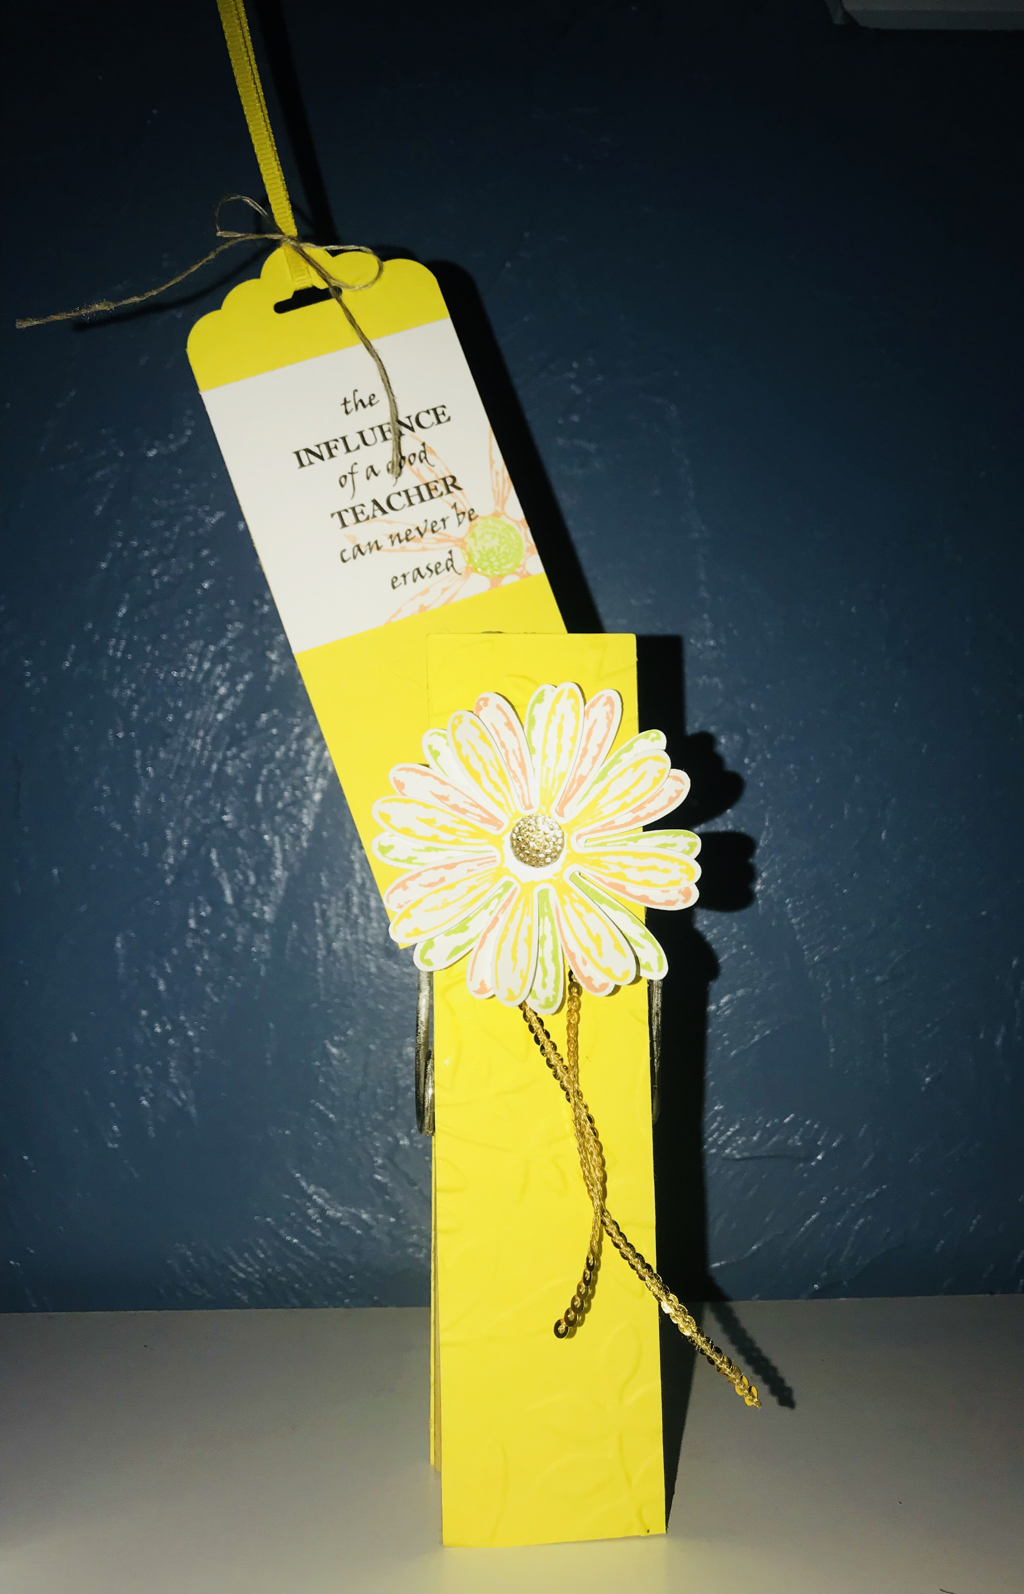
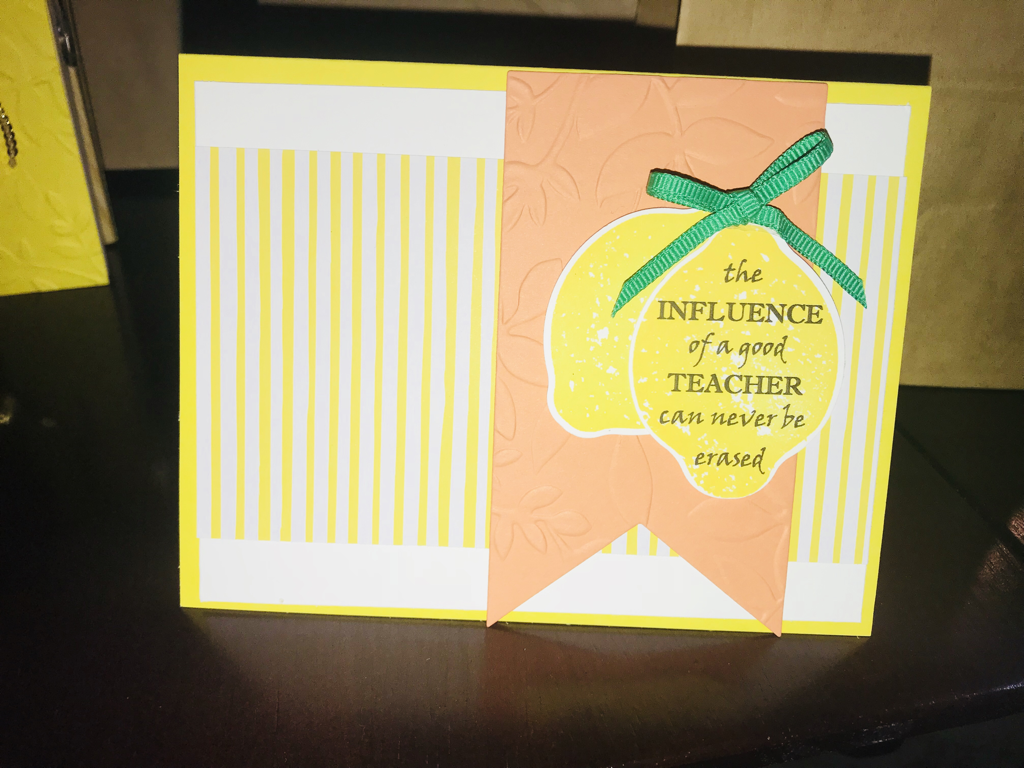
My card was super easy. Pineapple Punch base layers are Whisper White and the coordinating new In Colors DSP 6x6 Stack. Then a banner cut from the Grapefruit Grove paper that was embossed with the Layered Leaves Dynamic Embossing Folder. The sentiment was printed on Whisper White then stamped over with the Lemon. Finished off with the Call Me Clover Grossgrain ribbon.

I hope you enjoyed my projects, be sure to leave a comment. I'd love to hear your thoughts. I appear to be the end of the hop, but incase you missed someone along the way, you can find all the hoppers listed below!
Hope you have a wonderful summer Thanks for stopping by and Happy Stampin Steph 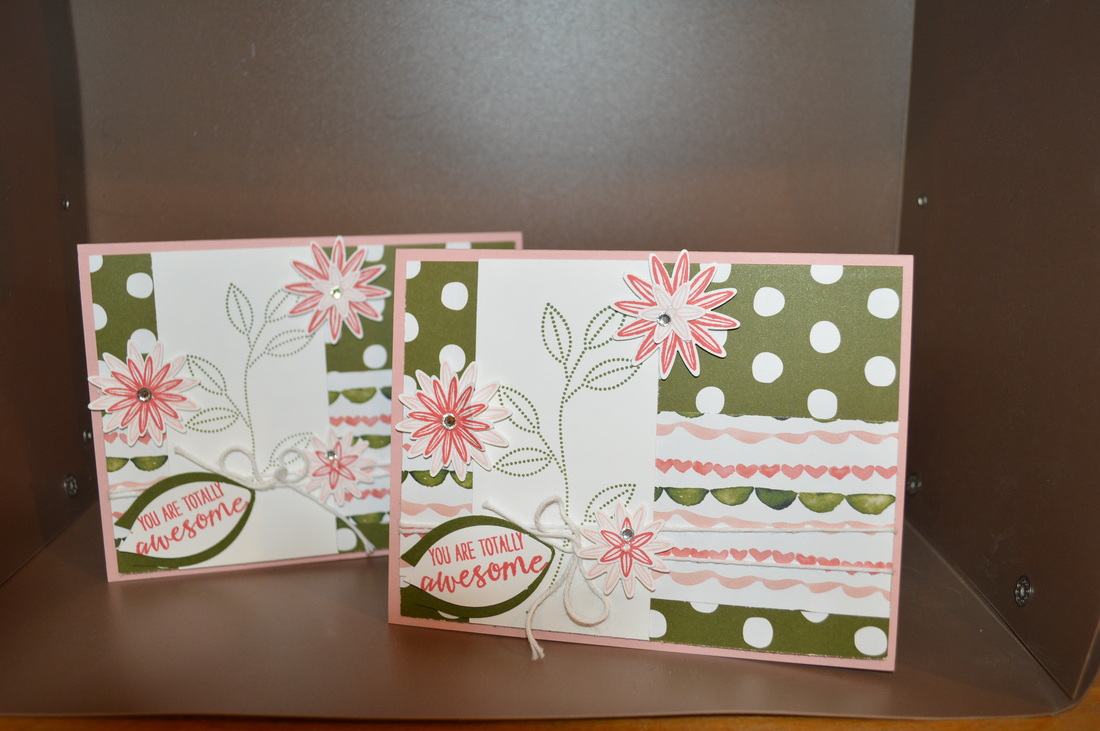 I love how this card came out so I just had to share. I used the Grateful Bunch stamp set and coordinating punch. The Designer Paper is Birthday Bouquet. The colors of Mossy Meadow, Blushing Bride and Melon Mambo go together so perfect. It really is a super easy card to make. Might be one I offer at an upcoming card club.
We shall see Happy Stampin Steph
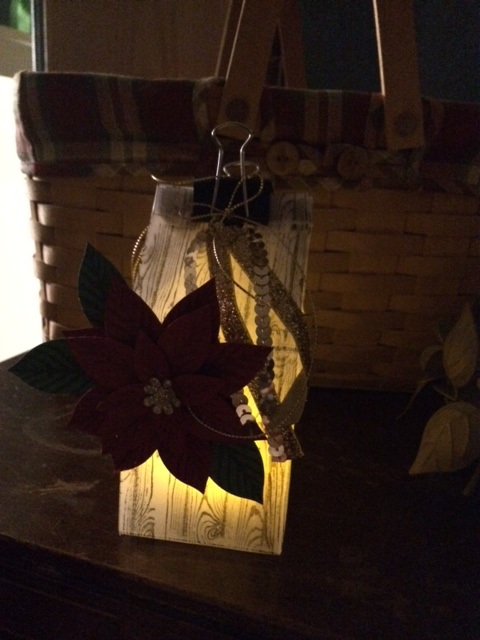
I love decorating for the holidays. But sometimes when life gets crazy with all the running around, I don't get much of a chance to enjoy all the decorating. And, well sometimes it feels more like another chore I have to get done. But I created this holiday lantern. It's been sitting on my shelf waiting for the perfect time to be "blogged". I was inspired from a few lanterns I had seen on Pinterest. I love Pinterest, have I said that yet?

I will admit this was my first attempt at using our new Festive Flower Builder Punch. It was so easy to do! For the Poinsettia, I stamped then punched out the petals and layered them to create the flower. It was the perfect adornment to my lantern.
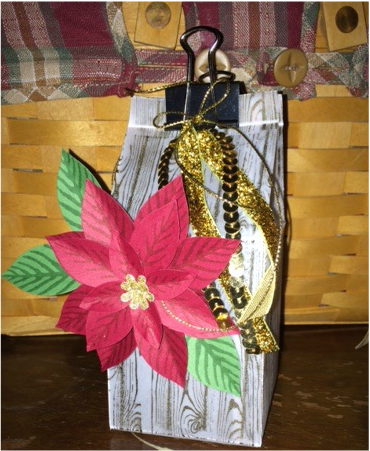
I used our Vellum paper to make the milk carton shape of the lantern. I stamped the Hardwood background stamp in Early Espresso and really waited for the ink to dry before scoring and folding. I will say after making this once, I would definitely use a stayzon ink for the fast drying.
I added a binder clip to hold the lantern closed. I wanted the inside to be accessible pretty easily. The Gold Sequins, new Gold Glitter Ribbon and New Gold Cording Trim are adhered to the lantern with glue dots so the won't fall off when you take of the clip. And what's a lantern without a little light? Right?
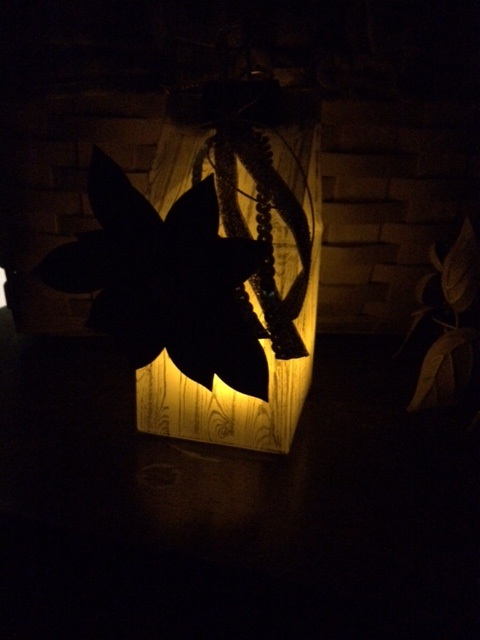
Inside the lantern is a little battery operated tealight. How cute! I am really excited to put this on display during the holidays. I can even be hung on a tree!
I hope I inspired some of your holiday decorating too! Happy Stamping! Steph
Built for Free Using: My Stampin Blog
|


Categories
All
Archives
May 2024
|
 RSS Feed