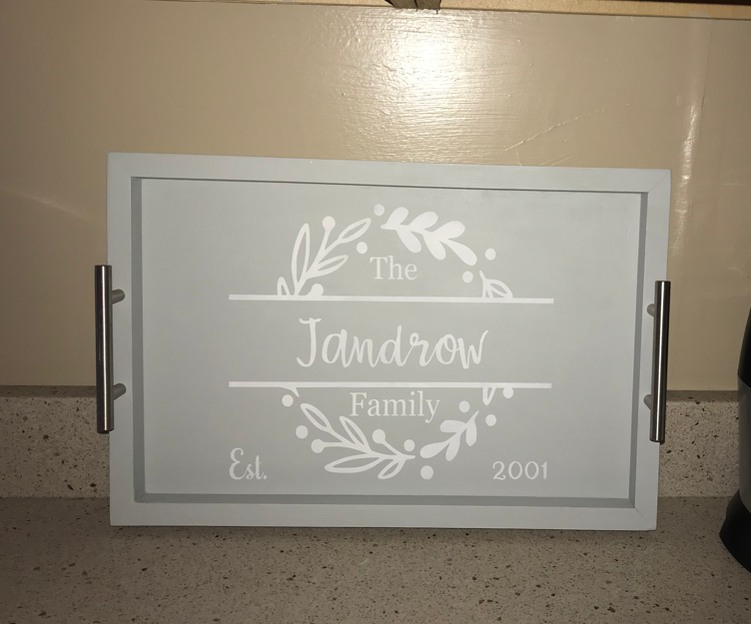
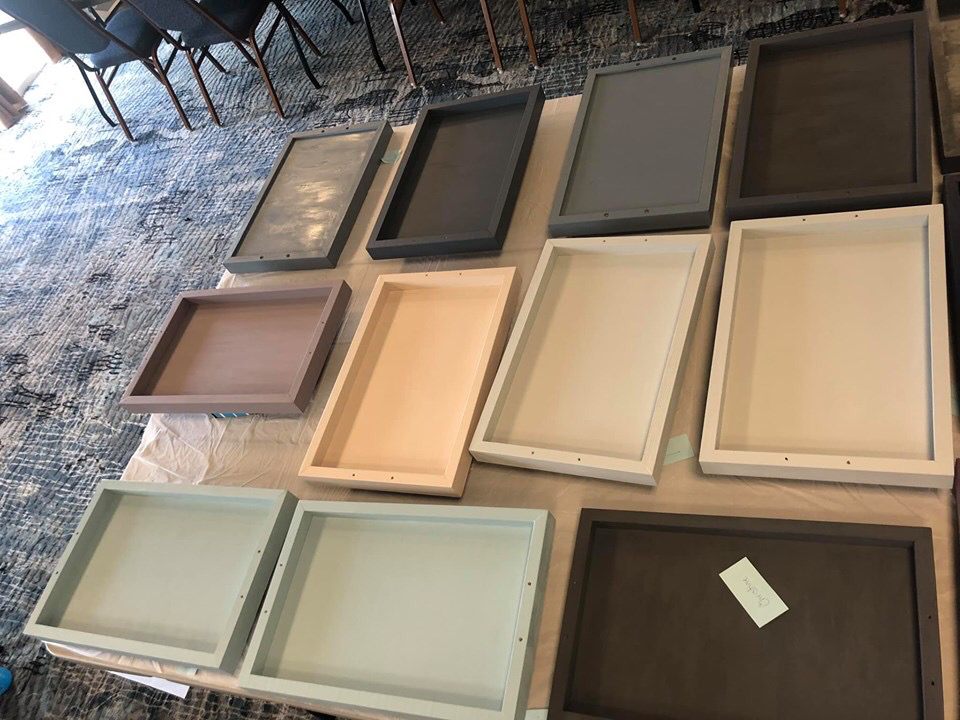
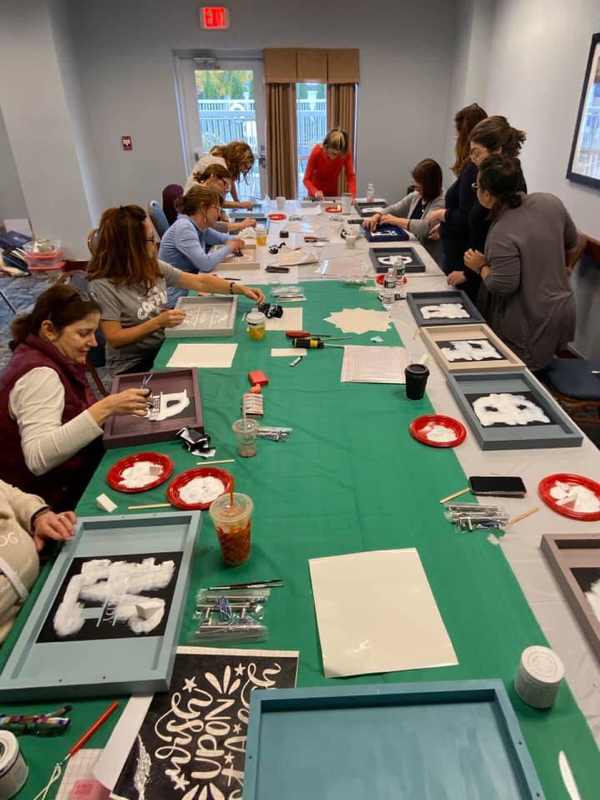
 Painted wood decor is all the rave today! So I was excited to see that The Crafting Room offered a class at their craft weekend. Lara was gracious enough to bring lots of paint colors for us to choose from and gave us choice for our design prior to the weekend! Her attention to details was just awesome. Her father made the trays and they are amazing! Recessed bottom so you don't see the edges and recessed holes so the screws sit below the edge of the wood and little rubber feet for the corners to make sure the trays don't scratch surfaces! I mean c'mon!!!! AWESOME LOVE LOVE LOVE the end result and I have my tray proudly displayed on my kitchen counter!!! Thanks for stopping by Happy Stampin Steph
0 Comments
 I made 23 pencil boxes for my son's 4th grade class to hand out for Halloween. We can not hand out candy and Halloween really isn't celebrated in schools any more. But I was able to still give a little treat to each of his classmates! My daughters are too old in school now that they just don't want to share gifts anymore and they switch classes so there would be too many to make even if I wanted to!! :-(
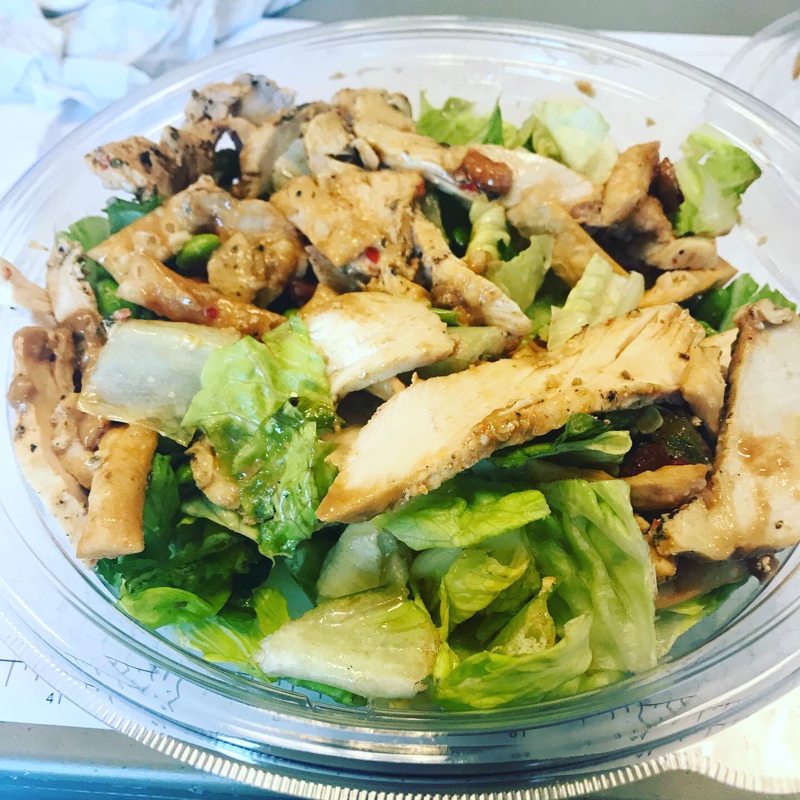
I wanted something simple, and I know kids can always use pencils! I found directions for the box on Pinterest. I followed the directions by crafter The Stampin B, you can find the directions here. I used retired Stampin Up products to decorate! My son was so excited to bring them into school today!!! I can't wait to hear all about it when he gets home! Happy Halloween & Happy Stampin Steph 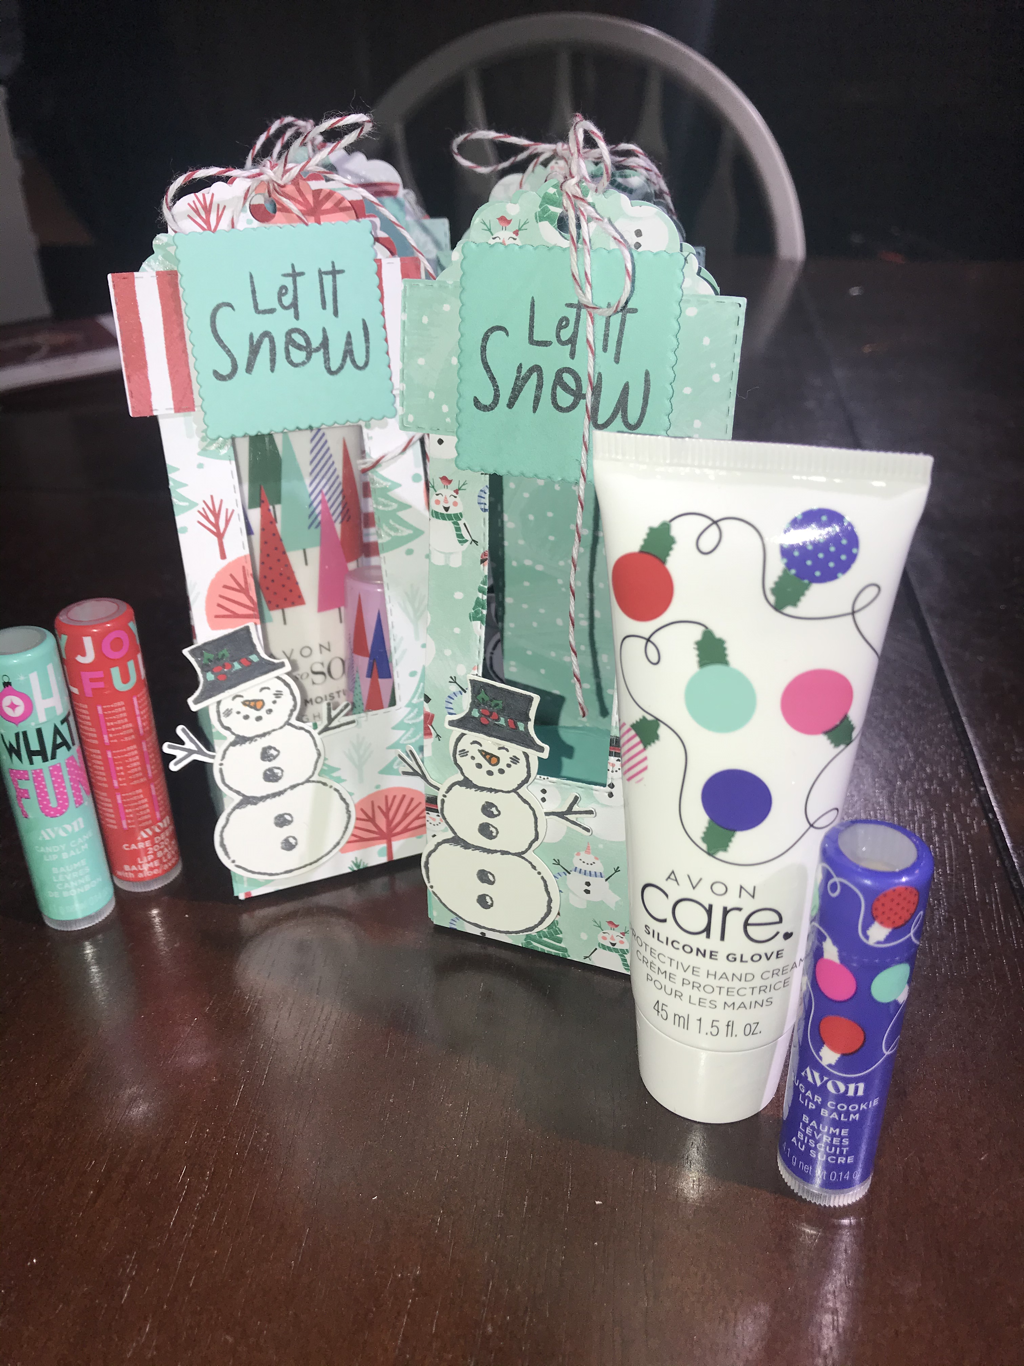 A project that I love to make for the holidays is a lotion & chapstick holder! Passed years I have made a gift bag holder with a cut out in the front for a window so you can see the content. Even tho I really like the gift bag, I decided to change it up a little this year. The reason being, I am involved in a Holiday Pop-Up shopping event again this year and this will be the 3rd time I will be displaying my projects for sale. So I figured for those repeat attendees that I am so gracious for!!!! I decided I needed a fresh look!
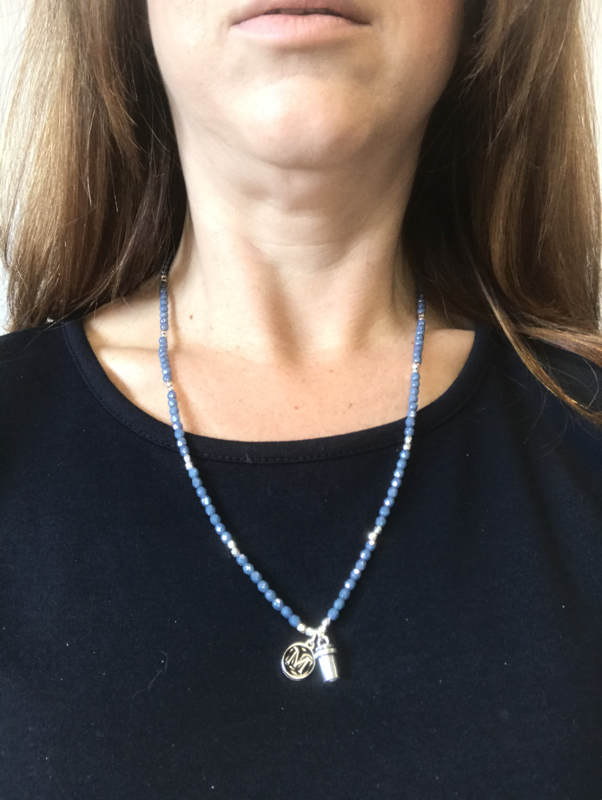
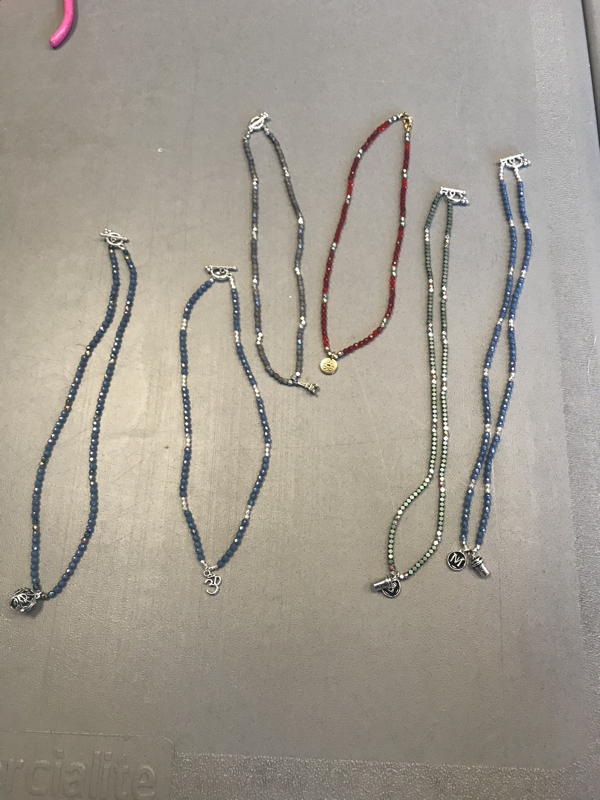
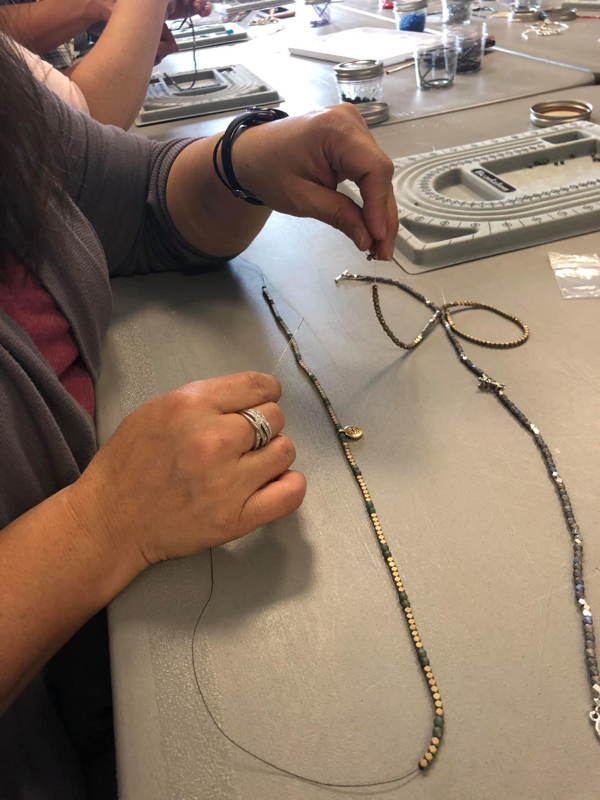
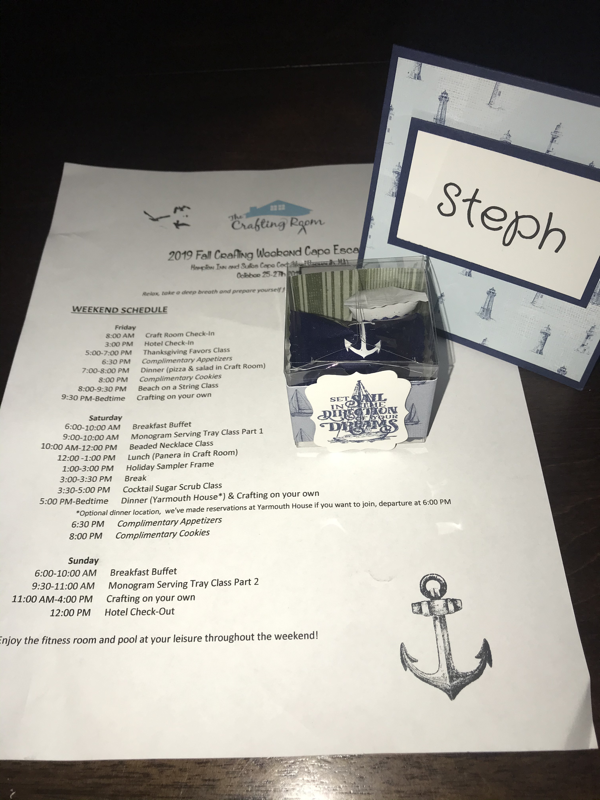
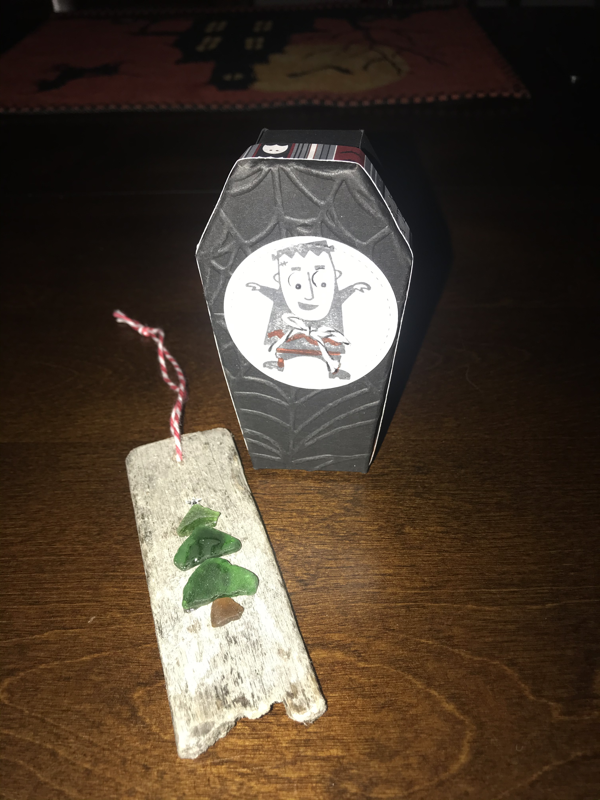
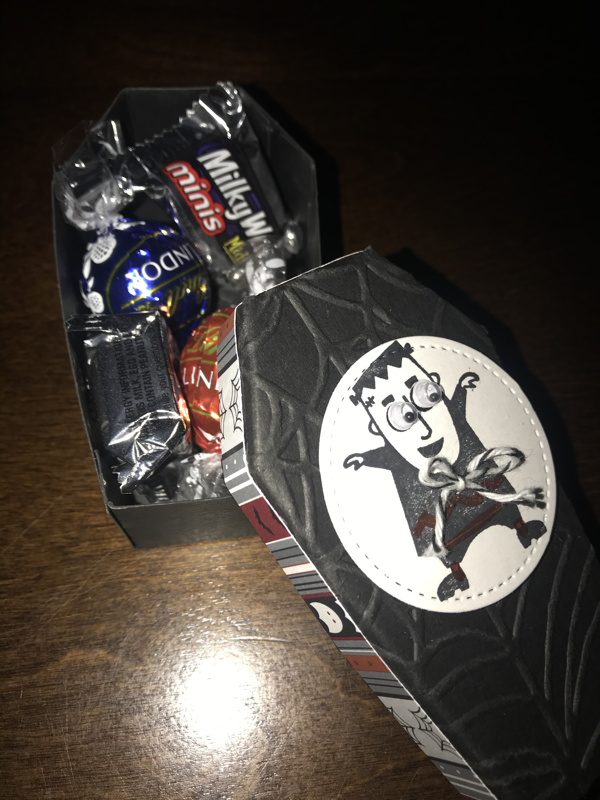
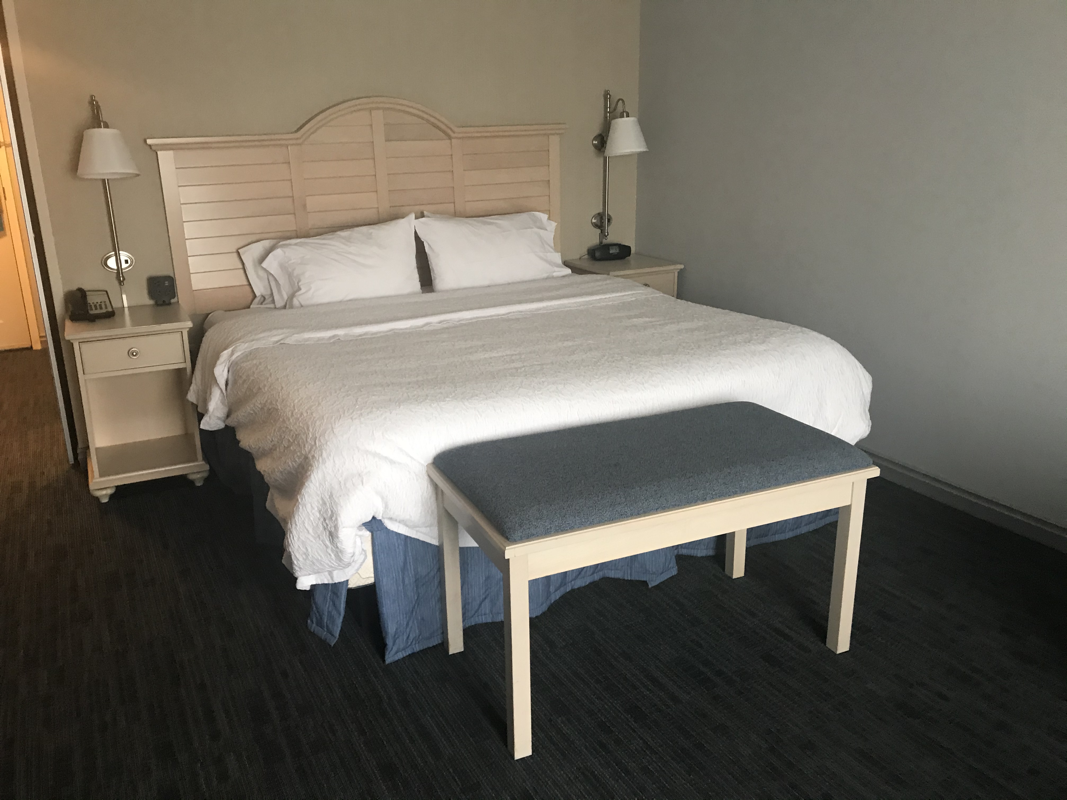
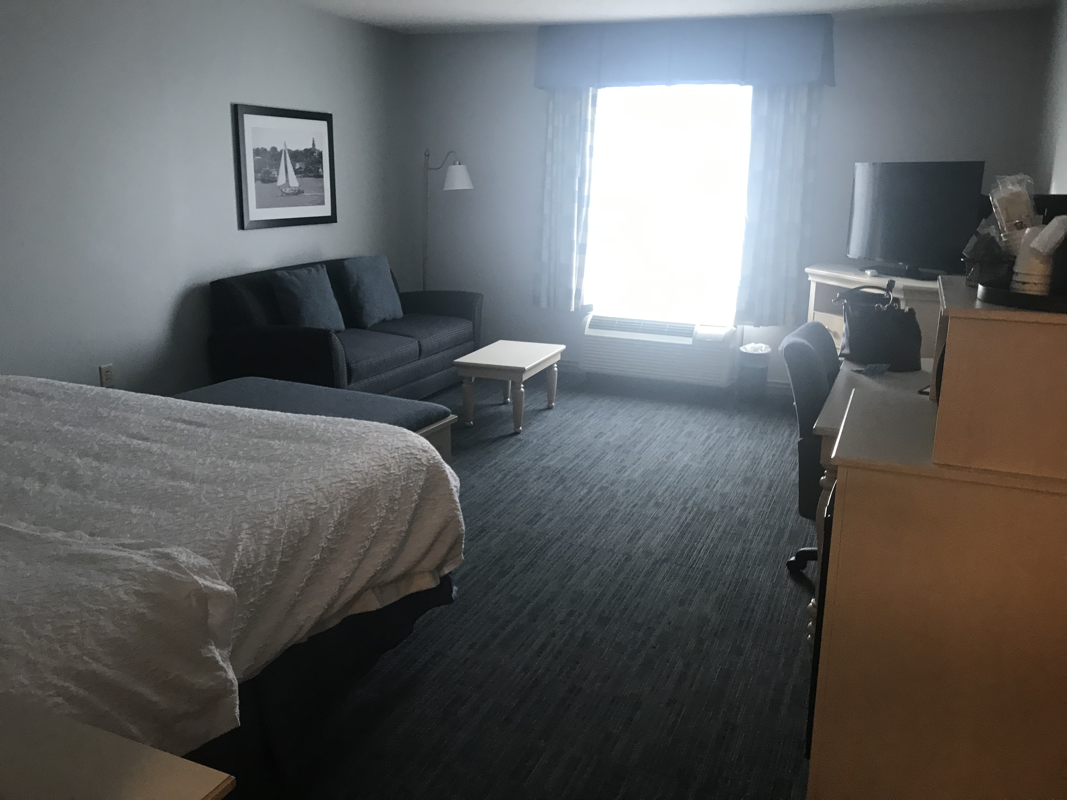
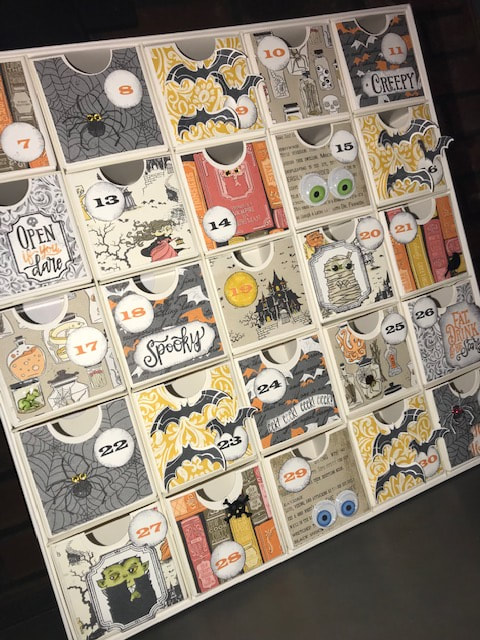
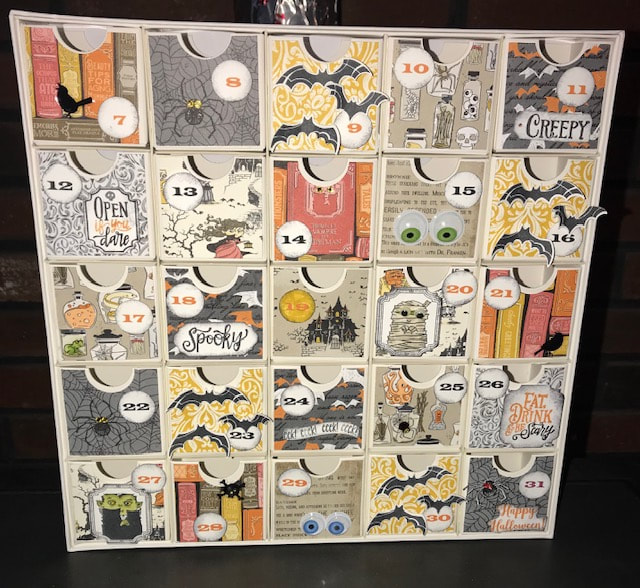
After a few failed attempts on my own, I came across a post on Pinterest and I really liked her project. I adjust it to be just a tad wider so that the lotion and chapsticks would fit without pushing against the paper edges. Unfortunately, I did not pin the post and I am having trouble locating it at the moment. SO I will keep looking and definitely update when I come across it! I want to make sure I give credit to the creator as well!! The DSP and stamp image I used is from Stampin' Up's new Let it Snow suite. The stamp set is called Snowman Season and there is also a Snowman Builder punch that coordinates with one of the stamps. I made 2 of each paper design for a total of 8 holders. I used the cut out from the window as a backing to the greeting and had the reverse side of the paper displayed. For the window opening you could use a window sheet. But I cut a piece of transparency. You can find these at an office supply store. I feel they work just as well and you get more for your money! I plan to put these into a cellophane bag and finish it off with a little tag that includes the contents for easy shopping. I hope you like it! Thanks for stopping by! Happy Stampin Steph 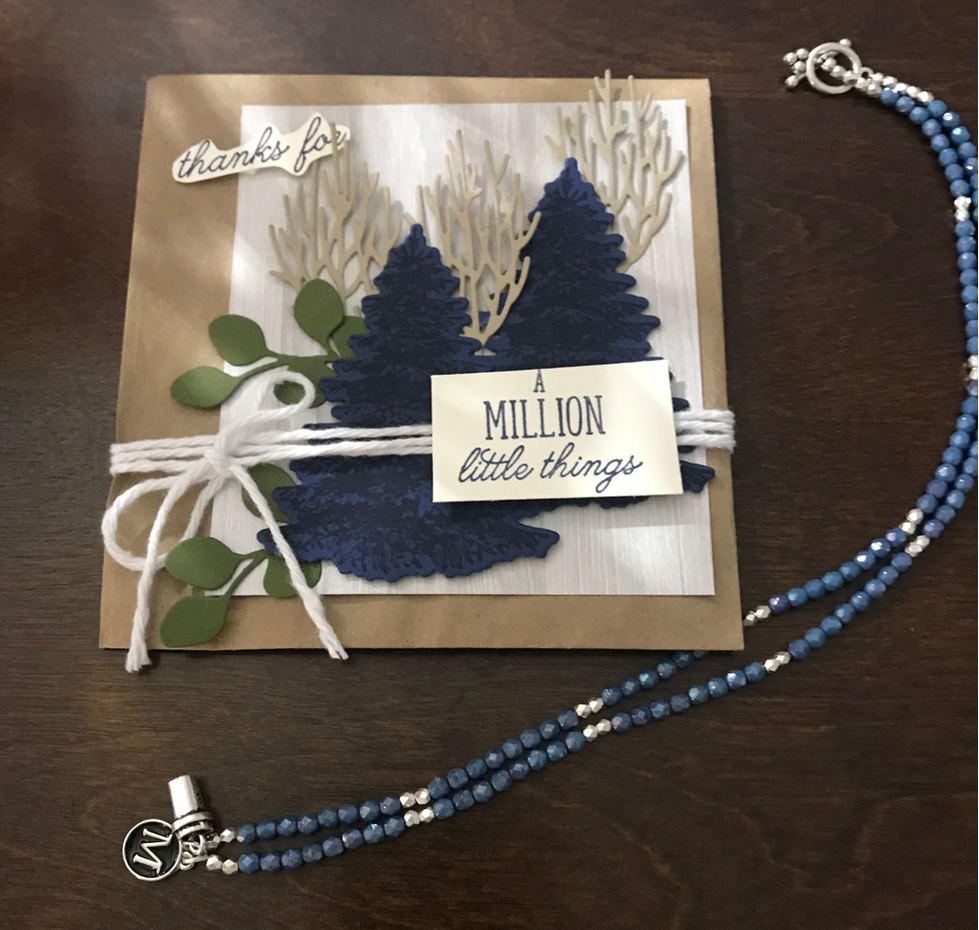 One of the classes offered at the craft weekend was making a beaded necklace! I was a little intimidated, definitely not something I would do on my own. The thought of threaded little beads onto a string had me a little stressed. But honestly this was so much fun and relaxed. We were able to pick out the colors we wanted and layout the beads to see how it would look! I can't tell you exactly what we used, because I haven't a clue about jewlery, but Michele from The Crafting Room was an awesome teacher. She kepts us relaxed as we learned each step! I made the necklace for my mom as a thank you for her staying the weekend at my house with the kids. I chose blue beads (blue is her favorite color) M for her first name and a little coffee cup, because like me she loves coffee!! I also decorated a little craft bag using the Stampin Up Winter Woods stamp set and Into the Woods Coordinating dies. I think it came out nice considering my resources were limited and this was not planned :-) I really like making the necklace, and Michele, was gracious enough to let me make a bracelet for myself! The beads are so pretty!!!!! Love it! So what do you think? Are you a jewelry maker too?? Do you think I should add this to my hobbies or stick with paper-crafting??? Happy Stampin or jewelry making :-) Steph 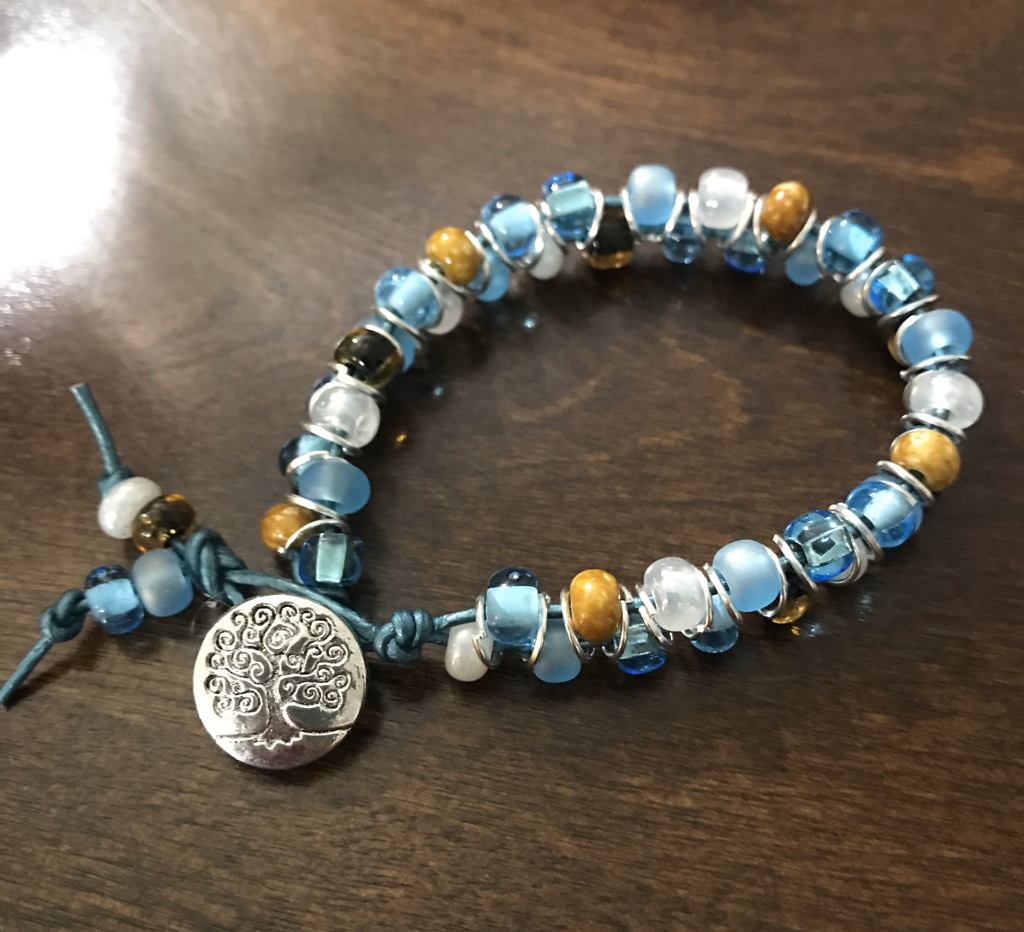 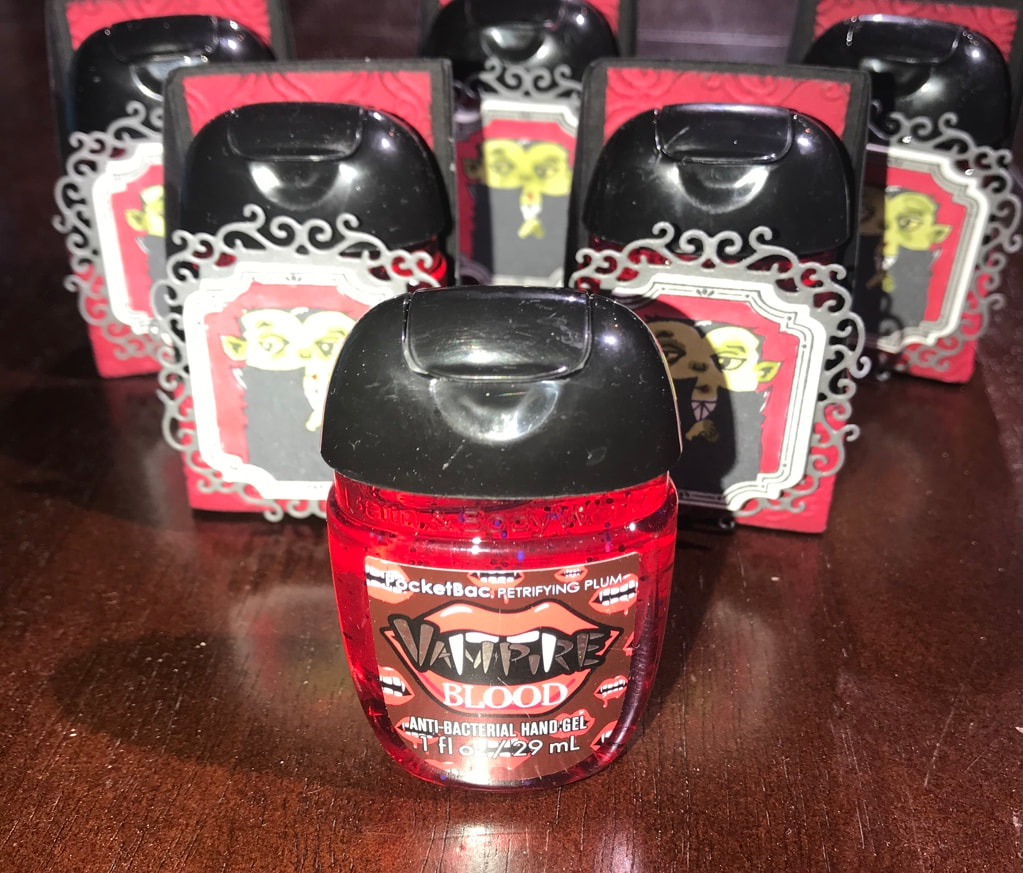 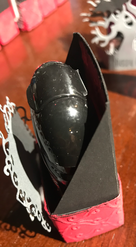 I love making little treats to give teachers, family, friends. The hand sanitizers from Bath & Body Works are perfect for this! They are affordable, have cute designs, smell amazing and everyone loves them! You can find many designs if you search Google or Pinterest. But I stick with this type of box to hold them! I like how it fits and you still have space to decorate! To make the box, you will need a piece of cardstock that measures 3 3/4" x 4 3/4". Score it on the 3 3/4" side at 1" and 2 3/4". Then turn the paper to the 4 3/4" size and score at 1" & 2" Fold all the score lines. On the sides that measure 4 3/4", cut the score lines to create tabs. Fold the middle tabs in and adhere the bottom tabs on the outside to create the box. The you going to cut at a diagonal from the top of the box side down to the top of the tabs. (My picture shows the completed box, but hopefully this makes sense) Contact me with any questions. I chose to match up the box to the style of the sanitizer, this one was called Vampire Blood. So I used a pieces of Real Red cardstock (measure 1"x6" and 1 3/4"x2 1/2") and embossed the pieces with the new Stampin Up embossing folder called Stylish Scroll. I then sponged the edges with Basic Black to give it an old look. The Vampire stamp is also from Stampin Up the stamp set is Spooktacular Bash. I made a layer by cutting the Vampire out and the greeting using a framelit from Stampin Up's Ornate Frames Dies. Added glue dots to the top of the greeting so you can lift the Vampire up. I adhered them to another die from the same size! Love it!! I also completed another set for the Ghoul Friends scent. I used the Stampin Up stamp set Spooky Fun & Halloween Scenes Dies. I think I prefer the witch flying across the moon, so I will up the rest of the boxes and finish them that way!!! I hope you enjoyed this project! Let me know what you think! Happy Halloween & Happy Stampin' Steph 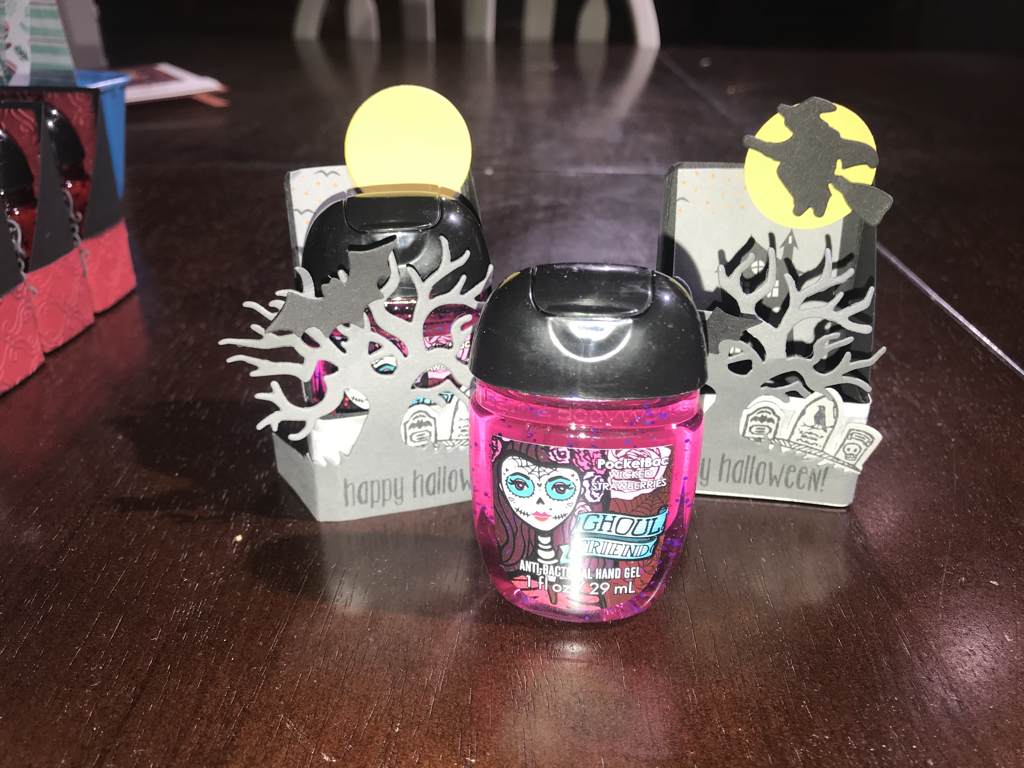 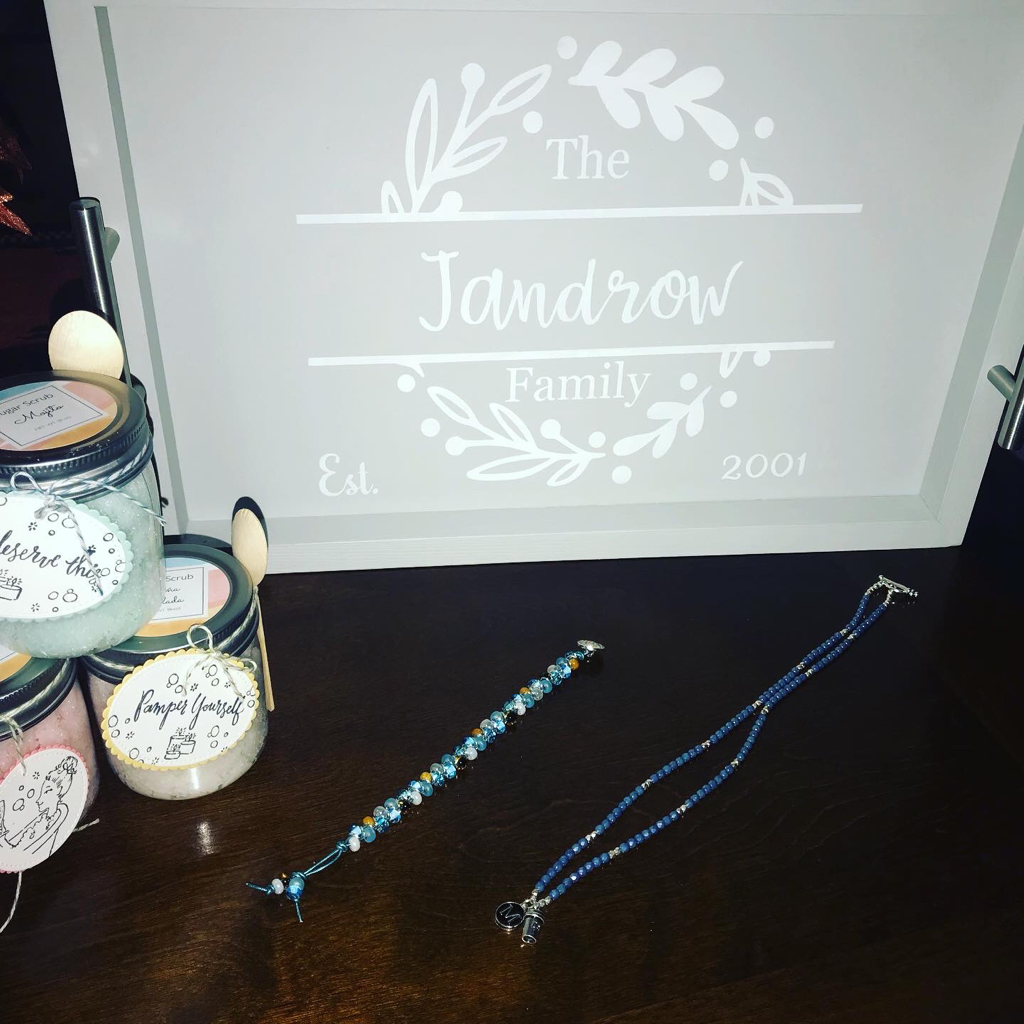 This weekend I had the pleasure of attending The Crafting Room's craft weekend held in Yarmouth, MA. I thoroughly enjoyed myself! If you're like me, you find yourself scrambling to get it all done during the week. Between sports, dance, homework, kids, meals, errands etc there isn't a lot of downtime. And let's face it, it can all be overwhelming at times! I think it's great, if you can to get away for a day, night or weekend and relax and recharge! And.....I didn't have to think about drop off's or pick-ups or what to make for dinner that everyone will eat! We enjoyed amazing meals too! Pictures below.........Grilled shrimp tacos from the Black Cat restaurant, Spicy Thai Chicken salad from Panera, and this delicious Grilled Salmon with a citrus sauce from The Yarmouth House! I also had a pumpkin cheesecake that was to die for ...but forgot the photo oops. The hotel The Hampton Inn, was great. They were very nice and clean! They offered a free breakfast bar that included anything from eggs to make your own waffles, oatmeal, yogurt, cereal fruit & more! It was so good! I brought a few projects I needed to finish up with me and also signed-up for classes they offered! I enjoyed working on projects that I wouldn't normally do on my own! The hostesses, Jen and Lara, did an amazing job planning the event, from the location down to the pillow gifts and everything in-between! This week I will be sharing a closeup of a few of the projects I made, from the classes I took, as well as the projects I took with me. Below was our schedule, welcome gift and pillow treats (left in our room each night we were there). How adorable is this. The nautical themed welcome gift was perfect for the location! We were located right in Cape Cod, minutes from the ocean! The coffin was filled with yummy treats and look at the ornament. It was made from beach with and sea glass!! WOW I can't wait to hang this on my tree!!! If you love to get away to craft, I highly recommend The Crafting Room!!!! "Like" my Facebook Page Stamin & Scrappin with Steph or @stephjandrowstamps and stay up-to-date on events! Thanks for stopping by! Have a great week! Steph 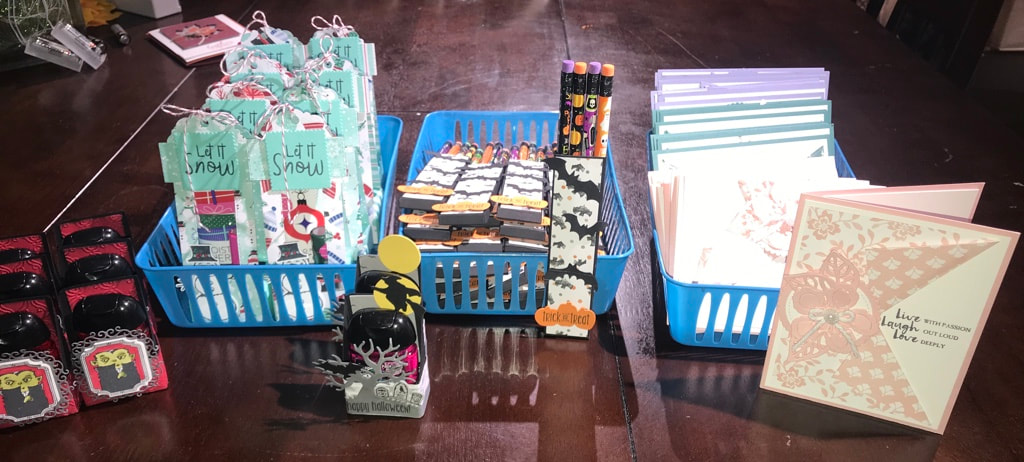 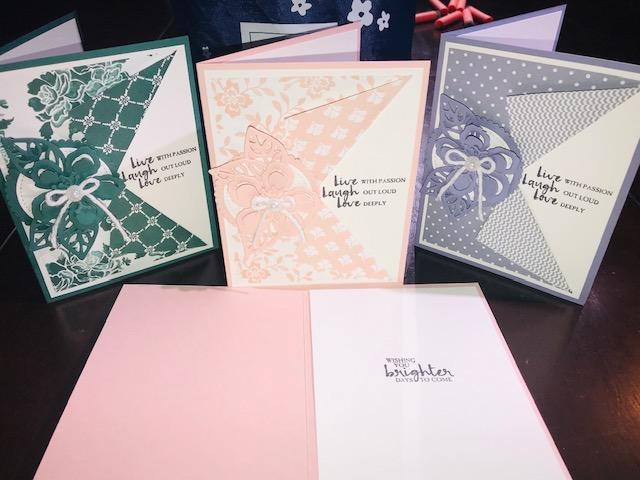 I am very honored to be a part of something amazing. A wonderful friend of mine is putting together Chemo Care packages that will be donated to a local cancer center. I offered to make the cards they will include in each kit. These are the cards I will be designing to donate! Below I have included the original Facebook Post. If you are interested in being a sponsor and donate a kit, please contact me for more details! Thank you so much and Happy Stampin Steph I am so excited for this collaboration with one of my best friends, we both know loss to cancer way to well, as many of you have, too. 💕 In honor of so many loved ones and the warriors that are fighting each and every day please consider sponsoring a Chemo Care Package. A collaborative effort between Amanda Matthews, ThirtyOne Gifts and my R+F team, “Team Hustle & Heart” every Chemo Care Package will be donated to the Dana-Farber/Brigham and Women's Cancer Center at Milford Regional Medical Center. If you are interested in sponsoring a package please let me know. Each ThirtyOne caddy will be filled with R+F Essentials Moisturizer, Essentials Lip Shield, hard candies, fuzzy socks, other necessities, and cards from the amazing Stampin & Scrappin with Steph. — with Steph Jandrow, Amanda Matthews and Craig Leger. 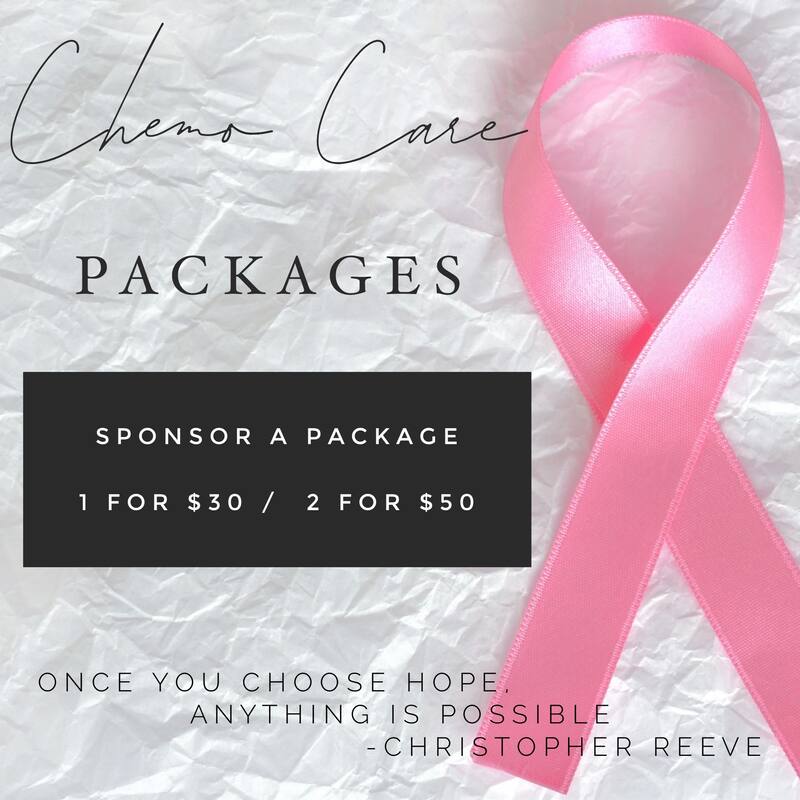 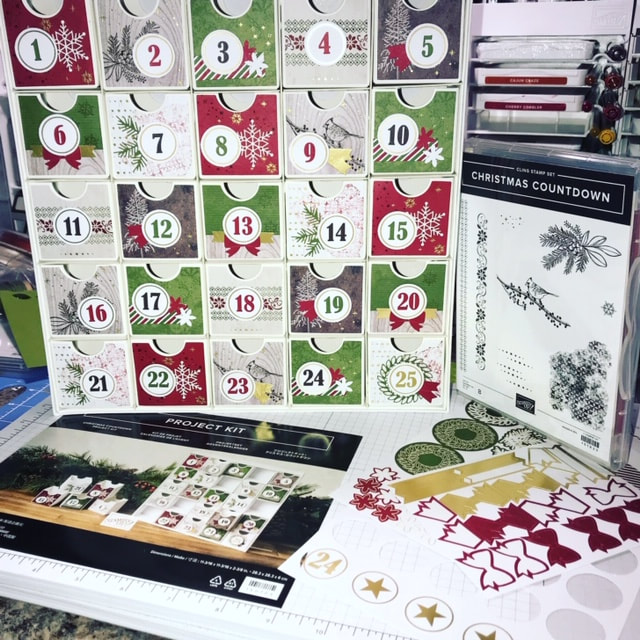 Who has time to create things from scratch this time of year? Me that's for sure!!! Stampin Up knows how busy this time of year is for us! We scramble to get cards addressed, gift purchased and the house the decorated! And that is why they have created their holiday kits. The Christmas Countdown is by far the best kit I have seen with Stampin Up! It's fun It's functional and It's versatile. The boxes are undecorated so you can use this for so much more than just Christmas. I have viewed many ideas on Pinterest! The possibilities are endless! But why stress out....I can help you get ready for the Holiday Season with a hand-crafted advent décor! Fill the small boxes with treats for the kids/grandkids, give as a fun gift, and let the countdowns begin! I am offering the new Stampin Up Christmas Countdown kit as a workshop! What is in included? The Christmas Countdown by Stampin Up created a kit that includes enough supplies to create 25 mini boxes, plus a sturdy outer box to hold them all. November 3 at 9am Cost - $35 I have created an additional kit so you can decorate the reverse side for Halloween. See pictures below......While it maybe too late to enjoy the Halloween side this year...You will be ahead of the game for next year! Halloween Add-on is $15 I will provide the stamps and ink! Please be sure to bring adhesives (Tombow liquid glue, dimensionals and snail) & scissors! TO REGISTER NO LATER THAN 10/25, please click on this link to pay https://www/paypal.me/StephanieJandrow View and RSVP the event on Facebook and stay up-to-date with any updates I provide. Thanks for stopping by Hope to see you soon Happy Stampin Steph The holiday season is almost upon us and we will soon find ourselves scrambling to find the perfect gifts for our family & friends. Let me take away some of the stress and provide you with a fun event as you create fun gift packaging. Not only will your family/friends be excited to open their gifts....they will be super impressed that you created the packaging! I do the hard part...the cutting and preparation. You do the fun part...putting it all together! We will be creating a variety of Holiday Gift Tags, Gift Boxes/Bags and Money/Gift Card Holders. A total of 24 projects! Yes, 24.....10 bags/boxes, 4 money holders, 4 gift card holders and 6 gift tags! (Stampin Up designer paper may vary from what is shown based on current product availability) Come on by December 1 at 9am! Workshop fee is $30 this includes all the precut materials to complete each project. You may also add on additional projects please contact me for details. Can't make? Contact me about my to go option! To secure your seat, please register and pay at https://www.paypal.me/StephanieJandrow Stay up-to-date with event information by RSVP'ing to the Facebook Event. Click here to view the event. I look forward to seeing you Happy Stampin Steph 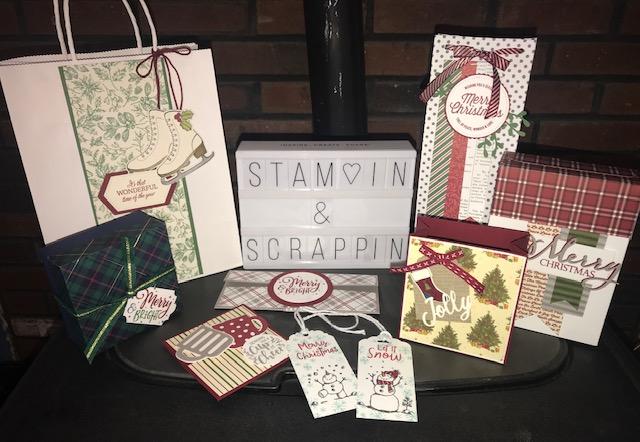 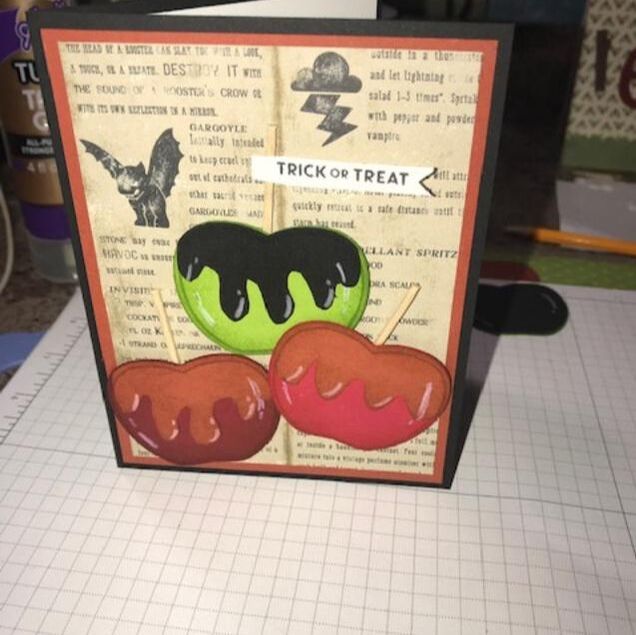 I decided to try my hand at these super fun Candy Apples made with the new Harvest Hello's stamp set and matching Apple Builder punch from Stampin' Up!
OMG LOVE LOVE how they came out!!!! Super easy to make as well! I used toothpicks for the sticks! I drew inspiration from The Craft Sergeant, she put together a video showing how to make the caramel/candy part of the apples. Stamp the image onto the color cardstock you want to use (stamp the image in the same color ink) add some sponges around edges to make the shadow. Stamp the image again onto the color paper you want for the caramel, and fussy cut out the drips, add shaded etc and attach to the top of the apple. That simple. The colors I used for the apples were Cherry Cobbler, Real Red and Granny Apple Green, for the caramel I used Cajun Craze and for the "poisoned" apple I used Basic Black. They are just so fun!!!! You can find the Harvest Hello bundle here I hope you enjoyed Happy Stampin Steph |


Categories
All
Archives
May 2024
|


 RSS Feed