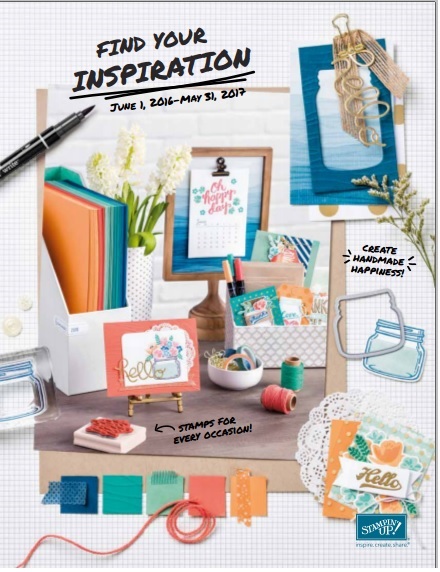
 The New Annual Catalog begins June 1. I can't wait for you to see the inside of this amazing catalog. Jammed with awesome products and ideas. If you're like me then your wish list is going to huge! So keep track of the products you must have using this printable Wish List. Download and print this file at your leisure. And jot down those products as you browse the catalog! Please contact me if you have not received your catalog yet, or if you would like one Happy Stampin Steph
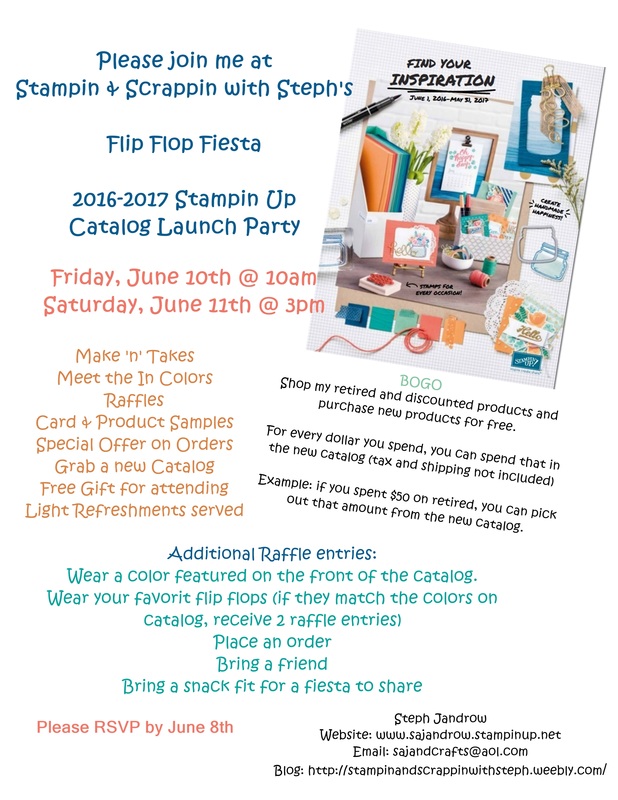
Flip Flop Fiesta - Catalog Launch Party  Have you ever thought about being a Stampin Up Demonstrator? Well, what are you still thinking about??? It's the perfect time to join. When you join in June, you'll get to choose two free stamps. That's right. For $99 you will be able to pick up $125 in product for you starter kit and 2 free stamps sets. See flyer below for details. Feel Free to contact me with any questions. Happy Stampin Steph 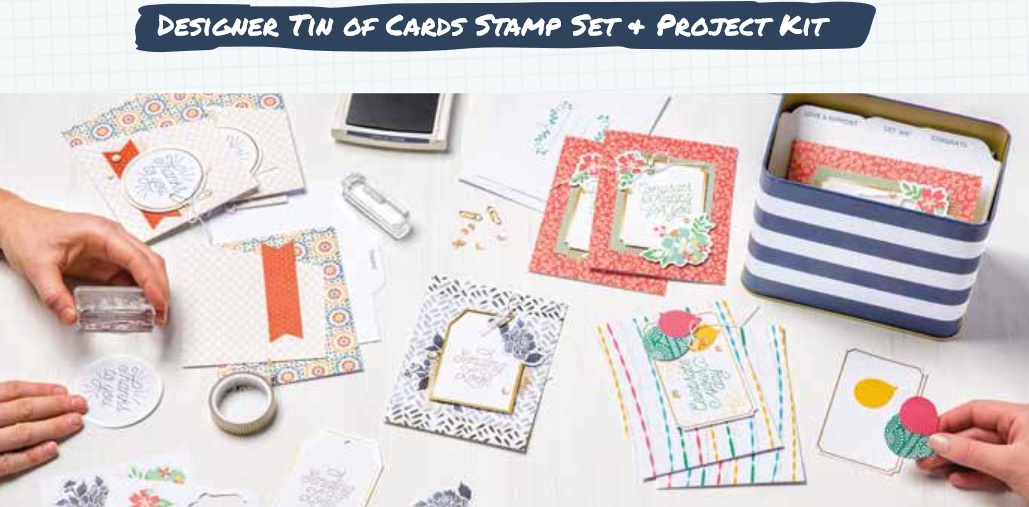 The Designer Tin of Cards Project Kit • 16 cards and all comes with this awesome tin to hold them in.
I will be hosting a Designer Tin of Cards Workshop on Wednesday, June 29th at 9am. The Makes 16 cards: 4 each of 4 designs. Folded size: 4-1/4" x 5-1/2". Includes 16 cardbases and envelopes; printed tin box with lid, 6-3/4" x 4" x 5-3/8"; file tab dividers; printed die-cut images; die-cut Designer Series Paper and vellum sheets; white cardstock tags with gold foil print; washi tape; Baker’s Twine; sequins, gold paper clips. You will make 16 cards all for the low price of just $31.38 (includes tax and shipping) I will provide the stamp set and inks used to complete the kit. Please make sure to RSVP by June 15th so I can order ontime. Want to earn your kit for free? Host a workshop at your home and invite your friends and family to make the Designer Tin of Cards kit. Each kit or Stampin Up products ordered, you will receive Host Rewards towards free merchandise. Feel free to contact me with any questions Make sure to RSVP on time, either on my Stampin UP website or Facebook page. Happy Stampin Steph
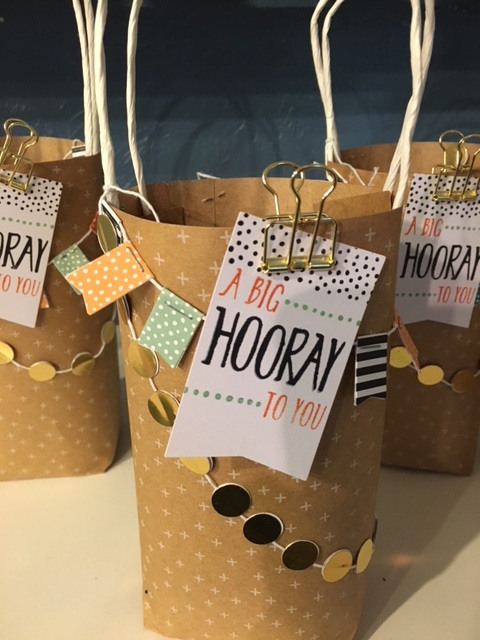
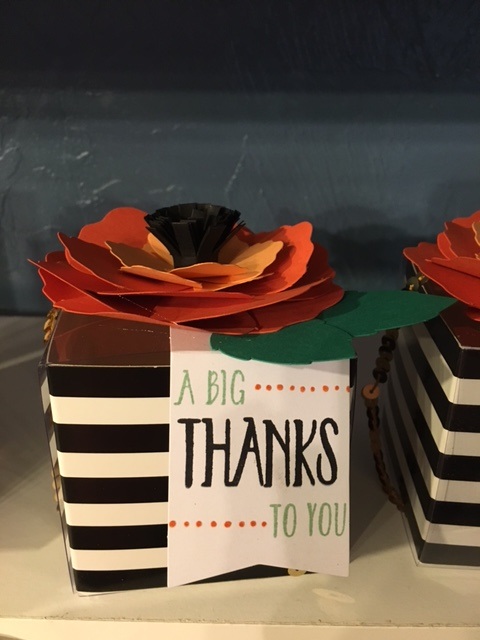
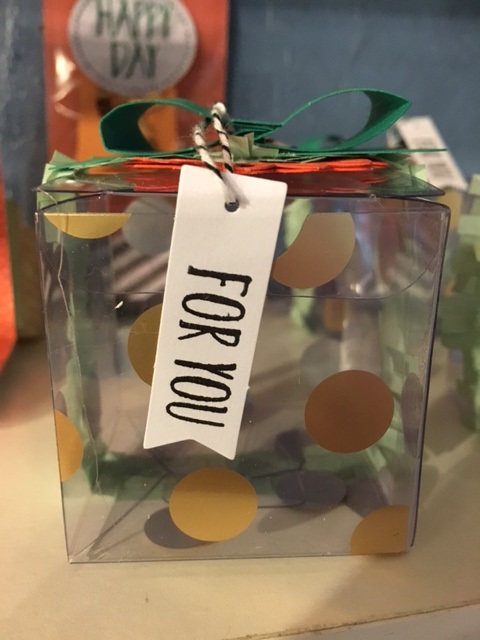
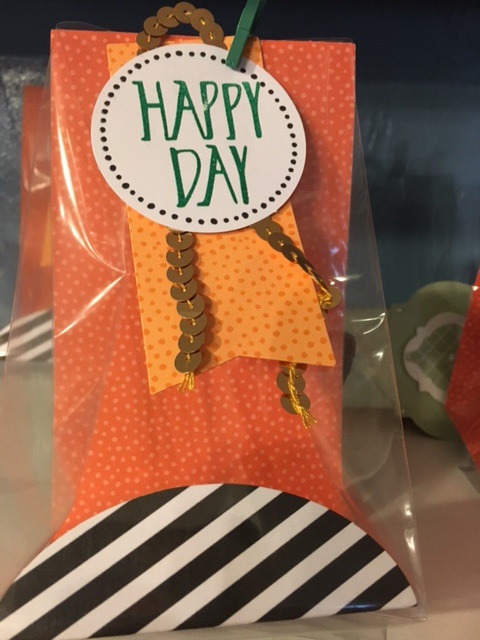
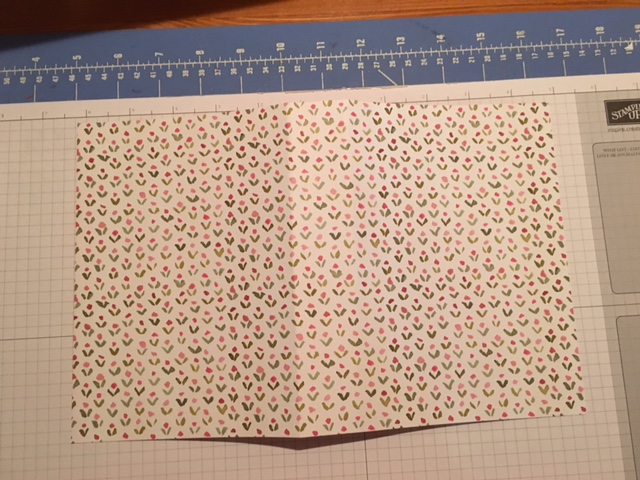
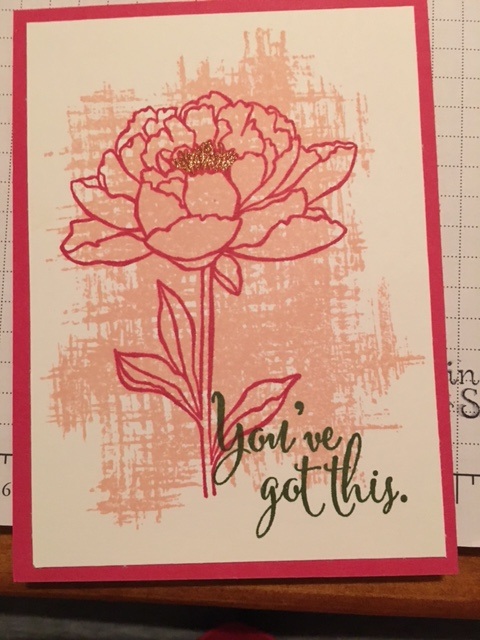
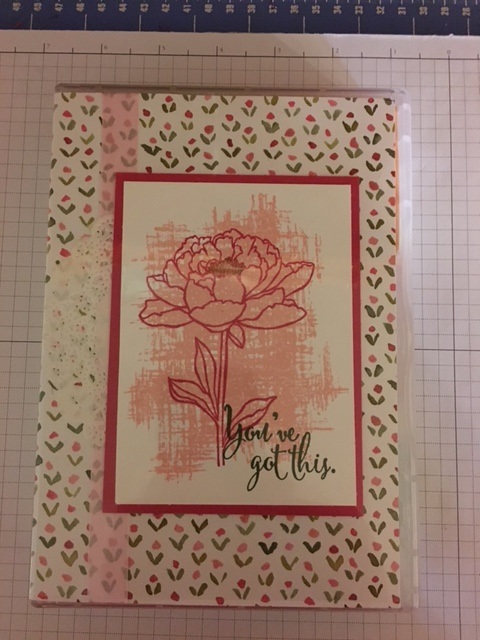
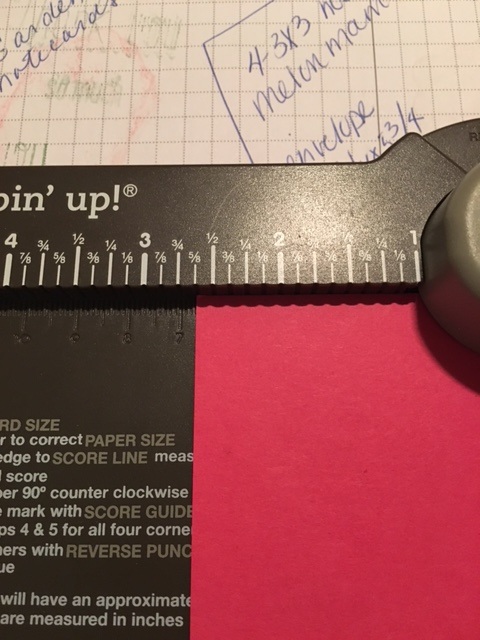
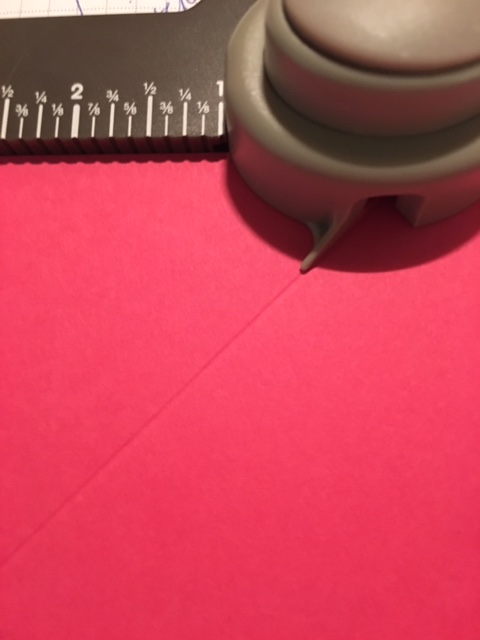
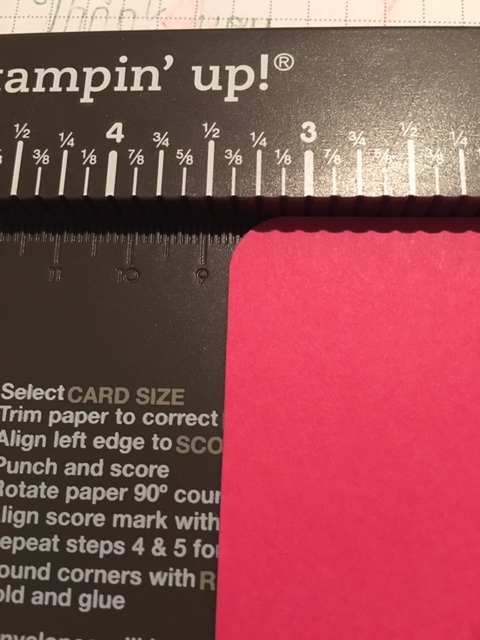
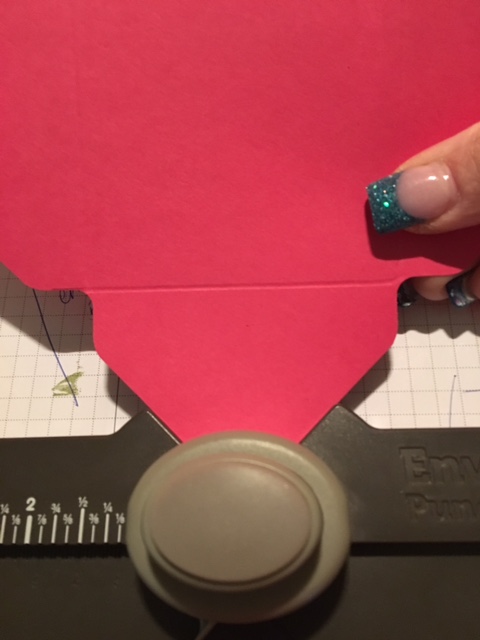
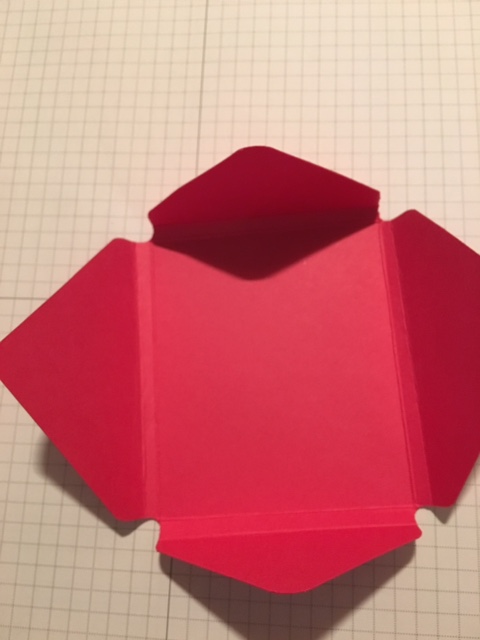
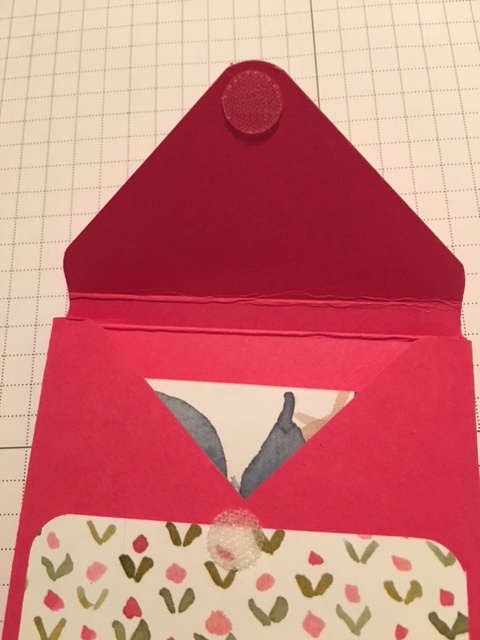
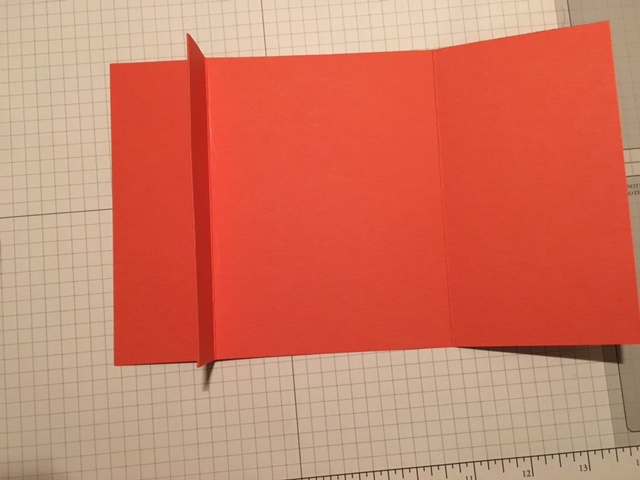
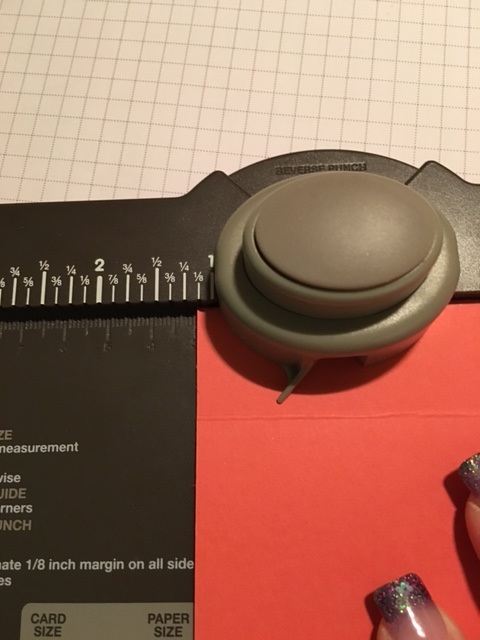
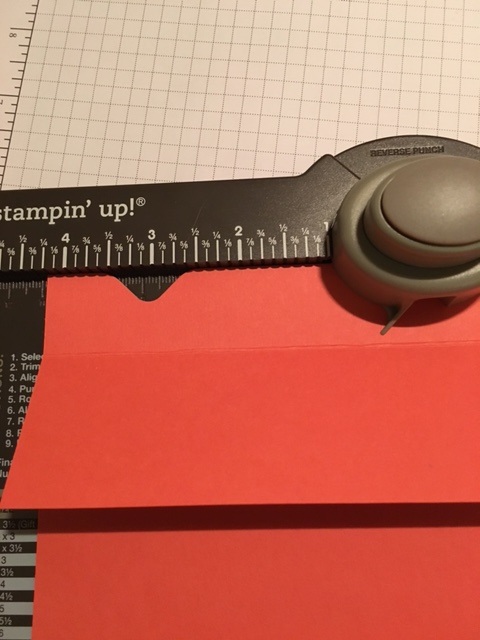
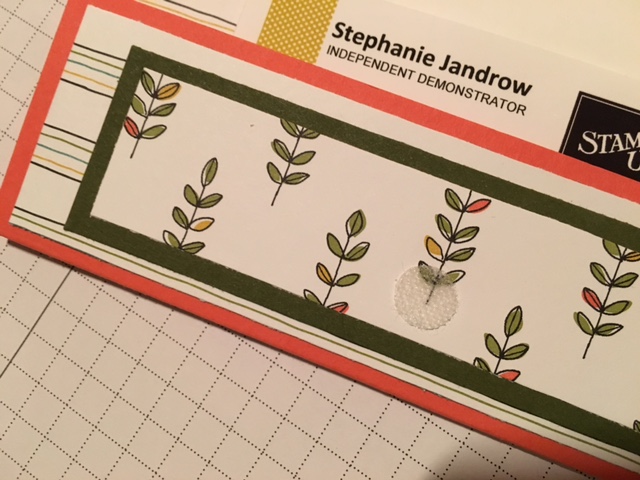
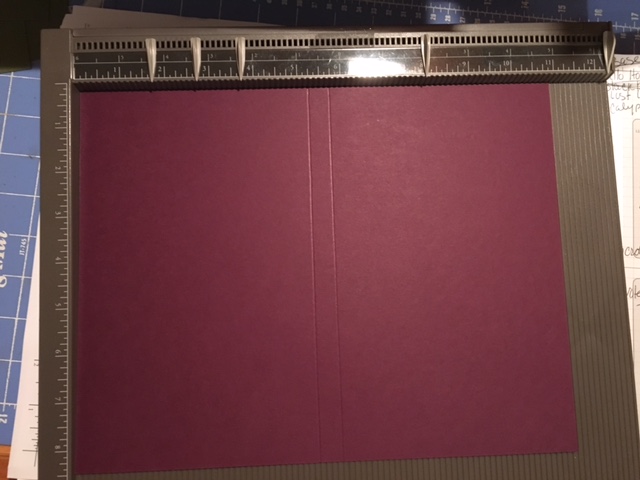
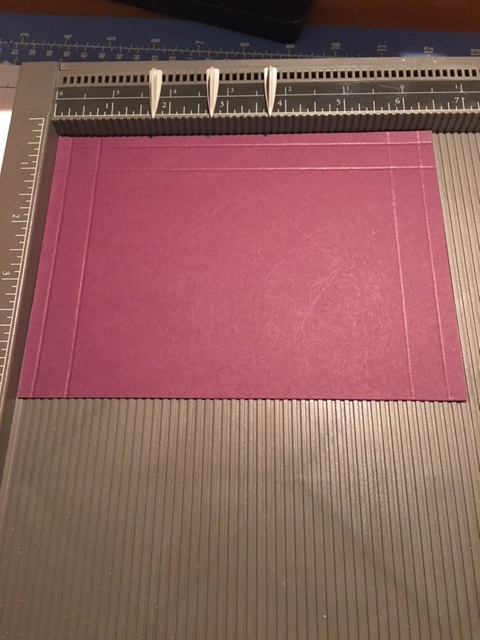
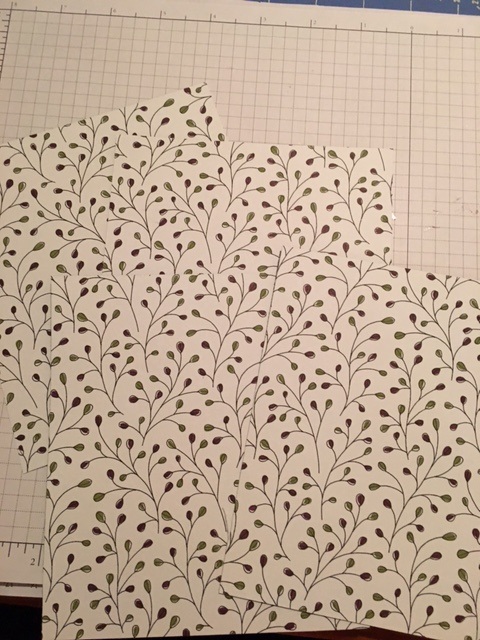
Hope to see you there Happy Stampin Steph 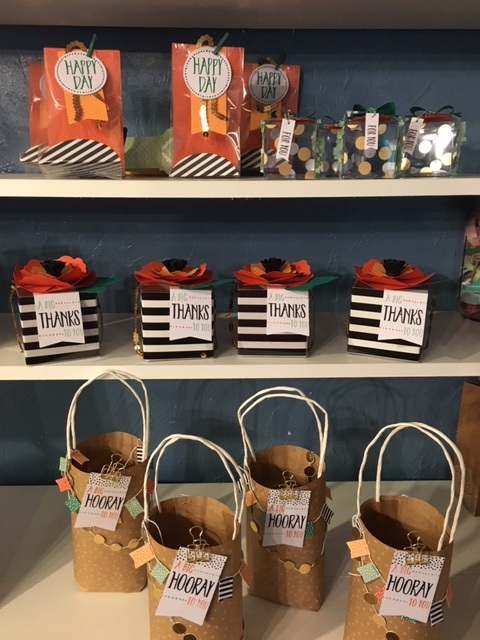 As we anxiously await the launch of the new Annual 2016-2017 Catalog on June 1st, demonstrators were able to pre-order select products in May. I grabbed the gorgeous Perfectly Wrapped Kit and coordinating Perfectly Wrapped Stamp Set that is found on page 159 If you can't wait till then you can join up as a demonstrator and add this item to your starter kit! You get $175 of product to add whatever you like to your kit and pay only $99!! Such a bargain. This kit was so easy to put together. I love how everything coordinates. It truly is the perfect solution for gift giving. And if you're like me, your always searching for the right packaging. The Perfectly Wrapped Project Kit • Makes 8 bags & 8 boxes! WOW crazy. I will be hosting a Perfectly Wrapped Workshop on Wednesday, June 13th at 9am. The kit includes 4 kraft bags, 3-1/4" x 7"; 4 cellophane bags, 3" x 6"; 4 clear acetate boxes with gold foil, 2" x 2" x 2"; 4 cardstock boxes, 3" x 3" x 3"; die-cut cardstock image sheets; Designer Series Paper; Baker’s Twine; labels; stickers; sequin and cotton paper trim; gold clips; mini clothespins. You will make 16 gift packages all for the low price of just $29 (includes tax and shipping) I will provide the stamp set and inks used to complete the kit. Please make sure to RSVP by June 1st so I can order ontime. Want to earn your kit for free? Host a workshop at your home and invite your friends and family to make the Perfectly Wrapped Kit. Each kit or Stampin Up products ordered, you will receive Host Rewards towards free merchandise. Feel free to contact me with any questions Make sure to RSVP on time, either on my Stampin UP website or Facebook page.  Welcome to our May Showers - Sympathy/Thinking of You/Get Well Stampin Friends Blog Hop! We have 13 amazingly talented crafters this month. So much to be had by all when you follow along and check out everyone's blogs and fabulous projects. Make sure to leave a comment to be entered in the Blog Hop raffle. Read each blog, scroll to the end, and leave a comment with #SFMayHop!! Each member and guest blogger, will randomly select a winner from our blog comments. We will then pool those together and randomly select the overall hop winner. I would love to hear some feedback and you will earn a chance to win some Blog Candy! Thank you for visiting my blog from Melissa Thomas's site, and thank you for continuing with the Blog Hop. Enjoy my project and at the end click the NEXT button to continue to Christine Pennington's Blog. Didn't come from Melissa's blog?? That's ok, just click the PREVIOUS button towards the bottom of the blog or scroll to the end and click on Melissa's name to visit her blog.  This month's blog choices were Sympathy, Thinking of You or Get Well. I choice Sympathy to base my projects on. Now, the problem wasn't the card, lately I've been sending out more Sympathy card, than I prefer to. But, the project? Hmmmm, what do you make as a 3-d project for Sympathy? I do not believe I have ever given someone a Sympathy gift, other than tissues. I hope you like what I came up with. It's versatile and can be used for other types of events. Rather than making 1 card. I decided to make notecards. A few quick cards that could be used for co-workers, friends or family. I chose the English Garden Designers Series Paper. Sad this DSP will be retiring. I cut 4 pieces of Whisper White to 6x3, then score at 3". Fold in half. The I cut cardstock to match. I used Mossy Meadow, Hello Honey, Melon Mambo and Night of Navy. Each were cut to a 2 7/8" square. I choice 4 different patterns of DSP and cut each to a 2 3/4" square. I choice sayings from the following stamp sets, Thoughts & Prayers, Teeny Tiny Wishes and You've Got This. Using the Decorative Label Punch: 2 Melon Mambo and one in Mossy Meadow Stamp Praying for You onto Whisper White, punch with Label Bracket Punch Washi Label Punch: 1 Night of Navy Stamp With Sympathy onto Whisper White, punch with Word Window Punch Stamp Sharing in your Sorrow onto Whisper White, punch with Washi Label Punch and trim the ends off to make is straight. Cut Hello Honey to 2 1/2 x 1 Stamp I'm here for you onto Whisper White and cut to 2 3/8 x 7/8 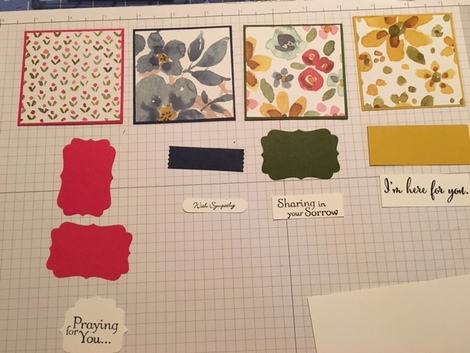 I adhered everything with Snail. No dimensionals. Very simple and fast. I'm sure you can be more decorative. 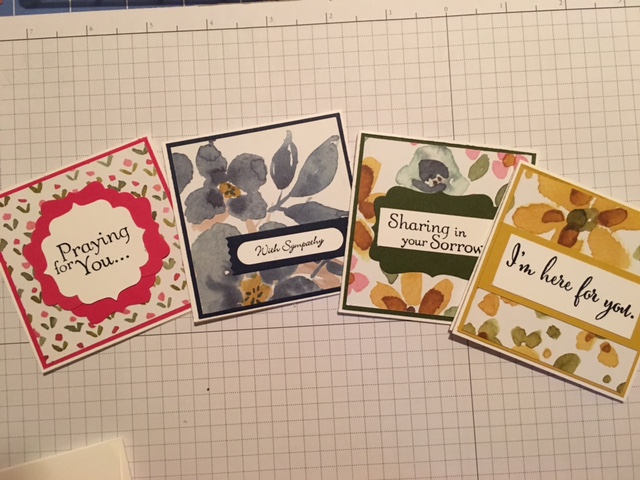 Now for the project, I decided to make a gift that could be given to someone as a Sympathy gift. But, could be used as a Get Well or Thinking of You. I think changing the sayings is all you need to do. I used a full-size Wood Mount Case from Stampin Up. This was perfect. I didn't have to fuss with coming up with a disposable bag or box, that probably would be tossed away after being used. The case was just the right size in depth. You can fit a lot and still close it with no problem. I stuck with the English Garden DSP and cut a piece to 7 1/8 x 11 1/4. I then slid it into the cover. I probably could have cut the length a smidge longer, but I wasn't going to fuss too much. When you close the case, it will create the score lines to the DSP on the spine. Perfect no measuring on the that!! To decorate the front, I removed the DSP from the case first. I used the You've got this stamp set. I stamped the bottom layer in Blushing Bride, the flower in Melon Mambo and the verse in Mossy Meadow. I added some Gold Wink of Stella to the center of the flower. It's hard to see in the picture, but I wrapped the DSP using Blushing Bride seam binding ribbon,and added a doily, cut in half. Just to add a little more embellishment. Whisper White measures: 3 1/4 x 4 1/2 and Melon Mambo measures: 3 1/2 x 4 3/4 Once it was dry I slid it back into the case. I put tissues, hand sanitizer, chapstick, some tea, a notepad and I am also going to include some candies. Perfect. 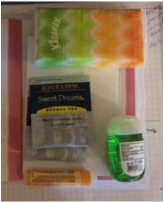 But wait I'm not done, I needed somewhere to put the notecards. I wasn't going to just throw them inside the box. So I made an envelope pocket. I went back and forth with the size. How big or small? Should it take up the inside cover? I stuck with the smaller size so it wouldn't compete with the contents when closing the case. I chose 3x3 1/2 as my card size to have a little extra room. It shows I need a sheet of paper that measure 5 3/4x 5 3/4. I used Melon Mambo. The first score line is at 2 5/8. So punch then score, turn the paper and line the score line up with the guide. Punch and score again, repeat until each side is done. I needed to make the envelope slightly wider, or deeper to fit the 4 notecards and notecard envelopes. so I went around and scored about 1/4 wider punch did not punch. So line the paper up again with the wider tab at 3 3/8 and score (see 3rd picture) do not punch, turn and score at the smaller tab at 2 7/8. Turn and score at 3 3/8 and turn and score at 2 7/8. So the 3 3/8 scoring should opposite each other as well as the 2 7/8. Fold and burnish the score lines. Oh and if you want the corners rounded. Insert into the reverse punch on the punchboard. See 6th picture. Assemble like you would a regular envelope. I cut a piece of DSP to cover the folds. I added Velcro to hold the envelope closed. And finally I glued the envelope to the inside of the woodmount case using the Tombow multipurpose adhesive. 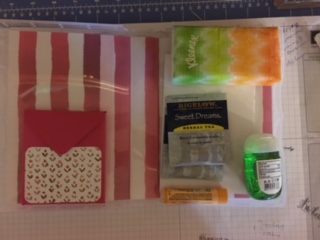 I hope you enjoyed my blog. Thanks for Stopping by To continue the block hop click the next button to visit Christine's blog.  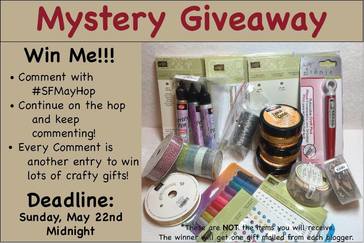 Don't forget to leave a comment to be entered in the Blog Hop raffle. Read each blog, scroll to the end, and make sure to leave a comment with #SFMayHop!! Each member and guest blogger, will randomly select a winner from our blog comments. We will then pool those together and randomly select the overall hop winner. I would love to hear some feedback and you will earn a chance to win some Blog Candy! Elizabeth Jeanne -- http://craftsbyhappystamper.com/2016/05/19/sympathy-themed-stampin-friends-blog-hop
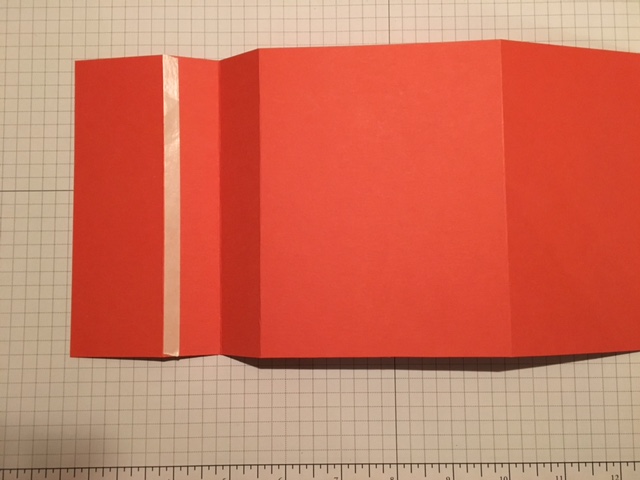
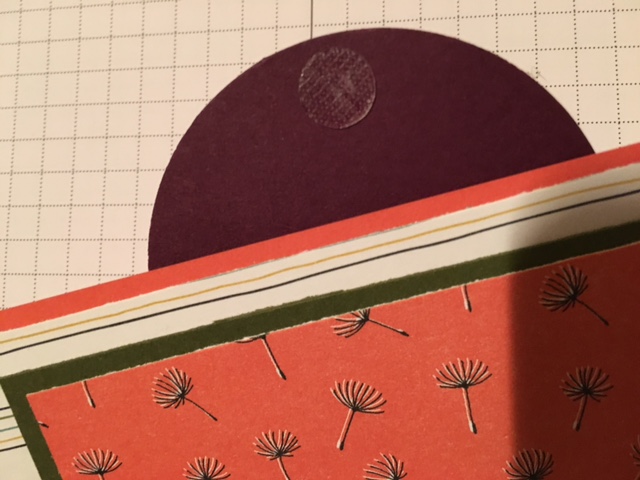
Kirsteen Gill: http://www.creatinwithkirsteen.com/home/stampin-friends-may-hop Kathie Rotti https://kathielovesstamping.wordpress.com/2016/05/19/stampin-friends-may-hop/ Carolina Evans -- http://studioevans.blogspot.com/2016/05/stampin-friends-may-blog-hop-thinking.html Maria Willis -- http://cardbomb.blogspot.com/2016/05/stampin-friends-blog-hop-may.html Bibi Cameron http://www.bibicameron.co.uk/2016/05/stampin-friends-may-blog-hop-sympathy.html Leanne Johnson -- http://literallymyjoy.blogspot.com/2016/05/stampin-friends-may-blog-hop.html Melissa Thomas http://stampinbythesea.weebly.com/blog/stampin-friends-blog-hop-for-may-thinking-for-you Steph Jandrow - http://stampinandscrappinwithsteph.weebly.com/home/may-showers-stampin-friends-blog-hop Christine Pennington: http://www.christinepennington.com/my-blog/stampin-friends-may-blog-hop Siara - http://www.siarasweetsensations.com/2016/05/stampin-friends-sympathyget-well-blog.html Deana Benson- http://www.designcreativelybling.com/2016/05/stampin-friends-may-blog-hop.html Lynn Streifert- http://lynnzcrafters.com/2016/05/16/stampin-friends-may-hop/ 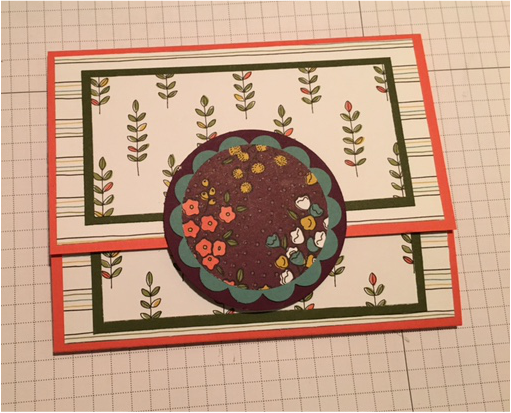 Day 5 - Last but not least. To end Teacher Week I decided to stick with a gift card. Perfect, the teachers can use the card for themselves. I came across this Giftcard Card while I was scrolling through Pinterest. The original design was from Lea Denton of The Crafty Spark. Her design uses measurements for a sheet of A4 paper. I modified it to work for a standard sheet of 8 1/2x11 cardstock in the US. You could use a sheet of 12x12 and use Lea's measurements if you preferred. You can view Lea's design here. So I started with a sheet of Calypso Coral 8 1/2x11 cardstock and cut it to 5 1/2x11. I used my Simply Scored Scoring tool. Place the 11" side at the top and score at 1 3/4, 2 3/4, 3 3/4 and 8. 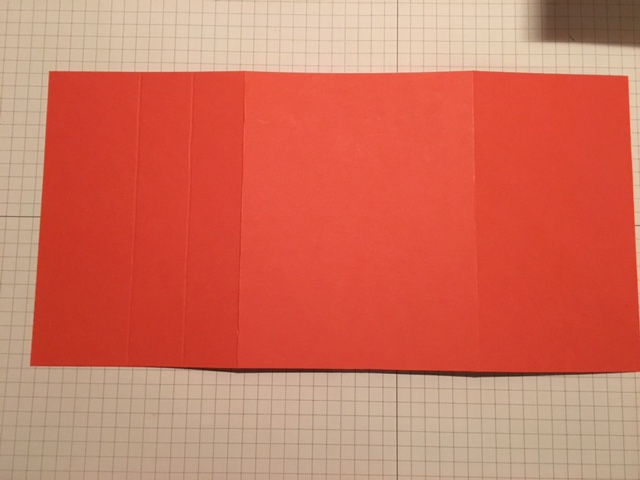 Fold on the score lines. Except on the 2 3/4 score line you are going to fold it in the opposite direction. 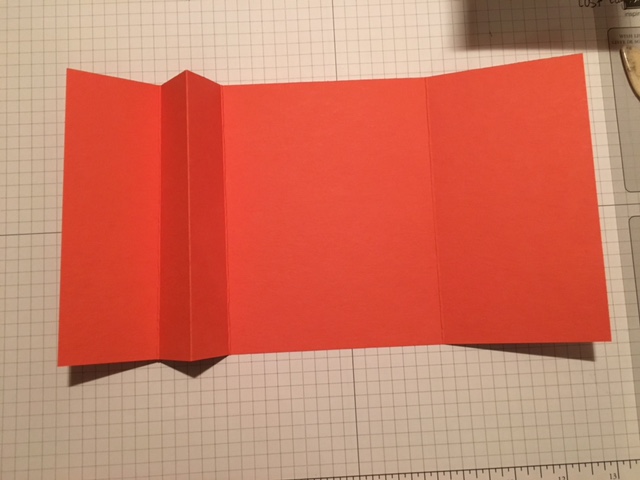 Then you will need to turn over you paper and add a strip of adhesive at the 1 3/4 score line. Make sure to add adhesive as close to the score line as possible. You will seal this together at the 3 3/4 score. Turn it over, this section will become the pocket to hold the giftcard. To make the giftcard pocket, you will need to use the Envelope Punch Board. You will not be scoring, just creating the 2 notches. Take the section you just glued (folded side up) and line up the left side at 1 1/8" and punch. Move it over to 4 1/4" and punch again. Boom that's done. Next, with your trimmer, line up the edge of the pocket (the side that's folded) and trim off just a smidge to open the pocket. Don't go too far down. You want to make sure there is enough to hold the gift card in. 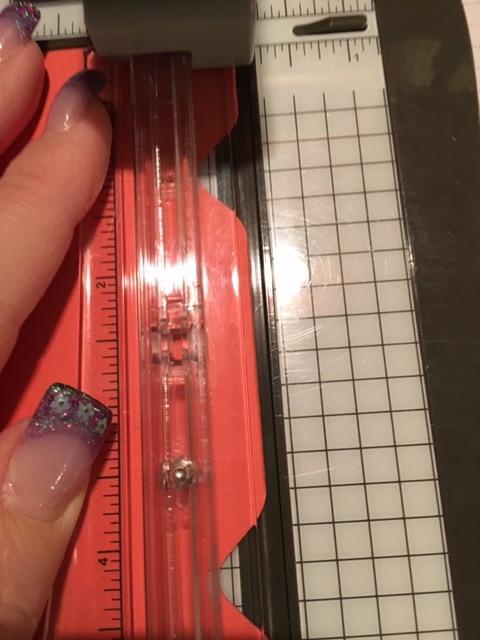 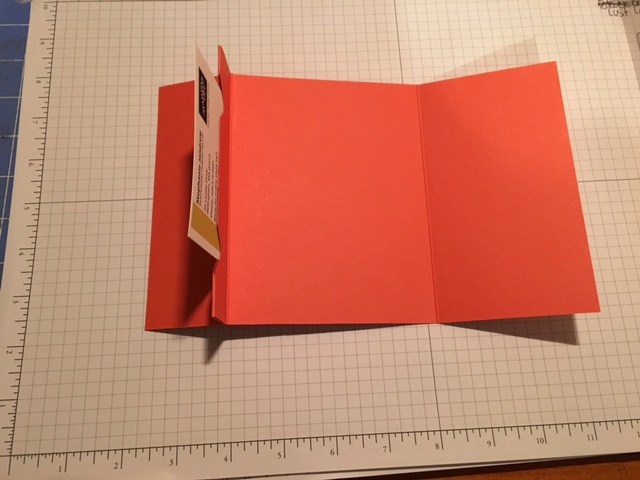 Ok, lets decorate. I had enough of the Wildflower Fields DSP to finish up the week. Yeah I like when that happens. Now I am no longer sitting on retired paper I am wondering what I'll do with it. Starting with the inside. I layered the DSP Inside top flap DSP: 5 1/4 x 2 3/4 CS: 4 1/2x 2 1/4 DSP: 4 1/4x2 Inside: DSP: 5 1/4 x 4 CS: 3 1/8x3 1/8 WW: 3x3 Inside Bottom Flap DSP: 5 1/4 x 1 1/2 CS: 4 1/2x1 1/4 DSP: 4 1/4x 1 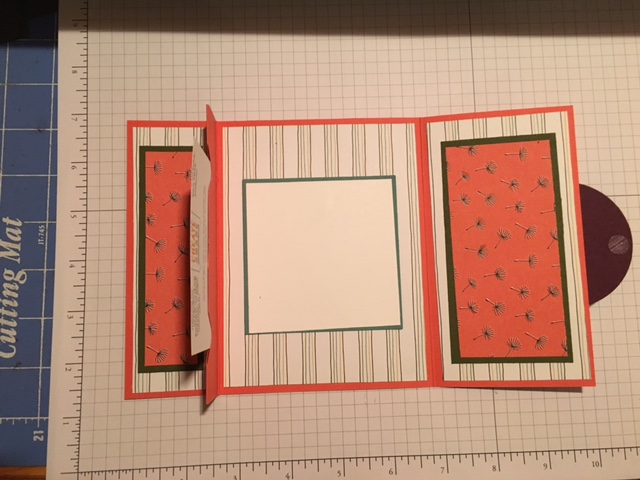 Now for the outside of the card: Same process except you do not need to decorate the middle section since this becomes the back of the card Outside top flap DSP: 5 1/4 x 2 3/4 CS: 4 1/2x 2 1/4 DSP: 4 1/4x2 Outside Bottom Flap DSP: 5 1/4 x 1 1/2 CS: 4 1/2x1 1/4 DSP: 4 1/4x 1 The I used contrasting colors from the DSP pack to make the closure. Punch a 2 1/2 circle in Blackberry Bliss Punch a 2 3/8 scallop circle in Lost Lagoon Punch a 2" circle with the DSP in a different pattern. Adhere on the front only at the top half. We will add Velcro to keep the card shut. So what I did was added both the top and bottom pieces of Velcro onto the back of the circle. Then close the card, and press, the bottom part of the Velcro will stick to the card. Just add giftcard and it's all done. Love it!!
Hope you enjoy this week's projects. Feel free to contact me with any questions! Happy Stampin Steph 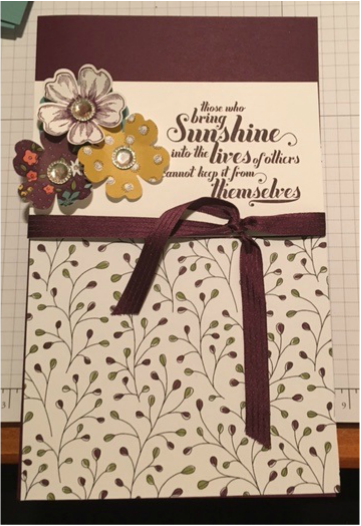 Day 4 - Notepad Holder I decided to make a notebook holder for day 4. It's my go to quick gift. Super easy! I feel like you can never have enough notebooks around. I used Blackberry Bliss Cardstock as the base of the holder. You can make 1 notebook holder out of a sheet of cardstock. I'm this particular one, I added a pocket on the inside. You can choose to skip to save paper too. The holder is sooo easy. Take a piece a 8 1/2x11, Take your Simply Scored Scoring tool, with the 11" side at the top score at 5 1/4 & 5 3/4 Boom folder is done. Fold on the score lines and add the notepad to inside right. I used little legal pads I found at Wal-Mart. I think they are like 5x8. To make the pocket, you will need a piece of cardstock that measures 4 3/4 x 6 1/2. Easy - score at 1/2" & 3/4" on three of the sides. You will need to fold on all the score lines. Then cut out the corners you don't need that section. The 1/2 section when folded, will be the section that adheres to holder and the 1/4" will be your sides. Hope this makes sense. Tear n Tape to adhere the pocket down.  To decorate the holder. I cut a strip of DSP that measure 1x5. I glued this onto the top of the notebook to hide that binding. Plus it gives the inside a little extra touch. 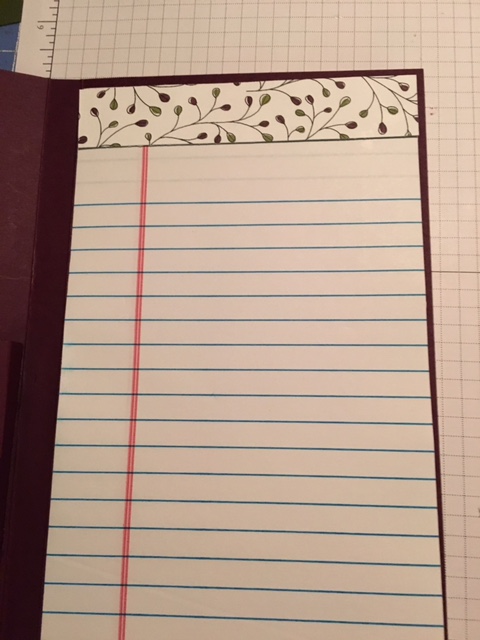 I cut a piece of DSP to 5 1/4x6 and glued it onto the front of the holder. I then cut a piece of Whisper White to 2 7/8x5 1/4.I stamped the saying from the Feel Goods stamp set in Blackberry Bliss. Then I tied a knot around the white in the Blackbery Bliss Stitched Satin ribbon. I then glued it onto the front of the holder overlapping the DSP allowing the Blackberry Bliss cardstock to still show at the top. I stamped a flower from Flower Shop in Blackberry Bliss and punched it with the Pansy Punch. I then punched 3 more flowers with the Pansy Punch using scraps of DSP and Lost Lagoon Cardstock . I added a Iced Rhinestone to the center of the flowers and then layered them onto the front of the holder. 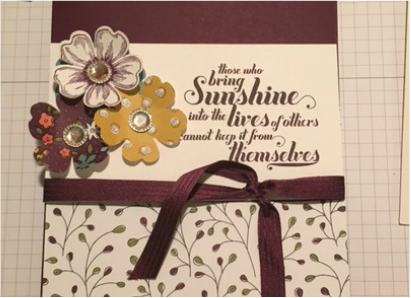 Just love it. I love that no matter how many times I make this notebook holder, it comes out looking so different!!!! Perfect for teachers right!!! Like I said in the beginning I was 100% on the Wildflower Fields DSP but, have truly come to love the colors as I worked to create these gifts. I enjoy working to coordinate as well. It makes me happy when the guess work is taking out of the equation and I can create at ease. Got to love Stampin Up!!!! 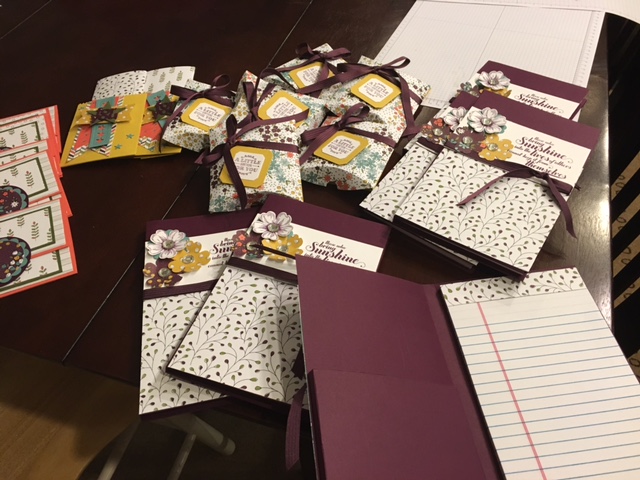 Check in tomorrow and see what I made for the 5th a final day of Teacher Appreciation week.
I am so happy with the results. Thanks for taking a look Happy Stampin Steph 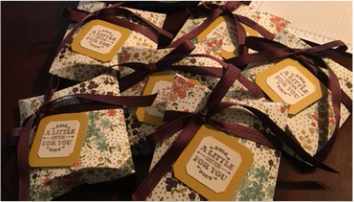 Day 3 of Teacher Appreciation Week. Today's project is a little lip balm packaged in a pillow box. As mentioned in Day 1, I did use a little bit of retired product to use things up. This project was fairly simple. I cut a piece of Hello Honey cardstock out using the Square Pillow Box Framelits (retired from Stampin Up).I repeated the step and cut out a second piece using the Wildflower Fields DSP. I stamped the A Little Something for You in Blackberry Bliss and cut it out using the framelits provided in the Square Pillow Box. I cut the larger one in Hello Honey and layered together. I assembled the box and tied a bow using a piece of Blackberry Bliss striped satin ribbon (retired) around. I attached the saying just under the bow. Like a said EASY. I found this little Vaseline Lip Balms at Walmart in Health and Beauty where the rest of the Vaseline is sold. The idea of this project came from a similar gift given to me by my Upline's, Upline Barbara Lash. She gave me a pillow box with the Vaseline Lip Balm in it. I thought it was sooo adorable. I couldn't wait to make it to give out too. Come back tomorrow to see Day 4 Happy Stampin Steph 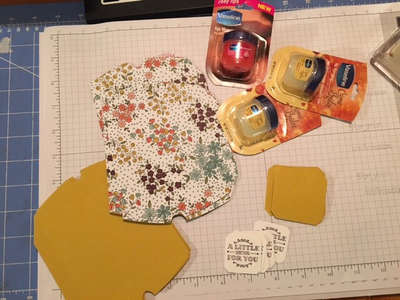 |


Categories
All
Archives
May 2024
|
||||


 RSS Feed