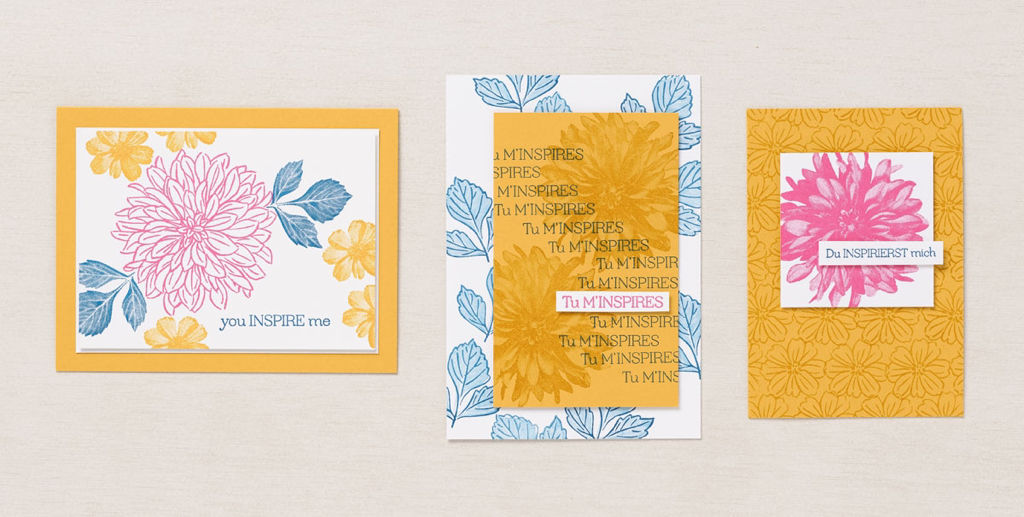
 Simple Stamping with Delicate Dahlias
If you are looking for gorgeous florals to add to your stamp collection, the Delicate Dahlias Sale‑A‑Bration Stamp Set is an excellent choice. And with just a $100 usd | $120 cad purchase, you can get this two-step Distinktive stamp set for FREE. You may want to imagine these dahlia images as dinner plate-sized blooms—because that’s how big some varieties grow in real life. They add instant beauty to any garden landscape with their candy colors, and because these flowers bloom into September in the Northern hemisphere, they can be stamped with abandon to create cards in warm autumn tones. (Our friends in the South Pacific start planting dahlias in September, so their choice may be fresh, springtime hues!)This month’s “simple stamping” projects were a cinch!
Happy Stampin Steph
0 Comments
For details on how I assemble this card, be sure to check out my newest You Tube Video Thanks for Stopping by Happy Stampin Steph Click on the headings below, each is a link to the full Card Share and 3 other cards that I made
Card Share Cutest Halloween Fun-Fold Card Beautifully Penned Card Peaceful Prints 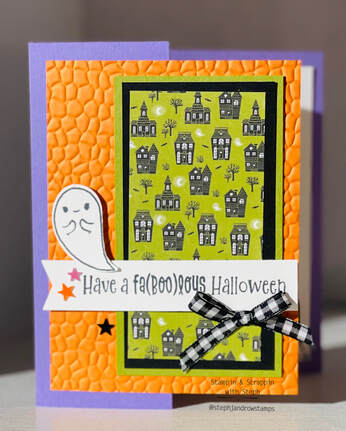 Today I made a fun fold card to share with you! Is it cute?? I made the card using the new Cute Halloween Suite by Stampin Up. This suite will be available in the new Mini Catalog August 2021. To make this card you will need the following: Measurements- Highland Heather 5 1/2 x 8 1/2 score on 8 1/2 side at 2 1/8 & 4 1/4 Pumpkin Pie 3 3/4 x 5 Embossed with Hammered Metal Folder Basic Black 4 1/4x2 1/4 Basic White 1 x 4 1/4, 3 3/4x 5, 4x3/4 Old Olive 4 1/2x 2 1/2 Supplies- Cute Halloween Suite pg 5 Mini Catalog
Banner Pick a Punch Hammered Metal 3D Embossing Folder Memento Tuxedo Black Ink Pumpkin Pie Ink For complete directions on how I assmbled the card, check out my newest video on YouTube. Thanks for stoppin by Happy Stampin Steph Click on the headings below, each is a link to the full Card Share and 3 other cards that I made
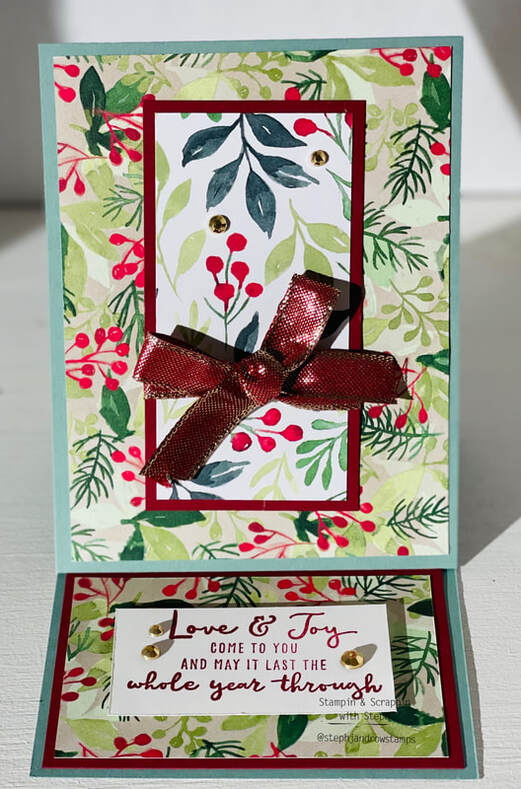
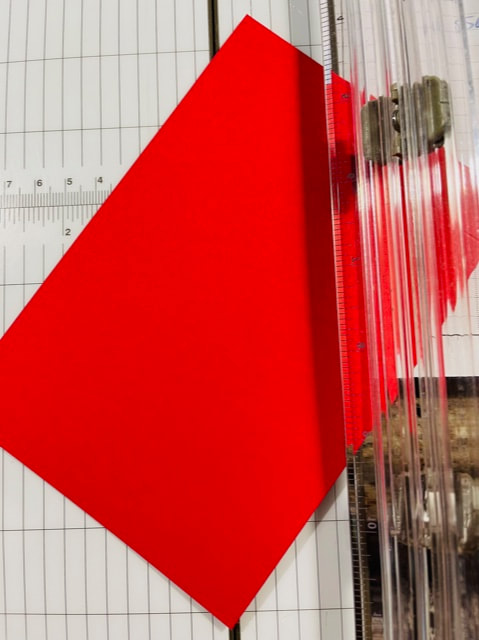
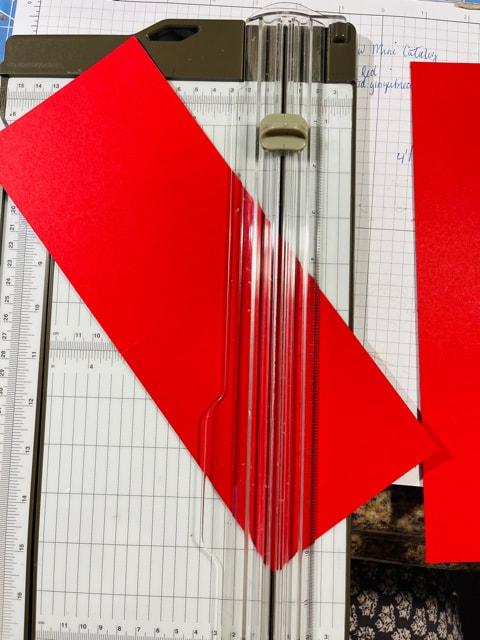
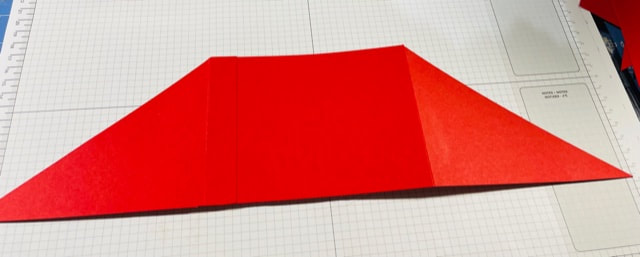
Card Share Beauty of Tomorrow and Christmas to Remember Easel Card Beautiful Penned Card Peaceful Prints  Today I am sharing with you a couple of my favorite projects! These are projects I have been making them for many years. This month's Stampin Friends Blog Hop Them is Rewind & Redo. Take something old and redo it to something new. How fun is that??? If you hopped from Tiziana Milano's blog, wasn't her projects AMAZING?? Be sure to continue to Kim Lamos after mine. And be sure to leave a comment I'd love to hear what you think! We have a packed hop with amazing projects so be sure to visit everyone. I have a provided a list of hoppers at the end of this blog. I knew right away the card I wanted to redo was the Triangle Flap Pocket card. And a go to box that I've made in different ways over the years. Now sadly I have searched for my original project and couldn't locate one. Which is crazy because I've made it so often! 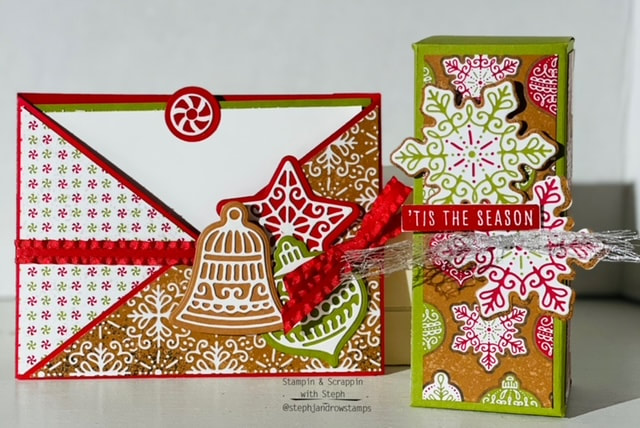 I used the brand new, not yet, available, Frosted Gingerbread Suite....It's just so stinkin' fun. I have never been successful baking or decorating gingerbread, so this suite is so easy to create fun designs!! To make the card I used Real Red Cardstock as my base and Old Olive for the card insert. You will need: 2 pieces of Real Red 4 1/4x11 and 4 1/4x 6 1/4 Old Olive 4 x 5 1/4 Basic White 3 3/4x 5 DSP 4 x 5 1/4 - cut on the diagonal. Some scrap pieces of Cinnamon Cider, Old Olive and Real Red and Basic White Take the largest piece of Real Red and with the 11" side at the top of the Simply Scored Score Board, score at 5 1/2 Using you Stampin Trimmer, line up the top of the score line to the bottom corner in the cutting line and cut...this will make a triangle flap. See picture. Take the smaller piece of Real Red and with the 6 1/4 side at the top score one side at 3/4 Then line up the bottom edge of the score line to the bottom corner in the cutting line and cut the triangle. Add adhesive to the 3/4 score section and adhere to the edge on the back of the large piece and fold over to the front, this will create the second flap. Now, take your triangles cut from the DSP and adhere to the flaps, reversing one side of the DSP.
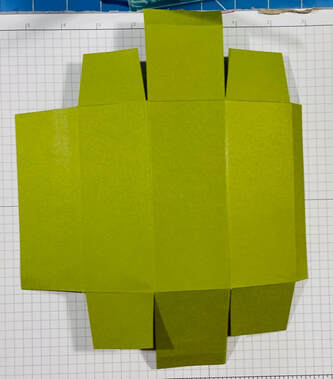 2. Cut down on the score lines to create tabs in the next section, remove the 1/2' section and then section below it then slight trim the next. 3. Keep the next sections in tact and round the corners, this will be the lid or bottom of box. 4. Repeat step 2. 5. Remove the 1/2 tab 6. Add adhesive down the remaining 1/2 strip, fold box over and seal. To decorate I cut the DSP 4 pieces 1 3/4x 4 3/o make the snowflakes, I used the dies that coordinate and cut them out using the DSP. I hope you enjoyed the projects I share with you. Be sure to leave a comment and visit everyone's Blog. Thanks for stopping by Happy Stampin Steph Below is a list of this month's Blog Hop Participants:
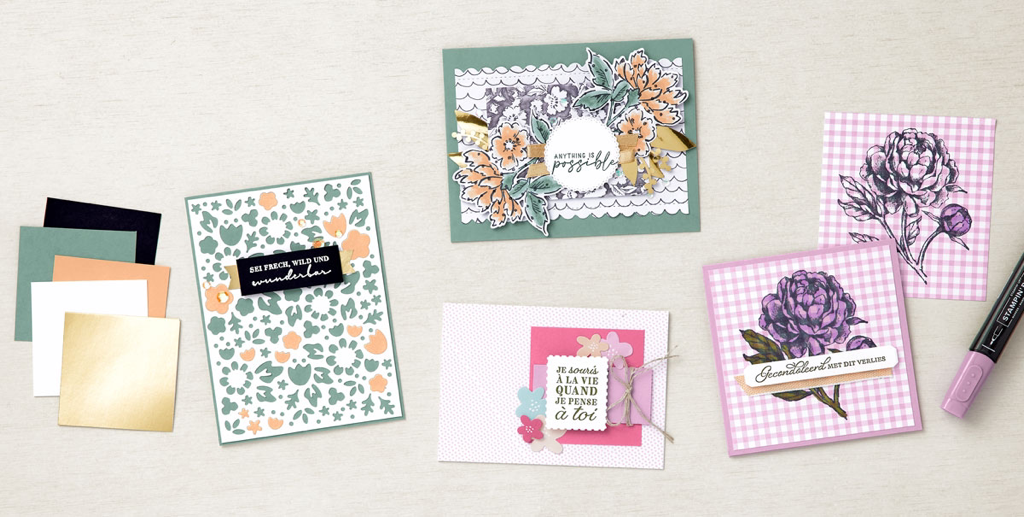 CASE = Copy and Share Everything Are you shy about CASEing? Seeing what Stampin’ Up! artists copy and share might help you feel a little more at ease and give you the courage to start employing this handy method for jumpstarting your own creativity. We suggest copying the layout, color scheme, or technique, but you can copy anything that makes you feel like pulling out your crafting supplies and starting on a project! For the Je souris à la vie card, we CASEd the card’s eye-catching layout with its lovely layers and accents. We also feature a great technique that you can add to your papercrafting knowledge base: Use cornstarch or baby powder on the back of stickers when you want to remove the stickiness. This makes it easy to pop them up using Stampin’ Dimensionals. (We love trying new things!)
We CASEd a breathtaking color combo (Basic Black, Basic White, gold, Pale Papaya, and Soft Succulent) to create the Wunderbar card. Isn’t that color combination striking? We also used the new 5-5/16" x 4" (13.5 x 10.2 cm) Flower Market Die to make a perfect layer, allowing you to enhance a card front with lattice-like intricacy and detail. As you can see, we added cardstock scraps to the back to pull in extra color and create interest. You’ll love that effect in your cards! On the Gecondoleerd card, we CASEd stamping and coloring on Designer Series Paper, and we think the Fresh Freesia and Mossy Meadow Stampin’ Blends look lovely together! And our new Pale Papaya & White 1/2" (1.3 cm) Ribbon adds just the right touch of softness to complete the card. What do you CASE? Share your projects! Happy Stampin Steph  Q: What do you get when you cross a sheep with a porcupine?
A: A sheep that can knit its own sweaters. We couldn’t resist sharing a corny sheep joke with you, because in case you haven’t “herd,” Sale-A-Bration is just around the corner. And . . . are “ewe” ready for this? From 3 August–30 September 2021, you can earn fabulous, FREE Sale-A-Bration products with a qualifying purchase—like the Counting Sheep Stamp Set and coordinating Sheep Dies. They’ll have you flocking to parties so you can earn yours! CASUAL Fühl dich geknuddelt Card (4-1/4" x 5 1/2") (10.5 x 14.9 cm)For our casual project, we used just a few products to create a fun, simple card that anyone can make. Stamp and die-cut the sheep, add a little color with Smoky Slate Stampin’ Blends, create a dimensional background with 1" x 3" (2.5 x 7.6 cm) strips of Basic Gray Cardstock, then dapple the “sky” with Resin Stars. Baa-adorable. AVID Tu es supeeerbe Card (4-1/4" x 5 1/2") (10.5 x 14.9 cm)We fancied up the Avid card by embossing the Basic Gray Cardstock Strips with the Painted Texture 3D Embossing Folder. Our special trick? Add a little White Craft ink to the folder to leave cloudy impressions on the embossed paper. ARTFULLY AVID You’re Amazing Card (4-1/4" x 5 1/2") (10.5 x 14.9 cm)For our final card we used Blending Brushes to add Basic Gray and Tuxedo Black Memento ink to a piece of Smoky Slate Cardstock. Once the inks were blended, we spritzed the cardstock with water, then splattered it with White Craft ink before cutting the paper into 1" x 3" (2.5 x 7.6 cm) strips. This time we used the inked embossing folder technique on the card base, giving it a marbled look that contrasts nicely with the darker cardstock strips beneath. Do you have any fun projects you’ve made with Stampin’ Up! embossing folders? Share them with us on social media! Happy Stampin Steph 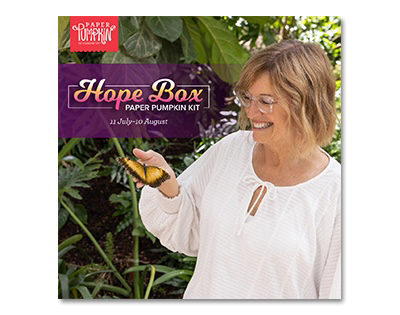 Empower yourself and others with the Hope Box Paper Pumpkin Kit! Created from the heart and soul of Stampin’ Up! cofounder, Shelli, the Hope Box Paper Pumpkin Kit reminds us why life is precious. This month’s Paper Pumpkin kit includes supplies to create nine encouraging cards and coordinating envelopes in an inspiring color palette, and a specially designed Hope Box! The Hope Box is designed to be a keepsake box—keep mementos of cherished memories or reminders of what’s yet to come. Collect treats and trinkets that represent what hope means to you in your Hope Box and look inside for inspiration or share it with a friends who could use some uplifting! What will you put in your Hope Box? Letters, song lyrics, inspiring quotes, and photographs are powerful reminders of hope and connection—and great additions to a Hope Box. For more inspiration on how to build your Hope Box, watch Shelli herself put one together in this video. |


Categories
All
Archives
May 2024
|


 RSS Feed