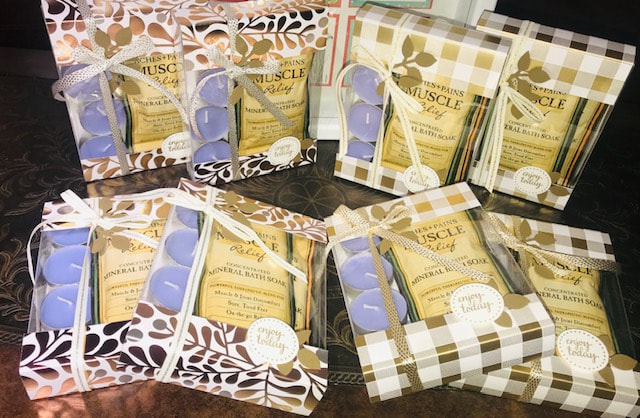
 With Teacher Appreciation being celebrated and the end of the school year around the corner, it's time to think about what to give! Most of the time I plan a gift card! I feel the teachers really appreciate that, and they can choose what ever they really need or want rather than receiving 20 novelty gifts that they may not have use for year after year! But I like to dress it up! Recently, I had the opportunity to display my projects at a Spring Pop-Up shop event. I worked on several projects for Mother's Day, Spring/Summer and Father's Day, I am hoping to post so more as the days go by. But this is the spa set I put together!
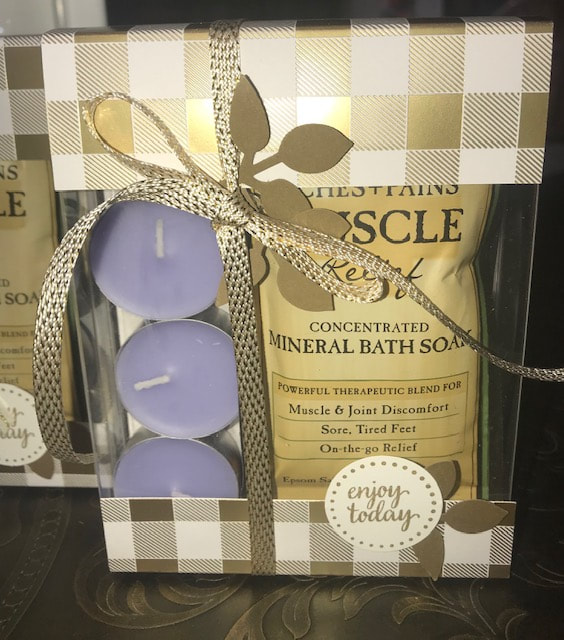
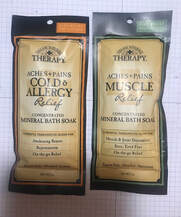 I found the boxes, lavender tealights and 2 types of bath soaks on Amazon. I was able to plan my project, order the supplies and have them here in a day! PERFECT! They are the perfect sizes for this project. And...teachers are their feet all day and dealing with germs! The definitely need some relaxation!!! Acetate Boxes Lavender Tealights Cold & Allergy Relief Aches & Pain Muscle Relief To make the wrap of the box, you will need a piece of paper 4 1/2"x10 1/2" and you will score on the 10 1/2" side at 1", 2 1/8", 8 1/8" and 9 1/8". I used a little bit of adhesive to hold the paper in place as I wrapped it around the box. Make sure you add your candles and soaks to the box before wrapping. The paper I used is called Year of Cheer Specialty Designer Series. It's now retired! Are you like me, I buy paper and I have to save it until I find the perfect project to use it on??? I felt this project was just right! I added the leaves from the Leaf Punch in Soft Suede, greeting from the Eastern Beauty stamp set was stamped in Soft Suede and then punched out with a 1 1/4" circle punch. Then finally I wrapped the box with a piece of Metallic gold or silver ribbon. The ribbon was about 30" long but you can probably go a little bit shorter, depending on the size of the bow you'd like to finish with. I am very pleased with this project and so happy have come across it! I feel like with a project like this, the possibilities are endless on what they can be used for!!! What do you think?? Feel free to leave a comment! Thanks for stopping by Happy Stampin Steph
1 Comment
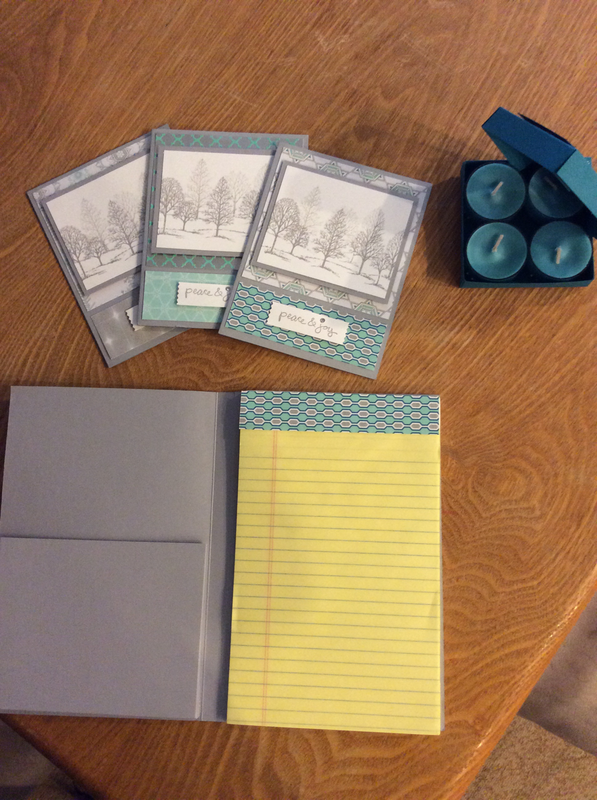
So I've had several requests to post the instructions for the notebook set I posted a few days back.
So here you go, it's very simple: Notebook: You will need 1 sheet of card stock 8 1/2 x 11. With the 11" side on the top score at 5 1/4" and 5 3/4". Fold on the score lines. To create the pocket on the inside, cut a piece of card stock to 6 1/2 x 4 3/4. Score at 1/2" & 3/4" on 3 sides. Fold on the score lines, you will need to cut up to the 3/4" score lines at the bottom of you pocket. Use a strong adhesive to glue to inside left of the cover. The pocket will measure 5 x 4 when done. On the inside right you can glue the 5x8 notepad. Depending on how you choose to decorate the front cover is up to you. Tealight box: You will need to cut 2 pieces of card stock for base 4 3/8" x 4 3/8" & for the lid 4 7/16" x 4 7/16" Using the Simply Scored scoring tool, Score st 5/8" on all 4 sides of the base and lid. To create the hinge on the lid. Take the lid piece and score at 2" down to the 5/8" mark. Turn it over and make sure the 2" scored line you made, lines up to the 2" mark on the left side of your simply scored tool. Now on the top measurements score at 2" again down to the 5/8" mark. Fold on all score lines on base and lid. You do not need to fold the 2" scored lines. Before you assemble, cut the circle opening with the Circle Framelits on the lid. I then too a pieces of the window sheet and cut the next size up with the frame,it and glued it on the inside. I took a piece of DSP cut it to 3x3. Cut a circle (slighter bigger than the size on the lid) and adhere on top. Take lid and a ruler and line up the edge to the 2" marks and using a stylus or bone folder score a diagonal line. Cut up on score lines to create the box. Also cut up the 2" lines and fold the diagonal opposite this will hinge the box. Assemble the lid and base. You then want to glue that corner piece onto the card base. I punched the bow using the Bow maker punch with same card stock and used reverse side.
Built for Free Using: My Stampin Blog
|

New 2023-2024 Stampin Up Annual Catalog


Kits Collection


Join today

Categories
All
Archives
January 2024
|


 RSS Feed