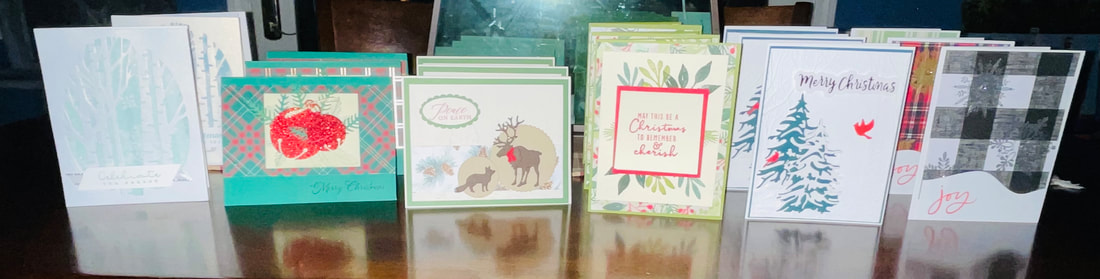
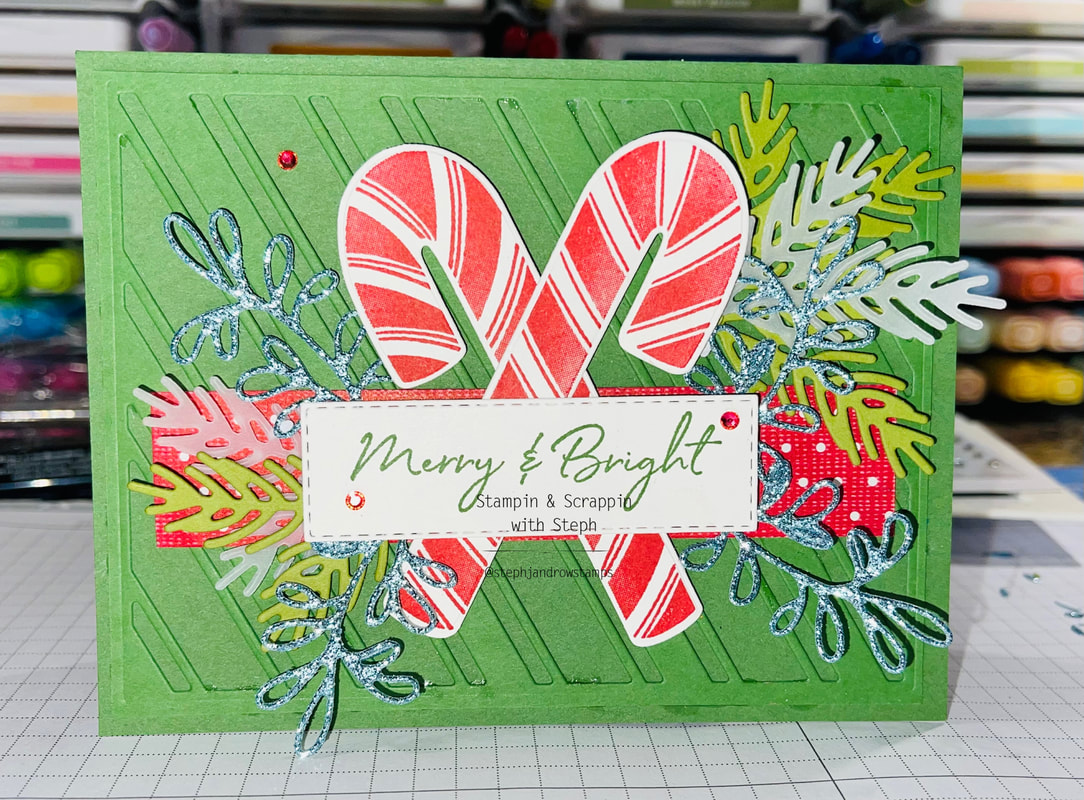
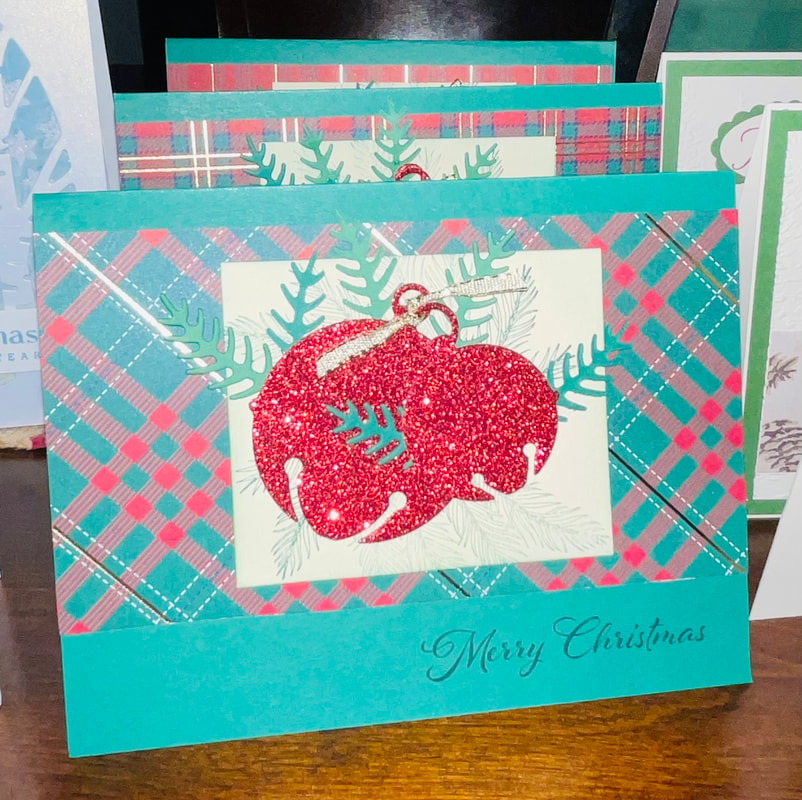
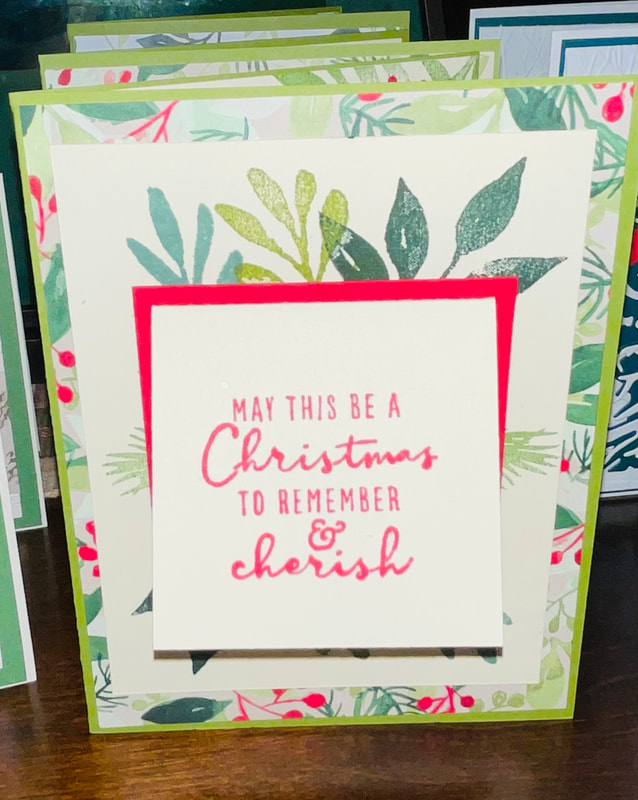
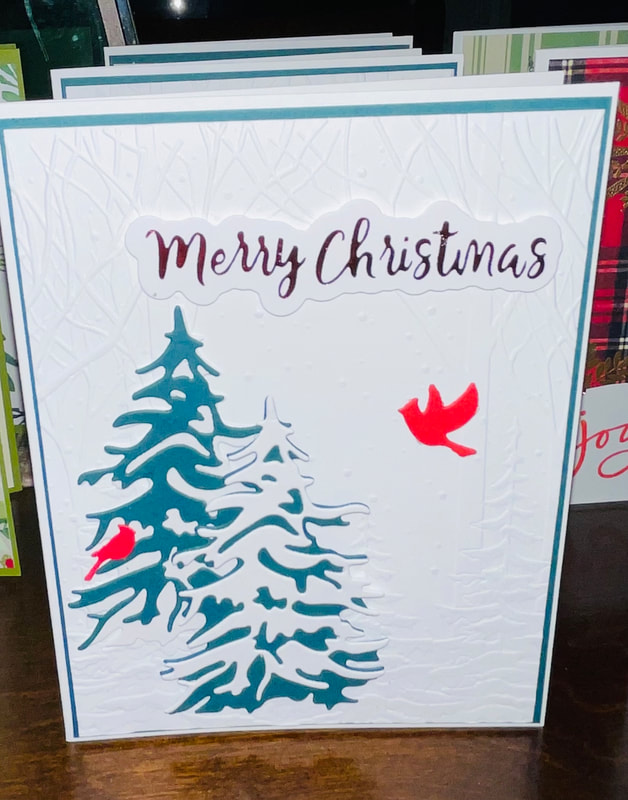
  Today was a fun day!! Thank you Tiziana https://stampinwtiziana.blogspot.com/ for inviting me to join your Shoebox Card Swap. The Candy Cane card is the one I prepped for everyone to make and the other 6 are the cards I made from the other ladies today!! Beautiful card yummy lunch and laughs made for a great day!!! #shoeboxswap #stampinup #stampinandscrappinwithsteph Happy Stampin Steph
0 Comments
How crazy is it that October is almost over! This year feels like it's flying by! So, it's time to take a moment and show our appreciation! This month we will sharing Thankful projects. Be sure to stop by everyone's blogs and check out their amazing projects. Leave a comment and share what you loved! I hope you hopped over from Tiziana Milano's blog; she's always creating something awesome! And after you view my hop, check the list below and stop by anyone's hops that you may have missed.
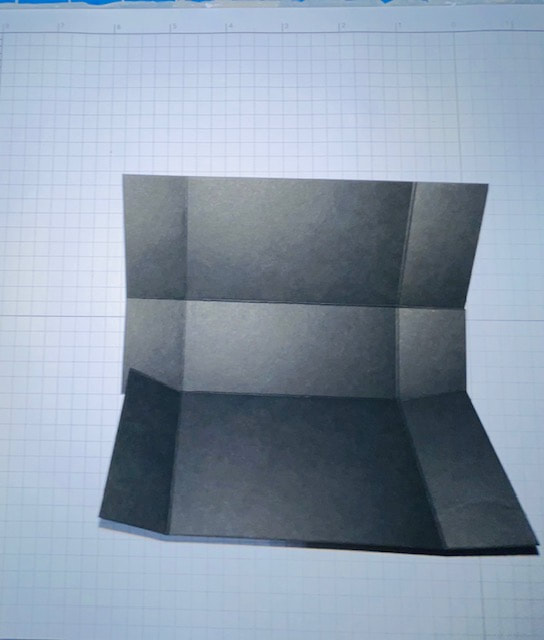
When planning out my projects I usually decide what I want to make fun fold card, box or bag. This time, I stepped out of my comfort zone and decide to try 2 different things this time. I typically do not create a 1 layer card. I always have different paper layers and designer paper. This was a bit of a challeng and with different attempts, my card changed many times along the way.
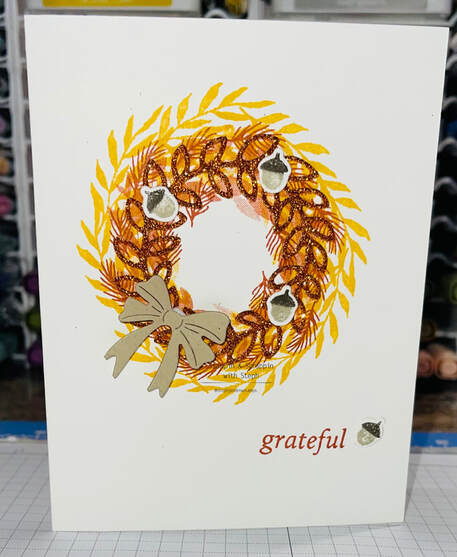
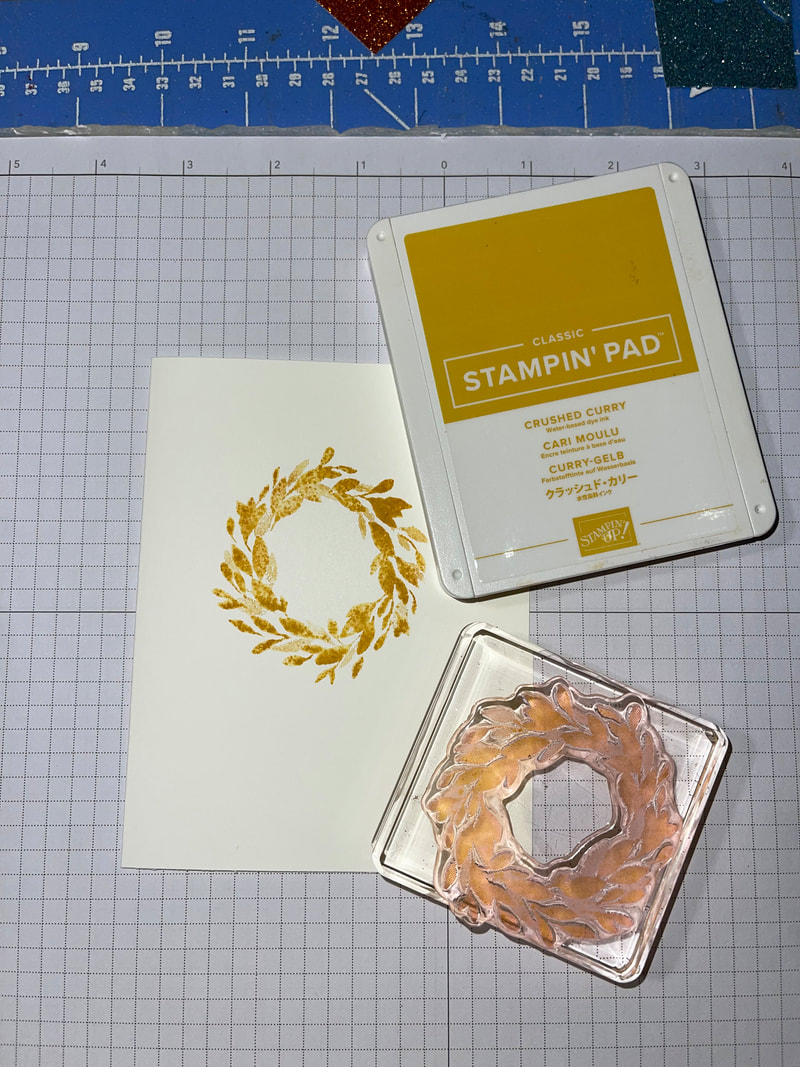
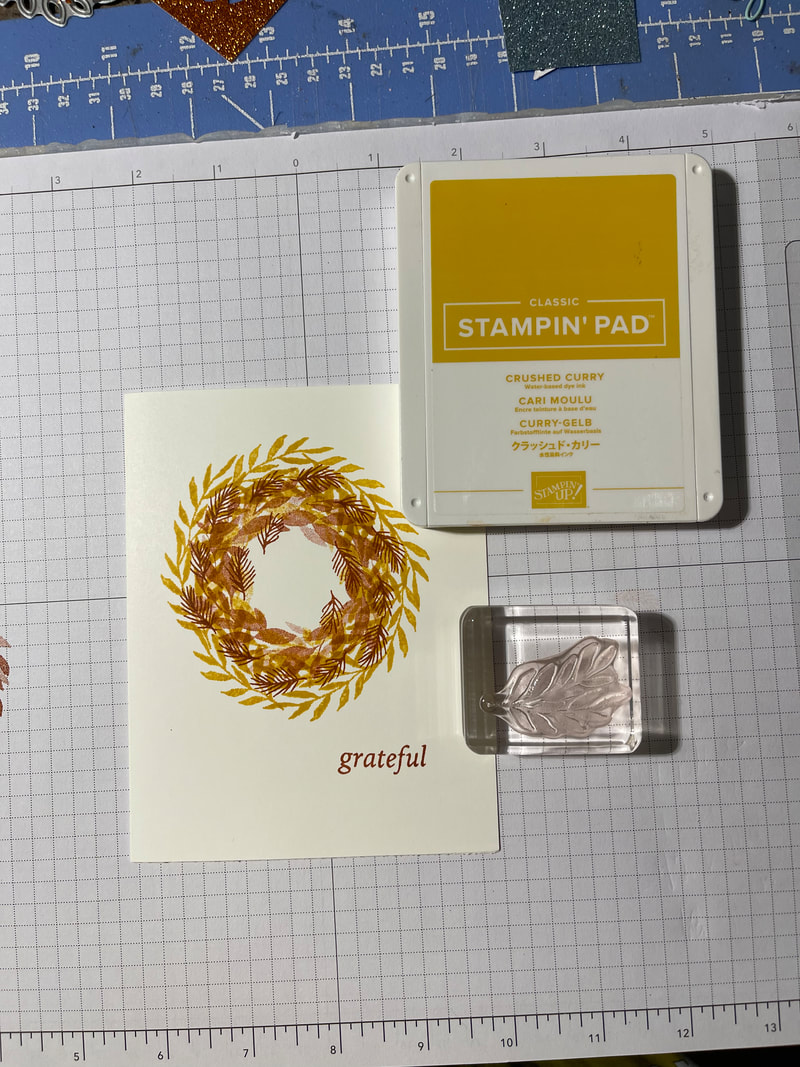
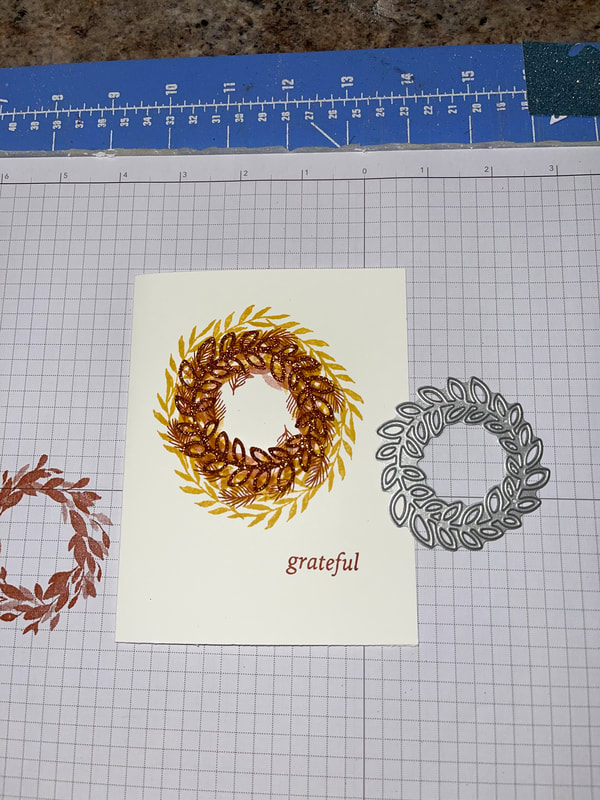
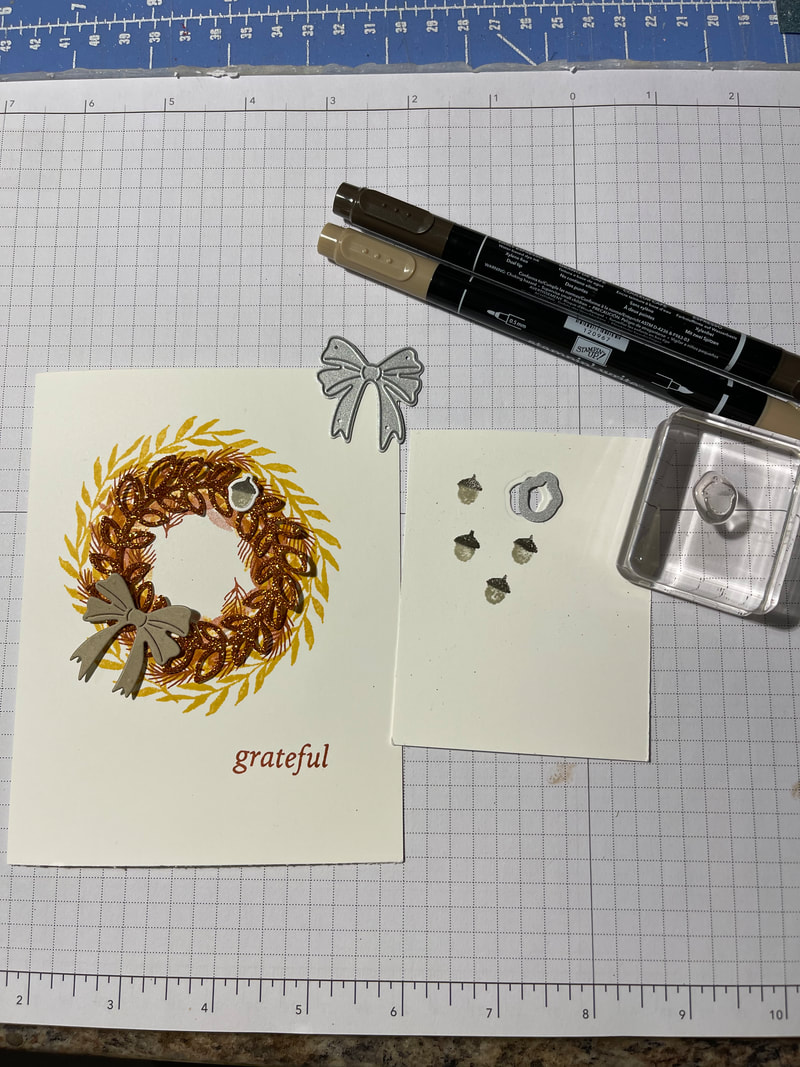
So first I grabbed the Cottage Wreath Bundle from the Stampin Up Mini Catalog. Grabbed some Basic White for the cardbase a chose a color scheme. I wanted a fall feel so I chose Crushed Curry and Cajun Craze. I started stamping with my lightest color first and then layered darker next. You can see from the pictures below the process I used to create the wreath! I cut out a piece of glimmer paper using the coordinate dies to add a textured layer to the wreath. I colored the acorns and cut them out and used the bow die in Crumb Cake. And finally, the word Grateful stamped! It was a super easy card to make.
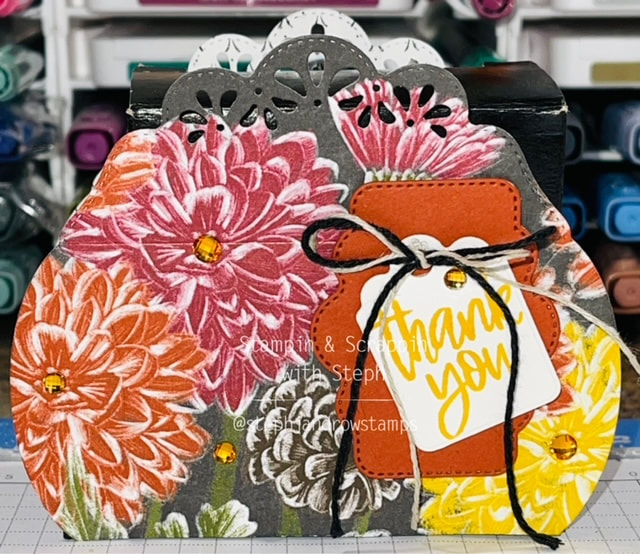
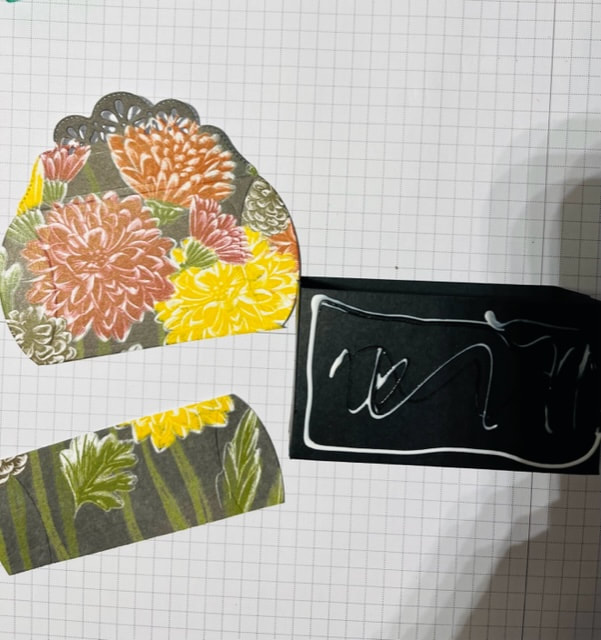
Moving onto the project. I normally create my card and 3D item to match or coordinate. I would use the same stamp sets, colors paper etc and usually make them to be given together. This time I made them independent of each other.
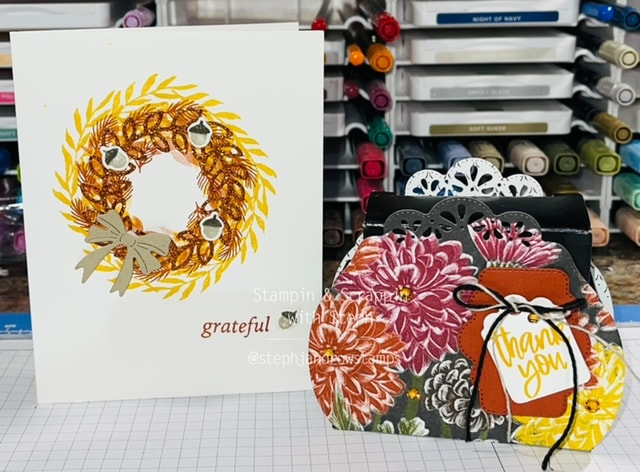
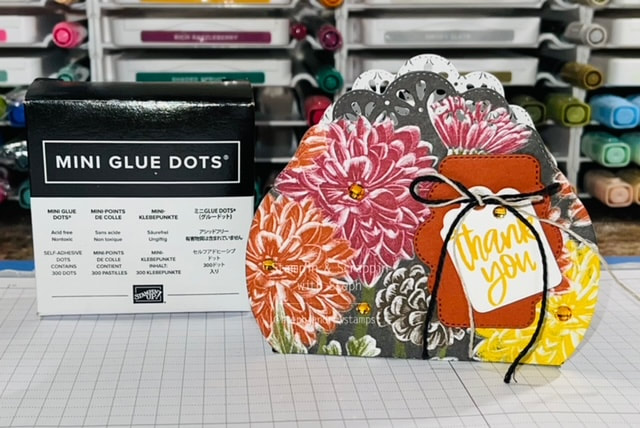
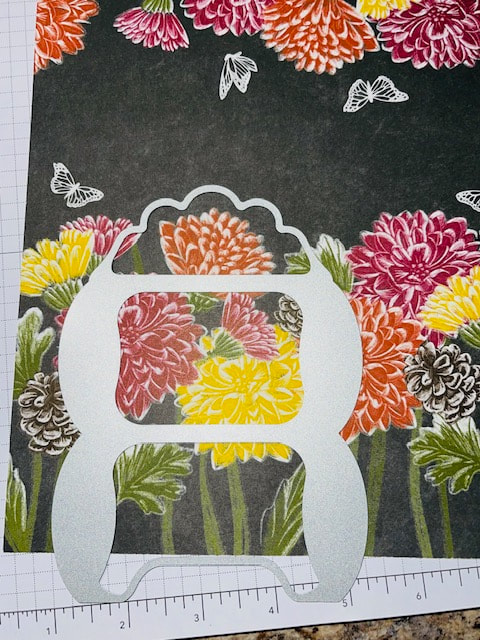
And if a little bit is there, your just going to cut that section off. Add glue to each side of the box, and attach the pillow box piece. I cut the label and tag out from the Pretty Pillowbox dies and I stamped the Thank you from the Cup of Tea in Crushed Curry. Added some black twine and linen thread to create double bow. I added a box of mini glue dots to give as a gift. SO cute SO easy!!
Thank you for stopping by. I hope you enjoyed the projects I have created for you today.
Please leave a comment and let me know what you think and stop by everyone's blogs to see their projects. Thanks again, Happy Stampin Steph  A sweet Christmas can be yours with our July–December 2022 Mini Catalog Sweet Gingerbread Bundle, which includes the charming Sweet Gingerbread Stamp Set and Gingerbread House Dies. Use this bundle to create a festive Christmas cottage with gumdrops, lollipops, pine trees, and a cozy curl of smoke that doubles as an adorable speech bubble—where you can stamp loving sentiments for family and friends.
To duplicate this month’s “technique focus,” fold Thick Basic White Cardstock in half to create a 4-1/4" x 5-1/2" (10.8 x 14 cm) card, then add texture to the card front using the detailed border die pieces. Ink the stamps in a lighter color, stamp off once, then use Sponge Daubers to add shading in a darker color before stamping and die cutting. Heat emboss the sentiment on Basic Black Cardstock using white Basics Embossing Powder, cut a tag shape, then adhere the sentiment to the card front using Stampin’ Dimensionals. What can you make with this super-fun bundle? Post your projects on social media and use the #SweetGingerbread hashtag so we can see your work! Happy Stampin Steph |


Categories
All
Archives
May 2024
|


 RSS Feed