|
These days, everyone needs a lift and wants to hear that they’re important to someone. And with everything going on in the world, a reminder to your family and friends that cards are a perfect way to reach out and show appreciation for special friends will be very welcome indeed. This is a great to refresh and make as many cards as you can for all occasions. Figure out cards you need for the remainder of the year, for of 2021, for an organization like Operation Write Home; nursing homes, co-workers, whatever you like to do!
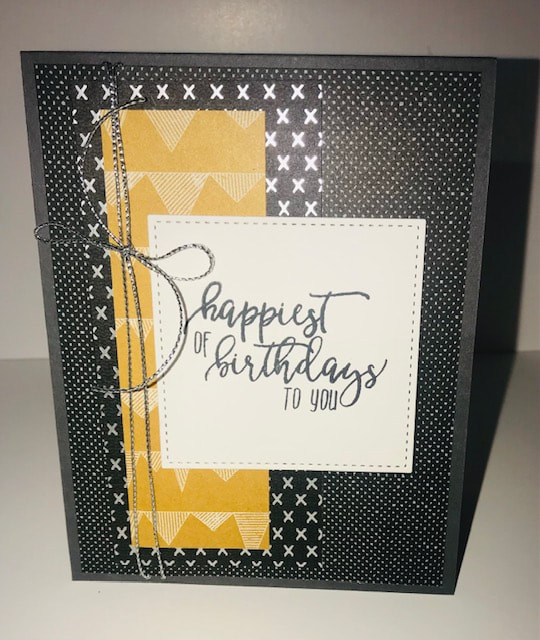
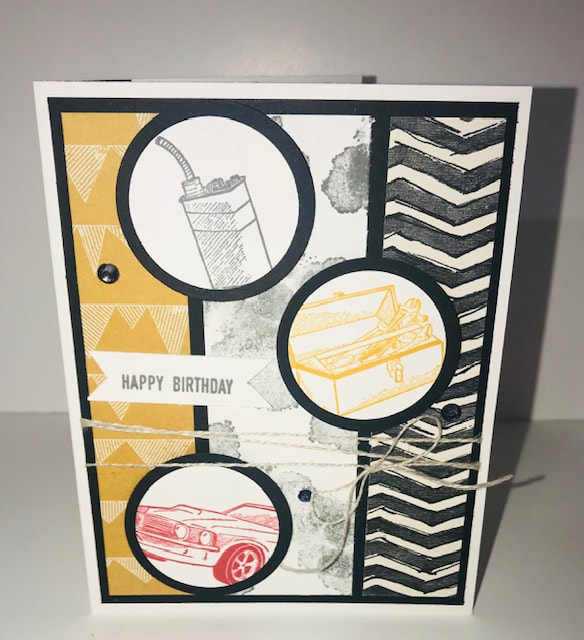
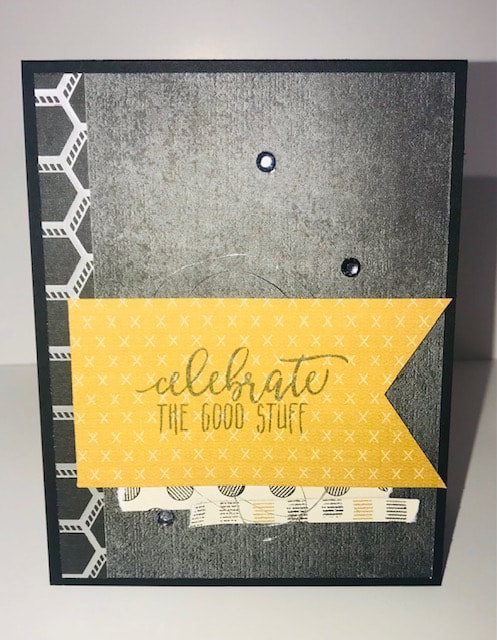
Here are the projects I will be working during the event so be sure to join on October 3rd at 930am-10:30am Be sure to check out my event on my Facebook Page Stampin and Scrappin with Steph. Join my World Card Making Event today and stay up to date with ideas and event information. If you're local, and need a card kit to go, please contact me directly! Hope to see you on WCMD! Happy Stampin Steph
0 Comments
Simple stamping is fun for everyone. Whether you’re brand new to papercrafting or you just want to stamp a greeting to add to a plate of cookies, we all need ideas for quick cards.
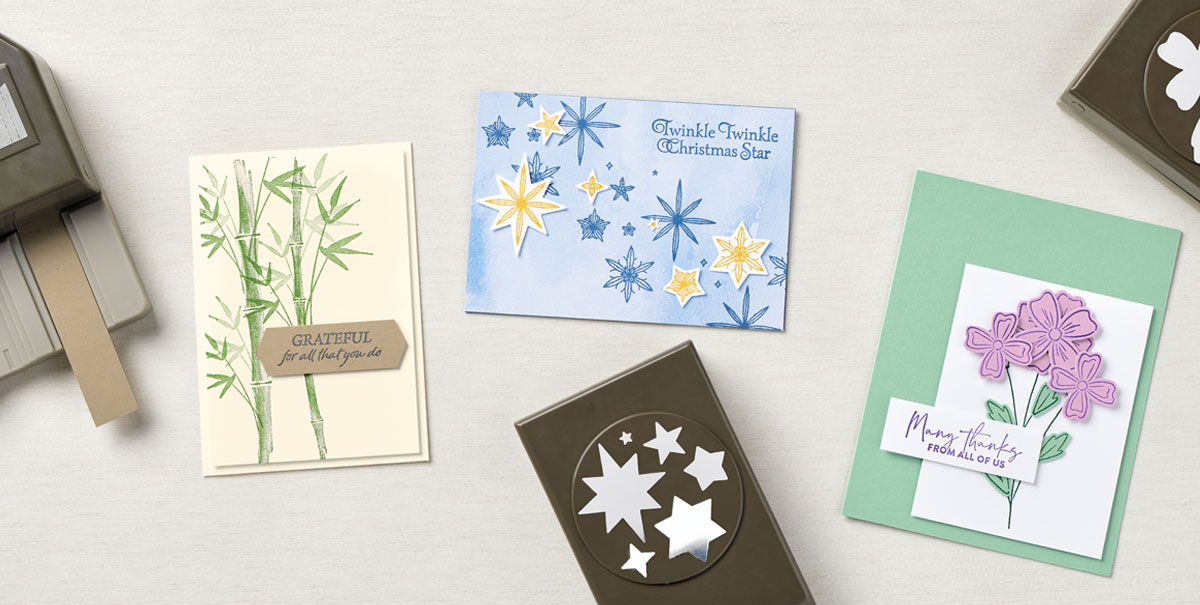
To make simple cards with a touch of pizzazz, use the “stamp-off” technique as we did here with the Love of Leaves Stamp Set. 1) Ink the stamp. 2) Stamp the image. 3) Re-stamp the image one or more times without re-inking it. This technique gives your card sophistication and depth without a lot of effort—and you get several shades of ink from one ink pad. Just add a bow and a sentiment and you’re done! You can always add a touch of color to a card using a simple Blender Pen trick. (We used the wheelbarrow image from the Autumn Goodness Stamp Set.) Stamp the image, then go over the stamped lines with the Blender Pen to color in the wheelbarrow. So fun! Plus, you’ve added a touch of artistry that doesn’t require a lot of effort. We used the stunningly beautiful Autumn Greetings Stamp Set to create our final example—and to show you how stamped cardstock layers can add visual complexity without requiring a ton of work. Stamp one layer with a large stamp and adhere it to the card front. Then add a stamped tag—popped up with a Stampin’ Dimensional. It looks sophisticated, yet it’s easy to do. Simple stamping at its finest! #stampinup #simplestamping Have a great day Happy Stampin Steph THE HOTTEST STAMP SALE OF THE YEAR! September 23, 2020 Stock up on stamp sets at a stellar price! For one day only, you can purchase select cling and photopolymer stamp sets at a 15% discount. This short, stamp-tacular sale only happens once a year—you won’t want to miss out on these super savings!
The 15% discount will apply to select cling and photopolymer stamp sets only. This sale is for 24 hours on 23 September—from 12:00 AM to 11:59 PM (MT) online, and 7:00 AM to 6:50 PM (MT) by Phone A select number of cling and photopolymer stamp sets from the 2020–2021 Annual Catalog will be available for purchase at a 15% discount. Visit my website to view the sale items and to order today! Happy Stampin Steph One of the perks of being a demonstarting is getting to see new products before our customers can get them in their hands!!! We have some new products coming out....and while I don't know much, I know beginning October 1st, I will get to learn more details......
Celebrate with curvy stamps, dies, and more! Designed for a variety of special occasions, the Quite Curvy Variety Bundle includes everything you need to create one-of-a-kind crafts. Don’t let stress steal your spirit—get ahead and order this exclusive bundle for a festive and frenzy-free season! The Quite Curvy Variety Bundle will be available for customers November 3, 2020 to January 4, 2021. For more details about this promotion, check back here in October, I will share more details! Happy Stampin Steph Save October 3rd in your calendar! Why? Well, because it is World Card Making Day!!!!! What's World Card Making Day you ask? Besides being a favorite holiday for papercrafters, it's a day to work on your card projects...we focus on making as many cards as we can for family, friends or organizations! This day is shared by Paper Crafters all over!!!
Be sure to contact me to day for make sure you have all the supplies you need to make your cards for your loved ones. I would normally create an event to gather with my customers to make cards. But, as I am sure you know the saying, do to all going on I am planning to host virtually, either through a Facebook Live or Zoom. I am working to create some cards to share in advance that you can create as we work together! Details to follow....Feel free to contact me if you have any questions!! Until then, start planning the cards you need to make, gather your supplies and be ready to go!!! Happy Stampin Steph Have you ever considered becoming a Stampin UP Demonstrator??? What about considering doing something you love while making money and receiving products at a discount, theres no time like now! There's only a 8 days left to take advantage of the The Get & Go Starter Kit promotion. This promotion benefits those who sign up to be a Stampin’ Up! demonstrator additional products to help you get started right away. In addition to the already great valued Starter Kit, by signing up, you will receive precut paper, stamps, and embellishments to use in your first event. Whether you're interested in becoming your own boss, or expand your hobby....this promotion is key! Don't wait, join my team today! 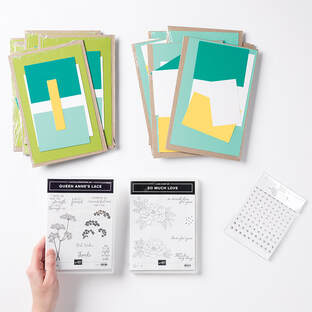 Granny Apple Green card pack contents 8-1/2" x 5-1/2" (21.6 x 14 cm) Granny Apple Green Cardstock 3"x 4" (7.6 x 10.2 cm) Bermuda Bay Cardstock 3"x 4" (7.6 x 10.2 cm) Coastal Cabana Cardstock 3/4"x 4" (1.9 x 10.2 cm) Daffodil Delight Cardstock 5-3/4" x 4-3/8" (14.6 x 11.1 cm) Whisper White Envelope Coastal Cabana card pack contents 2-1/4" x 3-1/2" (5.7 x 8.9 cm) Whisper White Cardstock 2-3/4" x 4" (7 x 10.2 cm) Daffodil Delight Cardstock 3" x 4" (7.6 x 10.2 cm) Bermuda Bay Cardstock 8-1/2 x 5-1/2" (21.6 x 14 cm) Coastal Cabana Cardstock 5-3/4" x 4-3/8" (14.6 x 11.1 cm) Whisper White Envelope COMING SOON OCTOBER 1-31
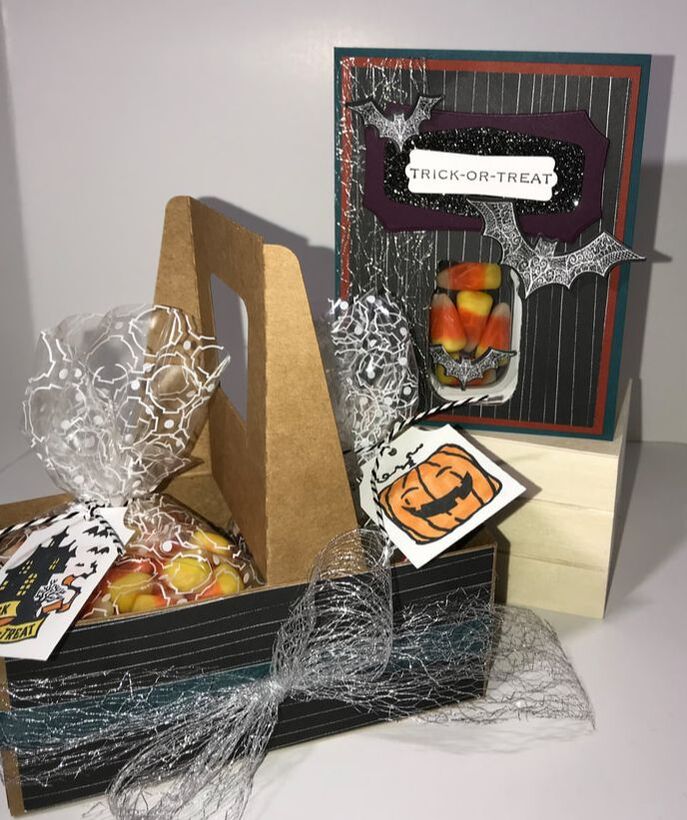
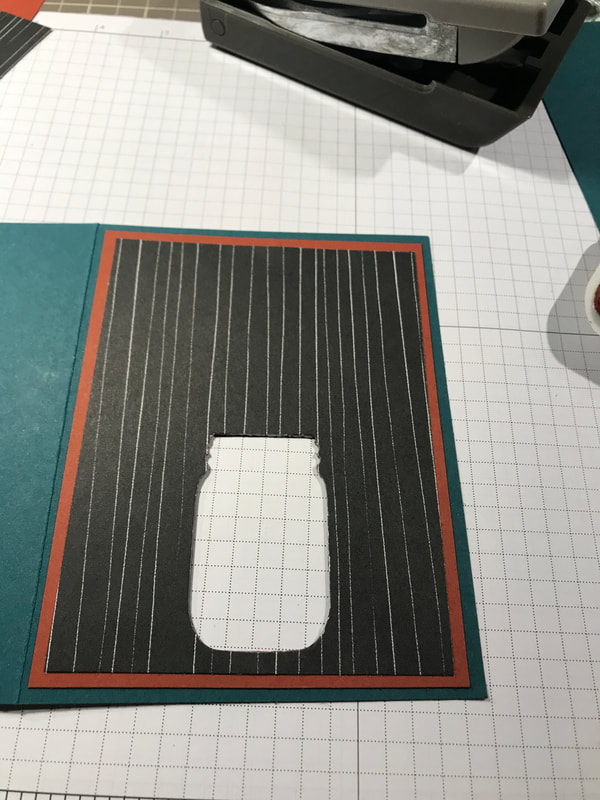
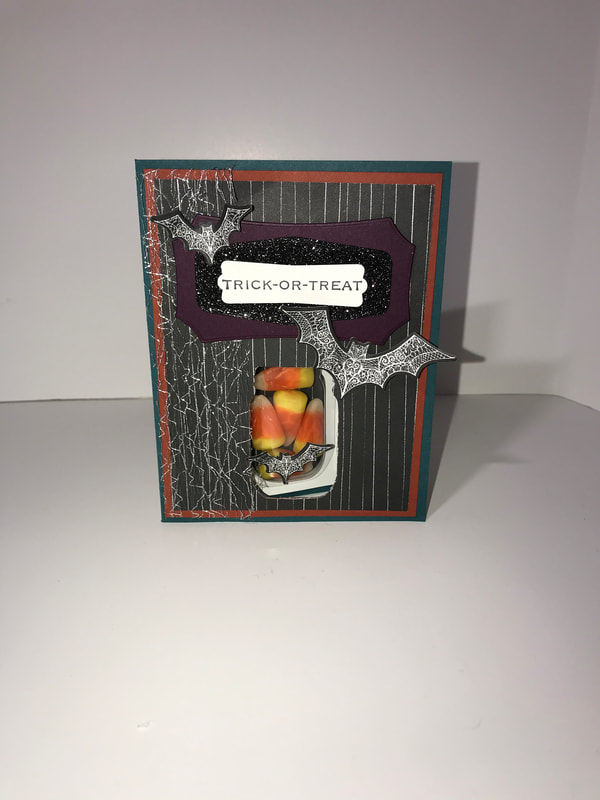
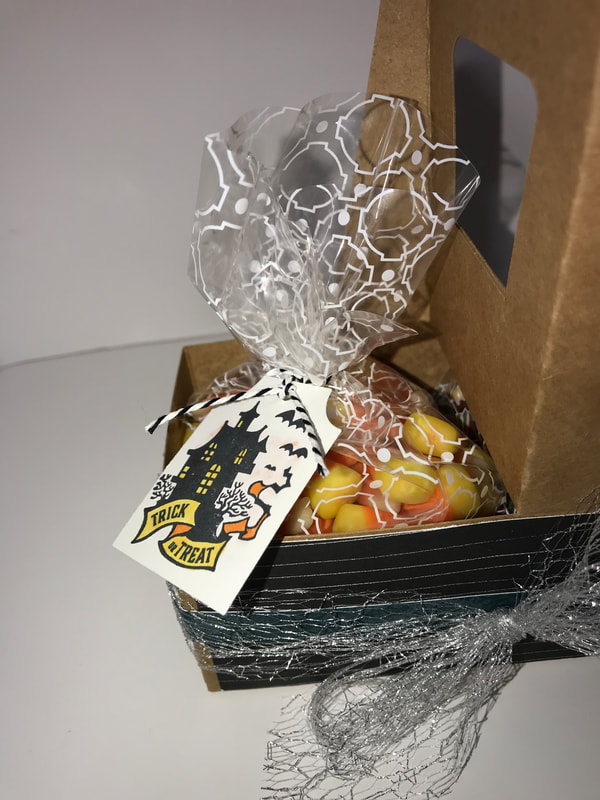
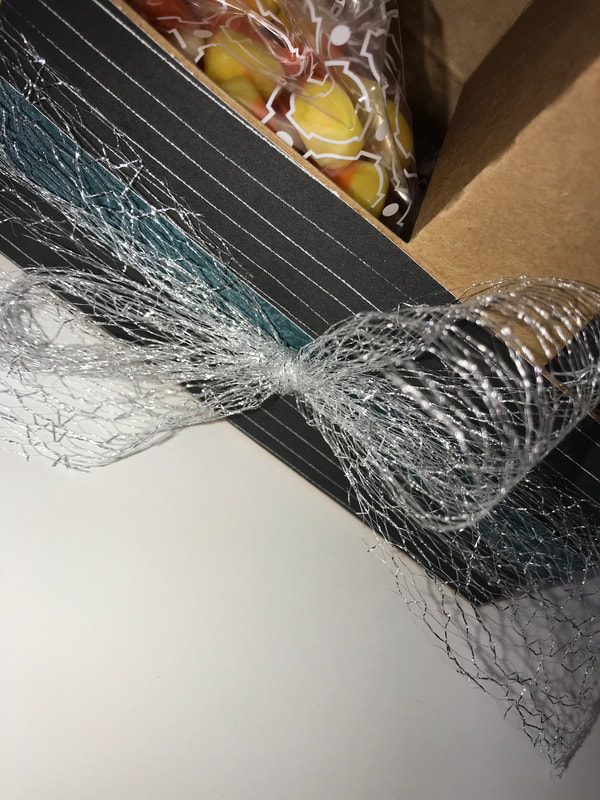
We all love gorgeous Designer Series Paper, and during this incredible sale, you can enjoy a 15% discount on select papers from our current catalogs! Now is a great time to stock up and save on some of our most popular paper designs! Be sure to check back on October 1st to order your favorite papers! Happy Stampin I am excited to share with you September's Friends Blog Hop! Each month I work hard to come up with a card a projects that are new and different than what I've done in the past. This month's theme is Fall, Outdoors or Halloween depening on where we are located! Normally, I would be working on Hallween Treats to pass out when we are camping to all the Trick or Treaters. But, as you know, Trick or Treating may not be happening. So I wanted to come up with a few treats that I can give my kiddos. And... while I know they appreciate the time and effort I put into handmade treats for them, I know they don't keep the packaging.... I hope you came from Melissa Thomas's Blog and be sure to continue to Katja Ettig, their projects were really amazing! If you missed someone along the way, you can find a list of all hop participants at the end of my projects. My projects were fun to make and feature new products from the Stampin UP Mini Catalog. Both projects use the Magic in This Night Suite. This suite, to me, doesn't use the traditional Hallween colors like black white and orange, but uses colors like Blackberry Bliss, Cajun Crazy and Pretty Peacock. Which together are just perfect for the season! 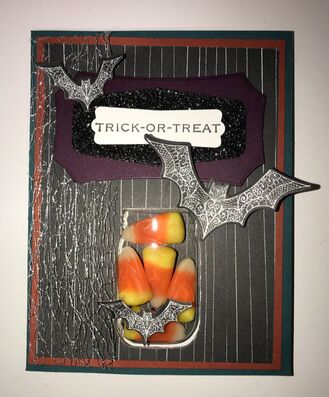 I kept my card layout pretty simple. I started with a Basic Black cardbase, the added a 4 x 5 1/4 layer of Cajun Craze then 3 3/4 x 5 layer of DSP. Before adhering the layers together, I used the jar punch and from the bottom, I put the paper into the punch as far as it would go and made sure it was centered. Then punched. Then I used this layer as a template for the next and for the cardbase. I wrapped the Metallic Mesh Ribbon around the layers and then added to the cardbase. Next, I added the new Mason Jar Shaker Domes, making sure the clear part is popped out of the top of the card. Add your contents. Then I took the black jar that gets punched out of the cardbase...... ...and add adhesive to one side. Add this to the backside of the dome. Make sure the adhesive side is out. Remove the tape off the dome and fold the back side of the card up. The dome will now be stuck to the inside of the card. But the dome will pop out of the opening you punched out!!! Hope this all makes sense. It really is easy too do! I will be sharing a Facebook Live on my Stampin & Scrappin Page, Friday to demonstrate the card. Next add the Blackberry Bliss cut of of the largest label Hallween Magic dies in the suite. I also cut out the Black Glimmer Paper using a die from the Tasteful Labels Dies. I cut the bats out of the DSP using the Hallween Magic Dies, they line up perfectly! It seems like theres alot but I promise it really is easy to make! To make the treat holder, I used the Mini Coffee Carrier and decorated it with DSP. I used the same pattern I used on the card. I got 2 of each sizes then I took a strip of 1/2x12 DSP and 1/2x6 to wrap around the base. Next I wrapped the Metalllic Mesh Ribbon and tied it in a bow. I used 2 Mosaic Gussetted Cellophane bags and filled one with candy corn and one with mini chocolates. Tied them closed using the Black/White Baker's Twine from the Playful Pets trim combo pack. For the tags, I used the Everything Essential Bundle. I stamped 2 tags, bothsides. One side was the Haunted House - Trick or Treat and the otherside the Jack-o-Lantern. I colored the windows and label on the house with Daffodil Delight and a little Pumpkin Pie. And I colored the Jack-o-Lantern with Pumpkin Pie. This way no matter which way the tag is laying there is an image showing. I used a whole punch and added the tags to the twine and finished with a knot. So Fun. You could also decorate and fill the Mini Coffe Cups with treats. But since I'd give these to my kids, I decided the bags will do!!!! I hope you enjoyed my projects. Be sure to visit Katja Ettig blog and see her amazing projects! Thanks for stopping by Happy Stampin Steph Below is a list of all the Stampin Friends Blog Hoppers.
JUST CASE IT
To CASE (Copy and Share Everything) is something nearly every experienced papercrafter does on a regular basis. You see a card in a catalog, for instance, focus on something you like about it, then re-create it with your own spin. You can add layers or simplify the project, but the main point is to enjoy being inspired by the work of others. Our minds start working when we study and learn from a project someone else has made. So pick up the catalog and look through the pages until you find something that really makes you want to pull out all your crafting supplies and start working. Copy the project, then use the following ideas to make it your own:
Our talented artist CASEd a card from the August–December 2020 Mini Catalog to create samples. Why not see what you can find in this great publication, then CASE a festive card? Whatever you do, have a fabulous time! Follow this link here to view all samples in Pinterest. Share your ideas! I can't wait to see what your CASE Happy Stampin Steph When creating projects, Stampin Up knows it’s important to consider the abilities of every crafter—from beginner to avid crafters. By using similar products and the same layout, creating a card for every crafter to replicate is simple (and fun!).
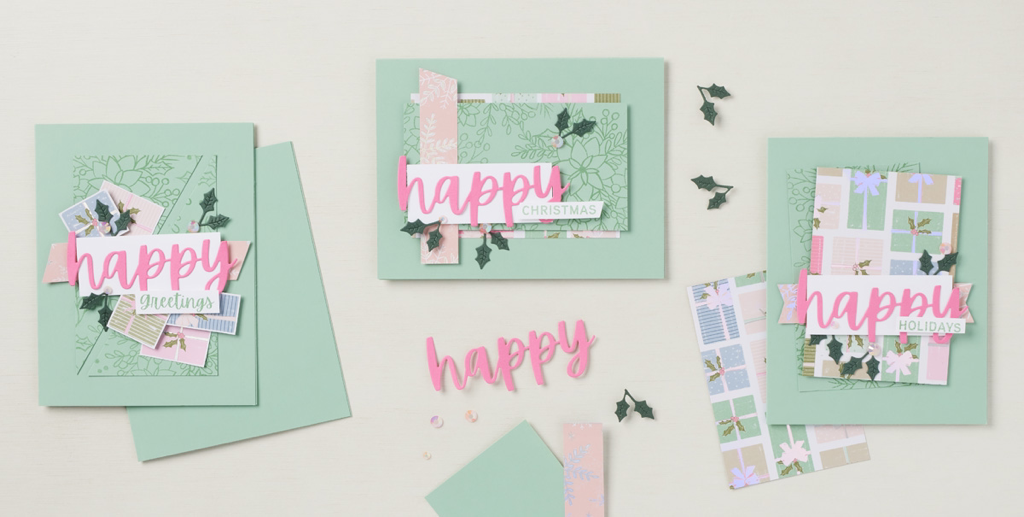
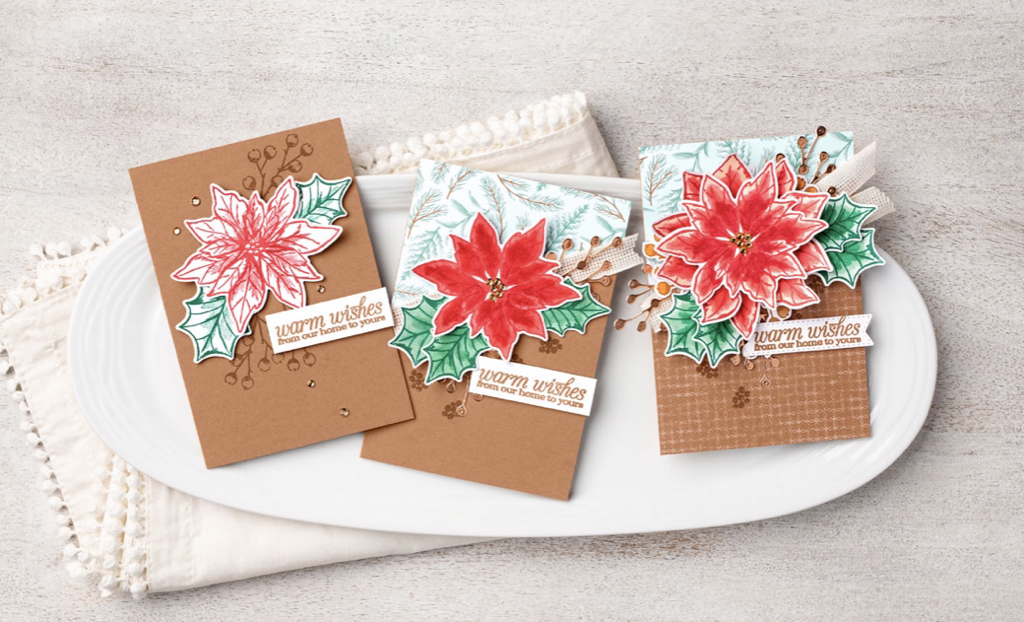
CASUAL To begin creating, stamp the sprig images on the card front in Cinnamon Cider ink. Stamp the flower in Real Red ink and the leaves in Shaded Spruce ink on Whisper White Cardstock. Tip: To create depth, stamp off the Two-Step Stamping flower and leaf dimensional images. Die cut the stamped images and adhere them to the card front. Stamp the sentiment in Cinnamon Cider ink on a Whisper White Cardstock label, adhere the label to the card using Stampin’ Dimensionals, and you have a fabulously festive card in just minutes! AVID Step up the second card by adhering Designer Series Paper to the front. Brighten the poinsettia and leaves using Cinnamon Cider, Poppy Parade, Real Red, and Shaded Spruce Stampin’ Blends. We also added a sprig cut from Copper Foil Sheets using the Poinsettia Dies. Tip: Fold the ribbon in half lengthwise before cutting the notches on each end. STEPPED UP AVID For our fanciest card, we adhered additional flowers and leaves, cut the label using the Tasteful Labels Dies, and added more Flowers for Every Season Designer Series Paper to the card front. We also took the artistry to an entirely new level by creating more light and dark contrast and expanding the color palette with Mint Macaron and Petal Pink Stampin’ Blends. Whatever your level of crafting Stampin UP has products and ideas for you! With the steps listed above you can create beautiful projects and with a few simple changes step up your projects! For more information on the Poinsettia Place Suite please use the click here. Please contact me with any questions you may have! Happy Stampin Steph |
Categories
All
Archives
May 2024
|





 RSS Feed