|
Welcome to our May Stampin Friends Sympathy and Flower Blog Hop! We have 11 amazing crafters participating in this months blog hop, including 1 Guest Hoppers.
Please, make sure you check everyone's blogs out. After reading my blog, scroll to the end, and please leave a comment for your chance to win a little blog candy from me! If you have visited my blog from Lana Staab's site, thanks so much for continuing with the Blog Hop. A full list of Blog Hop participants are listed at the end so you can continue along the hop! This Month's Guest Hopper is: Lori Schaefer Mueller 
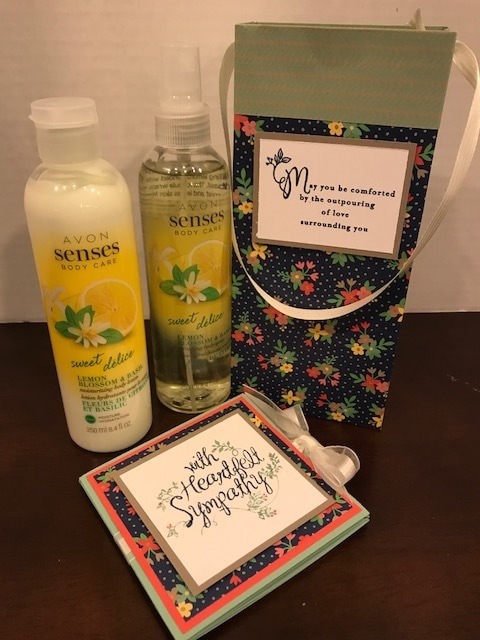
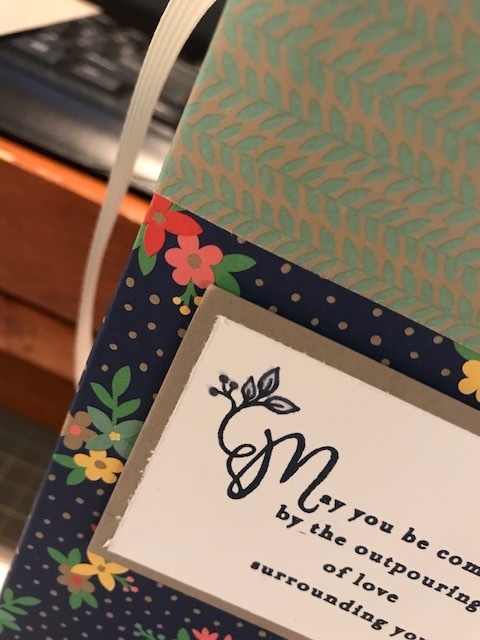
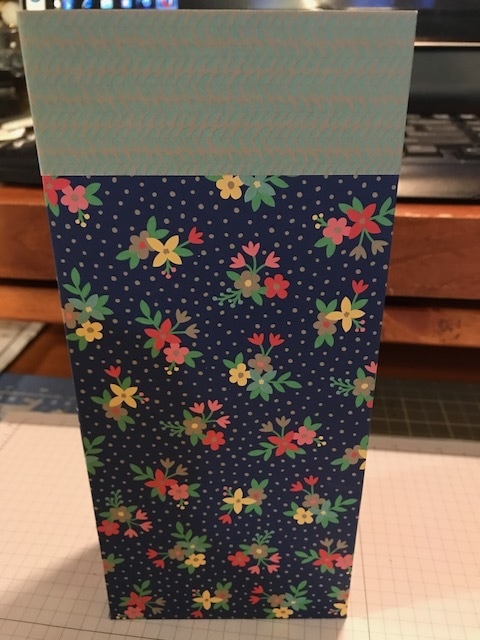
Both the card and tall bag were made using all Stampin Up products! For products I used Affectionately Yours DSP with cardstock, ink and marker colors in: Mint Macaron, Night of Navy, Tip Top Taupe and Watermelon Wonder. Stamp Sets: Garden in Bloom and Heartfelt Sympathy were used.
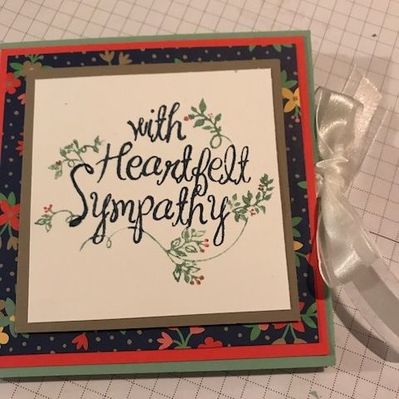
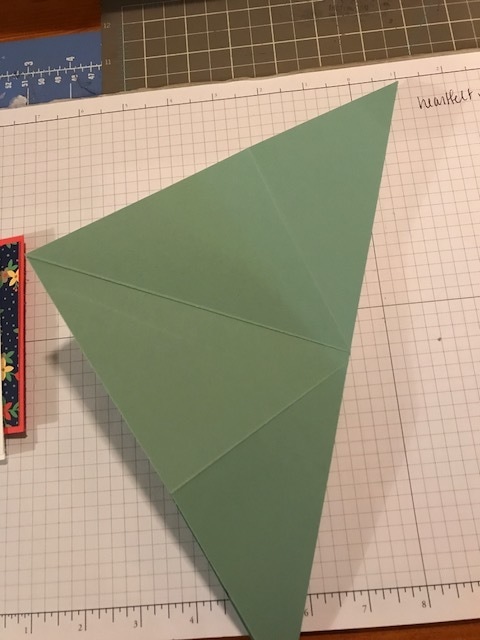
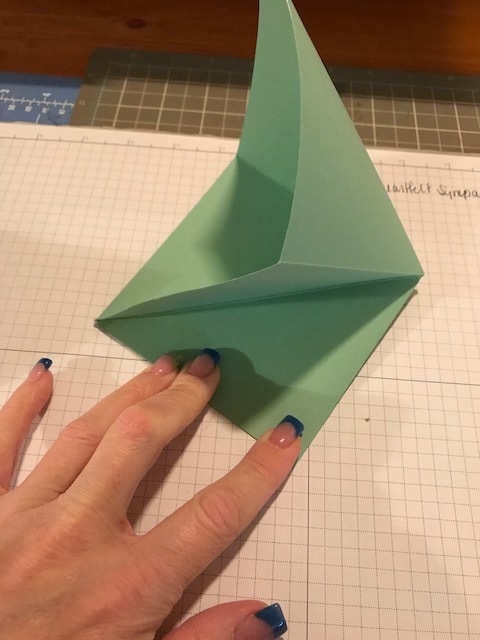
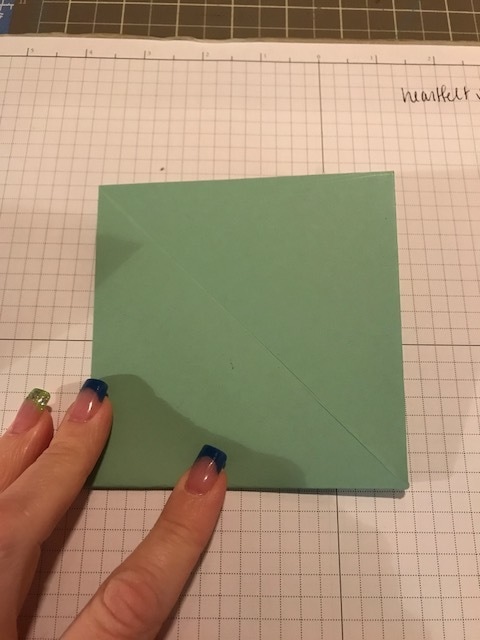
The card is a fancy fold. I honestly do not know the technical name for this type of card. I made a card using this fold technique years ago. I really thought it was a nice style to use for a sympathy card! It adds an extra touch or pick-me-up that someone may need! So you need a piece of cardstock that measures 8 1/2 x 8 1/2. Score on each side at 4 1/4. Then fold in half on the diagonal in both directions. Burnish all score lines. It's a little tricky to fold, harder to explain, but you basically have the 4 sections of the card top left, top right, bottom left, bottom right. The top right and bottom left are going to fold into the diagonal and meet an the card will fold flat.The other 2 sections remain flat. Cut 2 pieces of Whisper White measuring 4 1/4 x 4 1/4. I stamped using the Garden in Bloom and verse from Heartfelt Sympathy. Add these pieces to the top left and bottom right of the inside of the card. By having these pieces on, it will encourage the fold of the card. These 2 sections remain flat and do not bend on the diagonal. Cut a piece of ribbon long enough to wrap around the card to tie a bow. I added a little snail to the front of my card to hold the ribbon in place. DO NOT add any adhesive to the ribbon on the back side of the card!!! If you do the card will not be able to unfold open. I layered the front of the card (the layers hold the ribbon secure in place) cardstock at 4 1/4 x 4 1/4x, DSP 4x4, cardstock 3 1/4 x 3 1/4 and Whisper White 3x3. I colored the Heartfelt Sympathy stamped with Stampin Write Markers. What do you think? Seems like alot but really easy card to make!
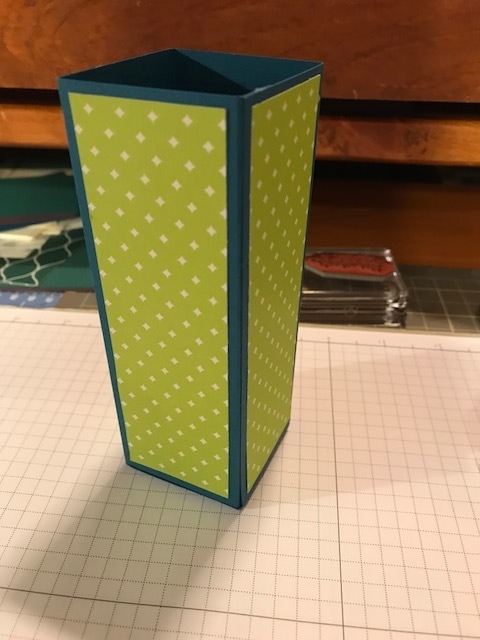
This bag was super easy too! Really Easy. I wanted a gift bag to hold a body spray and lotion I purchased from Avon. The body spray bottle was 8 1/2" tall. With a little tweaking here and there! This is what I came up with.
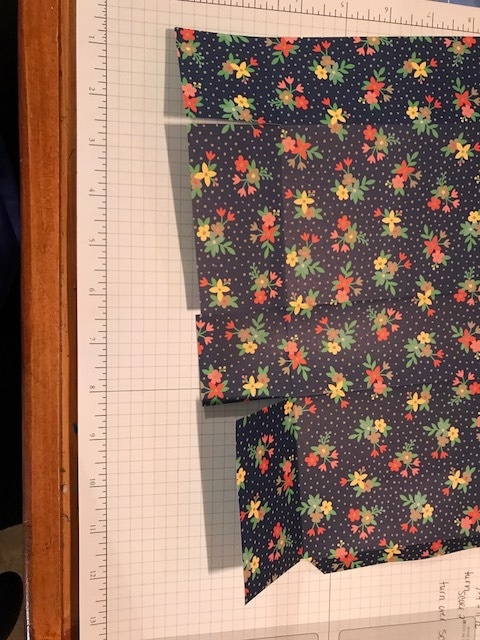
You need a full sheet of 12x12 DSP. If you are using a piece of DSP with a specific design, make sure the first set of score lines are done with the DSP facing in the right orientation! Score at 2", 5 3/4", 7 3/4" and 11 1/2". Turn and score at 2". This is optional, but I did it to have that fold over flap! Turn the dsp over and score at 10 1/2". You can skip this step and pinch the bag at the top to keep it closed. I chose the flap and the open style at the top. 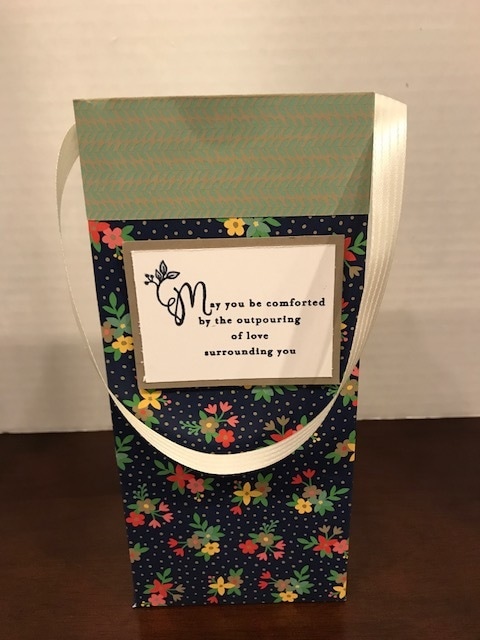
You will need to fold and burnish all score lines, make the score line that's 1 1/2' folded opposite.
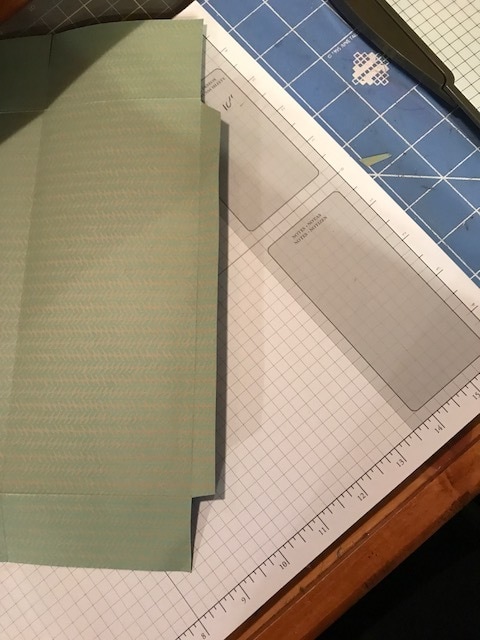
On the skinny section (1/2") trim away the top and bottom small pieces. You can see that in the second image below. At the bottom of the bag 2" section cut up on the score lines. Assemble! I adhered the flap down with Snail, just keeps it flat and makes the rest of the assembly easier. I adhered the bag closed with Fast Fuse since I was putting something heavy in. I stamped the verse on Whisper White and matted it on Tip Top Taupe. I adhered to the front of the bag using Dimensionals. I added a ribbon handle to make carrying the bag easier. I punched a hole on each side using the 1/8" handheld circle punch. I just eyeballed how long I wanted the handle! Feed through the holes and tie each end in a knot. Bag is done!!
I am really happy with how the bag came out! The lotion and body spray fit perfectly. I love that the DSP showcases the flowers without having to punch or diecut them out!!!
I think this is a really nice pick me up to give someone who needs there spirits lifted. Even though I designed my card and bag together, they work well alone! 2 for the price of 1. I hope you enjoyed the projects I made for you! Please leave a comment for your chance at winning some blog candy!!! Click on the next blogger, Maureen Rauchfuss, below - you are at Steph Jandrow, incase you forgot along the way! Thanks for Hoppin with me Happy Stampin Steph
10 Comments
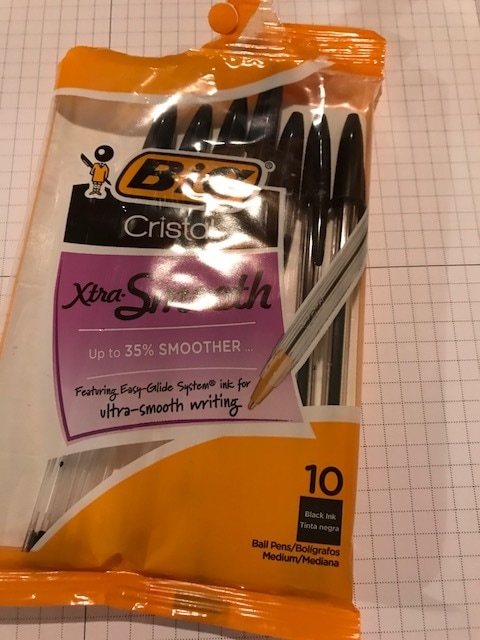
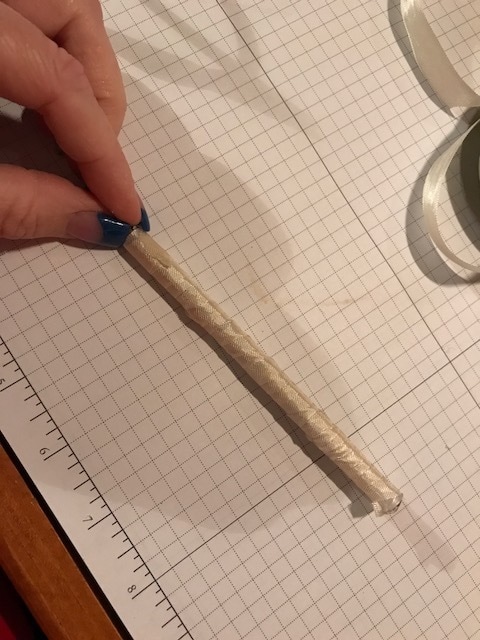
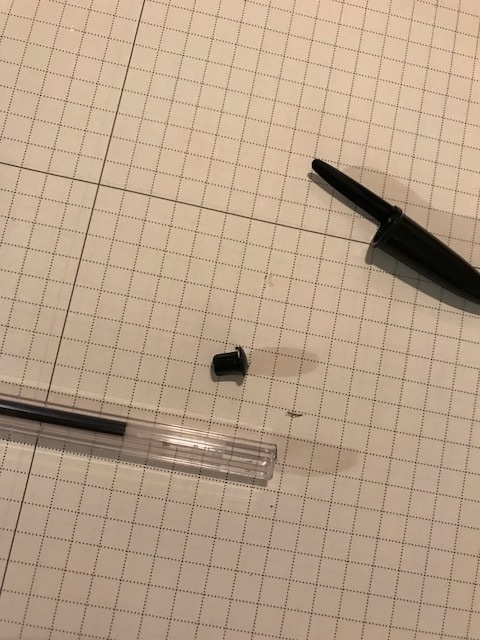
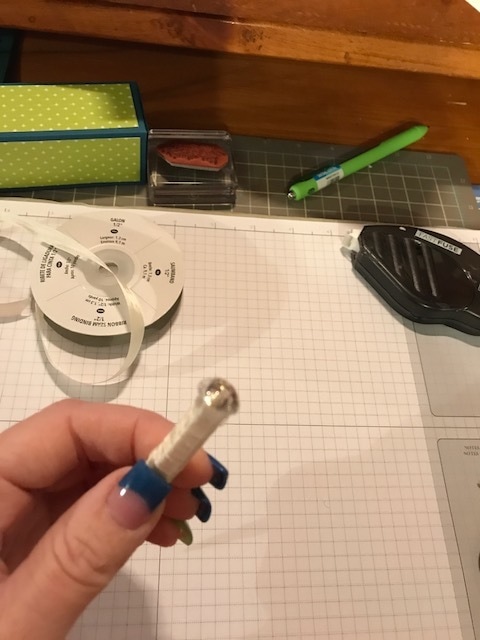
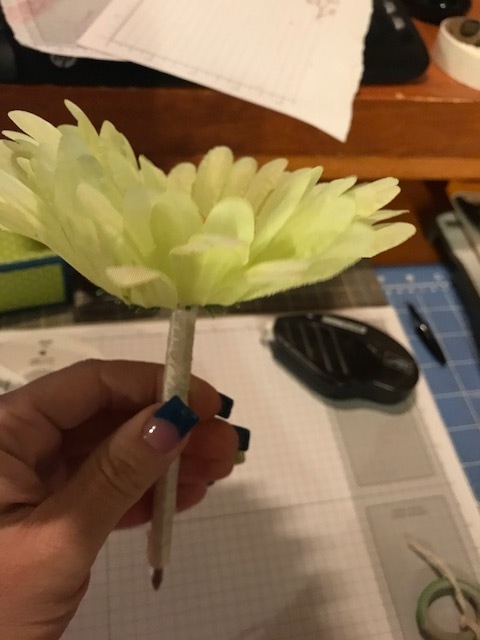
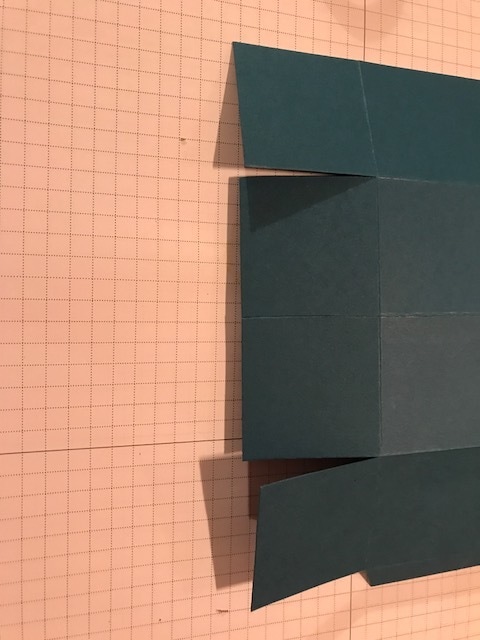
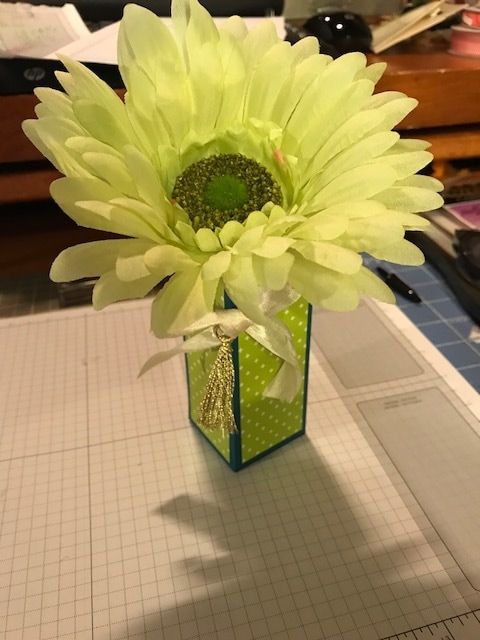
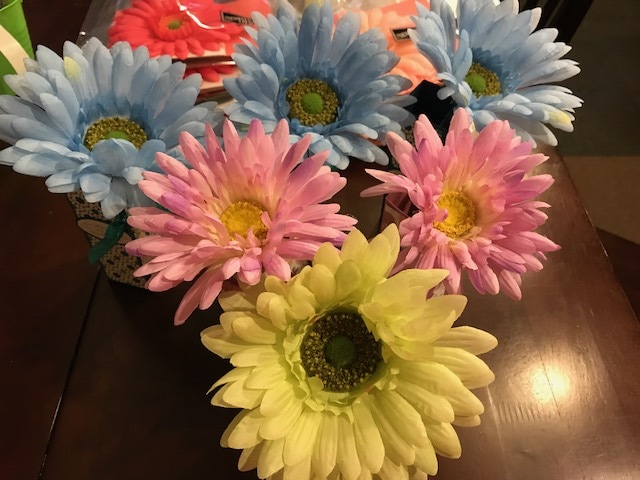 This week is Teacher Appreciation Week here in Bellingham, MA. Each day families are encourage to show the teachers how much they are appreciated! It's simple gifts that say the most!!! Our PTO offers some suggestions, so today we could bring a favorite flower in. Instead of grabbing flowers, that eventually wilt and get tossed out, I decided to make a flower topped pen. There are a lot of ideas out there for this.You can search Pinterest for directions. But I simply used BIC Pens (photo below), pry the end off, I used my scissors like I was going to cut the end off and eventually you can pop that little cap out, the plastic part of the pen may crack a little but as long as you don't break it it's ok, you will cover it. Typically, I love to use up my stash (old ribbons, paper and embellishments) or items that are not carrying over into the new Annual Catalog. I grabbed a bunch of Daisies in colors that would match Stampin Up. So the paper and ribbon colors are: Dapper Denim and the Moroccan DSP, Sweet Sugar Plum and the Blooms & Bliss DSP and the Brand new In Color Tranquil Tide with the brand new Eastern Palace DSP (for ribbon, I used the Retired Very Vanilla Seam Binding ribbon). I added a little bit of hot glue to the end of the pen and just start wrapping the ribbon around tightly and adhere then end with hot glue again. You can also add a strip of Tear n Tape down the side of the pen, this will help the ribbon to stay put and not loosen with use. Make sure to leave room for the cap. Add a glob of hot glue on the end and hold the flower in place.  I also made this little pen holder to hand out. Super easy. Piece of cardstock cut to 7 1/2x 6 3/4. On the 6 3/4 side, score at 1 3/4. Turn to the 7 1/2 side and score at 1 3/4, 3 1/2, 5 1/4 and 7. Fold and burnish score lines and trim ..see pictures below. I also added DSP to the 4 sides, cut at 1 1/2x4 3/4. Assembled and decorated with a bow. Pictured above/below is the new Tranquil TIde and Eastern Palace Suite, I used the tassel from the embellishing kit. I hope you liked the projects I have shared for you today! If you would like to receive more information on how to make them or receive a new Annual Catalog, Please feel free to contact me. Happy Stampin Steph 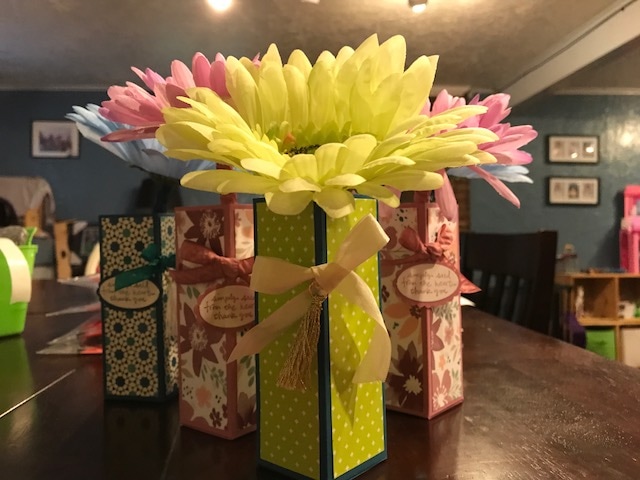 |


Categories
All
Archives
May 2024
|


 RSS Feed