 Welcome to my favorite hop of the year! I look forward to January, when we kick off the new year with a fresh blog hop! I am energized and organized after a much needed December hop break! Each year I look at my perpetual calendar and review all birthdays for the year and begin to go through current cards to send! I then plan to make more birthday cards if I don't have enough....and then some! So it's so fitting that we start our 2021 Stampin Friends Blog Hop with Birthday Celebrations! So here’s to a new year, new beginnings, new possibitlities and a new 2021 Stampin Friends Blog Hop!! Be sure to hop along and visit everyone's blogs, if you miss anyone along the way, you can find a list of participants to the bottom of each blog. I hope you came from Teri Pocock’s blog, wow weren't her projects amazing?? After you view my blog, continue onto Maureen Rauchfuss’s blog, you're going to be blown away. You are guarantee to find projects that you will want to make! 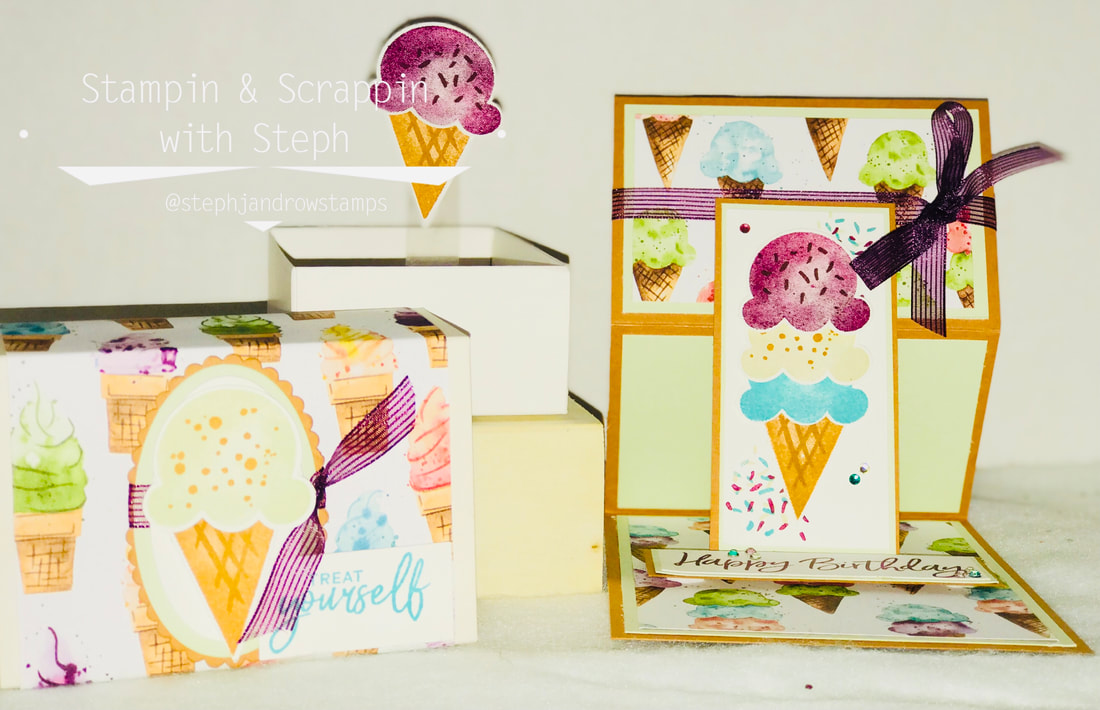
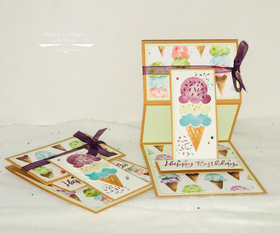
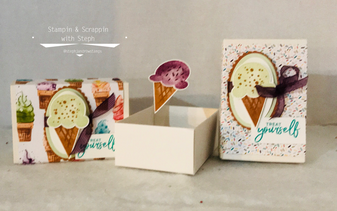
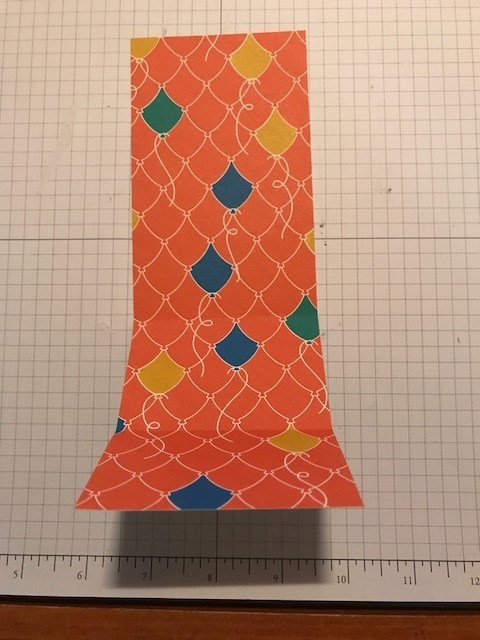
I chose a fun fold card that I have never made before! This Easel Card is so easy to make! I choice Cinnamon Cider as my base with a layer of Soft Sea Foam! Can you say Mint Chip? Ok, maybe just me!! Then, I added the layer of DSP. Rich Razzleberry, Soft Sea Foam and Bermuda Bay are the perfecct scoops! I see Black Raspberry, Mint Chip and Cotton Candy!! Well around here, those would be colors of so fun flavored ice cream. What about were you are??? Stamp the images and use the Ice Cream Cone Builder Punch to punch them out! Add the fun sprinkles or jimmies and chips on the scoops and then don't forget the criss-crosses to define the cone! The Happy Birthday Greeting can be found in the Sweet Ice Cream stamp set and I stamped that in Rich Razzleberry. Below is the measurements of the paper used! For more details on how I put this card & box together, I created a video for you to follow! To make the card: Cardstock: Cinnamon Cider 11x4 1/4; on the 11" side score at 2 3/4 and 5 1/2. Fold on the 5 1/2 score line and then fold back on the 2 3/4 score line. Layer 1: Soft Sea Foam 5 1/2x4, DSP 5x3 3/4 adhere to the bottom section of the card Layer 2: Soft Sea Foam 2 at 4x2 1/2, DSP 1 at 3 3/4x2 1/4. Adhere 1 of the Soft Sea Foam pieces to the center section (measures 4 1/4x2 3/4). Adhere the other piece of Soft Sea Foam and then DSP to the top section. Layer 3: Cinnamon Cider 2x4, Soft Sea Foam 1 7/8x3 7/8, and Whisper White 1 3/4x3 3/4. Stamp the sprinkles in different colors on opposite corners of the Whisper White. Adhere layers togther and then add about 1/2 way down on the top section. Use dimensionals. Make sure to only add the adhesive to the part that sticks to the card base. Layer 4: Cinnamon Cider 1 1/4x3 1/2, Soft Sea Foam 1 1/8x3 3/8 and Whisper White 1x3 1/4 Stamp the greeting in Rich Razzleberry. Ink Colors used to stamp ice cream scoops, jimmies/sprinkles, chips and cone on Whisper White. Bermuda Bay, Cinnamon Cider, Early Espresso, Rich Razzleberry and Soft Sea Foam. Punch out using the Ice Cream Cone Builder Punch. Add to the Whisper White Sprinkle layered piece. Wrap and tie in a bow, on top section, with the Rich Razzleberry Ribbon. Lift the card up, so the ice cream cone section stands almost up right, then add the greeting to the base of the card, so it holds up the top section.
To decorate the box;
What do you think? SO FUN right? I just love how adorably fun this suite is!! Thank you for joining me today, be sure to leave a comment and visit blog! Happy Stampin! Steph  Below is the list of hoppers for this month's Blog Hop.
7 Comments
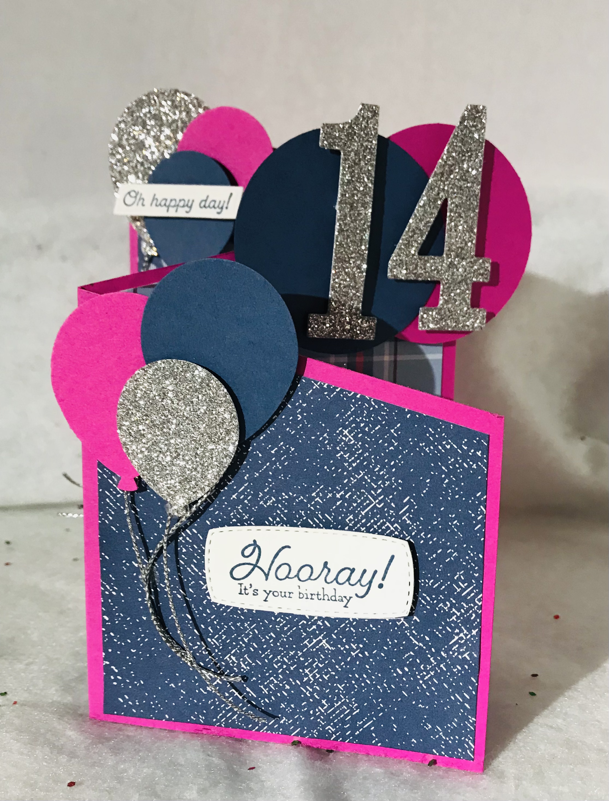
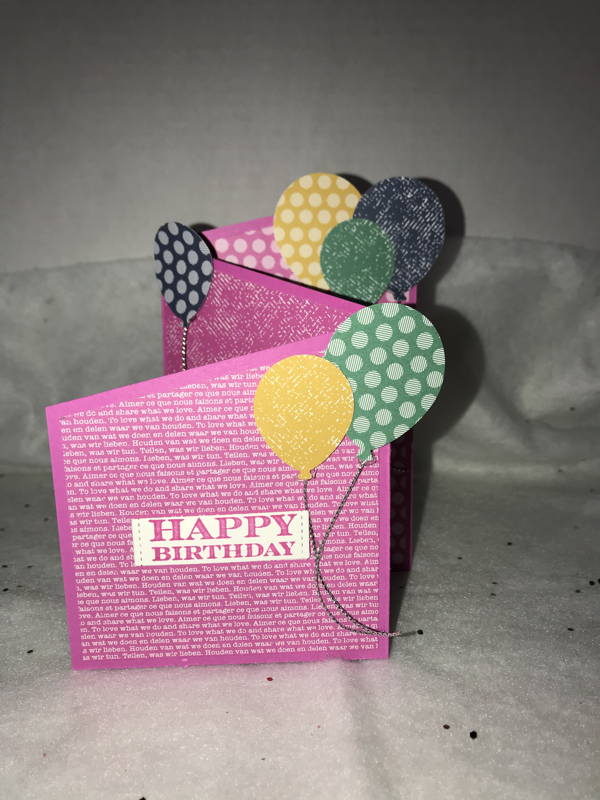
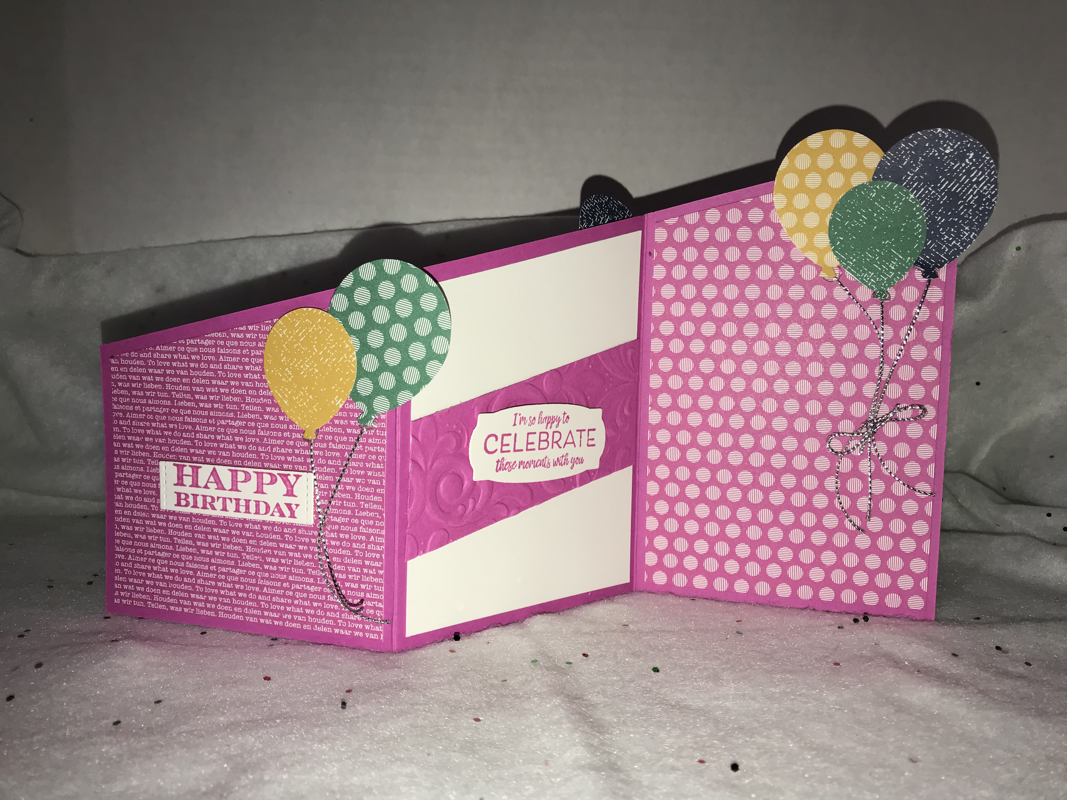
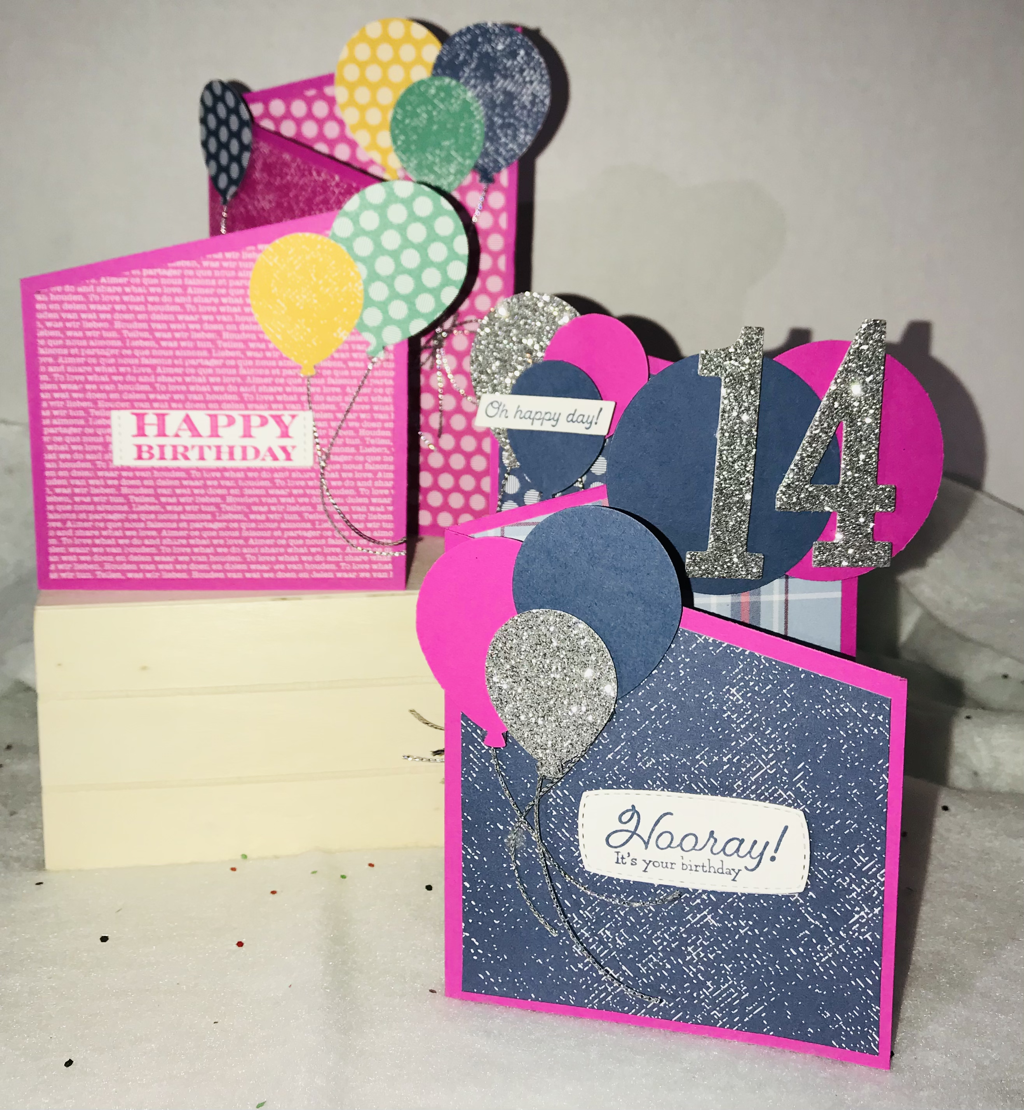 I made this super funTri-fold Card for my daughter who turned 14! I can’t believe how easy it was to make and the big smile on her face when she took it out of the envelope, was the best!!! She was so happy!!! She even said “Aww mom, you made this for me?” LOVE!!! And, I made the card featuring 2 BRAND NEW products from the upcoming Stampin Up January Mini Catalog the Many Messages Stamp set and dies and the Painted Textures 3D Embossing Folder! Using 2 In Colors of Magenta Maddness and Misty Moonlight, a few balloons some silver glimmer paper and silver cording Really make the card pop! I also used the 2020-2022 In Colors DSP and Plaid Tidings! I also made a version in Magenta Maddness and adding the other in colors or Bumblee, Just Jade and Misty Moonlight balloons! Which do you like better?? You can learn how to make this card and view the new products in my video below!! Thanks for stopping by!! Happy Stampin Steph 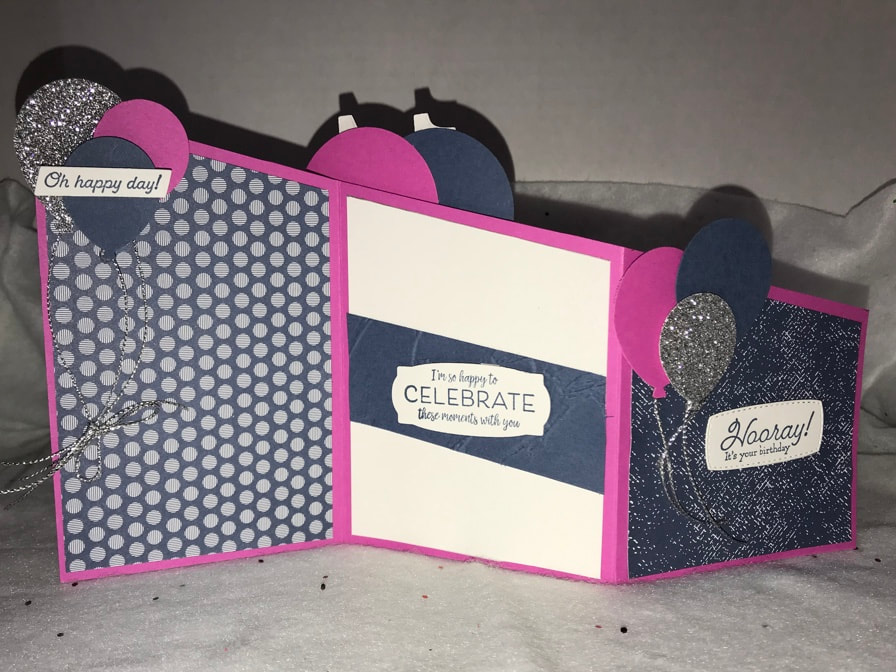 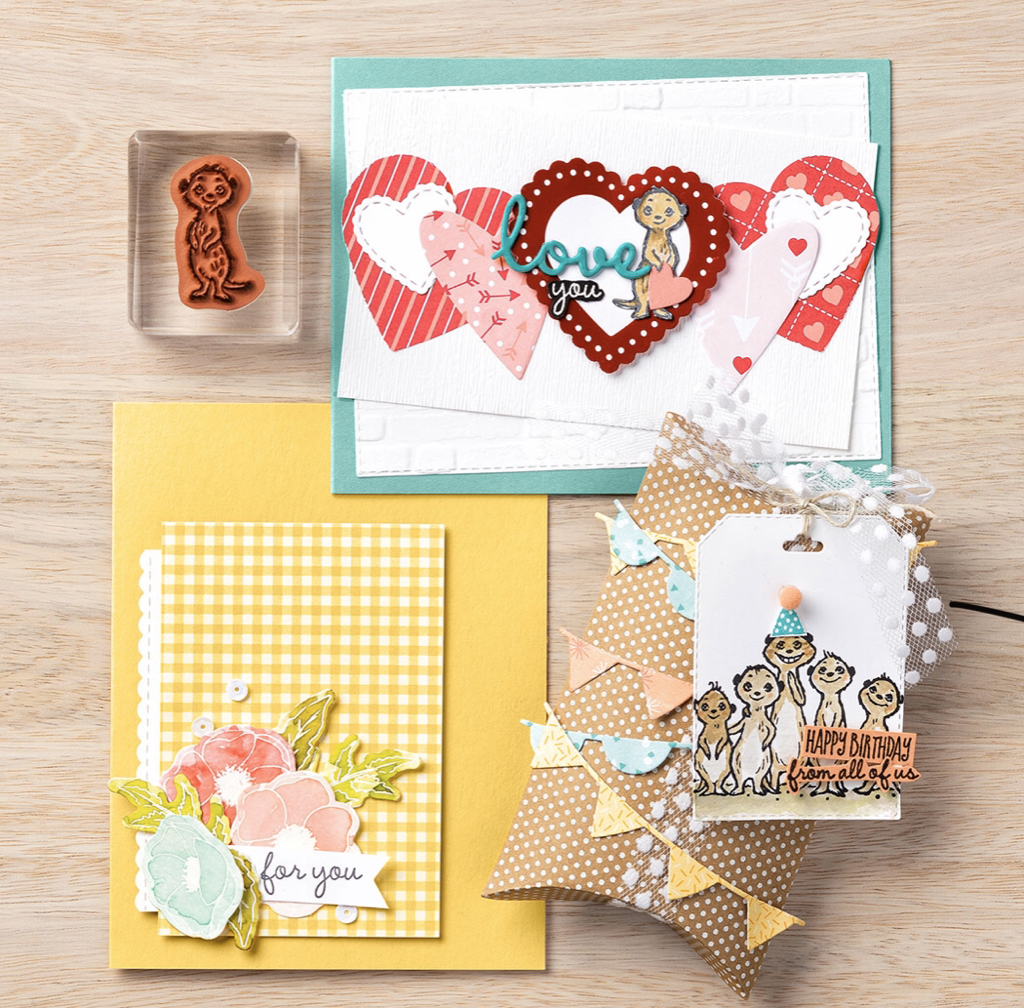 The Gang’s All Meer Stamp Set is a fun one to bring out the smiles and you can see its versatility with our projects here. To create a darling valentine, we paired the set with From My Heart Specialty Designer Series Paper, the Heart Punch Pack, and the Stitched Be Mine Dies. The beautiful For You card shows how to pair sentiments with embellishments, in this case, the Peaceful Poppies Elements. And on our cute birthday box, we combined the stamp set with the Bonanza Dies. There are so many ways to share creativity—and Sale-A-Bration!
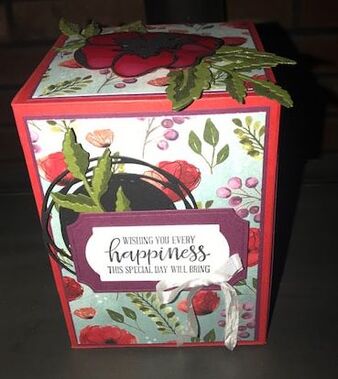
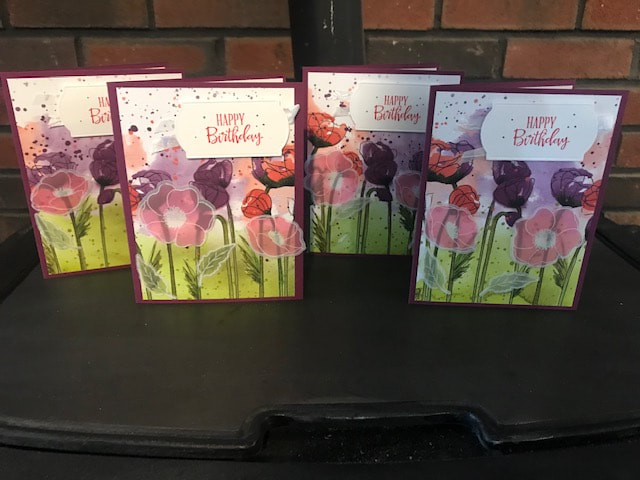
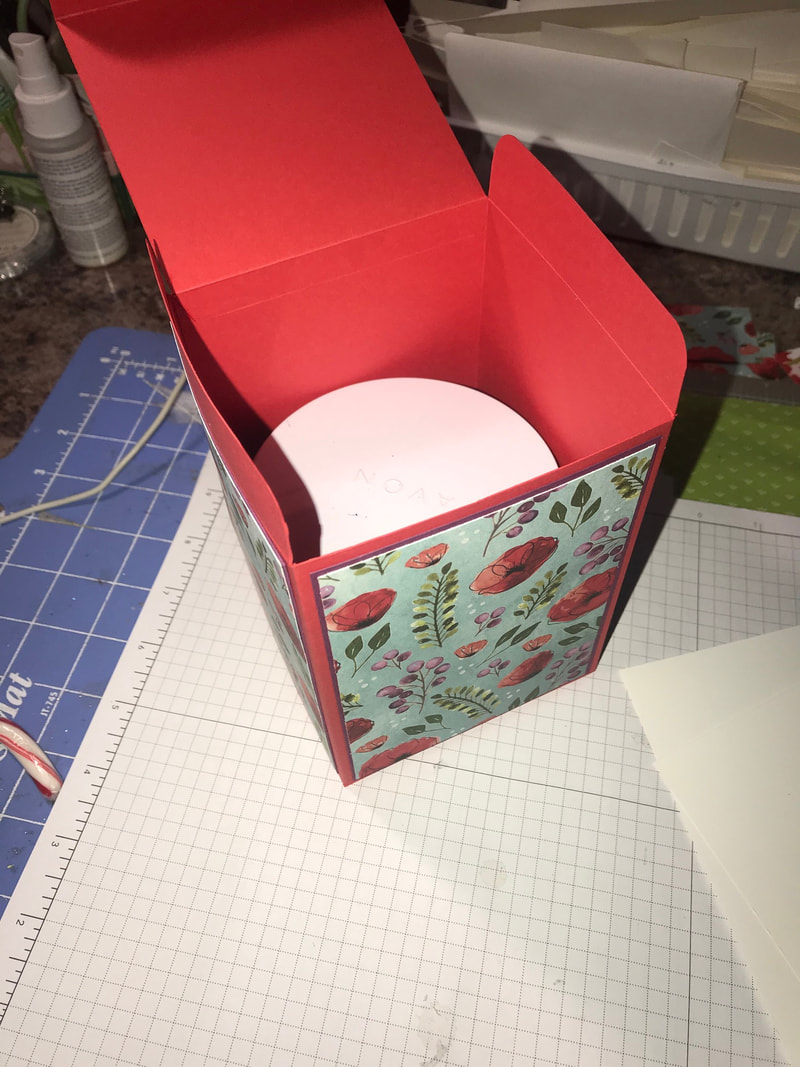
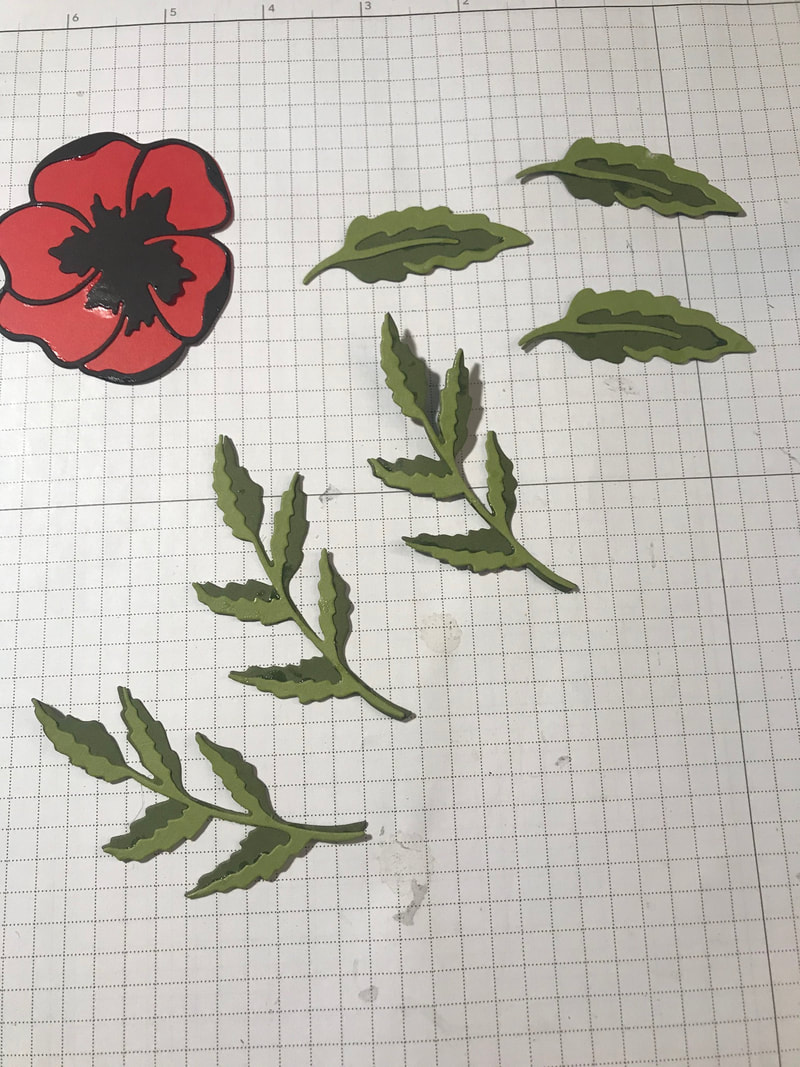
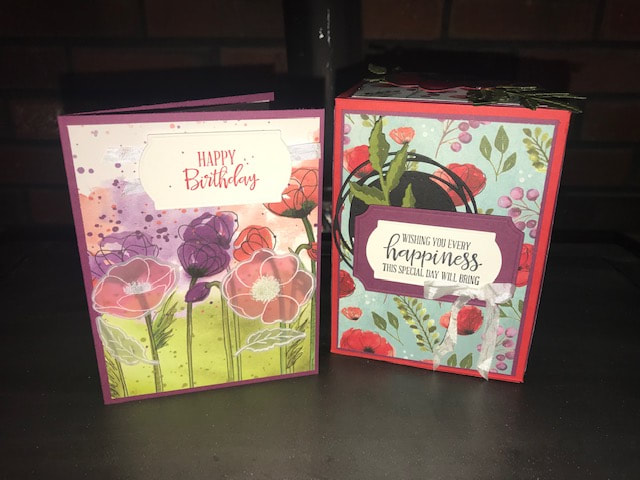
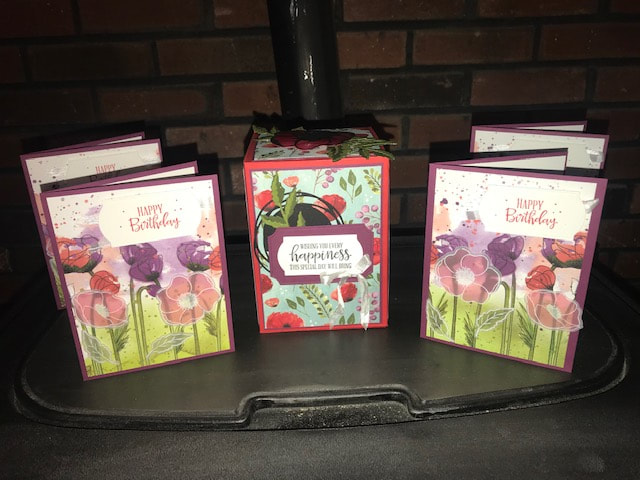
Be sure to contact me for your new catalogs Happy Stampin Steph  Welcome to a new year and a new 2020 Stampin Friends Blog Hop!! We have so many amazing new hoppers joining us. We are jammed packed with new projects to share with you as well. The Birthday Bash theme is perfect to kick of the new year and have you ready to go with all your birthday events in 2020! Be sure to hop along and visit everyone's blogs, if you get lost, be sure to scroll down to the end of each blog to find a list of hoppers. I hope you came from Jo Blackman's blog, wow weren't her projects Awesome?? After you view my blog, continue onto Katja Ettig's blog, you're going to blown away. So let's dive in! 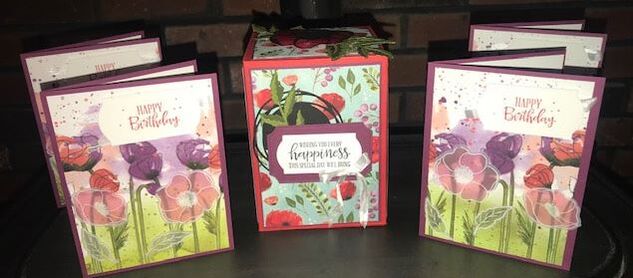 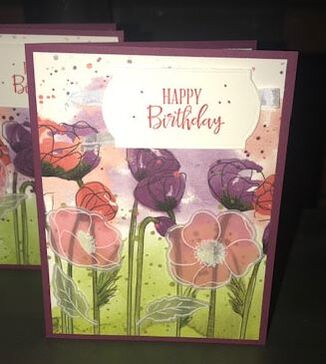 Today I have two fun projects for you using the new Stampin Up Peaceful Poppies Suite from the mini catalog. This Suite features not 1 but 2 stamp sets with coordinating dies. I think it is so pretty, I couldn't wait to use it! The card was made using Rich Razzleberry as the card base and features the Peaceful Poppies DSP. Isn't it pretty? The Happy Birthday greeting is from the new Peaceful Moments stamp set included in this bundle. The flowers and leaves are from the Painted Poppies stamp set. I stamped on vellum with Versamark, and embossed the images in white. The flowers and leaves were cut out using the coordinating dies, Poppy Moments. If you were browsing through the catalog, you may have noticed this card with a different greeting! I actually made a whole bunch of these cards as part of a swap for a Stampin UP group I am in. My next project is this huge box!!! I love to give candles to friends and families and normally I would just grab a giftbag and add a tag! But I thought what about a box. No problem right?? After a few failed attempts of trying to make a box on my own. I was ready to throw the towel in.
The flower and leaves were cut out with the Poppy Moments dies. I used Poppy Parade, Basic Black, Mossy Meadow and Old Olive. I layered them together and used the Fine Tip Glue Pen on the top of the flower to give it a shiny look. And I brushed the leaves with the Clear Wink of Stella. I hope you enjoyed my projects. Be sure to leave a comment, I will love to hear your thoughts!
Continue throught the Stampin Friends Birthday Bash Blog Hop by clicking here to go to Katja Ettig's blog!! Thanks for stopping by Happy Birthday, Happy Hopping and Happy Stampin Steph  Sometimes the most full-filling projects I make are the ones that incorporate old and new! Once stamps or supplies retire, I find myself siting on a lot of leftovers. When I teach workshops and design for my clubs, I focus on new products only!! For the these cards (except the pandas, I posted about those on Sunday) I was able to use up ribbon that I have had for a while!!!! I had enough of each color to create 2 cards of each! Perfect! I used the Picture Perfect Stamp set! Wild Wasbi, Daffodil Delight, Blushing Bride and Dapper Denim were the colors of my cardbases and inks, I also added Bermuda Bay, Berry Burst, So Saffron and Wisteria Wonder when stamping the candles. Easy cards that were easy to be reproduced! And then ribbon was perfect! Thanks for stopping by Happy Stampin Steph  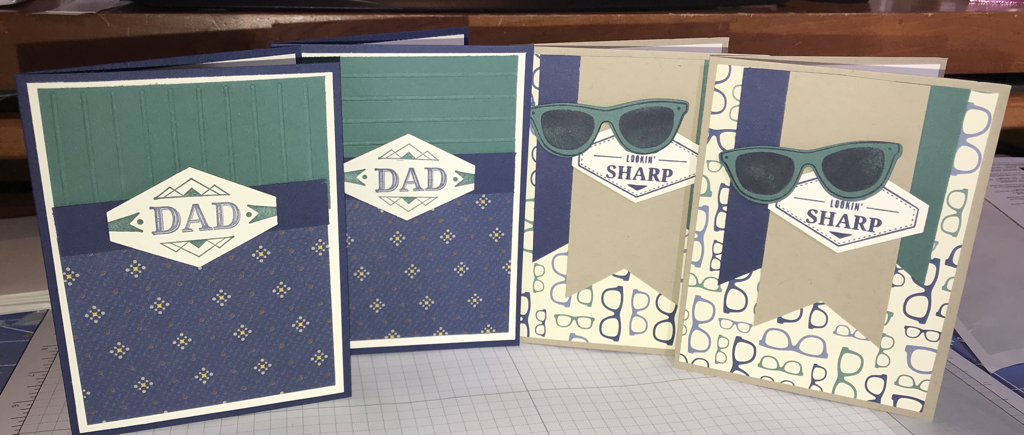 Does anyone else struggle with masculine cards like I do? I often feel like the products available for these types of cards are too specific. I don't like making cards with tool sets or ties, as the person receiving, do not wear ties or happen to be someone using tools. The of course I search and feel that I don't find anything more general. The masculine cards seem to be boring, older and quite frankly not fun to me! And well, the majority of my supplies are just to feminine and if I do make a more masculine card, it's too young looking??? Anyone feel my struggle?? So...the new True Gentlemen Suite is a nice addition to my supplies. But I am not a huge fan of the colors! But the DSP is really nice and very usable!! I do like the stamps! And I love that the set is bundled with a punch!!! Going forward, I want to work on creating my own patterns in colors I that I think is a little more appealing and modern! I am still very happy with the designs of the cards!!! I know I will definitely have more use of this suite than those of the past!!!!! Thanks for listening! I am open to suggestions as well!!! Happy Stampin Steph 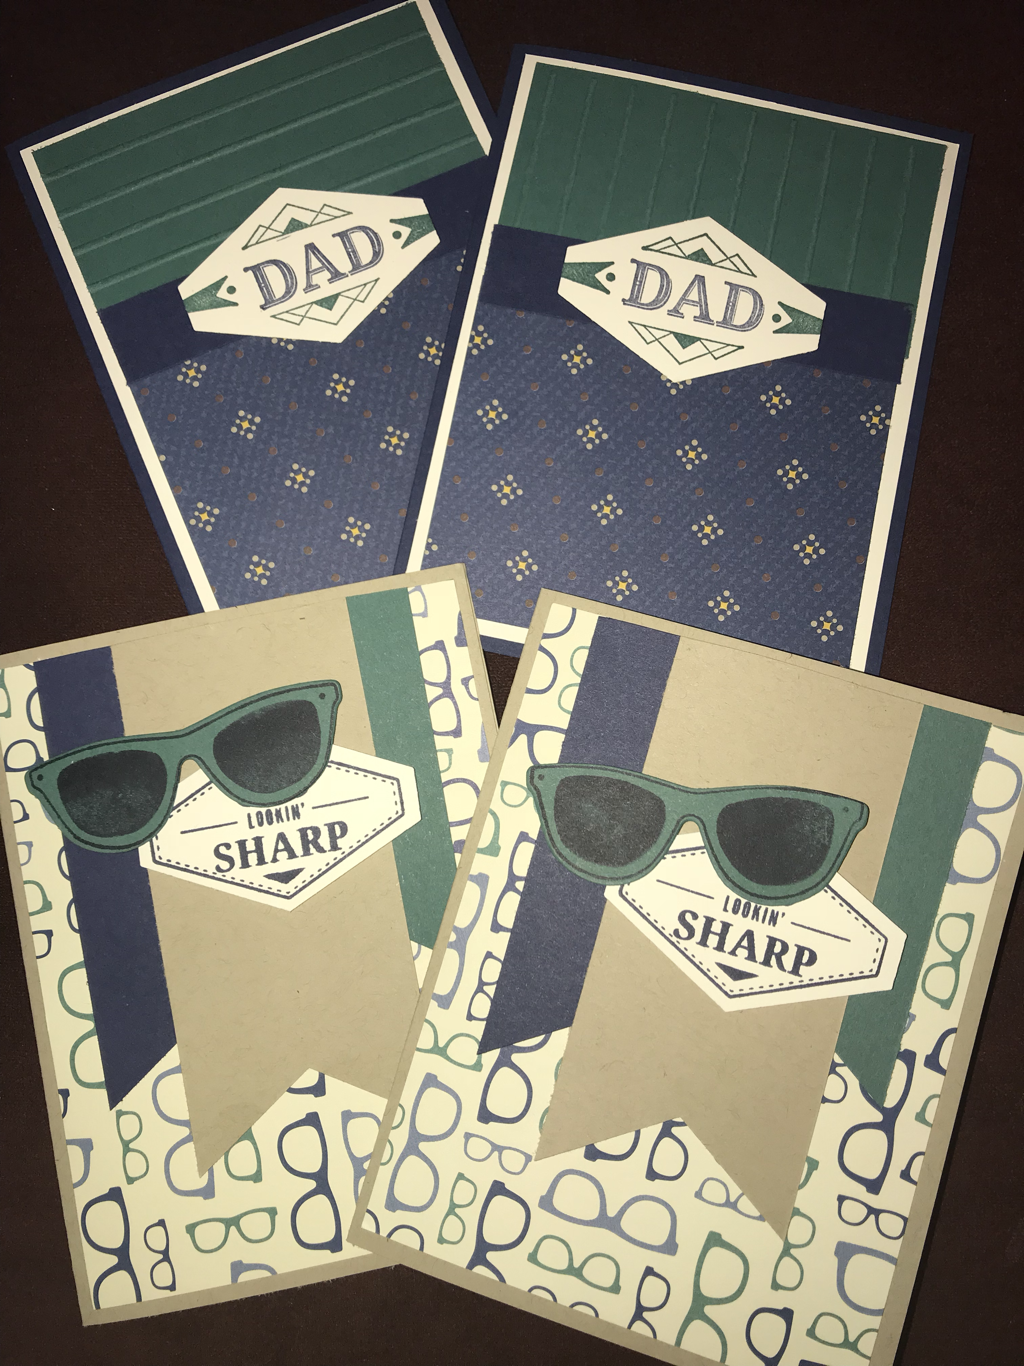 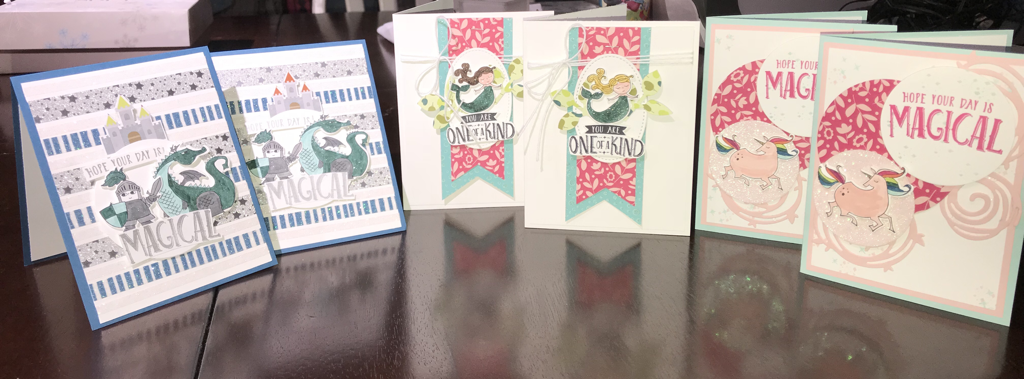 Aren’t these cards simply magical!! I just love them!!!! I do not have many stamps for children that I have come across and thought I have to have them!!! I will admit, I thought the set was cute but had a hard time seeing myself using them!!! Once I started seeing all the wonderful projects that have been created with Myths & Magic Suite, I knew it was time to purchase!!!! I am soo glad I did!! These cards were inspired by Kristal Bell, Stampin’ Hoot, and Mercedes Weber! Thank you ladies for you’re awesome creations! The Myths & Magic Suite can be found on pages 36-37 of the Occasions Catalog! Contact me to receive your Occasions Catalog!!! Happy Stampin Steph 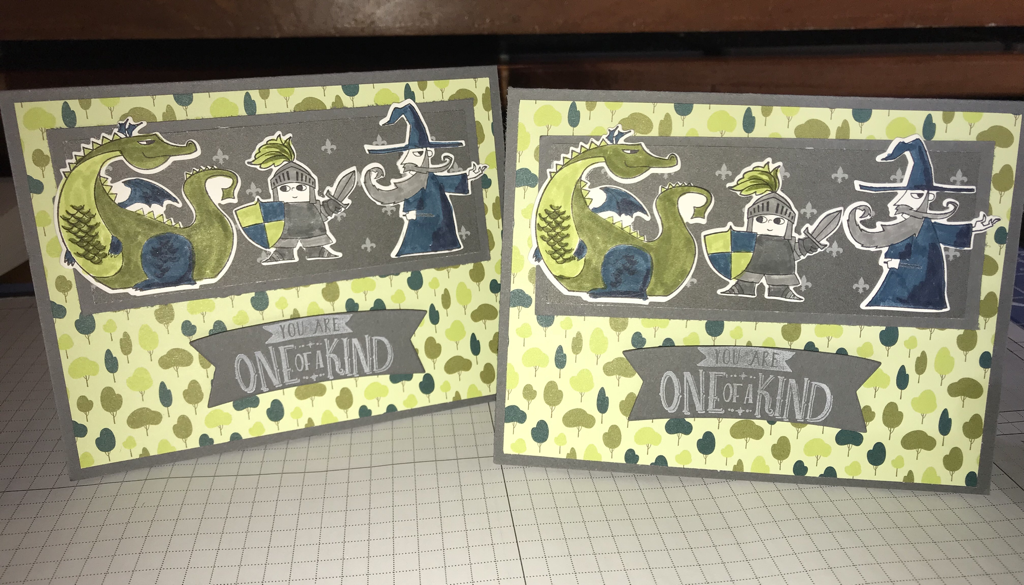 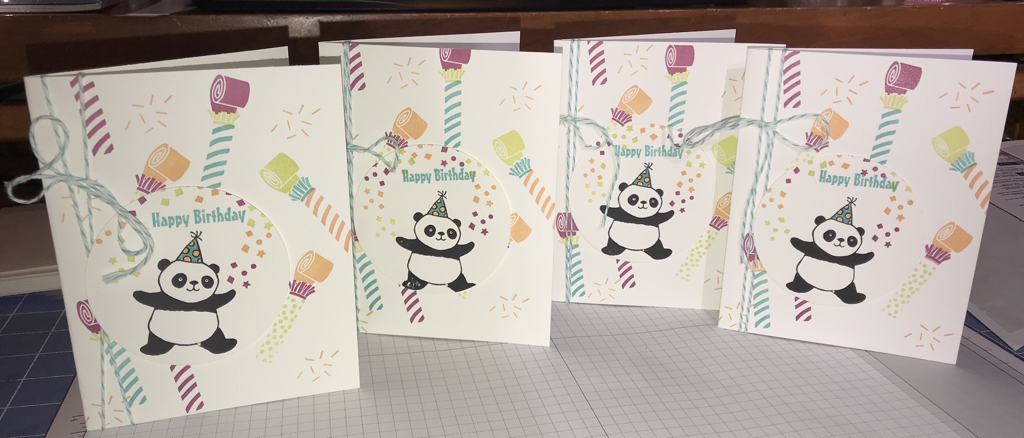 I have been working on refreshing some of my cards that I sell in a local boutique! My go to for inspiration is Pinterest! I love finding a design that works for my needs and I am very grateful for the demonstrators who share their creations!!! Todays’ cards were inspired by Patty Bennett, combining Party Pandas and Picture Perfect Birthday stampsets. Such a fun and simple card to make! I used the colors that are found in the Perfect Party DSP! The combination of Bermud Bay, Berry Burst, Lemon-lime Twist and Peakaboo Peach really makes a bright and cheery card!!!!
The entire Picture Perfect Party Suite can be purchased for just under $60! But the best part is you can earn the Party Pandas stampset for free, during Sale-A-Bration! How great is that!!!! Hope you enjoy Contact me with anything questions Happy Stampin Steph 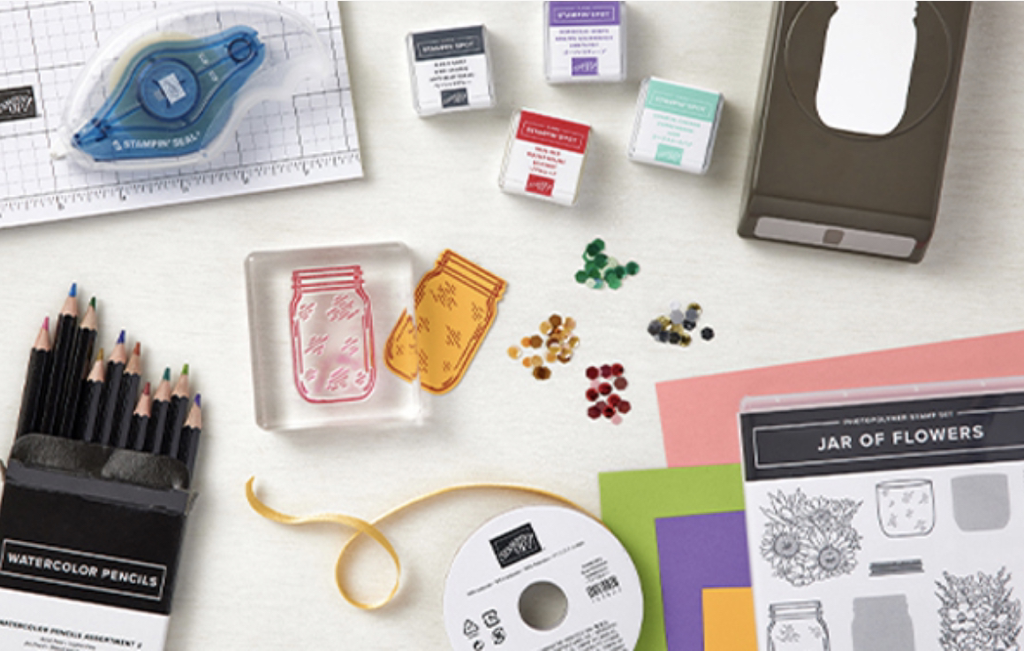
Welcome to our April Stampin Friends Birthday/Celebration Blog Hop! We have 14 talented crafters involved in the hop, including 1 Guest Hoppers.
Please, make sure you check everyone's blogs out. After reading my blog, scroll to the end, and please leave a comment for your chance to win a little blog candy from me! If you have visited my blog from Elizabeth Jeanne Thatcher's site, thanks so much for continuing with the Blog Hop. A full list of Blog Hop participants are listed at the end so you can continue along the hop! 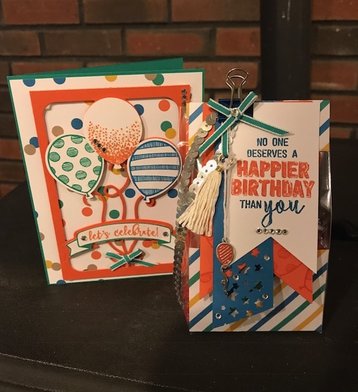
For the April Blog Hop I chose a bundle that I purchased awhile back when the Occasions catalog first went live! I have barely used it! The colors intimidate I think! And the DSP is more on the masculine side, which I don't typically make many projects out of!
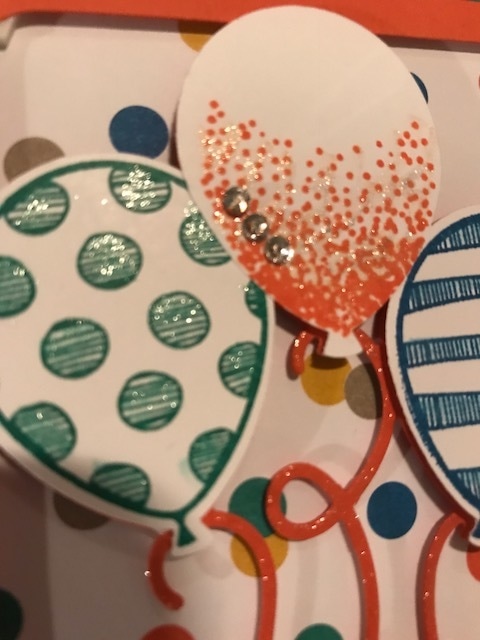
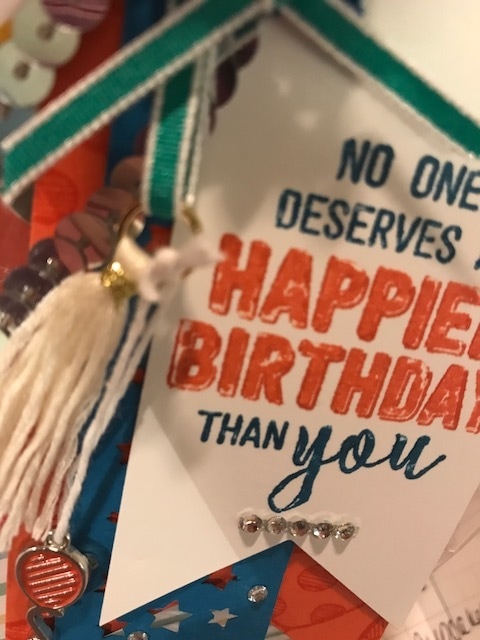
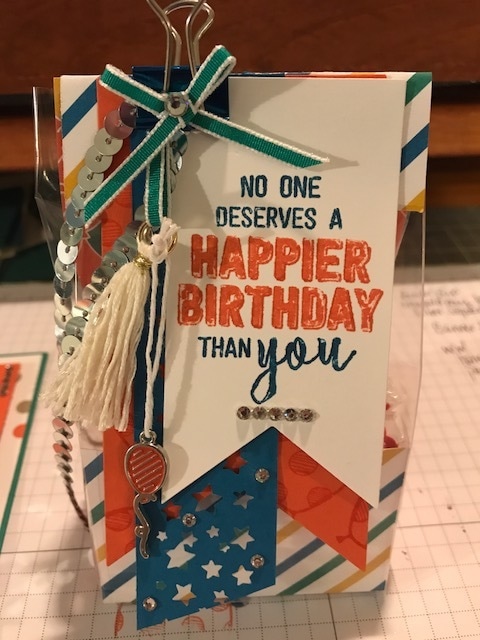
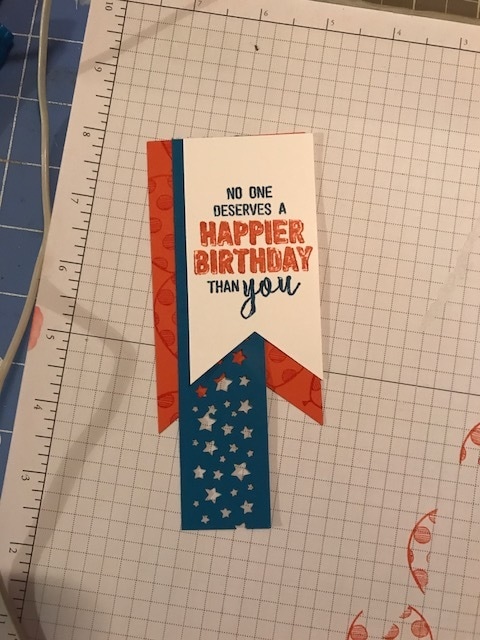
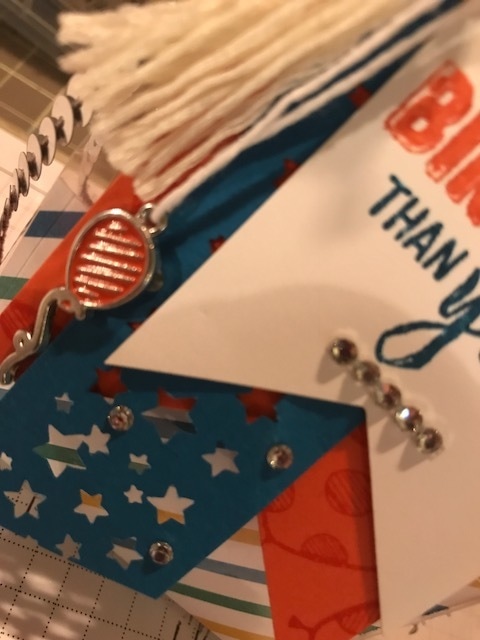
The card I chose to make uses all Stampin Up products. The bundle I chose was from the Party Animal Suite on page 4-5 of the Occasions Catalog and the stamp set is the Balloon Adventures. I also used the matching framelits (Balloon Pop-up) and Party Animal embellishments and Emerald Envy taffeta ribbon. I used a Paper and ink combination of Whisper White, Tangerine Tango, Emerald Envy and Pacific Point. Card: The card is pretty easy to make I used Emerald Envy for my cardbase and a piece of DSP cut to and 1/8" shorter than the cardbase. I cut out the balloon background with the Balloon Pop up framelits, then I trimmed the edges to the size I wanted it to be on the front of the card. Stamped the balloons using the Balloon Adventures and Balloon Celebration stamp sets. Punched them out using the Balloon punch. I stamped the banner and cut it out by hand. I added clear Wink of Stella on the balloons, banner and strings. I also added some Basic Rhinestones.
At the moment the bag is filled with Smarties. But I will be changing it up when I give it to my Aunt on Easter Sunday for her birthday. I plan to fill it with some of her favorite candy's and a gift card she can use shopping!!
I hope you enjoyed the projects I made for you! Please leave a comment for your chance at winning some blog candy!!! Click on the next blogger, Lana Staab, below - you are at Steph Jandrow, incase you forgot along the way! Happy Stampin Steph 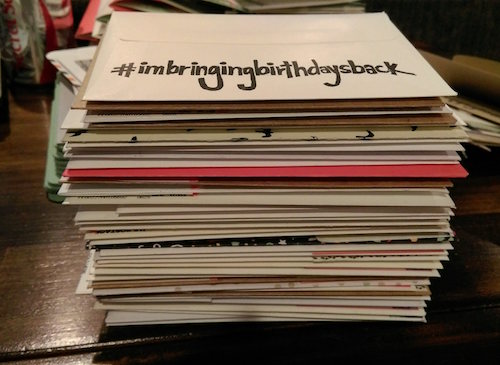 Back in March, I blogged about bringing birthdays back. I offered a challenge to anyone who commented or emailed me that I would send you a birthday card that you could use. You can read the original #imbringingbirthdaysback post here. The original #imbringingbirthdaysback was started by Shannon West and a stamp was designed. Love it!!! You can read about Shannon West's challenge here. So my challenge was: I challenge you to mail birthday cards out to those that you know the dates on. AND...comment on my blog with the #imbringingbirthdaysback and I will mail you a birthday card, handmade from me. After commenting, I will need to ask that you email me your full name and address so I can mail you the card. My email is [email protected] I received a wonderful response via email, which is great!!!! I know most won't want any personal information on a website. Soo with that said, I am going to offer this challenge again and I am going to offer this challenge from now until December 31st. With the exception, I am going to send you 2 birthday cards, (a traditional style birthday card and a non-traditional (may be seasonal or holiday themed)). For more information on the #imbringingbirthdaysback stamp, you can click on the image below. There's no purchase necessary and no soliciting! You will receive the cards from me in approx 7-10 business days, depending on the response and whether I need to create more cards. I really you will except this challenge, I look forward to hearing from you all again!!! Happy Stampin Steph  |

New 2023-2024 Stampin Up Annual Catalog


Kits Collection


Join today

Categories
All
Archives
January 2024
|


 RSS Feed