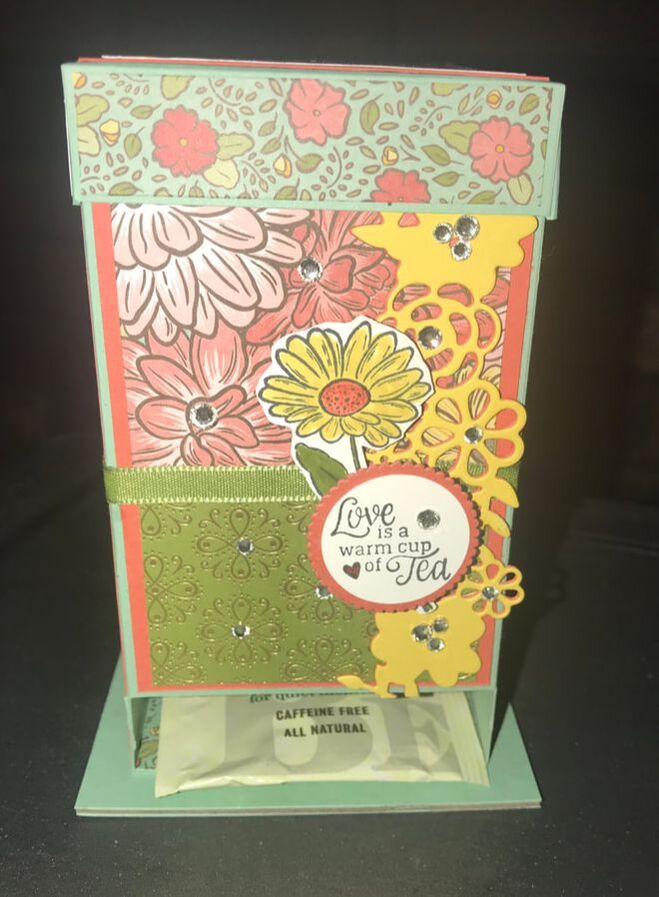
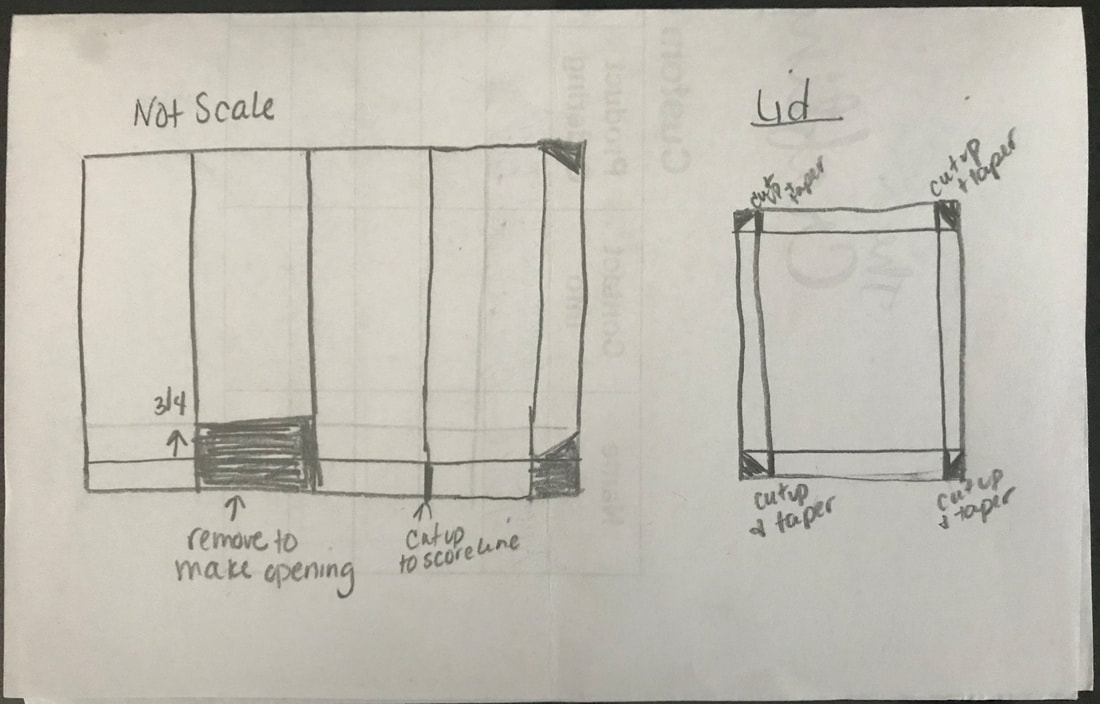
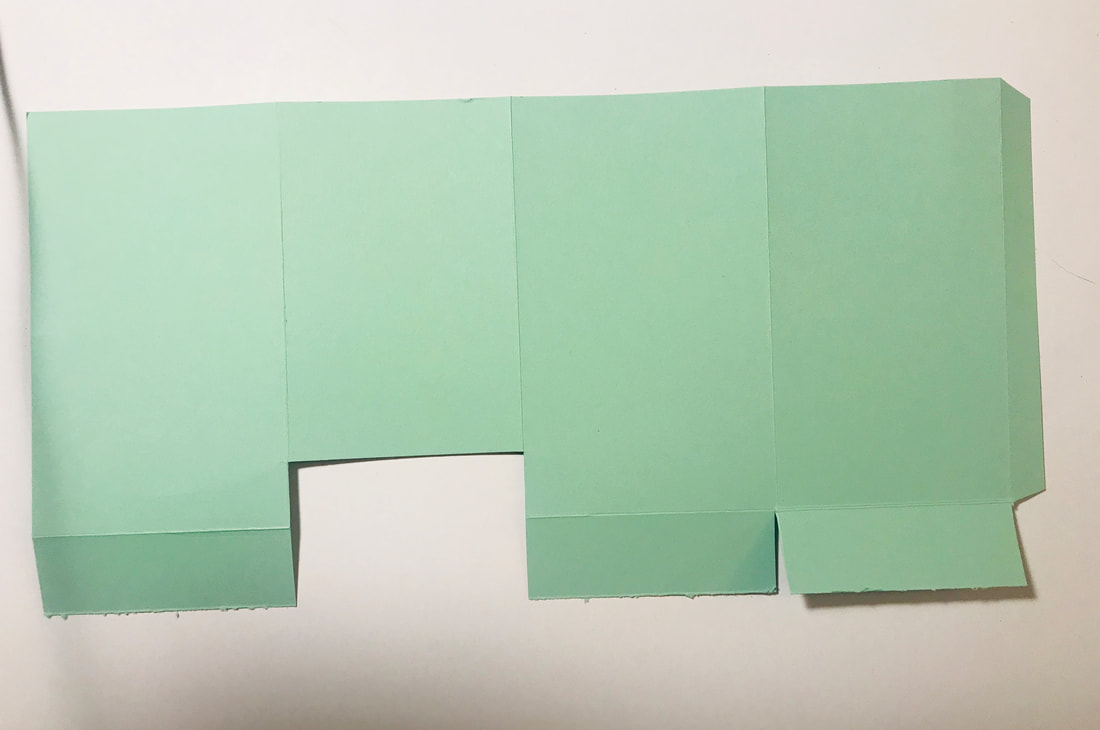
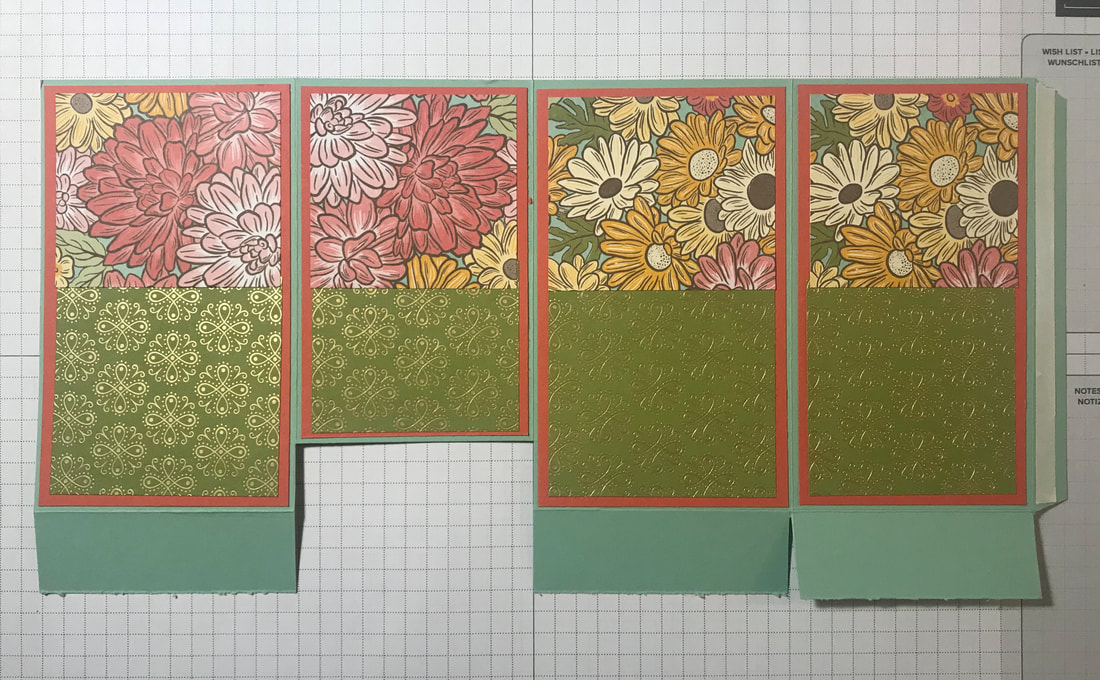
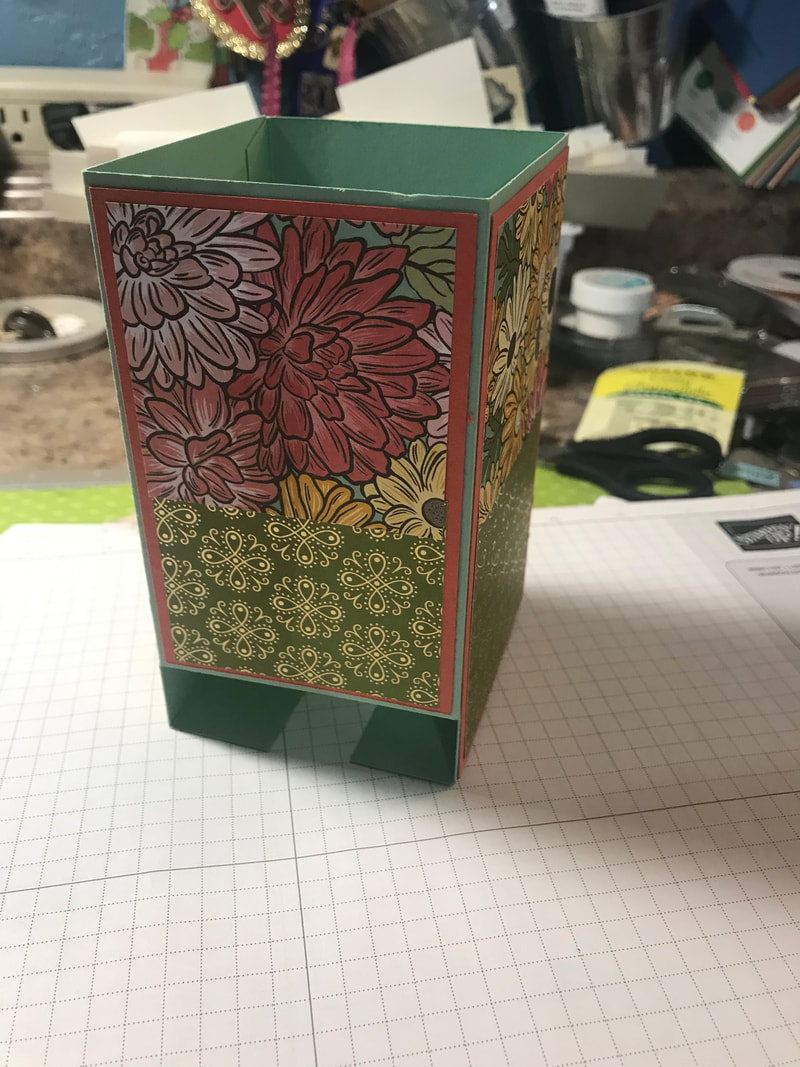
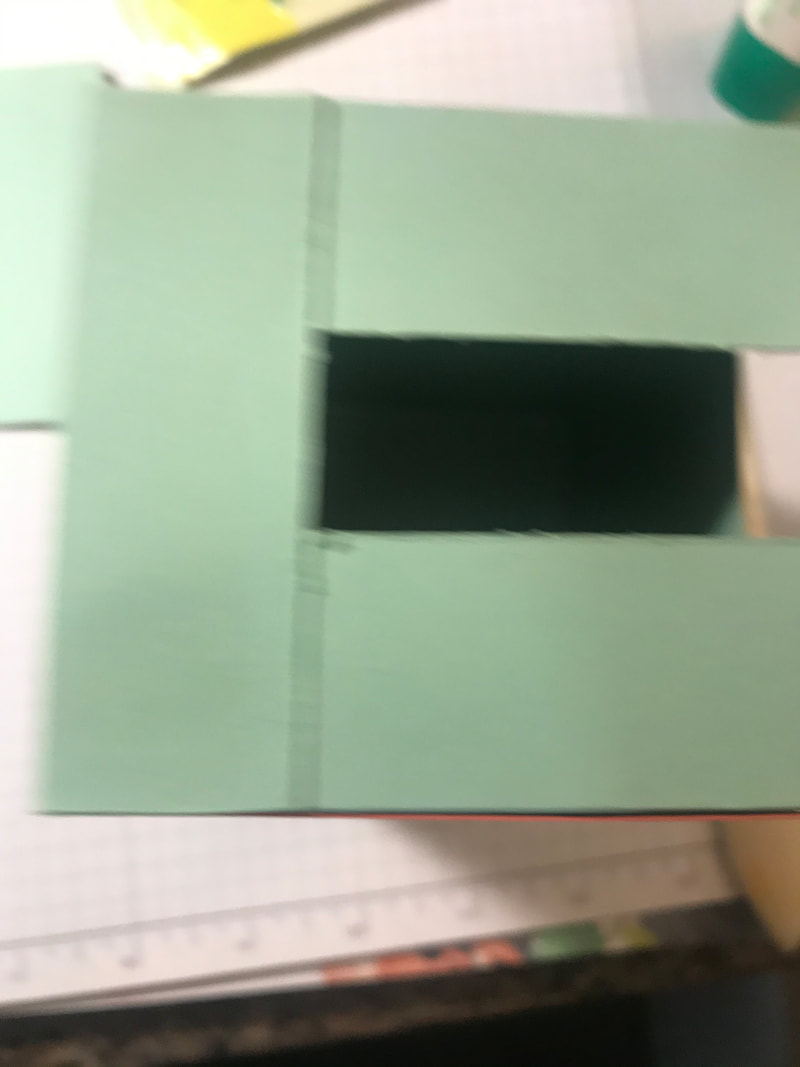
 Today's project is this beautiful tea bag holder that doubles as a dispenser. It's a project that is perfect for all those tea drinkers in your life! You can fit a whole box of tea and totally customizable to match anyones decor! To make this tea holder, I used the new Stampin Up suite called Ornate Garden. You get a sneak peak of what is to come in the new Annual Catalog in June. I have made this project in the past and I would like to say it always went without a hitch, but sadly i seemed to get hung up on some the measurements that were out there. This time I worked on modifying to simplify the process. So here goes. You will need 6"x12" cardstock Designer paper for layers Cardstock for layer and lid Ribbon Embellishments To make the dispenser:
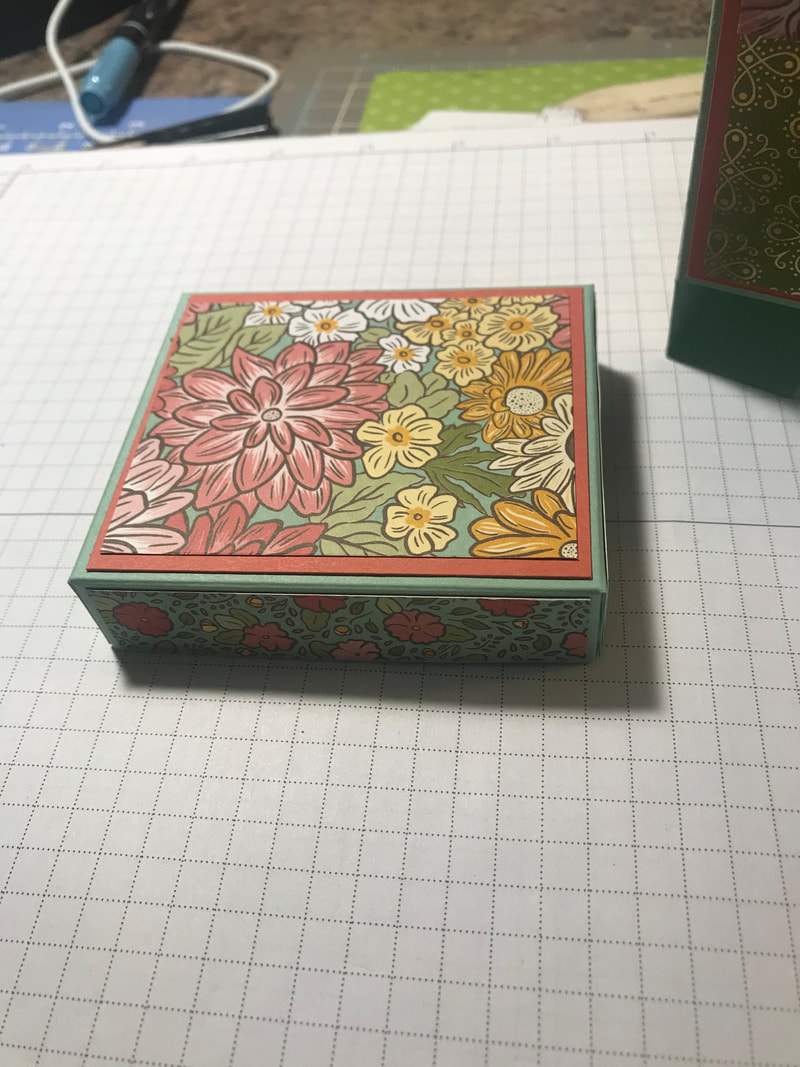
To make the lid:
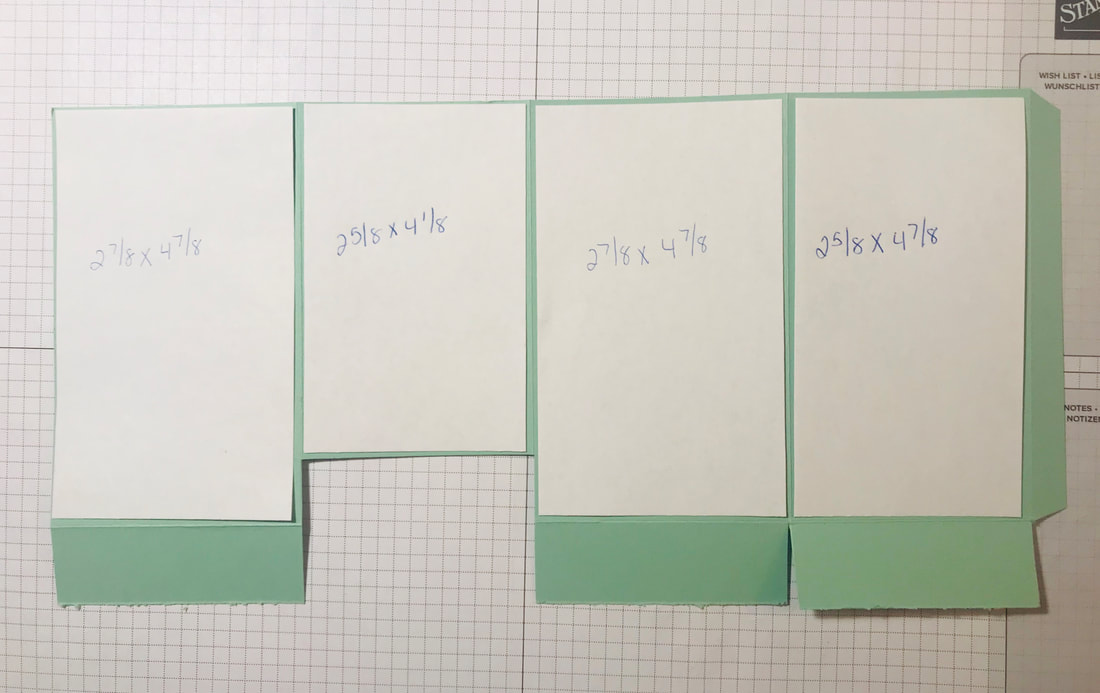
To decorate the outside of the box, I decided to use a layer of cardstock first, then 2 different patterned designer paper from the Ornate Garden DSP. The colors I used are Mint Macaron and Terracotta Tile. To add the cardstock layer you need:
To add the DSP layers for the top portion of the box:
To add the DSP layers for the bottom portion of the box:
To add the cardstock and DSP for the lid:
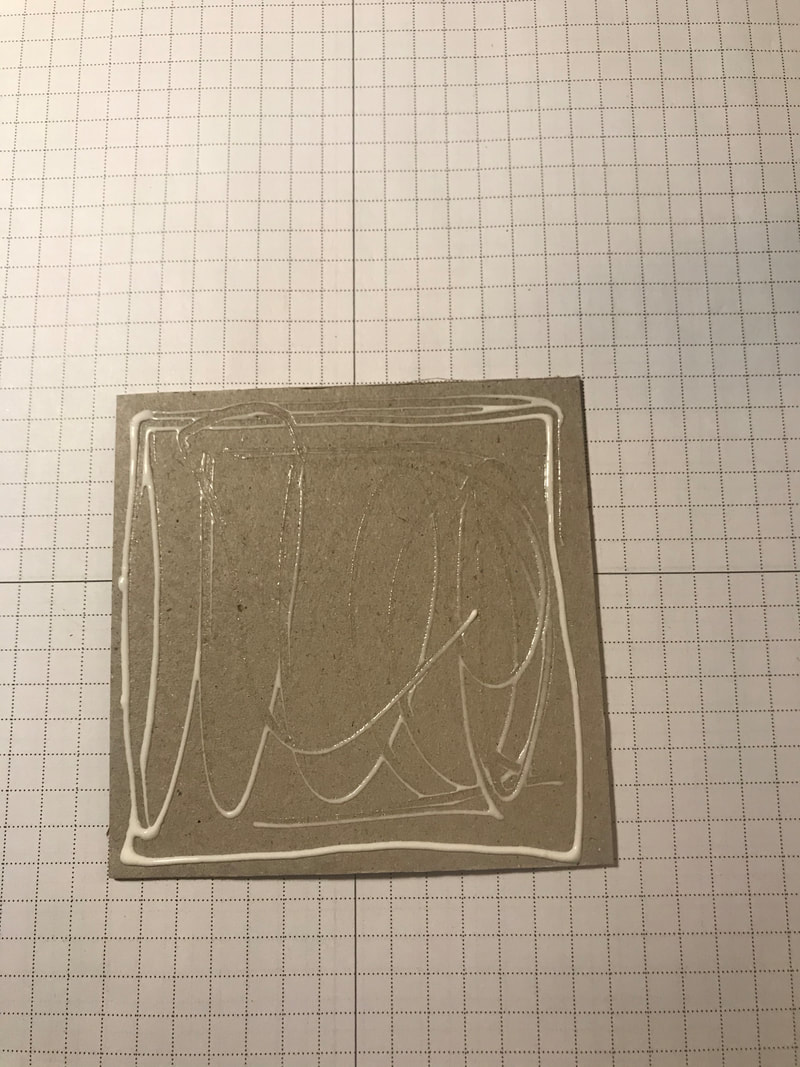
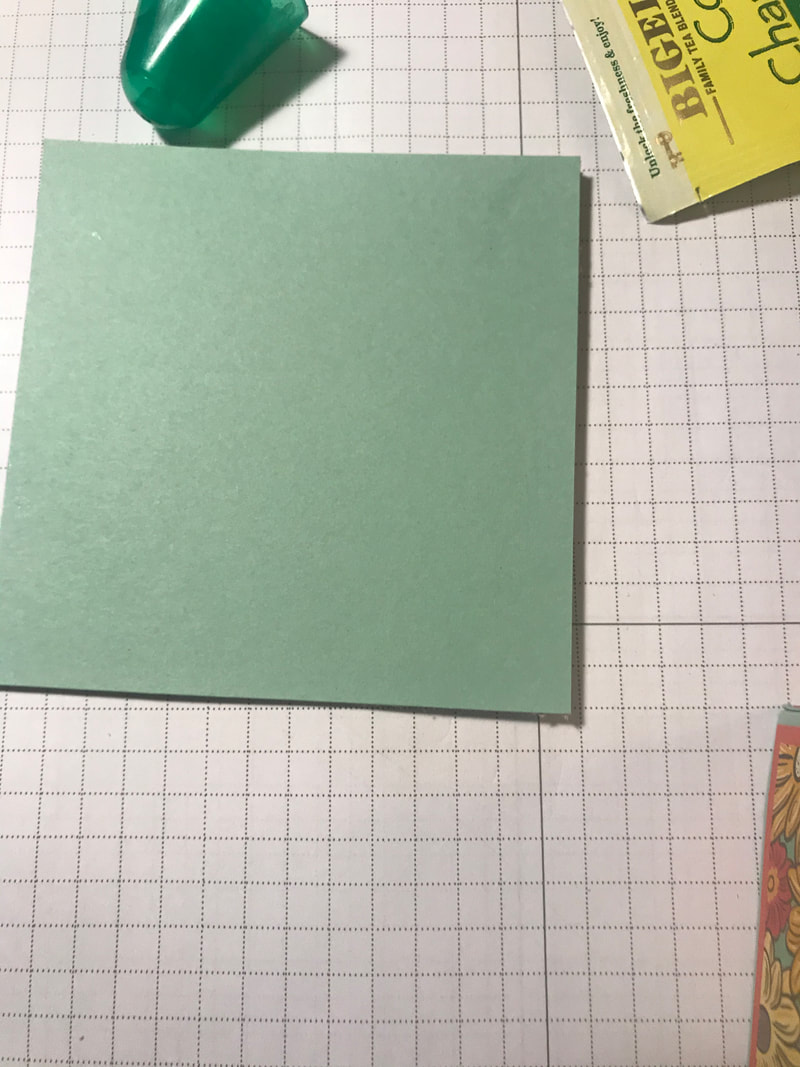
To create the base of the box, you will need a piece of chipboard that measures 3 1/2"x3 1/2" you will also need 2 pieces of cardstock that measure 3 1/2"x3 1/2". Glue them onto the top and bottom of the chipboard, you can also sponge the sides of the chipboard, I just left it as it. To adhere the box to the base, you will need to carefully glue the tabs onto the chipboard. Make sure to center as best as you can. The take a piece of DSP that measure 3 1/8"x2 3/4" and glue it on the inside to cover the tabs. To decorate the box, I took a piece of ribbon and wrapped it around, covering the seams from the 2 DSPs I used. I added some diecut flowers from the Ornate Garden Suite and the greeting is from the Tea Together stamp set. I finished it off with some rhinestones and it's ready to fill with some favorite teas.
What do you think? I love it too! I can't wait to make more and have these ready for gifts to give to some special people. Thanks for stoppin by Happy Stampin Steph
0 Comments
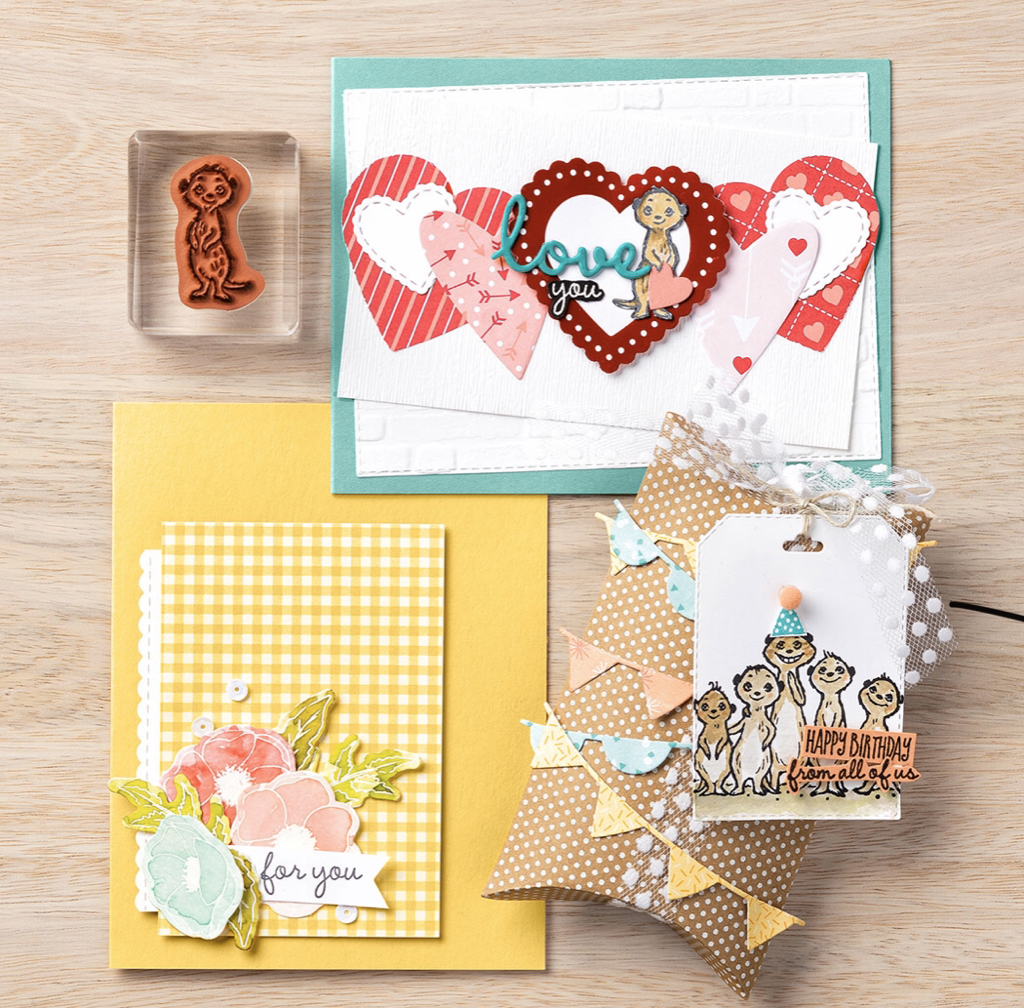 The Gang’s All Meer Stamp Set is a fun one to bring out the smiles and you can see its versatility with our projects here. To create a darling valentine, we paired the set with From My Heart Specialty Designer Series Paper, the Heart Punch Pack, and the Stitched Be Mine Dies. The beautiful For You card shows how to pair sentiments with embellishments, in this case, the Peaceful Poppies Elements. And on our cute birthday box, we combined the stamp set with the Bonanza Dies. There are so many ways to share creativity—and Sale-A-Bration!
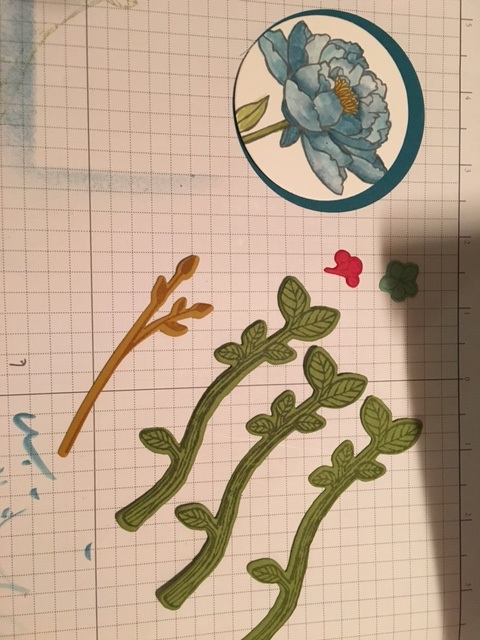
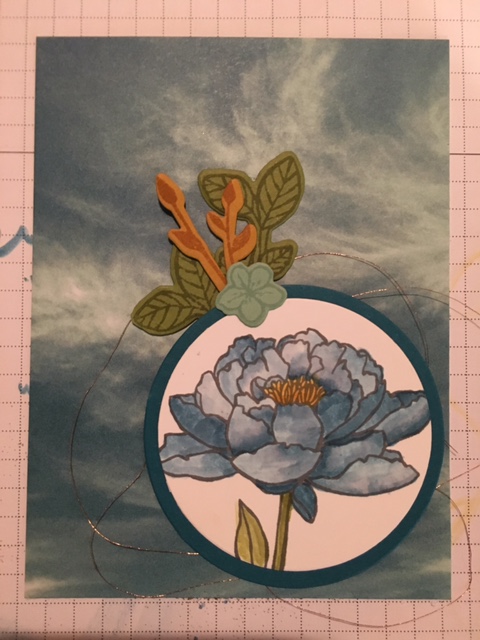
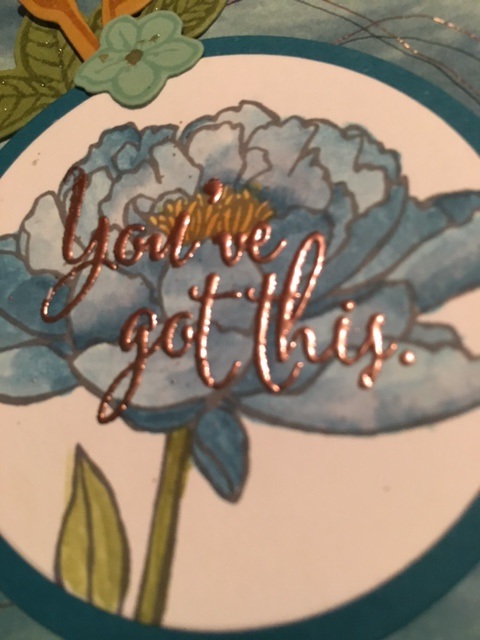
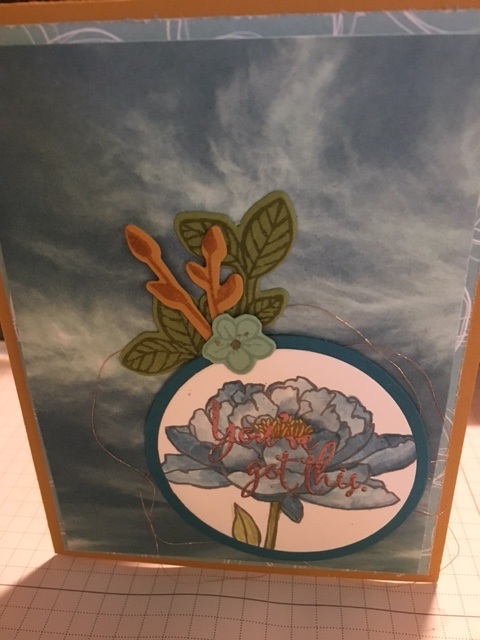
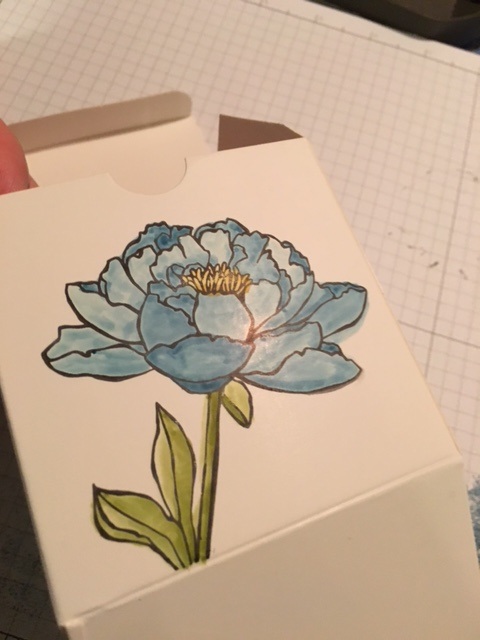
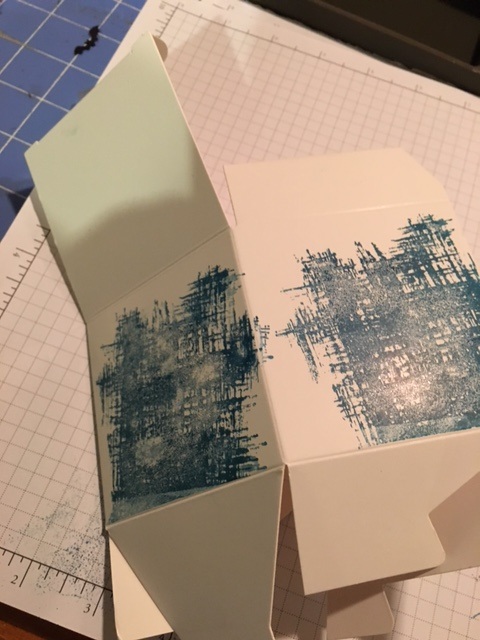
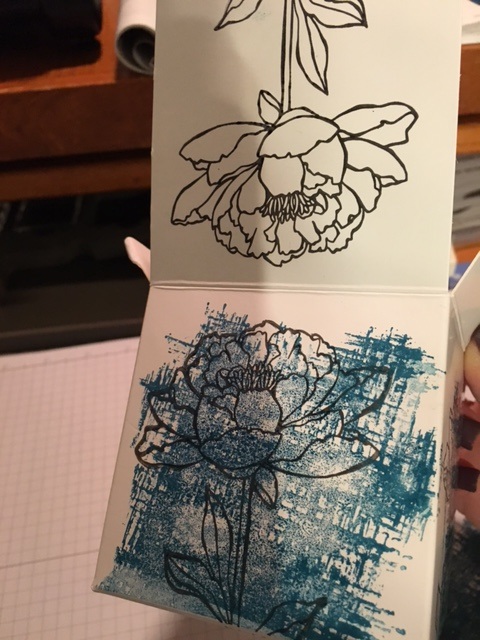
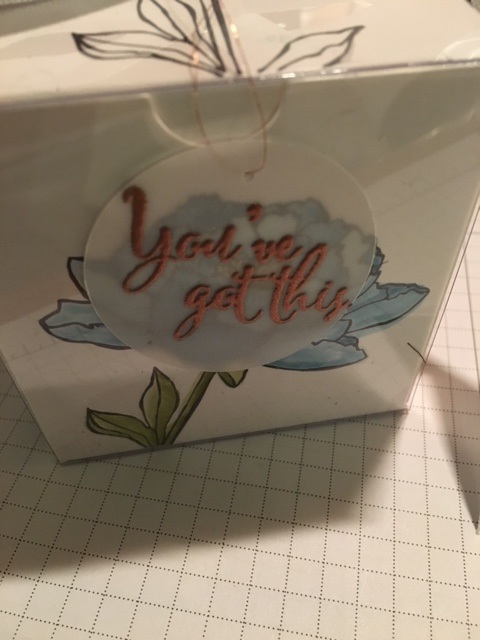
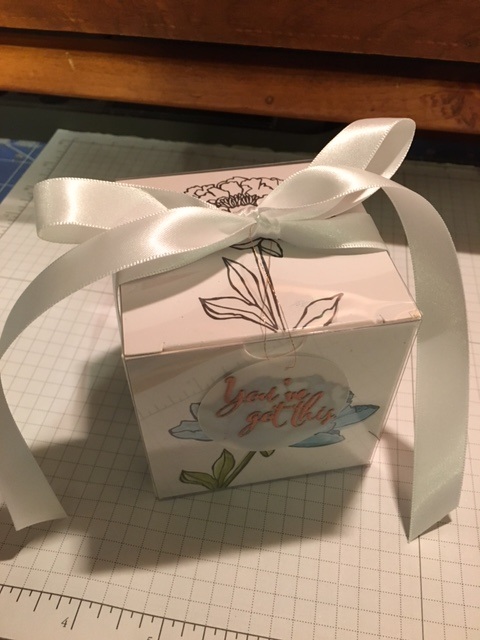
Be sure to contact me for your new catalogs Happy Stampin Steph  Welcome to our Stampin Friends August Hope Fun Blog Hop! I'm so excited that you have decided to stop by. We have 14 amazingly talented crafters this month. You're going to love this hop. So be sure to follow along and check out everyone's blogs and fabulous projects. Make sure to leave a comment to be entered in the Blog Hop raffle. Read each blog, scroll to the end, and leave a comment with #SFAugHop!! Each member and guest blogger, will randomly select a winner from our blog comments. We will then pool those together and randomly select the overall hop winner. I would love to hear some feedback and you will earn a chance to win some Blog Candy! Thank you for visiting my blog from Barbara Welch's blog, and thank you for continuing with the Blog Hop. Take a moment a check out my project and at the end click the NEXT button to continue to Melissa Thomas's Blog. Didn't come from Barbara's blog?? That's ok, just click the PREVIOUS button below or scroll to the end and click on Barbara Welch's name to visit her blog.  A big welcome to this month's guest hoppers Maureen Rauchfuss, Angela Lorenz and Kim Lamos 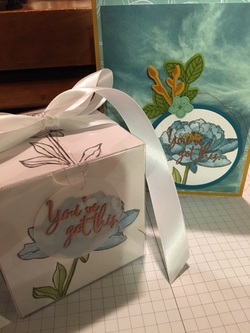 This month's Blog Hop is Hope. Hope can mean so many different things to different people. When you need strength, courage to move on, prayers it works out in the end etc and sometimes you need a little encouragement or just a quick cheering up. I used a stamp set that in a way says it all. It can be a powerful statement!!! So I chose the set by Stampin Up, YOU'VE GOT THIS!!! I love this set. I've used it so many times and I seem to go back to it whenever I need to send out a card to someone going through something, even if what they are going through is a positive thing. I "hope" you like what I came up with. So let's get started with my card. I used a few different stamp sets and techniques to make this card. The stamp sets are Best Birds, Jar of Love and You've Got This. The paper used is, Delightful Dijon, Island Indigo, Old Olive and a scrap of Pool Party Cardstock and Serene Scenery DSP. The ink used is the same color as the cardstock and I used the Archival Basic Gray to stamp the flower images. My cardbase is Delightful Dijon with 2 layers of DSP from the Serene Scenery DSP stack. I completed all the stamping first. I stamped the leaves in the matching ink colors and cut out with the coordinating framelits.The Old Olive Leaves and Pool Party flower are from the Best Birds stamp set and framelits. The Delightful Dijon Leaves are from the Jar of Love stamp set and Everyday Jars framelits. I cut the circles using the Layering Circles framelits. The flower was stampin Basic Gray and I used a Blender Pen to color and shade with Island Indigo, Delightful Dijon and Old Olive Inks. I did not use Watercolor Paper so be careful you do not over color in one spot, it will damage the paper. I stamped the You've Got This sentiment is Versamark and added the NEW Copper embossing powder. LOVE IT!!!! To put it all together, I made a few loops under the circle in the Copper Thread. As you can see by the photos below I was going to add more leaves and some berries. But when I when to assemble I preferred less. My gift is simple and sweet! The new White Gift Boxes featured in our new Holiday Catalog, were perfect. I didn't have to fuss with making a box to the right size or dealing with scoring and cutting. These boxes were just right. And you do not need to worry about the box opening and the contents spilling out, they come with a clear acetate sleeve that keeps all nice and tight. I whipped this gift box together in NO time. I wanted to tie the box and card together, so I stamped the flower on the front panel, gave it a moment to dry and them colored with the blender pen and inks. I thought of just leaving the flower on this panel as my only decoration....but well the rest seemed to blanked. So I stamped on 3 sides of the box using the background image from You've Got This set in Island Indigo. Before stamping, I stamped off the ink a couple times to lightening the color a bit. Then once the ink seemed drying I stamping the flower in Archival Gray over the backgrounds. I also stamped the flower on the lid of the box, but I did not color it in. I again stamped this You've Got This sentiment with Versamark, this time on Vellum. I added the Copper Embossing Powder and heated it. I punched it out with a 1 3/4" Circle Punch. Punch a hole with the 1/16" Circle Punch. I used the Copper Thread to tie the tag onto the box. So, depending on what someone was going through the contents of the box might be different. But for this project, I decided to fill the box with some sweet candy. I used the new gusseted Cello bags in the Annual Catalog and filled it with different hard candies. I was going to use chocolates, but um well, those didn't last! But I think the hard candies are just fine, the box can be left open on someones desk while they enjoy a piece of candy while they work! I tied the box with the Whisper White Satin Ribbon, between ribbon. Sometimes I such a hoarder with ribbon and embellishments, I don't want to use something because it's so nice....but this year, I vowed to use all my products and not buy it until I'm outta of it....we shall see how this goes. But anyway, I thought this ribbon was simple but gave an elegant touch to the gift. I fed the Copper thread through the knot in the sating ribbon and tied it so it hung just over the flower. I then finished the satin ribbon in a bow. I "hope" you liked my projects and I appreciate you stopping by. If you are need of the Annual Catalog or Holiday Message please let me know and I will gladly send one to you. US only. Be sure to leave a comment on my blog with #SFAUGHOP (see below for details) and click the Next button to visit Melissa Thomas's Blog. Thank you so much Happy Stampin Steph  Make sure to leave a comment to be entered in the Blog Hop raffle. Read each blog, scroll to the end, and leave a comment with #SFAugHop!! Each member and guest blogger, will randomly select a winner from our blog comments. We will then pool those together and randomly select the overall hop winner. I would love to hear some feedback and you will earn a chance to win some Blog Candy!  Got Lost along the way? Here is a list of our Stampin Friends Hoppers.
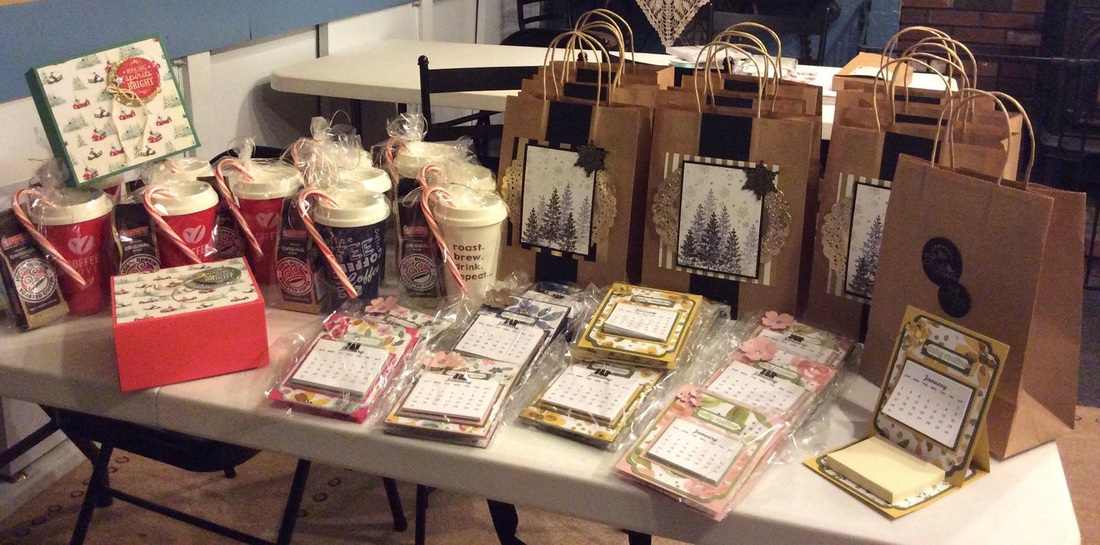
And the crafting continues. The picture above shows all the paper crafts I've completed in the last 48 hours with a few more minor details left. I typically give gift cards to our teachers. I feel they appreciate that the most, they can purchase whatever they want for themselves or their classrooms. But I like to give them a little something to open.
I found the BPA free travel mugs at Walmart. They were sold in a 5-pack for under $5 I believe. That was a great find. I then found mini size coffee packs at Dunkin Donuts. Boom! Little treat packed in a cellophane bag with a candy cane! I recently held a Calendar Workshop at my house. After making them the group, I thought hmmm, these might be a great gift for teachers. I used the English Gardens Designer Series Paper and coordinating cardstock in Blushing Bride, Hello Honey, Melon Mambo, Mossy Meadow, Night of Navy and Soft Suede. I love the colors!! 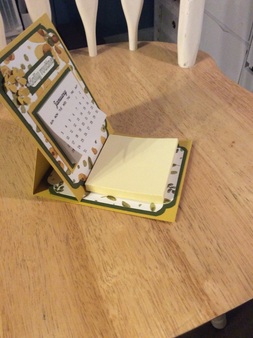
The base of the easel is super easy to make. Cut a piece of 8 1/2 x 11 piece of cardstock to 4 1/4 x 11. Use your Simply Scored Scoring Tool and with the 11" side at the top, score at 5 1/2 and 2 3/4.
Fold in half at the 5 1/2" score line, the fold the in the opposite direction at the 2 3/4 score line. (like an accordion fold). Cut another piece of the same color cardstock to 4 1/4 x 5 1/2. Attach this piece to only the 2 3/4 section of the base. Now you can decorate the top and bottom of your base. I added a post it note to the bottom to hold the easel up. Perfect!!! How easy. I added some flowers to give a little dimension. On some I used 3 flowers punch from the Itty Bitty punch pack and others I used the Pansy punch.
The gift bag was super easy to make. I will admit, there is contraband on the bag...oops my bad. I realized to late I needed to order the metallic doilies and black ribbon I wanted. Oh well. But I found some at AC Moore, definitely not as pretty as the Stampin Up ones, but they do the trick. Bottom line, I have no idea who will keep and/or reuse the bags so I wasn't going nuts. I found the kraft bags at Walmart in a 13-pack for $7.97. Not to bad. I wanted white and they were out, so this will do!
But again bag was quick and since I needed to make 12, I made an assembly line. I used the Winter Wonderland Designer Series paper. This paper is so smooth and shiny! I love it. You can decorate 4 bags from 1 12x12 sheet. Cut the DSP to 4 - 6x6 squares For the size bag I used, you will need black cardstock, cut one strip to 2 1/2 by 5 1/4 and another at 4 1/4 x 5 1/2. Also cut a piece of whisper white to 4 x 5 1/4. I stamped in Basic Black the tree from Lovely as a Tree and stamped off to give layers. I stamped the snowflakes from the Perpetual Calendar set using a gold metallic ink. Finally I stamped a snowflake from the Festive Flurries stamp set, which is now retired. And cut it out with the, also retired, framelits. Cut the doilies in half and attach to the back of the 5 1/4x4 black cardstock. Assemble your layers onto the gift bag. I wasn't thinking to take pictures individually I so I didn't take a close up of the bag. OOps, but you can zoom in.
And last but not least, the gift box. While this one not a project that I was originally planning on making, but I saw a YouTube video by Sam Donaldson Pootles in the UK for her gift box tutorial so I decided I wanted to give it a whirl. It was quick and sooo easy to make I made 3 in a flash. Love it. You can see the videohere.
Ok well I think that's it for now, have a few more easel calendars to finish and gift tags for the bags and I'll be good to go! Thanks for stopping by my blog! I hope you enjoyed! Happy Holidays and Happy Stampin
Built for Free Using: My Stampin Blog
It's been quite a busy week in my craft space. I've been working on finishing Christmas cards and gifts for co-workers, teachers and family members. I've had ideas for a while but never quite got around to making them. I soon realized better get cracking. But it's always a race against the clock. First was working on my husband's co-worker gifts. Each year we brainstorm what to get the men and woman my husband works with. Trying to figure out what to get always takes for ever! I always have Mason jars on hand so we decided to make some sort of jar gifts. I came across layering hot cocoa/marshmallow/peppermints in a jar. And well since we are giving these to adults not children, we decided to go with a mug jar and add some fun nips to make it an "adult" gift. Normally I would try to use all Stampin' Up products to create the gifts. But I just didn't have the extra time to hand punch and assemble bows and ribbon. I found the mesh ribbon, glitter bows, button embellishments and snowman hats at AC Moore. I layered the jars and measured enough cocoa to make 2 servings of hot cocoa. Maybe next time, I'd put the crushed candy canes and marshmallow in baggies so they can just scoop out the cocoa. But this time it can be dumped out in a bowl, mix it up and divided into 2 mugs. 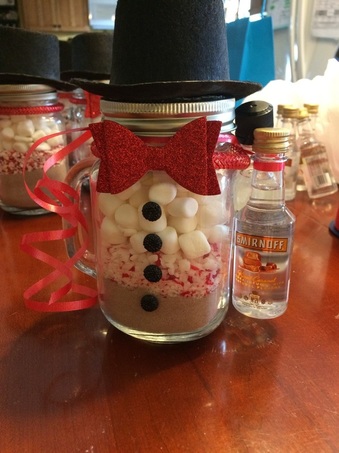 Now for the woman, it gets tricky, I never know what they like/dislike. So, I try to keep their gifts pretty general. Not always easy though. I was invited to a Thirty-One party and decided to grab the Littles Carry-all Caddy. Now, what to put in it?? To stick with the jar gifts, I chose to fill a Mason jar with a Christmas cookie mix. I layered and Oatmeal, Chocolate chip cookie. Very simple! But so yummy. Instead of decorating a jar and getting a gift bag. I tied a bow, added a wooden spoon and a tag with baking directions. 1 1/3 cup flour 1 tsp baking soda 1 tsp baking powder 1/4 tsp salt 1 cup oats 3/4 cup m&ms 3/4 cup nestle toll house semi sweet morsels 1/2 cup brown sugar packed 1/2 cup sugar I mixed the baking powder, baking soda, salt and flour together then added to jar. Layer in that order make sure to press down in jar to pack it tight. I used a wide mouth quart size jar. Tag reads: Mix: with 1 egg, 1/2 cup melted butter 1 tsp. vanilla extract Combine with the jar ingredients roll into balls Bake for 7-10 mins at 350 I forgot to take a picture of the jar once I packaged it in the Littles carry-all caddy. I Hope you enjoy. Happy Holidays and Happy Stampin 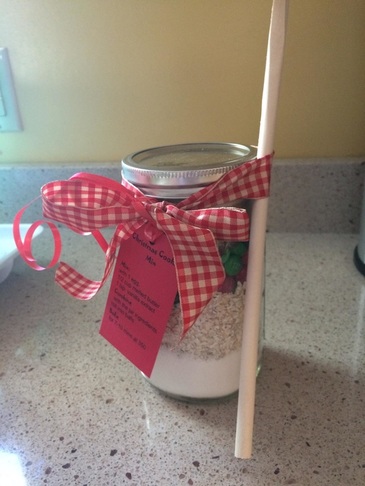 
Welcome to the Stampin Friends Thanksgiving Blog Hop! I'm really excited to be part of this Blog Hop. There are 12 amazing crafters involved. I was lucky enough to be a guest hopper this month, along with 2 other fabulous ladies.
So make sure you check everyone's blogs out. After reading the blog, scroll to the end of this post and you will be able to see all the Hoppers and Click Next to visit Wynne's Blog. This month's guest hoppers are: 1. Wynne Grob 2. Kim Smith 3. Steph Jandrow
What's blog without a little blog candy???? Do you like crafty supplies???? Everyone likes a free gift, right???? If so, make a comment on all 12 posts in this hop then, email Elizabeth everyone's favorite color at [email protected]. What do you get? In addition to enjoying all of this group's creations, you'll be entered to win a fun crafty present from every one of the bloggers! That's 12 crafty presents! Just a little thank you for your time! AMAZING!

Here's a quick picture of the products I used to make today's Blog Hop projects. I love the color green, all different shades of green. I'm naturally drawn to it, so I knew whatever I was planning on designing for the Blog Hop was going to have some sort of green in it. What could be more perfect to show green than a Thanksgiving project! So wala! My favorite color was included!
Oops I forgot to put the Winter Wonderland Vellum Stack in the picture. That's ok, you can scroll to the bottom to see the names of all the products. 
Here's the Thanksgiving notecard I decided to make. I wanted use the Winter Wonderland Vellum for this project. I was stumped at first. But, then the idea for this card came to me. I remembered awhile back during one of my card clubs, I put together a notecard for my guests to make. We used vellum to make the treat bag and a piece of cardstock for the notecard inside. It was perfect.
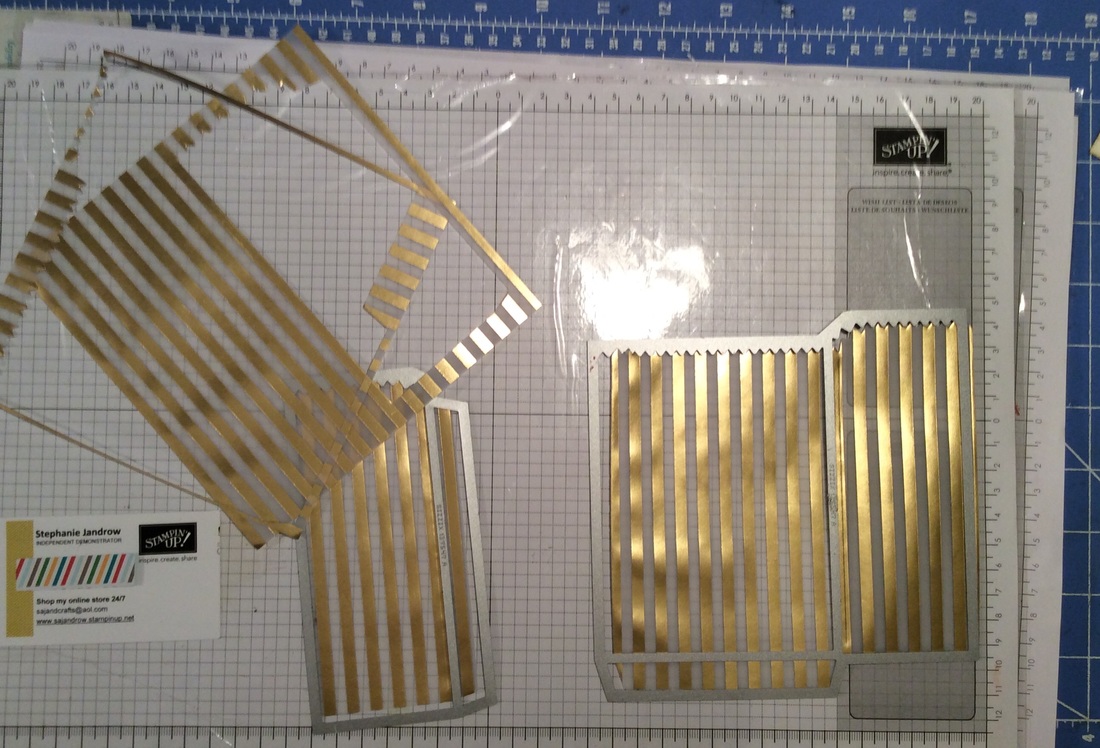
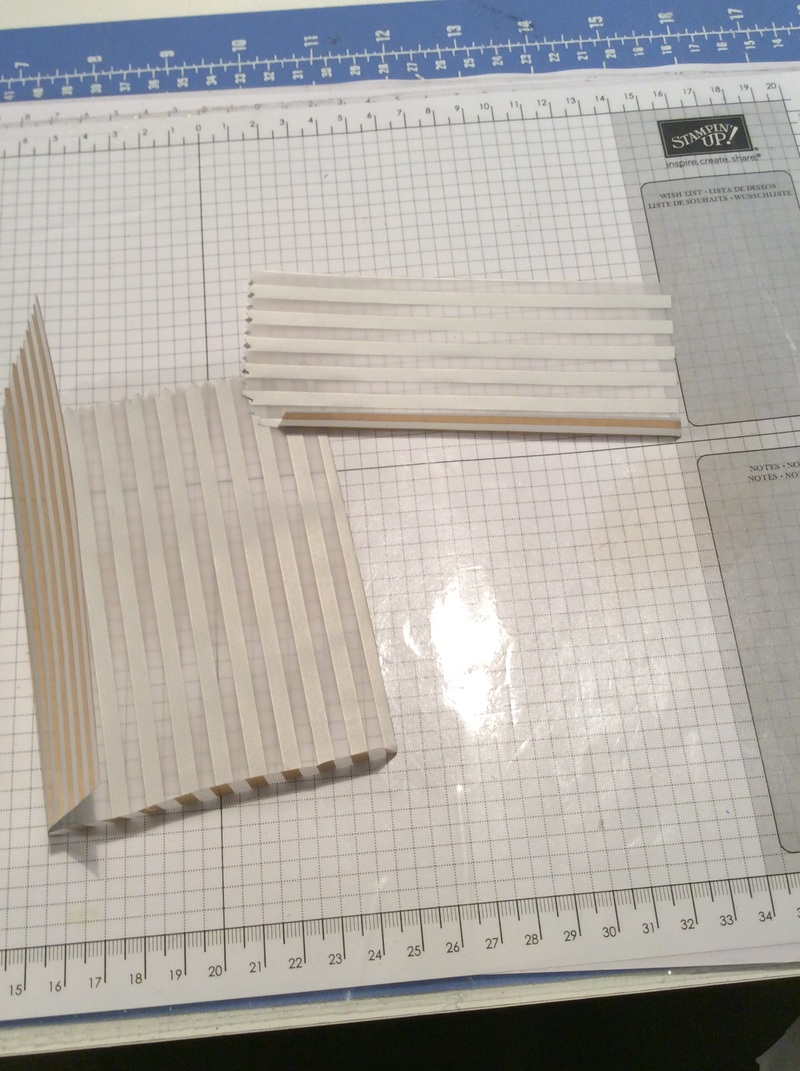
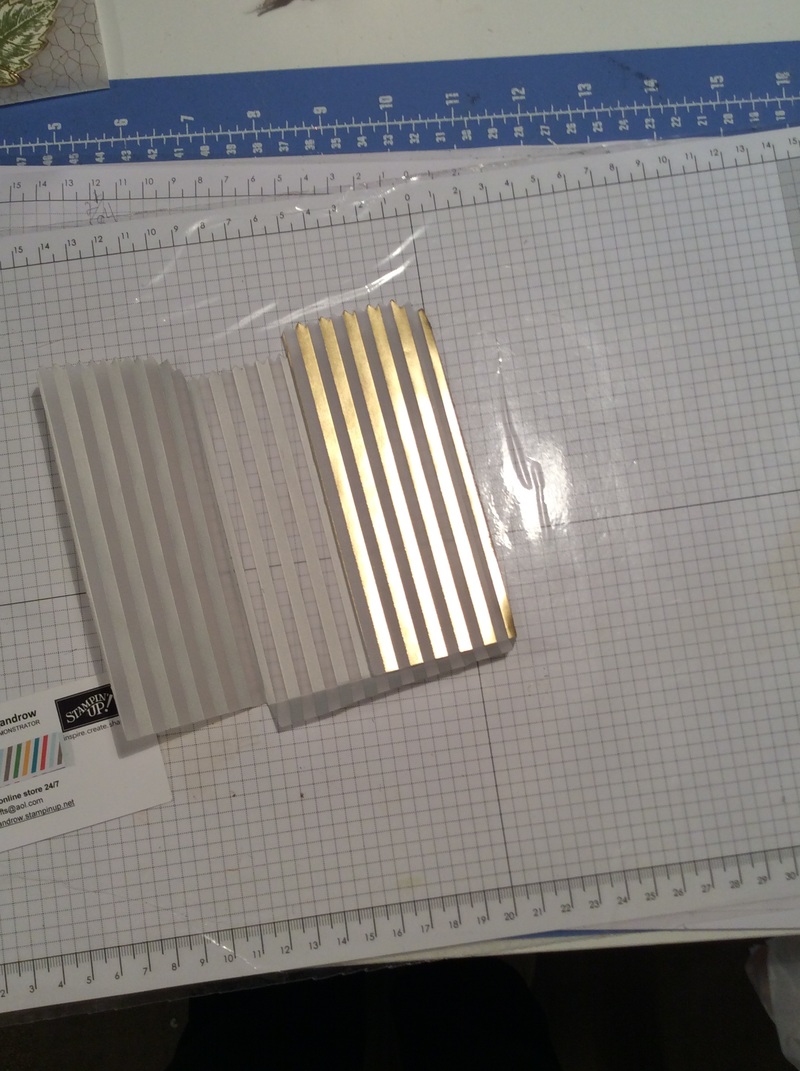
As shown in the first picture. (Top Left) You will need 2 sheets of 6x6 Vellum. Take one sheet and the Mini Treat Bag Thinlit and run it through the Big Shot. Take the 2nd sheet of vellum and use the side panel from the Mini Treat Bag Thinlit and run it through the Big Shot. Gently fold on the score lines. Then add adhesive (I used Fast Fuse) to the side panel tab and attach it to the treat bag. Add adhesive to the one of the back panels. Then add adhesive to the bottom tab and adhere. The Mini Treat bag is done.
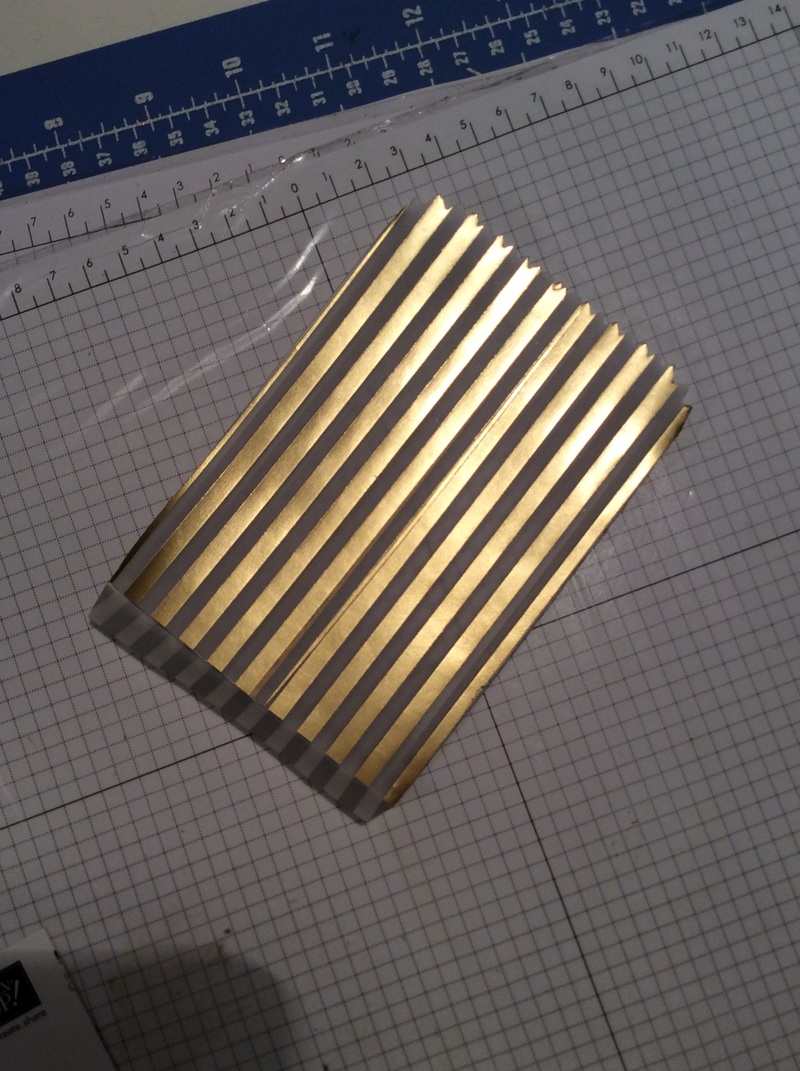
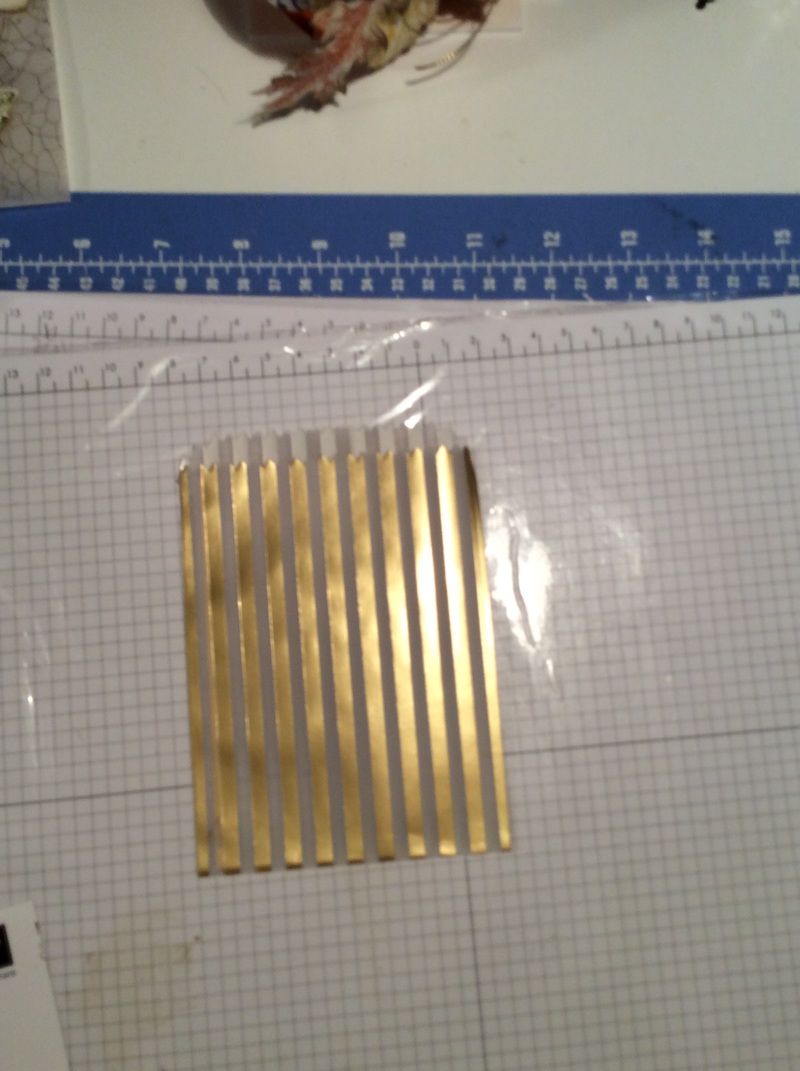
As I was playing around designing the project I decided I preferred the crackle print from the vellum stack and went with that for my finished project. I felt the gold stripes would work well for a Christmas project so I decided to put it aside for later. 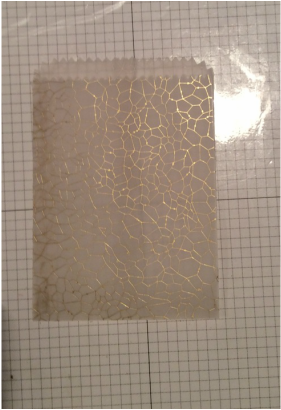
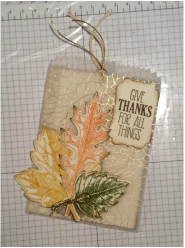
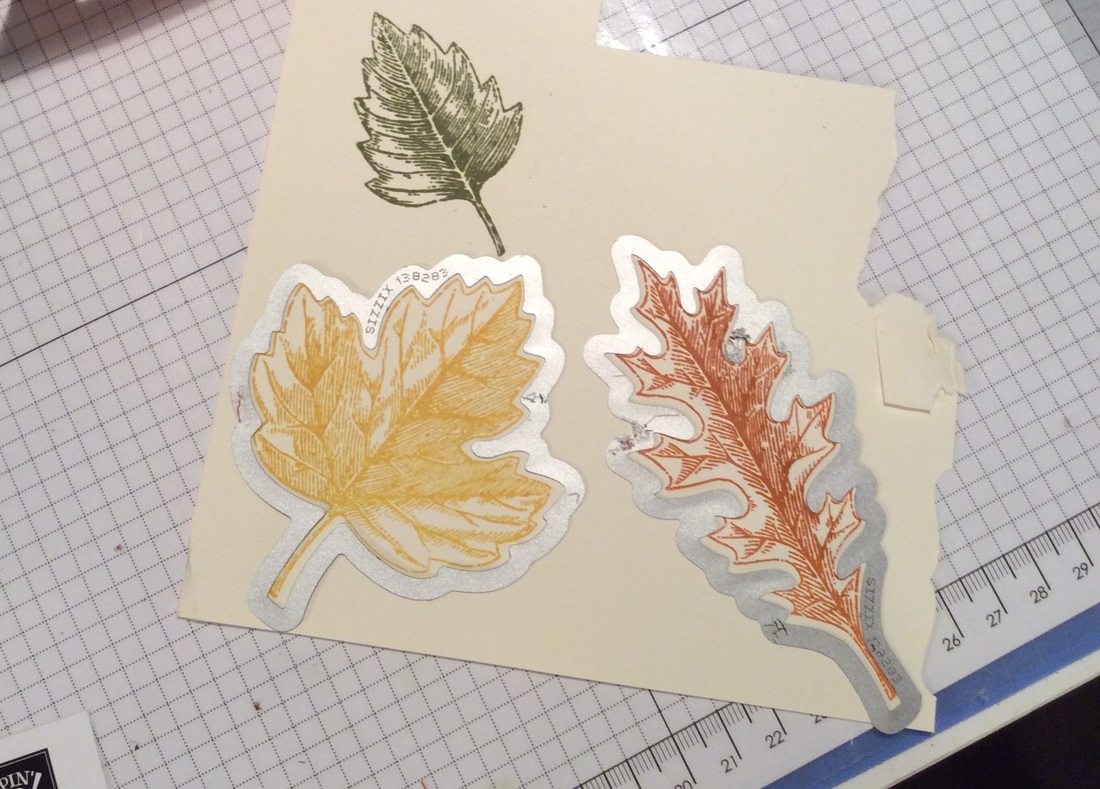
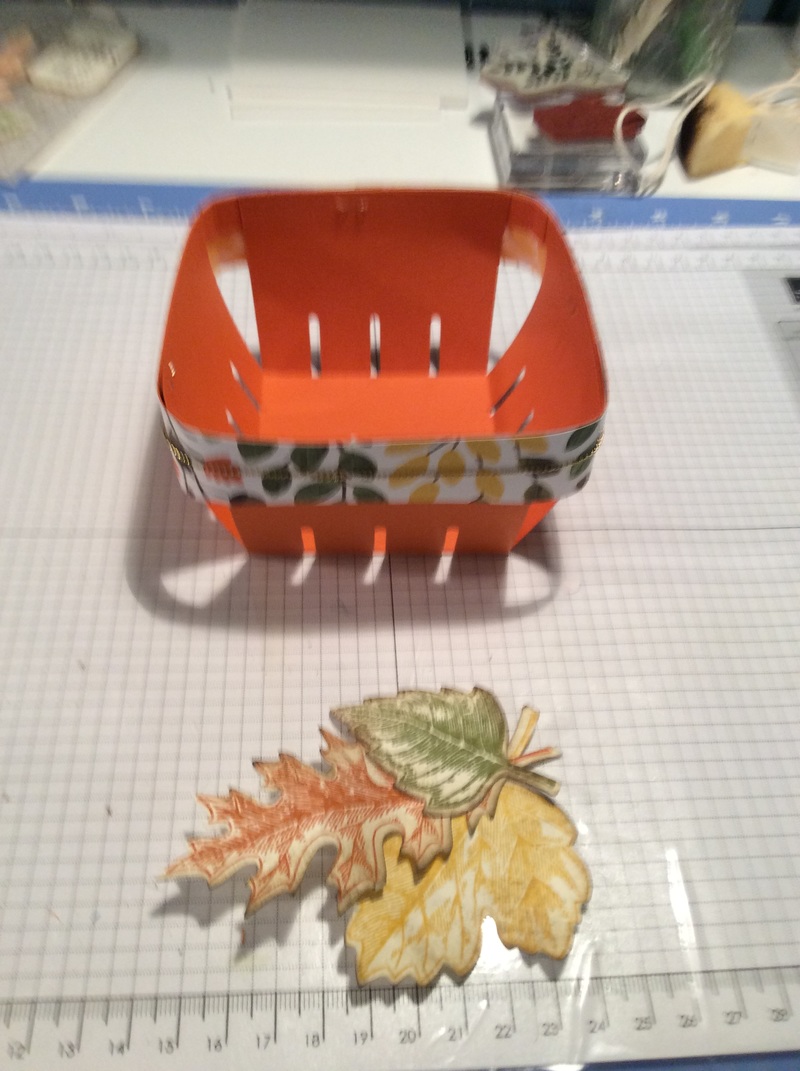
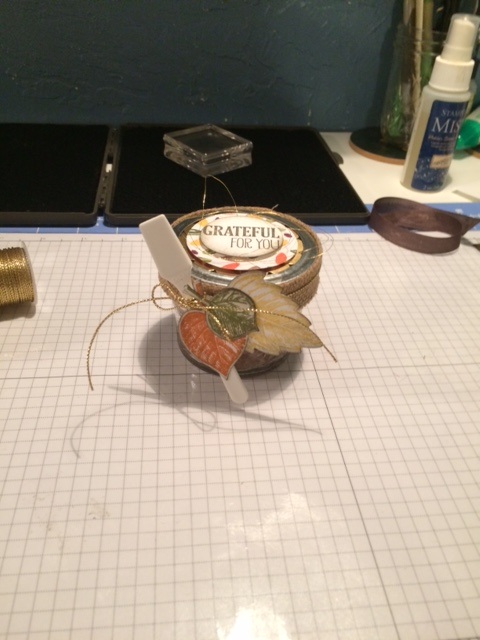
Take a piece of scrap Very Vanilla cardstock and stamp 3 leaves from the Vintage Leaves stamp set, using Crushed Curry, Old Olive and Tangelo Twist. Next, take the matching leaf shapes from the Leaflet Framelits and run them through the Big Shot. Stamp the Give Thanks For All Things saying from the For All Things stamp set, on a scrap of Very Vanilla with Soft Suede ink. Punch it out using the Decorative Label punch. Sponge the edges of the leaves and label with Soft Suede.
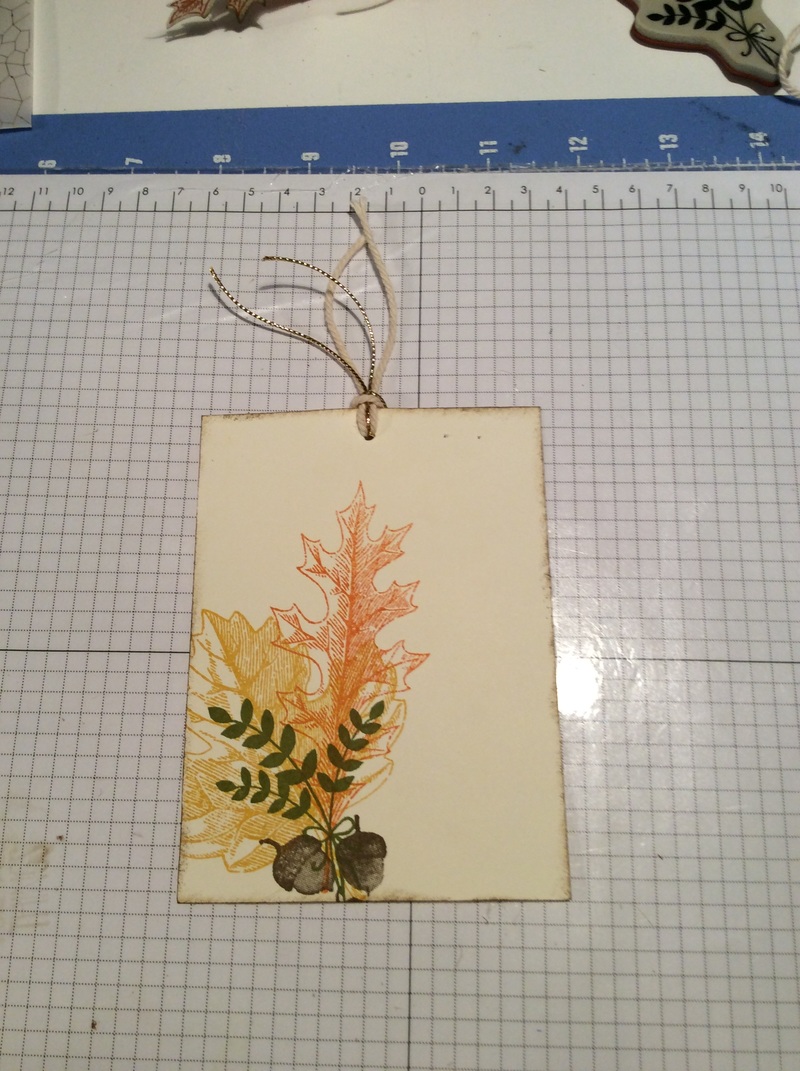
Next you need Very Vanilla cardstock. I cut a piece to 3 1/2 x 4 3/4 for the notecard to fit inside the treat bag. Stamp the same leaves onto the notecard. I also added the bunch of leaves from the For All Things set. Sponge the edges of the notecard with Soft Suede. Punch a hole at the top of the notecard using the 1/8' Circle Punch. I cut out the same length ( about 6") of Very Vanilla Think Baker's Twine and Gold Cording Trim. Tie onto notecard.
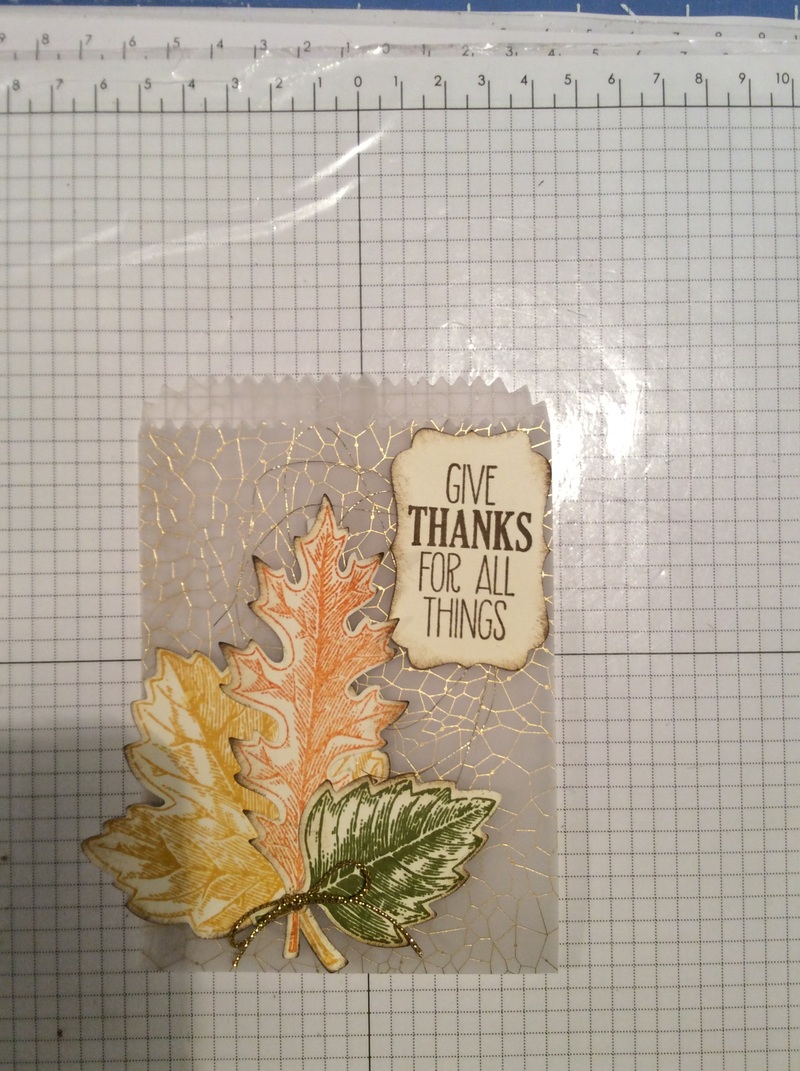
Before decorating the front of the mini treat bag, I took some Gold Metallic Thread and loosely created loops. I held them down when I layered the leaves onto to the front. I used glue to dots on the leaves and the label. Add your notecard inside and your project is done.
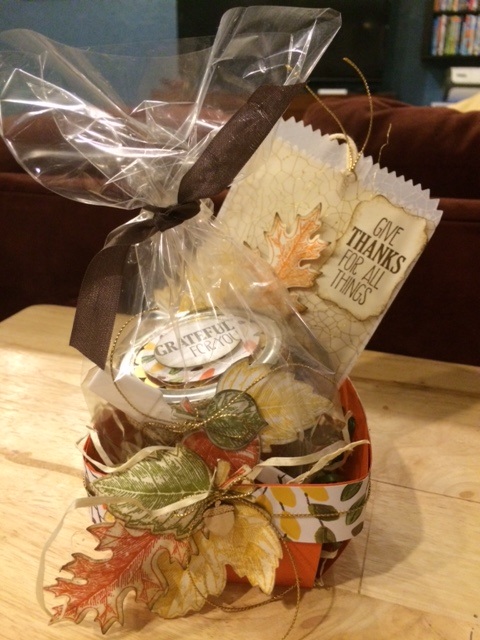
Here's a super easy Thanksgiving project I made to go along with the notecard.
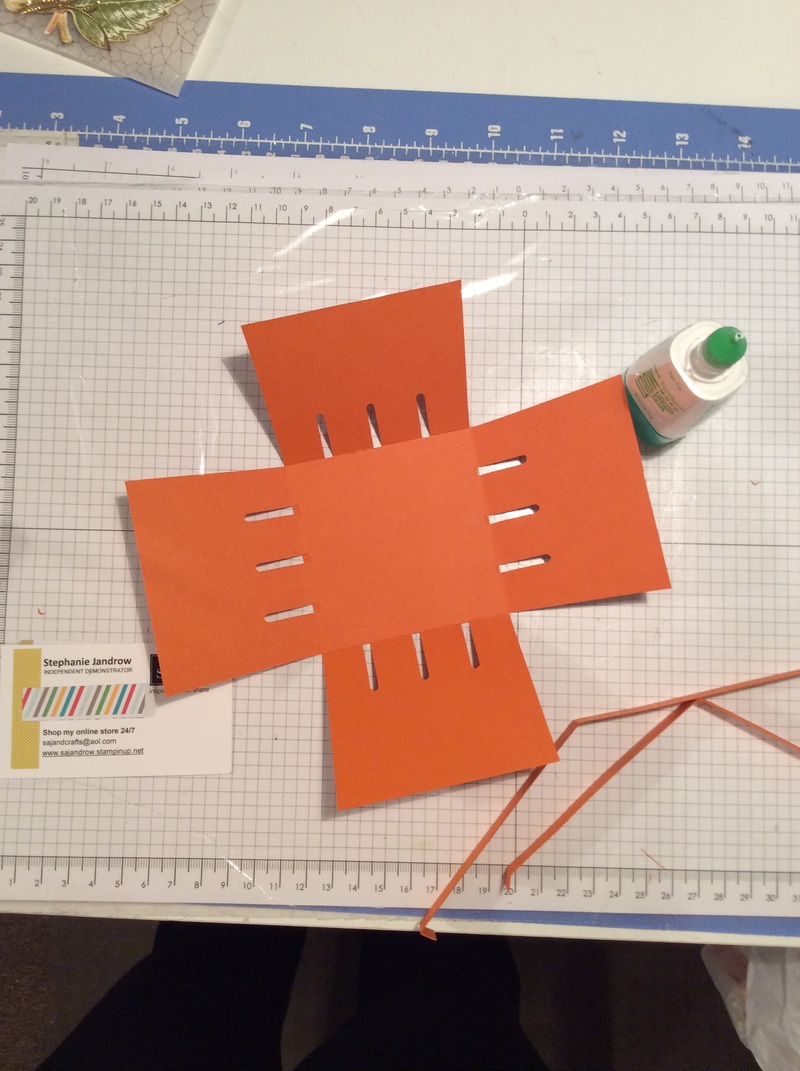
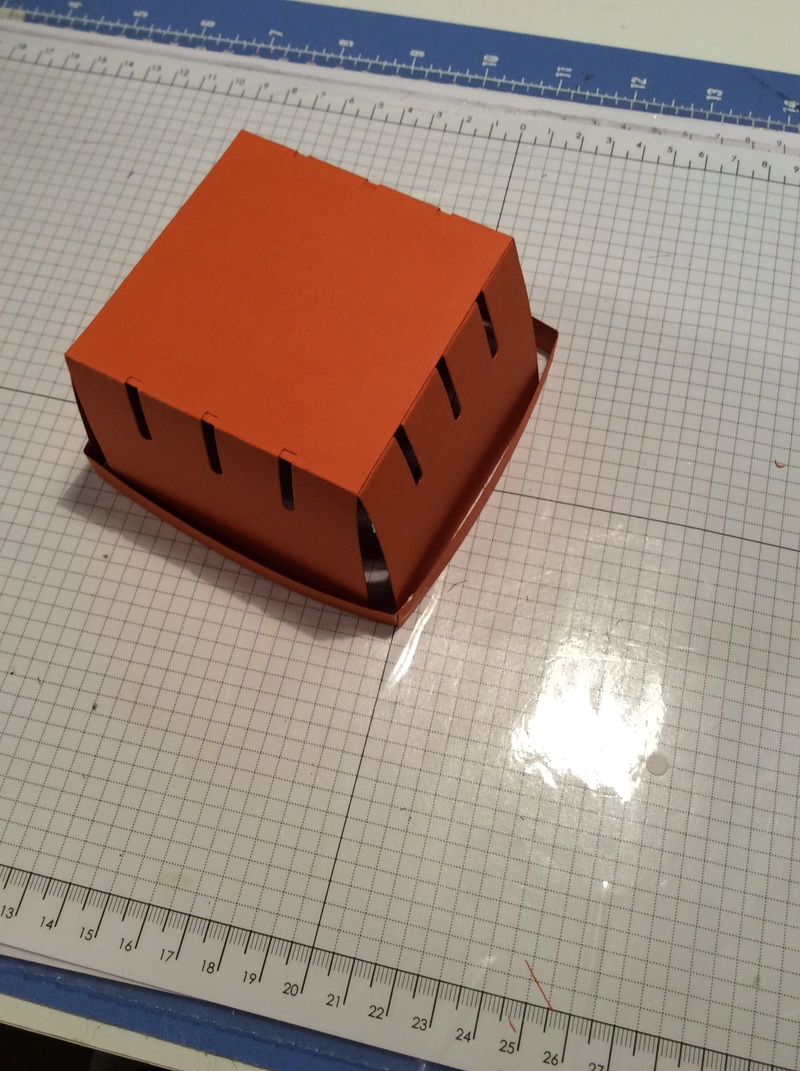
I made a berry basket using Tangelo Twist cardstock. Cut the cardstock in half so you have 2 pieces that measure 8 1/2x5 1/2. Take the Berry Basket die and cut out the basket using the Big Shot. You will need to cut this out twice. But remember to cut one piece of paper at a time.
Fold on the score lines. Adhere the basket pieces together. I used the multipurpose liquid glue for this. I took the straight bands that are cut out and glued them together. I flipped the basket onto it's top and fed the bands onto it pushing it down to the top. Then holding the bands in place, flip it over and adhere. I used a stapler for this. I am not worried about the staples showing because I am going to cover them.
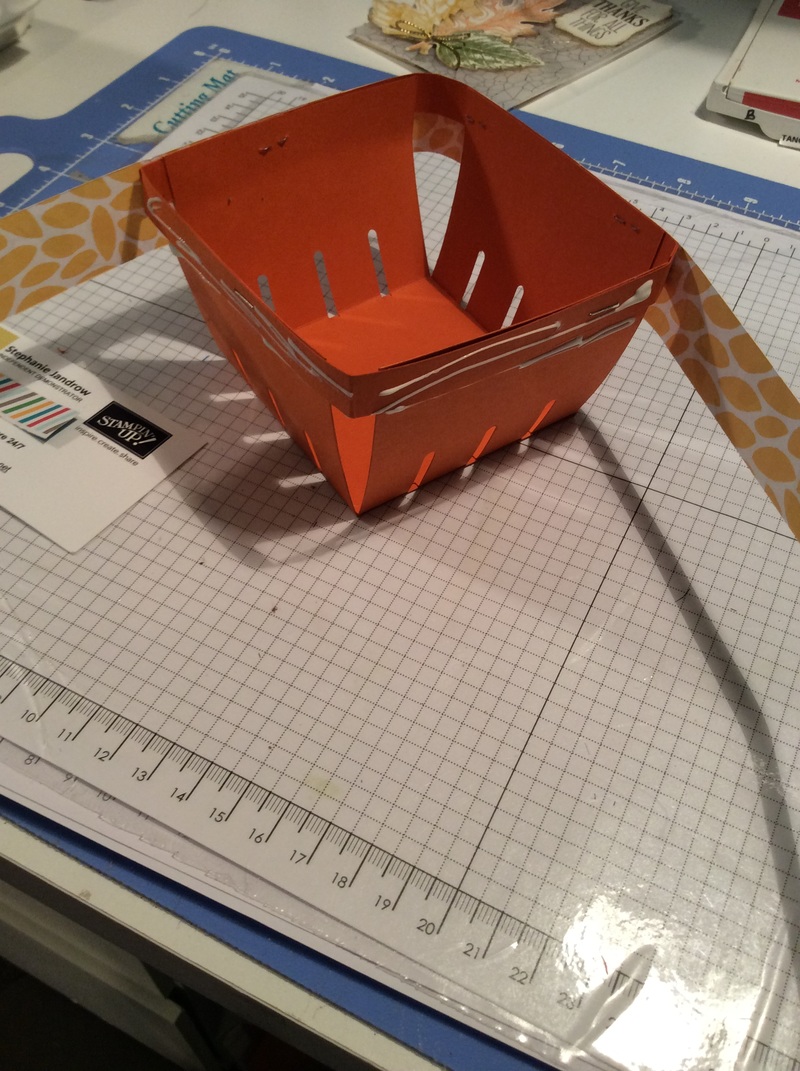
I chose the Into the Woods Designer Series Paper. It's a perfect compliment to the leaves. I cut 2 strips one measure 1x12 and the 2nd one measures 1 x 4 1/2. I added glue to the top of the basket band and wrapped the DSP around. I then took a piece of Gold Cording Trim and wrapped it around the basket and cut to size. I used glue dots to hold them in place.
I layered the leaves on to cover where the trim meets to hide that seam. I also added a little wood acorn accent from Into the Woods Elements. And again finished it off with a bow made from the cording trim.
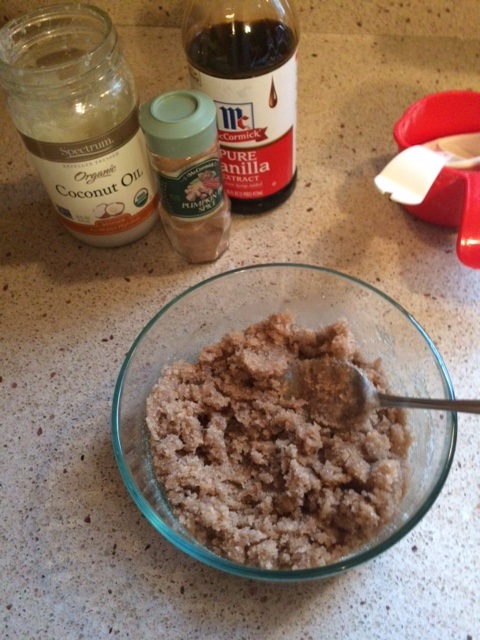
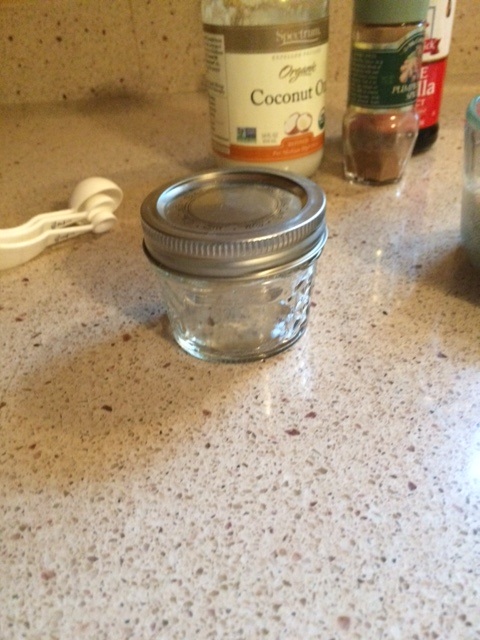
Since I was putting the scrub in the berry basket. I decided to decorate the jar as well.
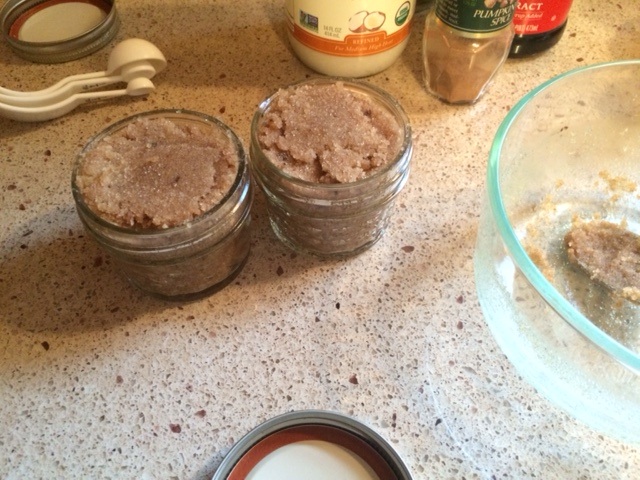
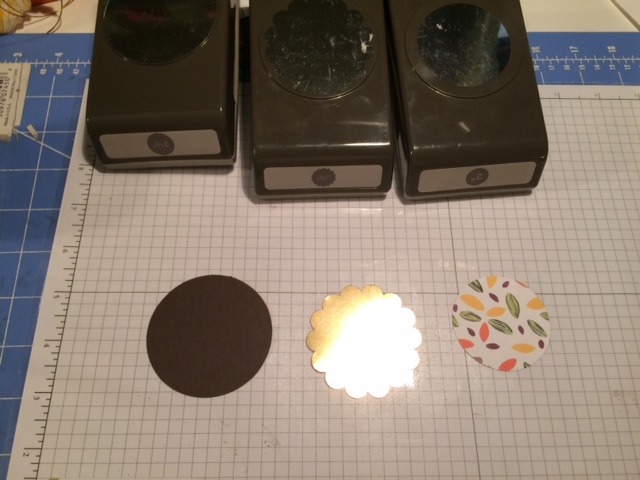
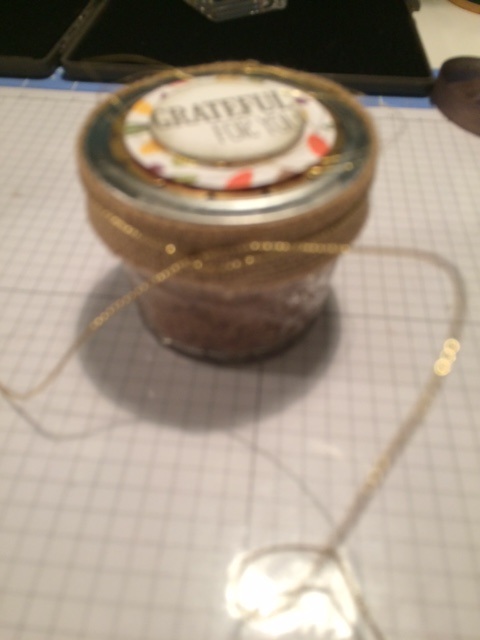
I punched out 3 different size circle to make the lid. Remove the band from the jelly jar, but leave the lid on. 2 1/2" Early Espresso, 2 3/8" Gold Foil and 2" Into the Woods DSP. Layer onto the lid. Use Fast Fuse for to put the Early Espresso and Gold Foil on then dimensionals to add the DSP. Put the jar band back on. Cut 9 1/2" of burlap ribbon. Cut in half to make two strips. Adhere onto band using Sticky Strip of Tear n Tape. The tie a piece of Gold Cording Trim around. Make it long enough to make a bow, leave in a knot for now. Don't cut ends just yet. Stamp 3 different size leaves and cut out. Also stamp the greeting in Early Espresso cut out with 1 1/2" circle punch. Sponge edges of leaves and greeting in Early Espresso. Attach the leaves onto the jar with glue dots, slide the spatula under the cording trim at an angle behind the leaves and then tie the cording trim in a bow. The spatulas were bought a while back from a friend. They were purchased through Amazon, I just don't have the exact order. But you can search for cosmetic spatula. Finally I put the jar in a Gusseted bag and tied it with a piece of Early Espresso Seam Binding ribbon. I used a bunch of basket grass in the berry basket, I found in the floral department at AC Moore.
I had a lot of fun planning my projects for the Stampin' Friends Thanksgiving Blog Hop. I hope you enjoyed your visit. Thank you so much for stopping by!!!
Don't forget to click Next button below, to see Wynne's blog!
Don't forget, make a comment on all 12 posts in this hop then, email Elizabeth everyone's favorite color at [email protected]. What do you get? In addition to enjoying all of this group's creations, you'll be entered to win a fun crafty present from every one of the bloggers! That's 12 crafty presents! Just a little thank you for your time! AMAZING!

1. Elizabeth Jeanne
2. Mandy Reedyk 3. Wynne Grob 4. Tina Riddle 5. Deana Benson 6. Siara Acdal 7. Kim Smith 8. Andrea Pancrazio 9. Kirsteen Gill 10. Cindy Waldroff 11. Lisa Altman 12. and me Steph Jandrow
Here are the products used to make the Mini Treat bag notecard
Built for Free Using: My Stampin Blog
Here are the products used for the Thanksgiving Berry Basket and Sugar Scrub jar. The stamp colors, Vintage Leaves/Leaflets Framelits, Into the Woods DSP, Very Vanilla cardstock, Gold Metallic Thread and Gold Cording Trim is also used, I just didn't relist them.
Built for Free Using: My Stampin Blog
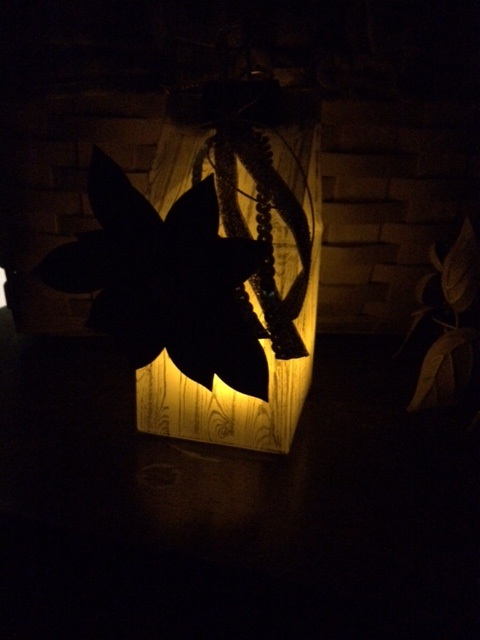
I love decorating for the holidays. But sometimes when life gets crazy with all the running around, I don't get much of a chance to enjoy all the decorating. And, well sometimes it feels more like another chore I have to get done. But I created this holiday lantern. It's been sitting on my shelf waiting for the perfect time to be "blogged". I was inspired from a few lanterns I had seen on Pinterest. I love Pinterest, have I said that yet?

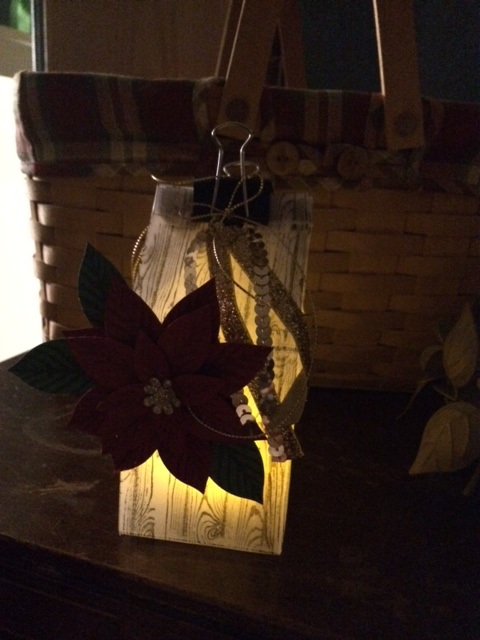
I will admit this was my first attempt at using our new Festive Flower Builder Punch. It was so easy to do! For the Poinsettia, I stamped then punched out the petals and layered them to create the flower. It was the perfect adornment to my lantern.
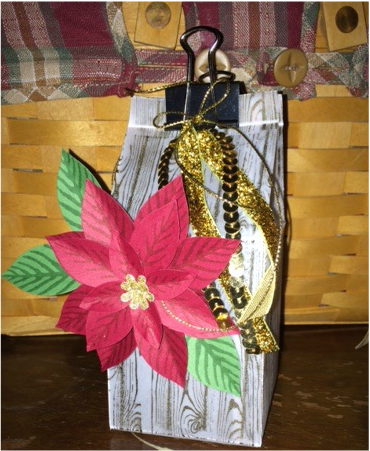
I used our Vellum paper to make the milk carton shape of the lantern. I stamped the Hardwood background stamp in Early Espresso and really waited for the ink to dry before scoring and folding. I will say after making this once, I would definitely use a stayzon ink for the fast drying.
I added a binder clip to hold the lantern closed. I wanted the inside to be accessible pretty easily. The Gold Sequins, new Gold Glitter Ribbon and New Gold Cording Trim are adhered to the lantern with glue dots so the won't fall off when you take of the clip. And what's a lantern without a little light? Right?
Inside the lantern is a little battery operated tealight. How cute! I am really excited to put this on display during the holidays. I can even be hung on a tree!
I hope I inspired some of your holiday decorating too! Happy Stamping! Steph
Built for Free Using: My Stampin Blog
Stampin' Ups holiday catalog is jammed packed with holiday products. Whether you're interested in crafting from scratch or complete kits, there is something for everyone. You won't be disappointed.
This is the perfect time of the year to make something special with friends. Plan an evening together to craft away the stresses of the season.
Built for Free Using: My Stampin Blog
Please contact me if you have not received your Holiday Catalog or if you would like one. I will get it to you ASAP.
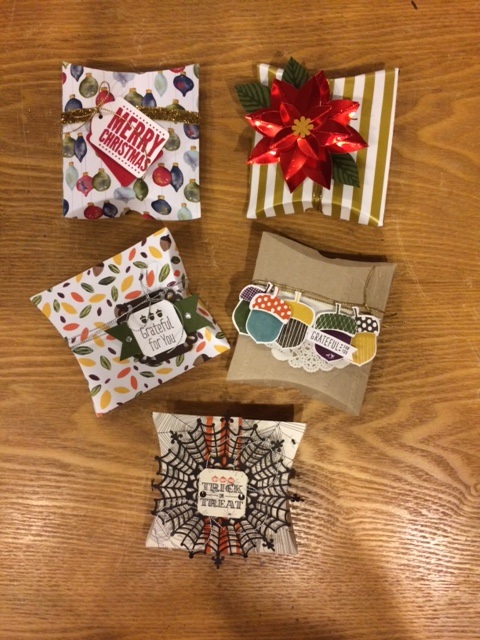
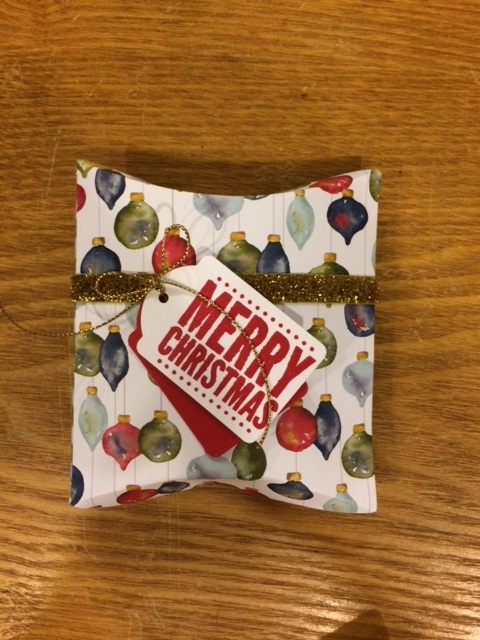
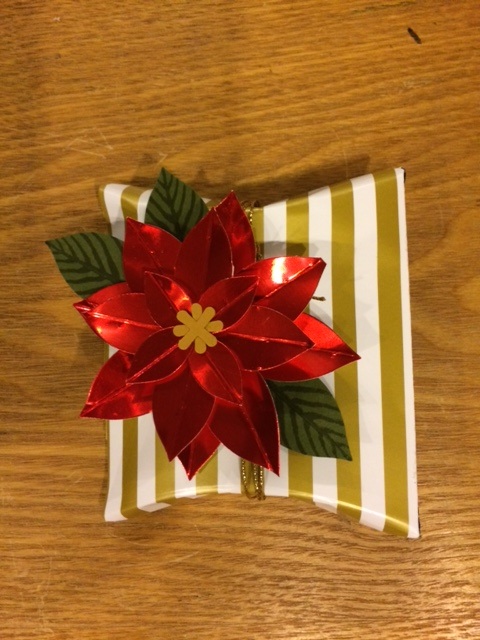
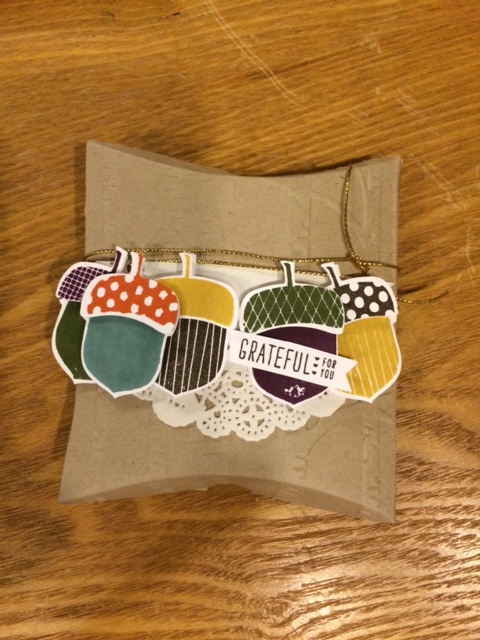
I simply love the new Square Pillow Box Framelits. It's the perfect little customizable package for some treats, cash, gift cards, jewelry. I think the list could on and on. The Square Pillow Box framelits can be purchased separately or in bundle with the coordinating stamp set, A Little Something. How cute are these????? I will admit with the rush I am in to get some new items displayed for Fall Fest, I was inspired by Pinterest to create these.
I hope you enjoy Happy Stampin' Steph
Built for Free Using: My Stampin Blog
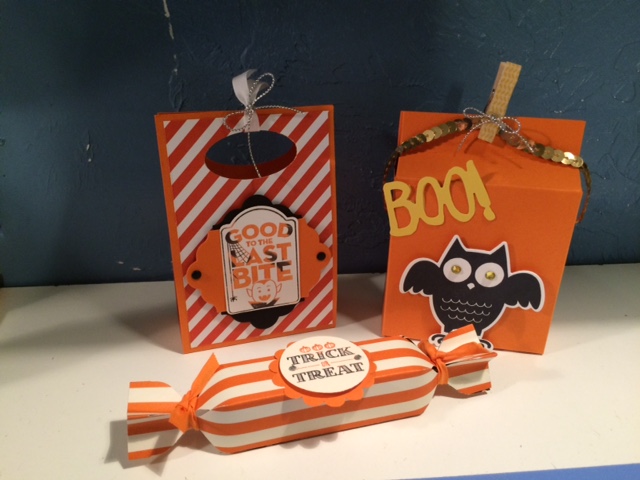
When I am in a slump I have a hard time being creative. I love that so many Stampin' Up! Demonstrators share their creations on Pinterest, YouTube and Facebook. Sometimes it's just a simple as seeing how a product is used and then the creative juices flow! Other time their projects are amazing and you just have to CASE them!!
I had loads of fun making these super cute treat holders that I found in a video from Chic N Scratch's 12 Weeks of Halloween. Hope you enjoy them too! Happy Stampin' Steph
Built for Free Using: My Stampin Blog
|

New 2023-2024 Stampin Up Annual Catalog


Kits Collection


Join today

Categories
All
Archives
January 2024
|


 RSS Feed