Welcome to the Lots of Love Stampin Friends Blog Hop! I'm really excited to be back again as a guest Hopper for Stampin Friends. There are 14 amazing crafters involved in hop, along with 3 Guest Hoppers. And like I said I've very proud an excited to be back as a guest.
Please, make sure you check everyone's blogs out. After reading the blog, scroll to the end, and make sure to leave a comment with #SFJanHop at each blog!!! I would love to hear some feedback and you will earn a chance to win some Blog Candy! If you have visited my blog from Elizabeth's site, thanks so much for continuing with the Blog Hop. Make sure to check out my blog and at the end click the NEXT button to continue with the Blog Hop and visit Leanne Johnson's Blog. Didn't come from Elizabeth's blog?? Make sure to click the PREVIOUS button or scroll to the end of the post to and click on Elizabeth's name to visit her blog. 
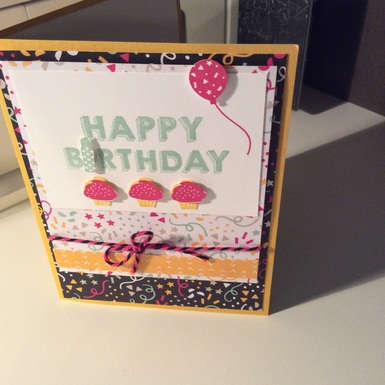
This month's Blog Hop theme is Lots of Love. I knew exactly what products I wanted to use for the blog. NEW! Of Course! NEW items from Stampin Up's Occasions catalog!! I will be showing you 2 projects and 1 card for the blog hop. It may seem like alot of products were used. But it really isn't. I used the same colors, DSP and stamp set throughout the projects and cards. So if you do not have alot on hand, this is great, because we are just using same products,in different way. What I decided to make is SUPER easy projects that I can make multiples, in a breeze. As a busy mom of 3, I need to accomplish the most, in what appears to be a very short amount of time. I'm all about coordination!!!!
So here we go....I hope you enjoy what I've prepared for you! I look forward to hearing your feedback!!!
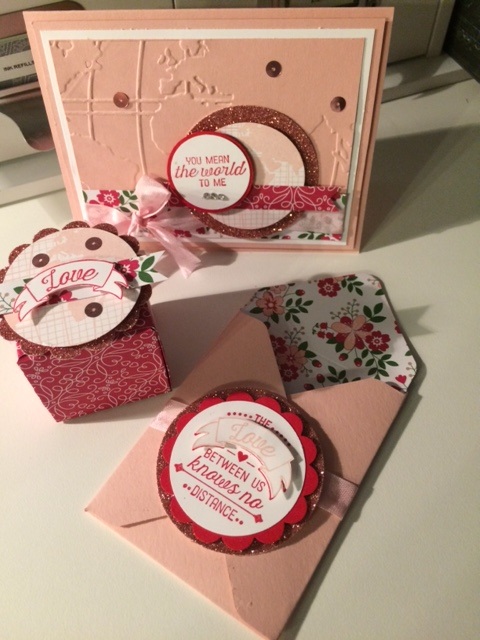
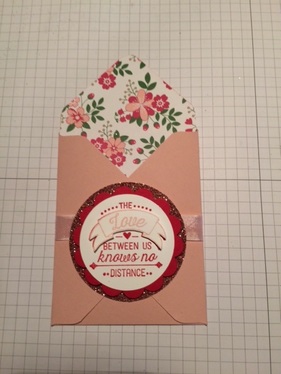
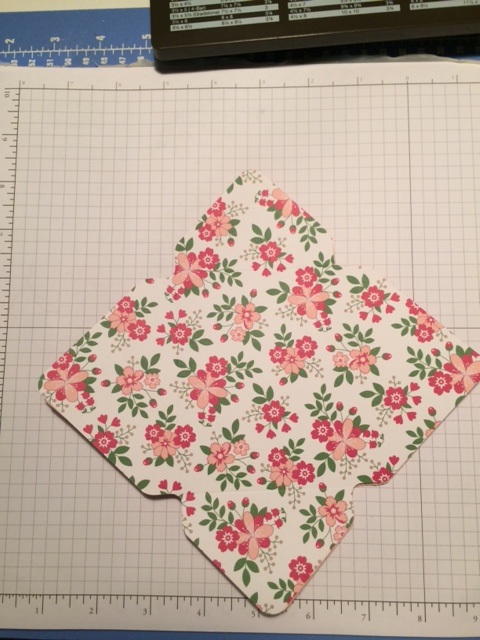
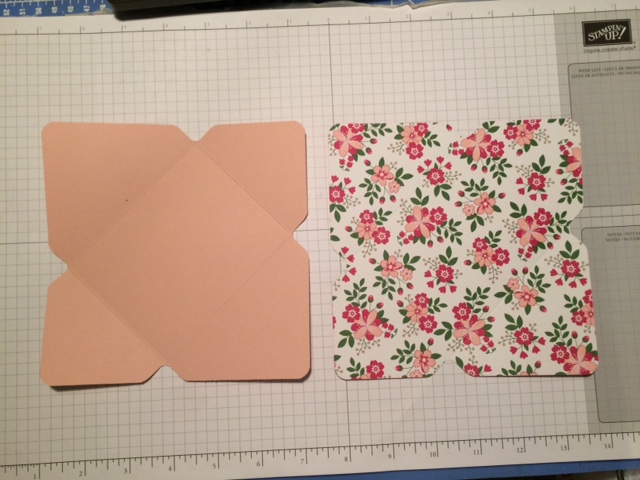
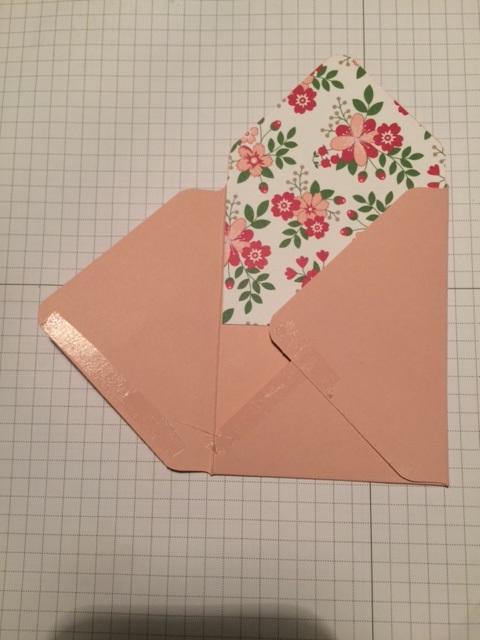
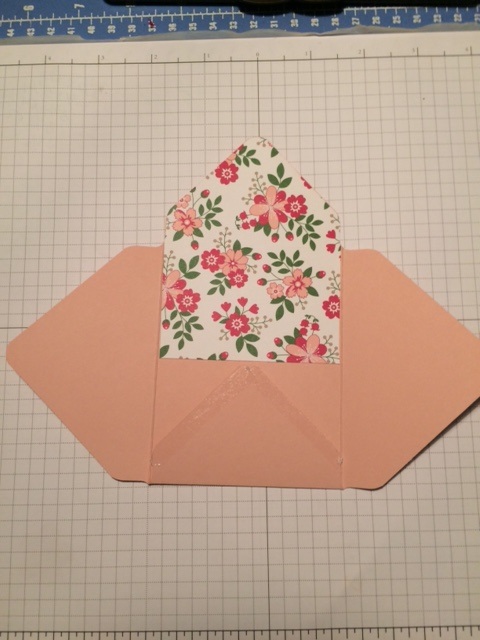
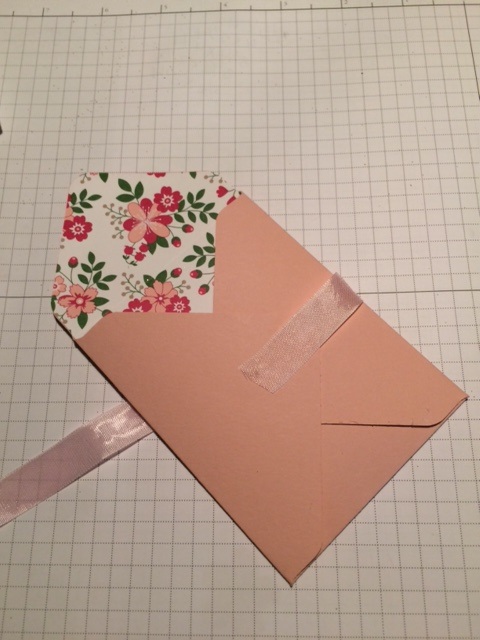
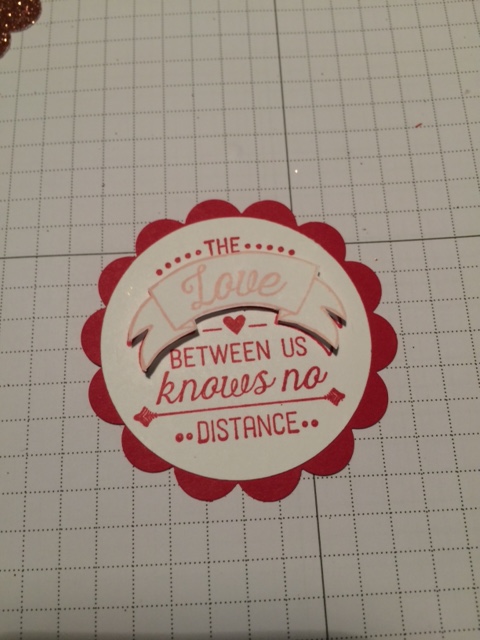
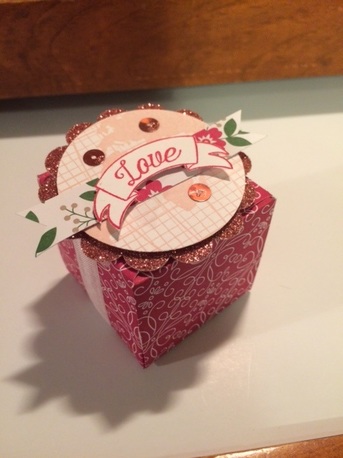
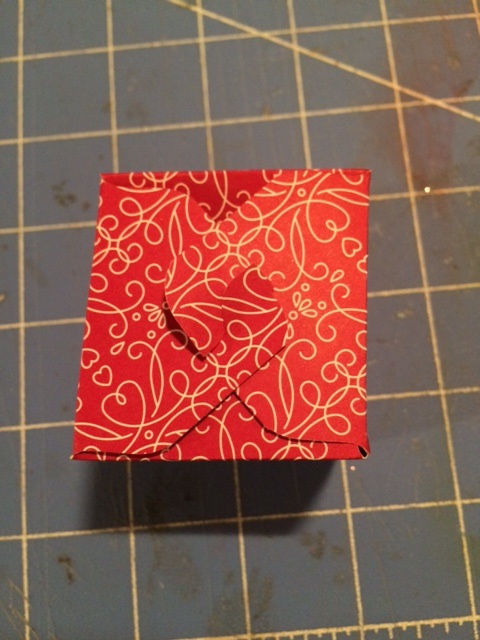
This project was really easy and uses a small amount of paper. The stamping/punches and glimmer could be scraps on hand! But whats better, is the project can be easily duplicated, if you needed to make a lot, it will take no time!!! The envelopes are not very deep, so this treat package would be perfect for a regular Hershey bar or another thin candy bar, a gift card, perhaps a note, as well. You could also add a couple pencils or pens for a school gift. I am debating whether or not to make for my elementary school kids Valentine Swaps...hmmm there's plenty of time to decide...Right??
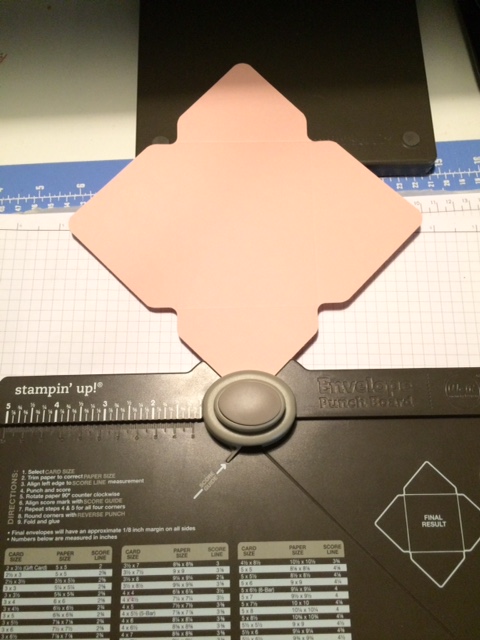
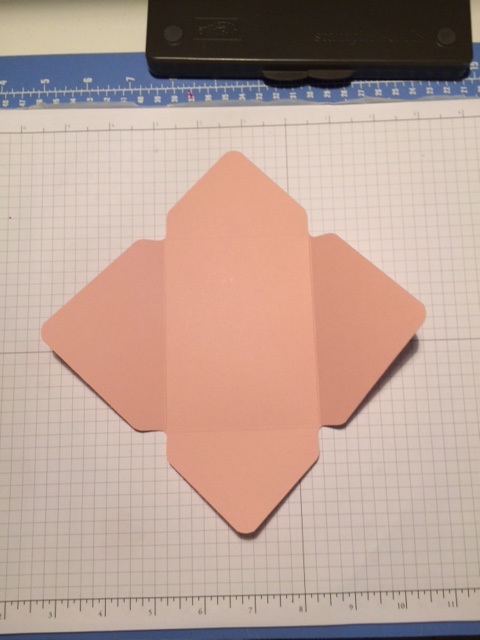
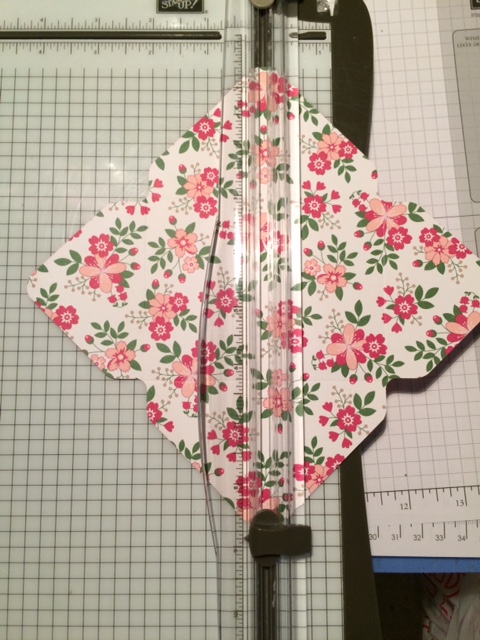
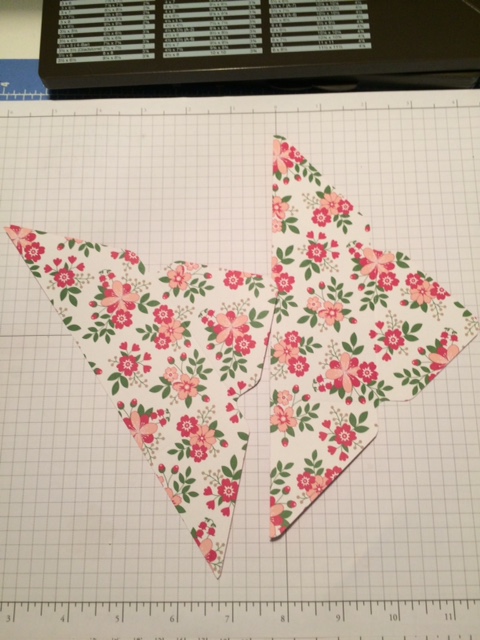
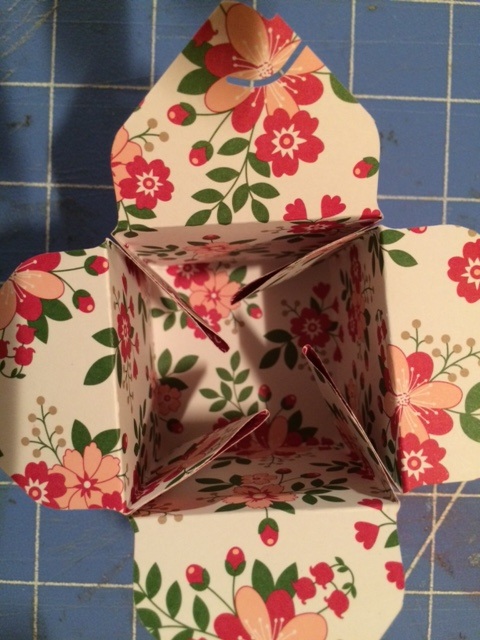
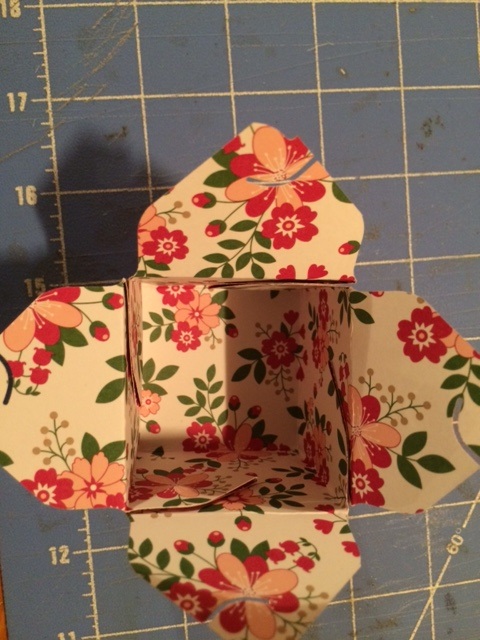
You can see in the second picture below, that once you fold the sides in, there are these little corners that stick out into the middle of the box. That is because the box will open flat. No worries. Just take a few glue dots and stick them to the sides. Wala, they are out of the way. You can fill the box with little treats...maybe a special piece of jewelry!!

Built for Free Using: My Stampin Blog
68 Comments
Stayed tuned on Thursday, January 21st. I am once again participating as a guest hopper for the Stampin Friends Blog Hop. Be sure to stop by so you can follow the blog hop and enter your chance to win some Blog Candy.
Stay Warm and Happy Stampin Steph 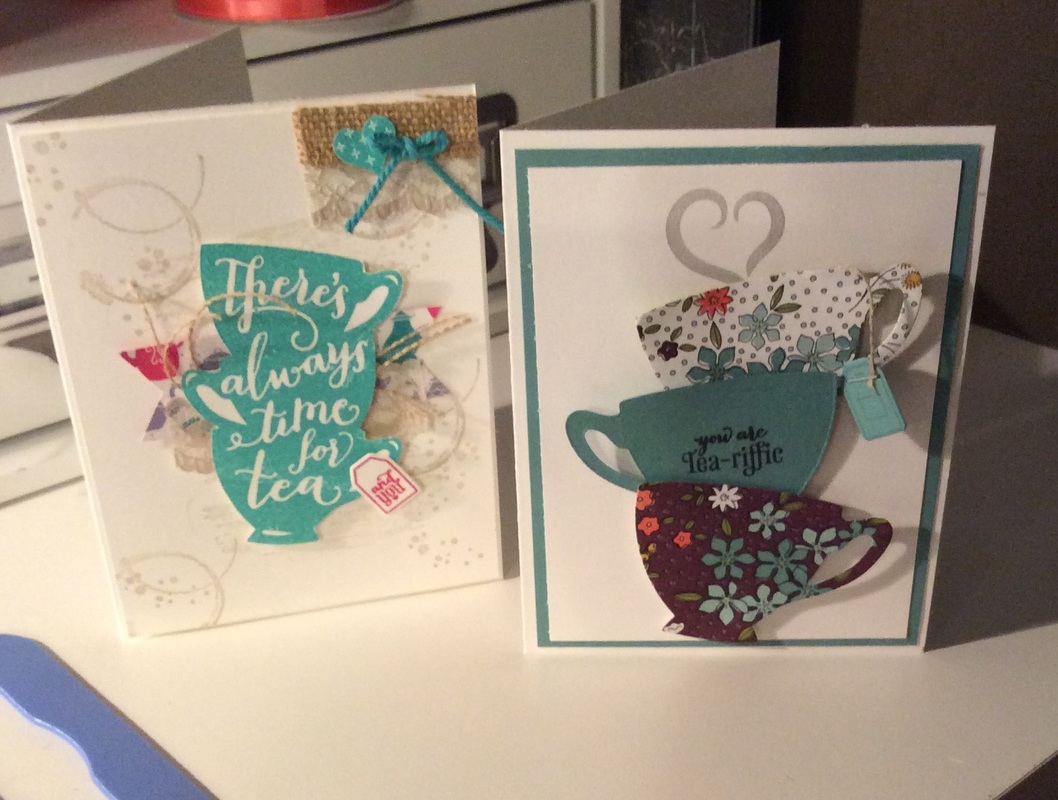
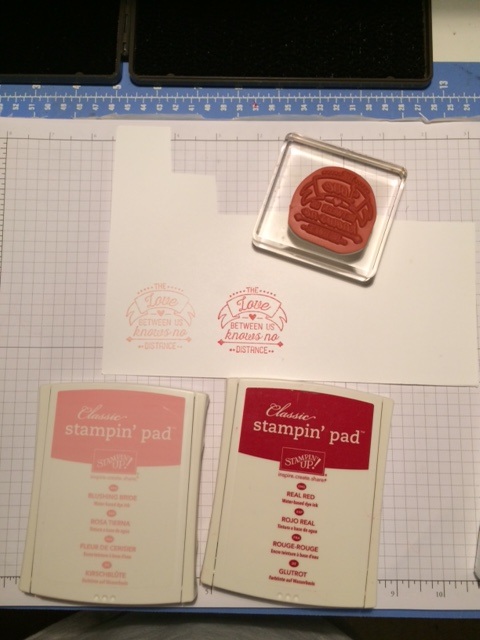
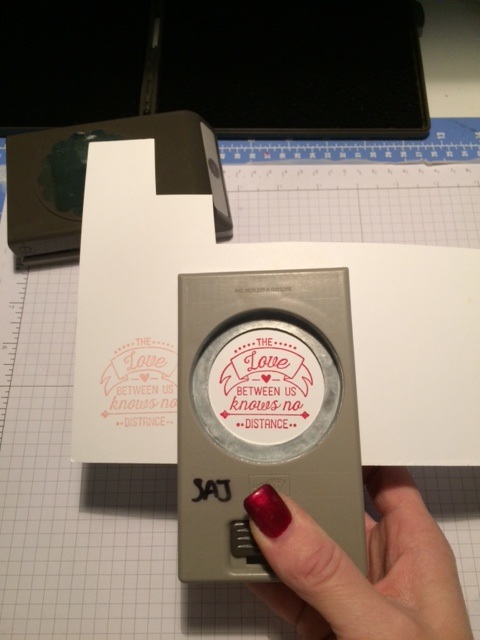
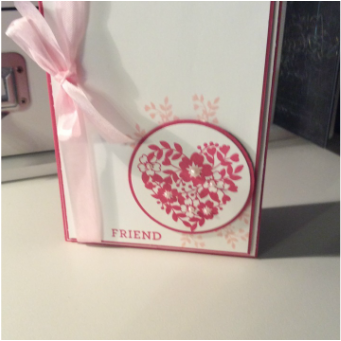
This, by far, has quickly become one of my favorite sets of all from the new Occasions catalog!!! I'm not a tea drinker, but I really think this set is a lot of fun to use! And well....Drinking tea really doesn't have to do with liking the set!!!!
I love the color combinations in the Wildflower Fields DSP. So pretty! The best thing about that paper is, it's free! With any $50 purchase you can choose the Wildflower Fields DSP for free!!!! Awesome Each card was really easy to make! Let me know if you need a catalog! Happy Stampin Steph
Built for Free Using: My Stampin Blog
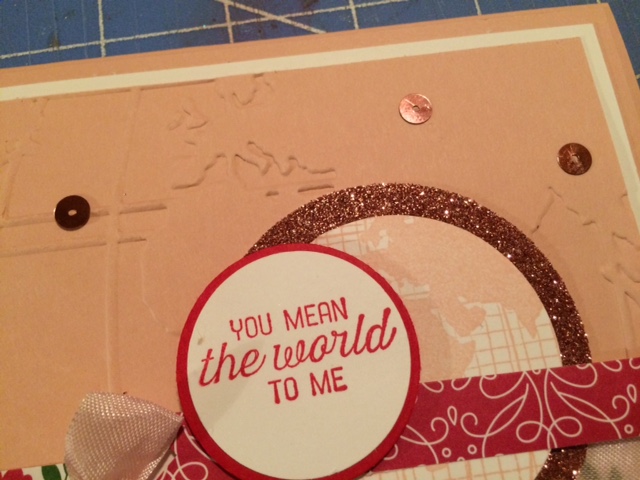
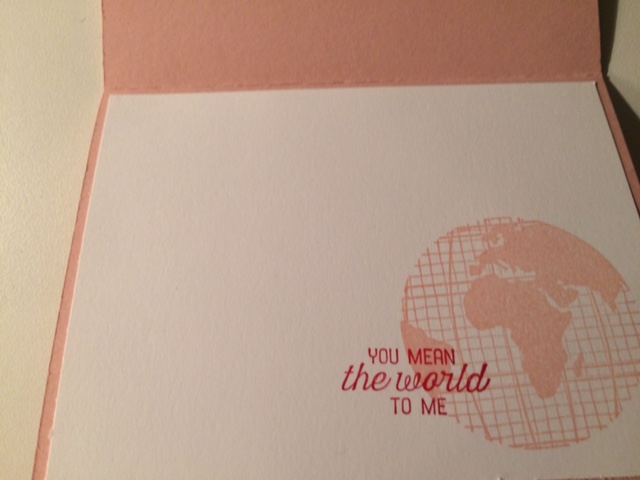
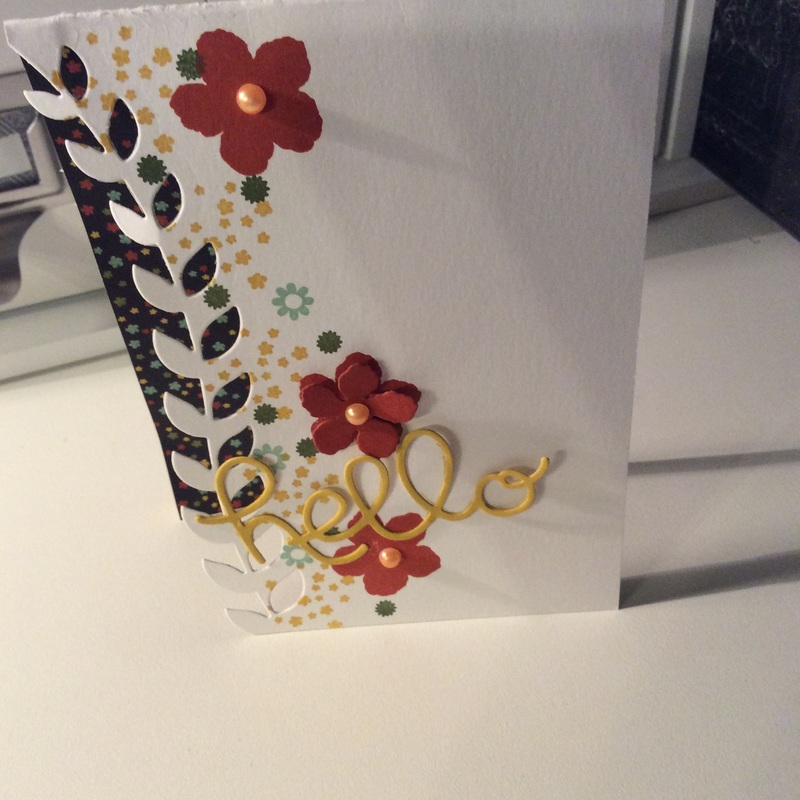
This card look hard but was super easy to make using the new Botanicals Blooms Bundle. I love the Botanical Builder framelits, especially the border or edgelit. It's adds wonderful detail to any card. I added some detail with the smaller stamps to bring out the colors in the DSP.
Just another one of the beautiful bundles you can order in the Occasions Catalog. See below, for products used in this card Hope you enjoyed. Happy Stampin Steph
Built for Free Using: My Stampin Blog
Party Wishes
What can I say, the Occasions catalog is jam packed with awesome new products. This next card is from the party suite and oh boy it's awesome!!!
You may have seen cards similar floating around like this one already. I made this card after one I saw that was a make n take at On Stage. I tweaked it slightly. I wanted to make something quick to show the new products! So fun Enjoy and Happy Stampin Steph
Built for Free Using: My Stampin Blog
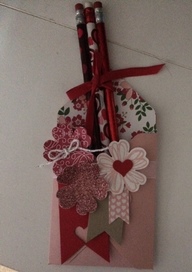
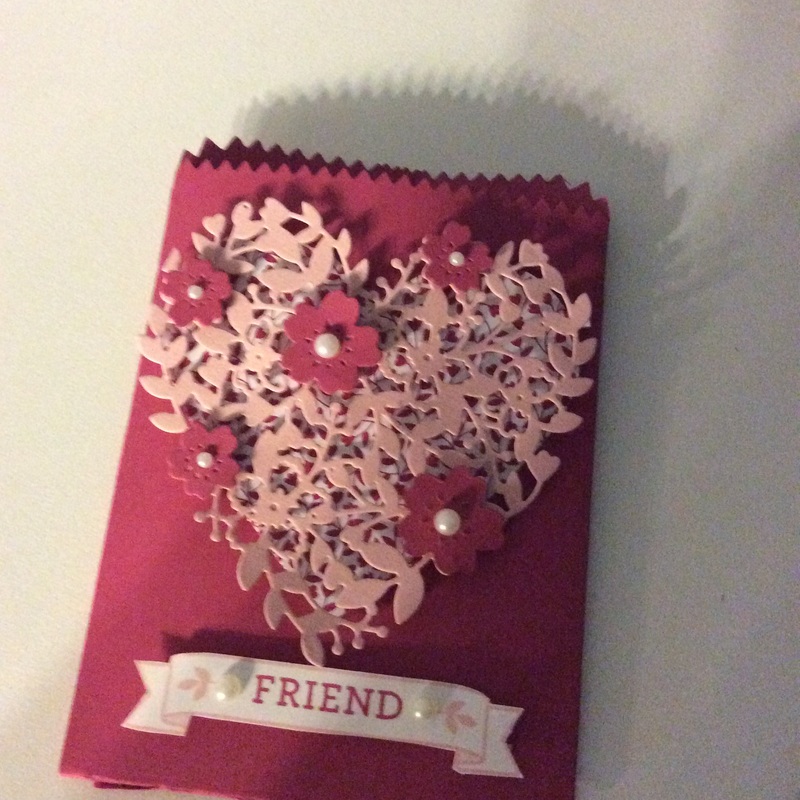
Here is the Mini Treatbag using the Bloomin' Heart Framelits on top. I cut a Heart in in the Love Blossoms DSP using a heart from the Hearts Collection framelits. (oops the hearts framelits are retired). Then I used Blushing Bridge cardstock and cut of the Bloomin' Heart. I adhered it to the top of the DSP with dimensionals. I also cut out 5 flowers from the Bloomin' Heart thinlits dies. Added the basic pearls to the flower centers.
I hope you enjoyed. Feel free to contact me if you are interested in this new Bundle from the Occasions Catalog.
Happy Stampin Steph 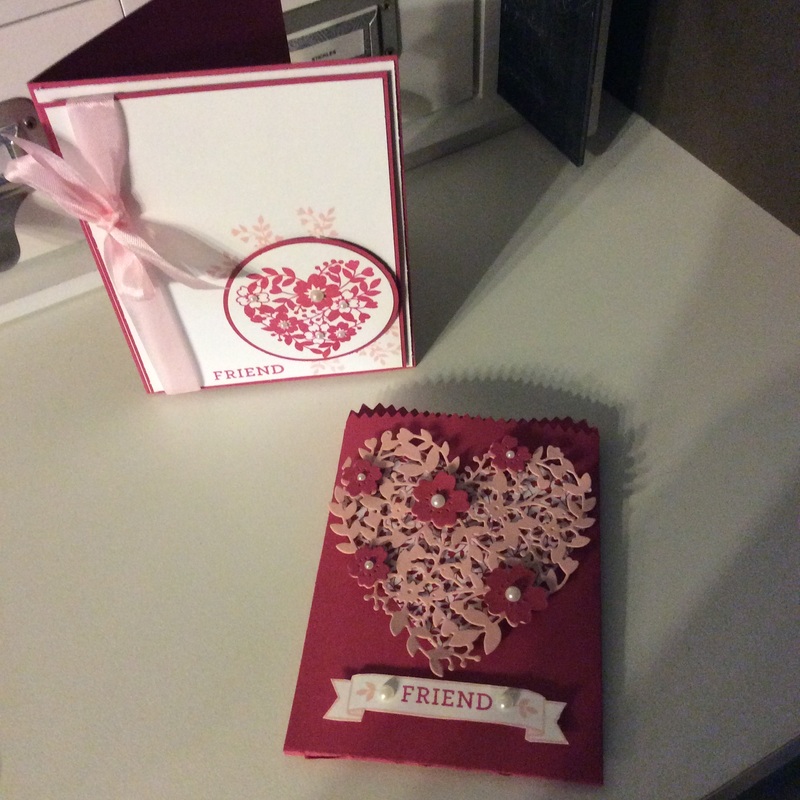
Built for Free Using: My Stampin Blog
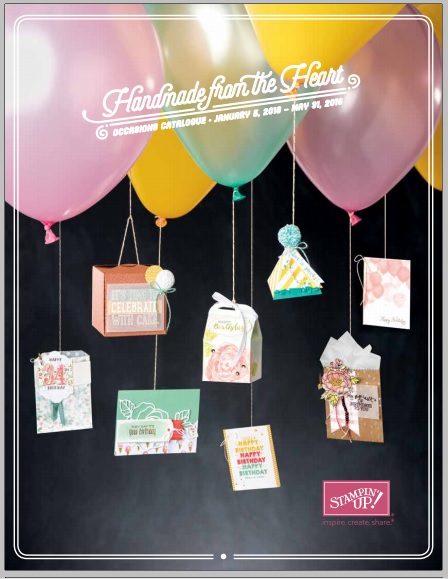
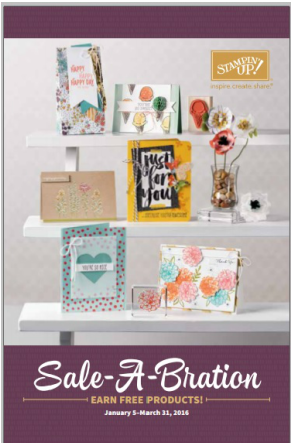
Yeah I'm just bursting with excitement that I can finally share with you the new Occasions Catalog and Sale-A-Bration Catalogs. The best I've seen thus far being a Demonstrator. Take a minute to check them out! You're going to love all the products.
Remember the Sale-A-Bration products are not for sale. The way the Sale-A-Bration works, for every $50 in product (before tax/shipping) you can choose 1 item from the Sale-A-Bration catalog. Your $50 purchase does not have to be just from the Occasions catalog you can combine, or just order from the Annual Catalog as well. And also any $50 purchase from the Clearance Rack also will earn you 1 free item! AMAZING!!! Haven't received the new catalogs? Feel free to contact me and I will happily send one to you! Happy Stampin Steph
Weekly Deals January 5, 2016
Every Tuesday Stampin' Up offers savings on products. Here is this weeks!!
Built for Free Using: My Stampin Blog
Have a great week and stay warm!
Happy Stampin Steph Wow check out all these new product videos from the new Stampin Up Occasions catalog that will be live tomorrow Jan 5th. Amazing! There's just so many to choose from, I posted a few of my favorites. You will definitely want to bookmark this page if you can't watch them on. I love how they showcase all the new product suites. I have had the pleasure of playing with some of the new products during our preorder. Just one of the perks of being a Stampin' Up demonstrator. You can visit Stampin Up's YouTube channel to see the rest. Please contact me if you're interested in a new Occasions Catalog and Sale-A-Bration catalog. I'd be more than happy to send you one. Take care Happy Stampin Steph
What could possibly make Sale-A-Bration even better? Getting Paper Pumpkin involved of course! It just might be the easiest way for you to earn FREE* Sale-A-Bration items. 3-Month Prepaid Subscription (137859) $59.85 $55 Save on a 3-month prepaid subscription and instantly qualify for a FREE Sale-A-Bration item! 12-Month Prepaid Subscription (137861) $215.40 Take it to the next level with a 12-month prepaid subscription. Save $24 a year with the everyday awesome price, earn Stampin' Rewards, and instantly qualify for 4 FREE Sale-A-Bration items! This offer will end on March 31, 2016 at 11:50 PM (MT). Click here for more information about prepaid subscriptions. Click here to sign up! Please contact me with any questions! Happy Stampin Steph 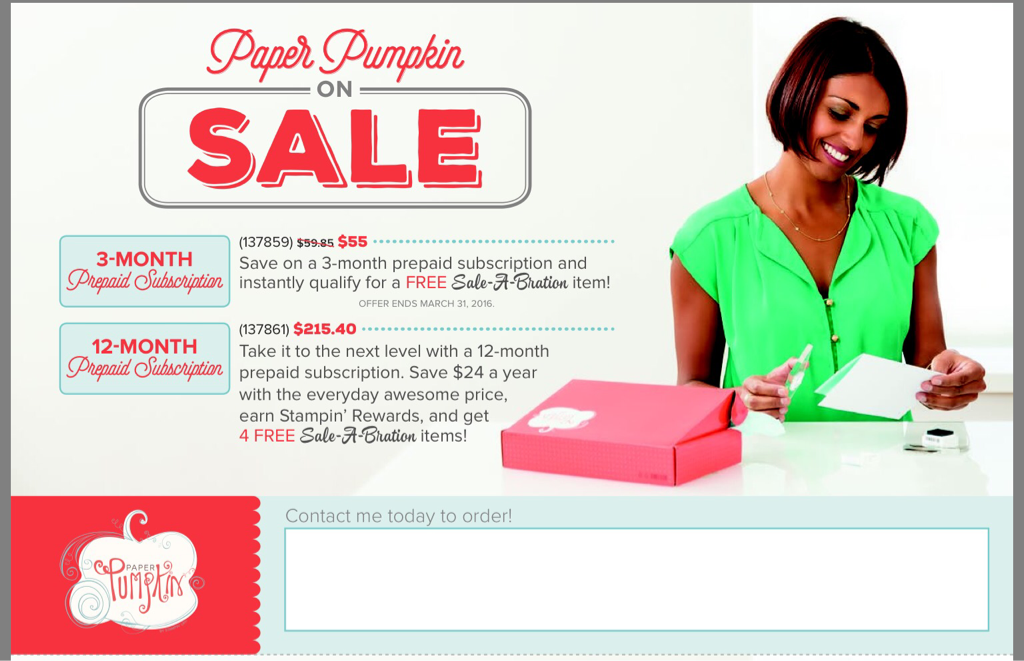 Better late thank never, right? I finally got around making the December Paper Pumpkin. How cute is it? A very easy desk top calendar to make. The colors are so pretty. Sure to compliment any decor. I hope you got in on Paper Pumkin in December. These went like hot cakes. Unfortunately, the refill kits sold out very quickly. There are still some great passed kits available. So check them out. Don't subscribe to Paper Pumpkin? It's so easy to do! Click on here and choose the subscription that works for you! Month to Month, 3 Month, 6 Month or 12 Month. Please let me know if you have any question! Happy New Year and Happy Stampin Steph 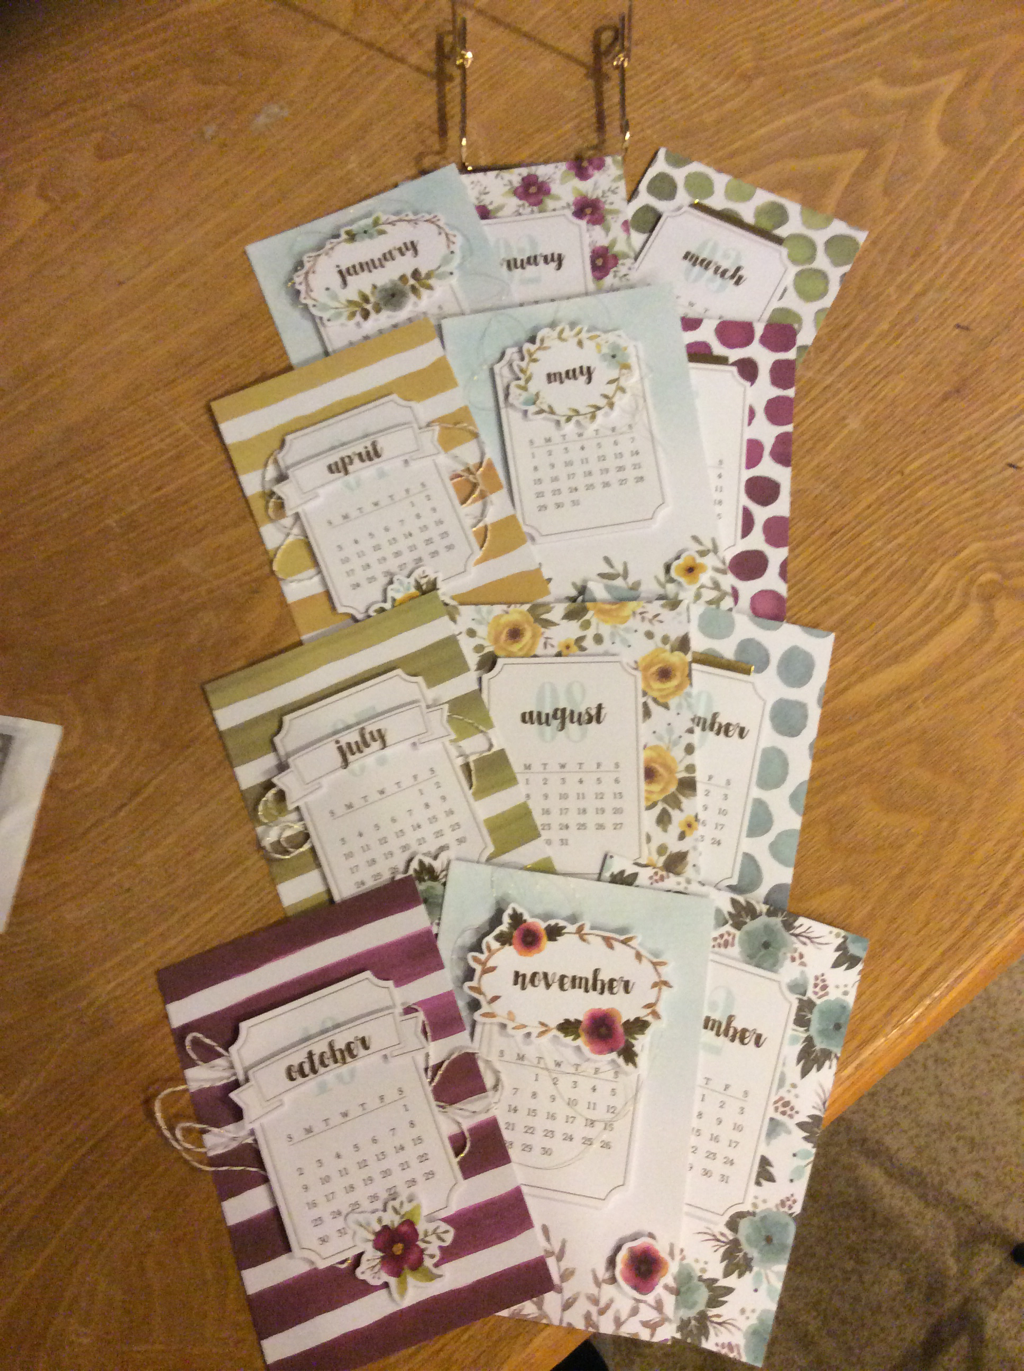 |

New 2023-2024 Stampin Up Annual Catalog


Kits Collection


Join today

Categories
All
Archives
January 2024
|


 RSS Feed