 We’re all papercrafters, here. And that means visions of sugarplums (and Christmas crafting) start dancing in our heads as soon as October hits. I can help you get those visions translated into reality by planning now to create handmade packaging for your family and friend! Keep it simple or make it fancy. All that matters is that you add a bit of yourself to your giving this year by making it handmade and heartfelt. CASUAL The standout on this sweet Christmas packaging is our adorable, rustic tag. And trust us—once you make the first one, creating multiples is easy. Tip: Besides using the ripped paper technique, stamp off the solid trees to add depth. Once you finish stamping, tie the tag to the Mini Shipping Box with a bit of Linen Thread. So cute! AVID We fancied up our second tag by adding a variety of stamped embellishments. Just run the stamped images through the Stampin’ Cut & Emboss Machine with the Warm Wraps Dies, then adhere them with Stampin’ Dimensionals. We also added die-cut Real Red Cardstock trim along with open-weave ribbon and gold metallic trim from the Forever Greenery Trim Combo Pack for extra charm. ARTFULLY AVID We stepped up our final project by embossing the tag with the Wrapped in Texture Embossing Folder. We then adhered pretty wreath sprigs and finished with a bit of ink splattering using the Aqua Painter. This tag is so festive you could almost hang it on the Christmas tree! Regardless of the type of crafter you are, we have something for you!!! Contact me to get your gift packaging into a reality Happy Packaging Happy Stampin Steph
0 Comments
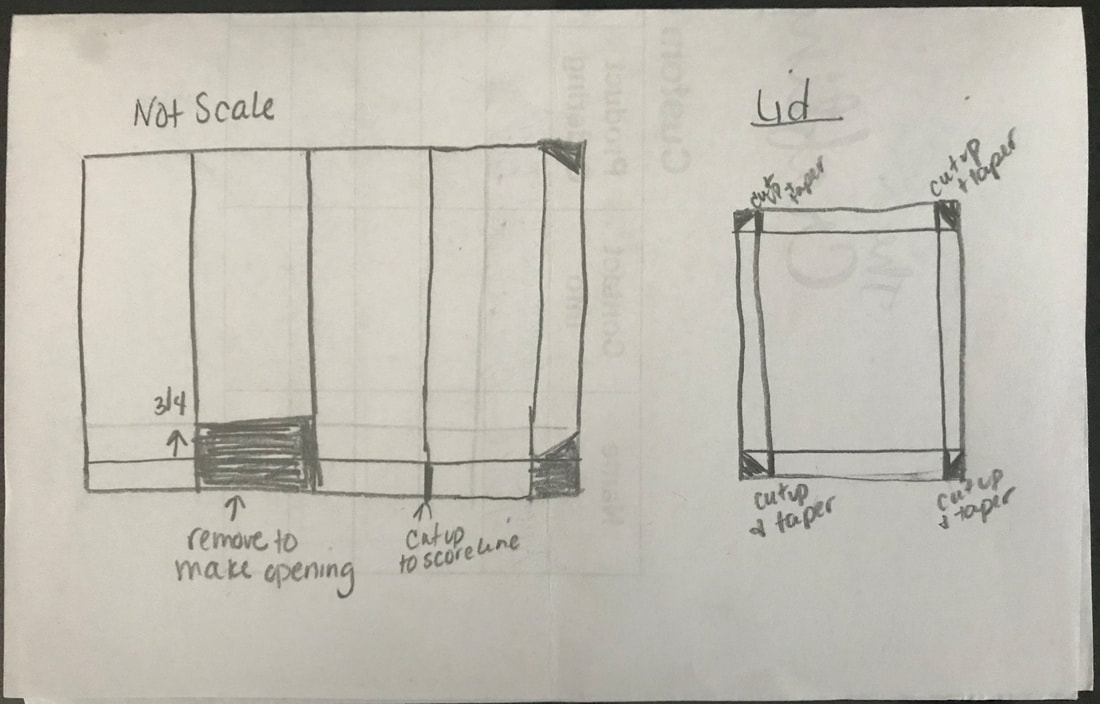
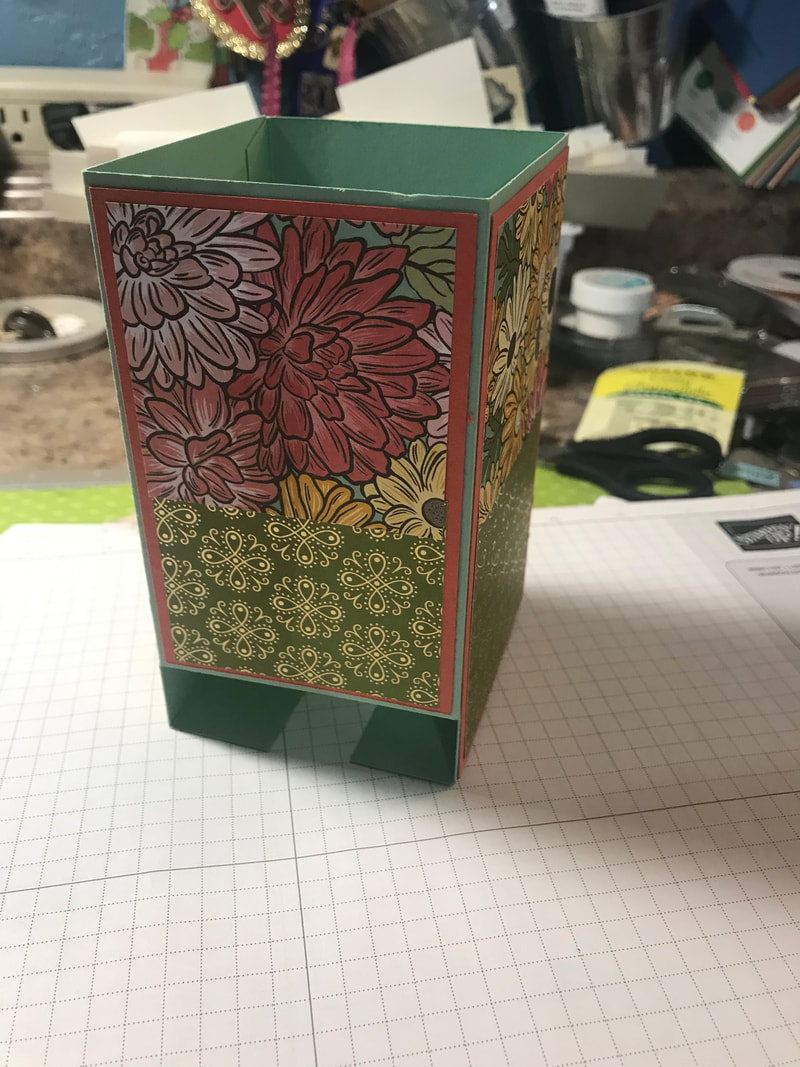
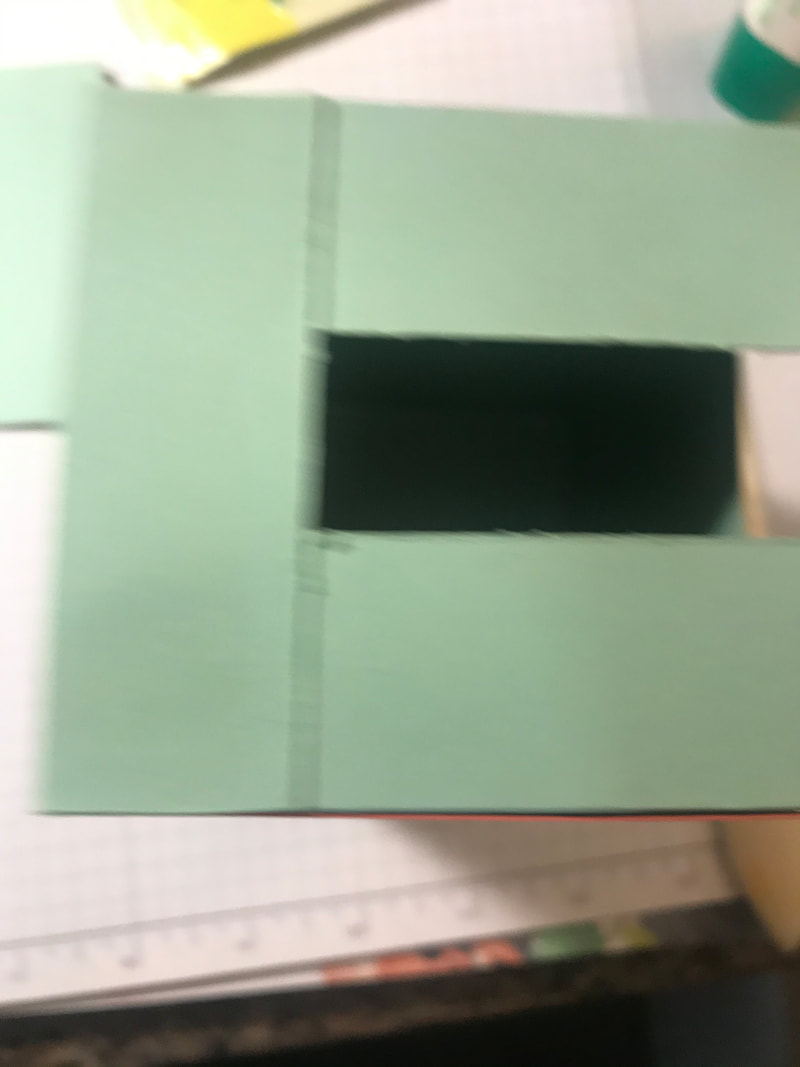
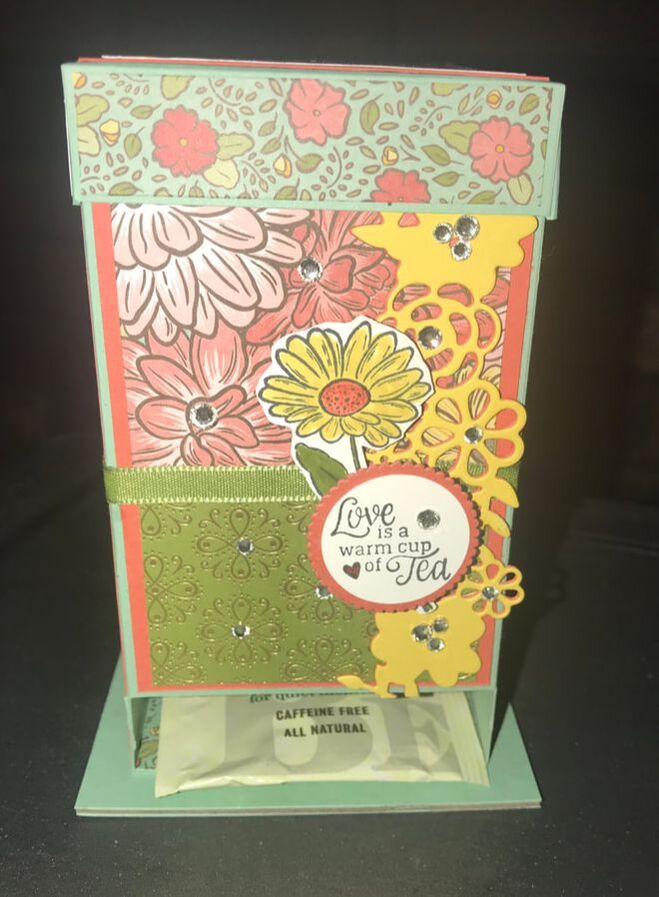 Today's project is this beautiful tea bag holder that doubles as a dispenser. It's a project that is perfect for all those tea drinkers in your life! You can fit a whole box of tea and totally customizable to match anyones decor! To make this tea holder, I used the new Stampin Up suite called Ornate Garden. You get a sneak peak of what is to come in the new Annual Catalog in June. I have made this project in the past and I would like to say it always went without a hitch, but sadly i seemed to get hung up on some the measurements that were out there. This time I worked on modifying to simplify the process. So here goes. You will need 6"x12" cardstock Designer paper for layers Cardstock for layer and lid Ribbon Embellishments To make the dispenser:
To make the lid:
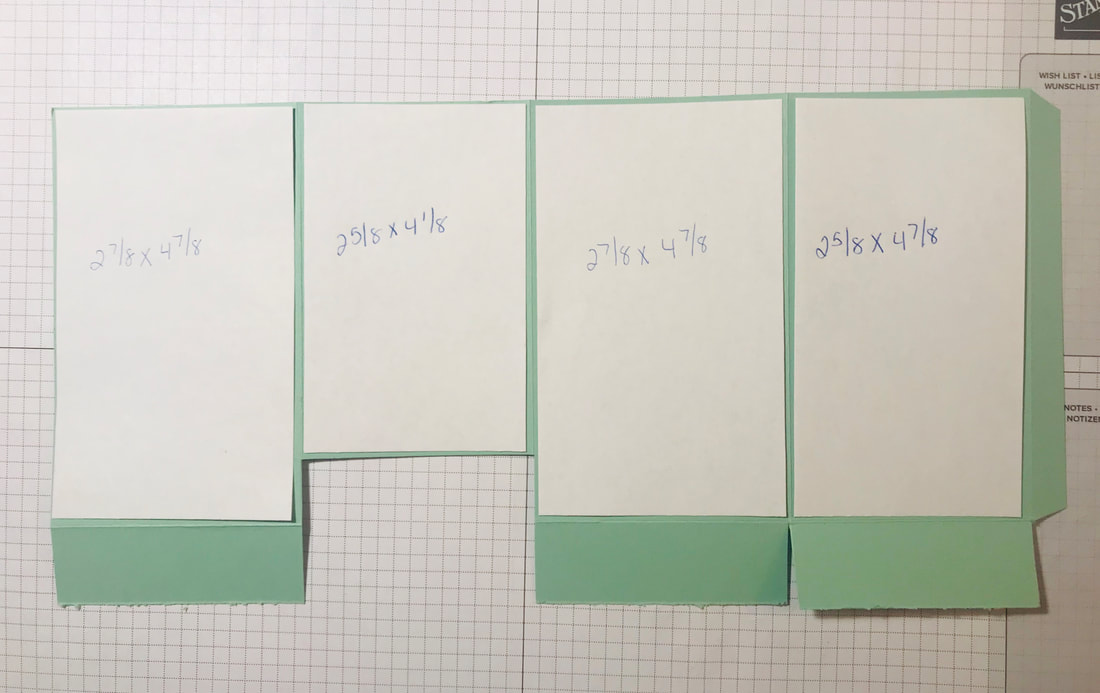
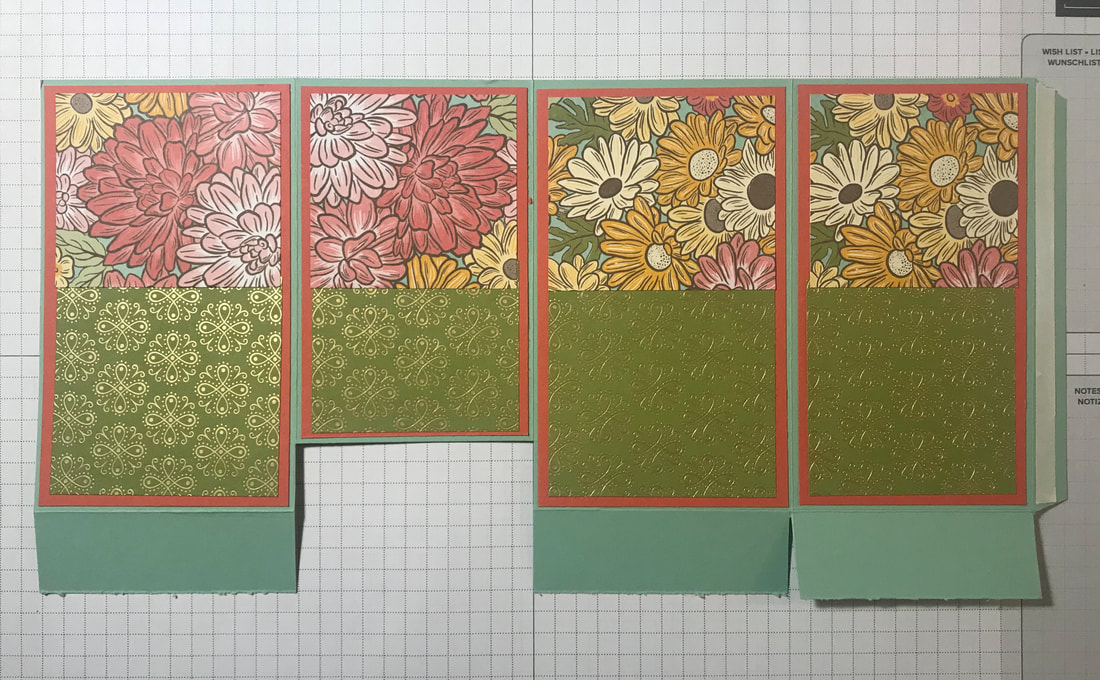
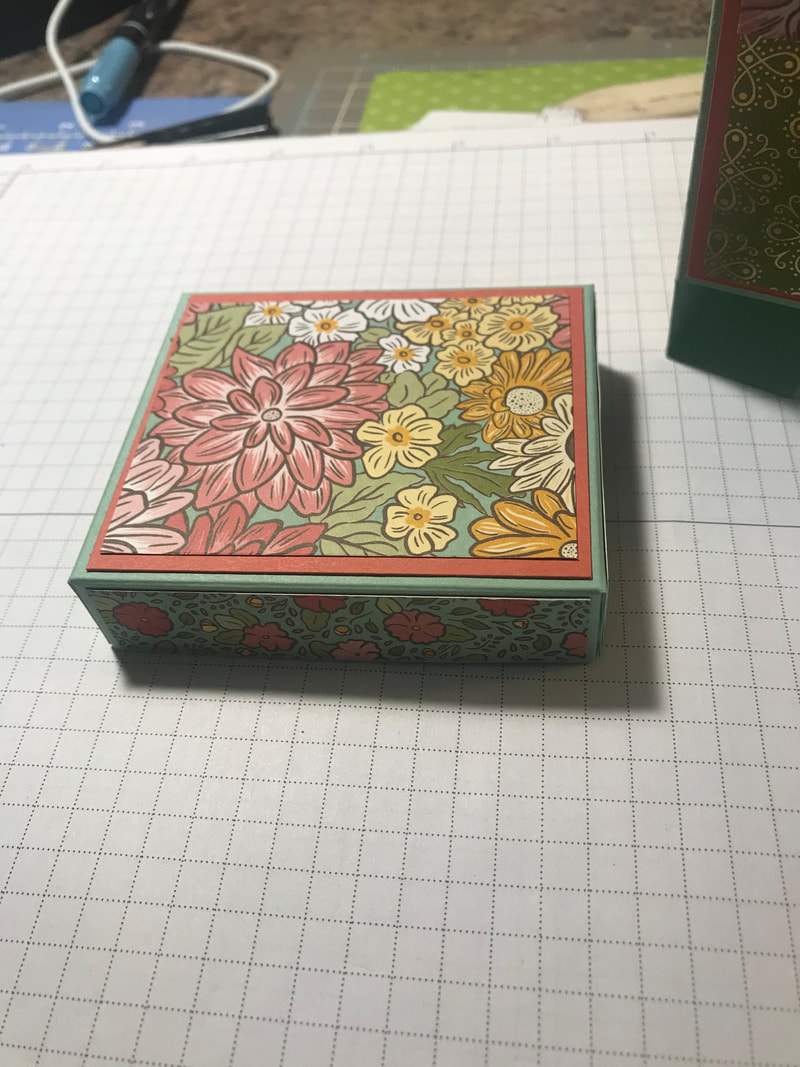
To decorate the outside of the box, I decided to use a layer of cardstock first, then 2 different patterned designer paper from the Ornate Garden DSP. The colors I used are Mint Macaron and Terracotta Tile. To add the cardstock layer you need:
To add the DSP layers for the top portion of the box:
To add the DSP layers for the bottom portion of the box:
To add the cardstock and DSP for the lid:
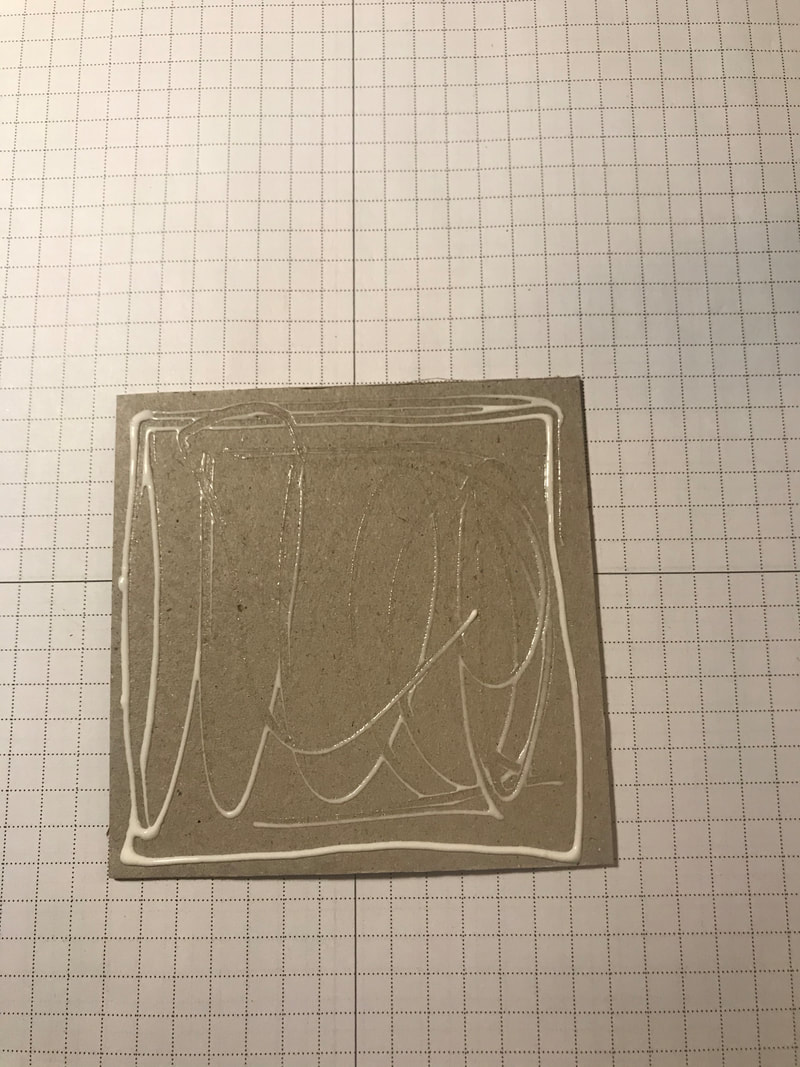
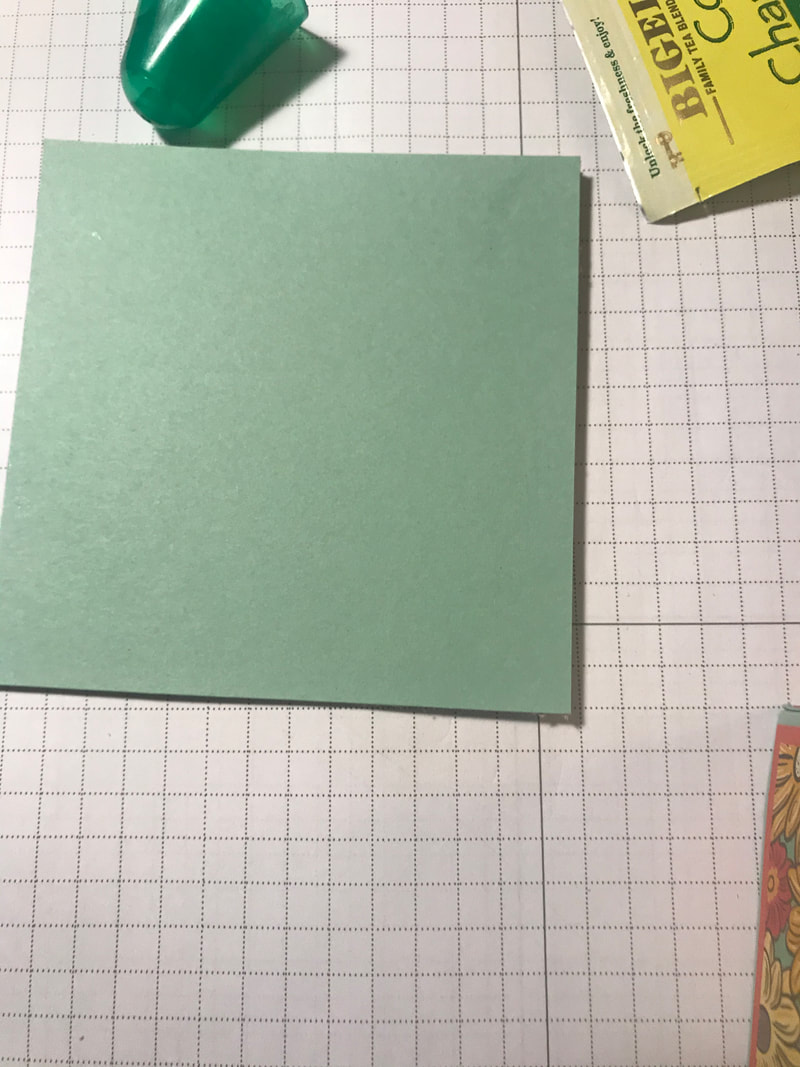
To create the base of the box, you will need a piece of chipboard that measures 3 1/2"x3 1/2" you will also need 2 pieces of cardstock that measure 3 1/2"x3 1/2". Glue them onto the top and bottom of the chipboard, you can also sponge the sides of the chipboard, I just left it as it. To adhere the box to the base, you will need to carefully glue the tabs onto the chipboard. Make sure to center as best as you can. The take a piece of DSP that measure 3 1/8"x2 3/4" and glue it on the inside to cover the tabs. To decorate the box, I took a piece of ribbon and wrapped it around, covering the seams from the 2 DSPs I used. I added some diecut flowers from the Ornate Garden Suite and the greeting is from the Tea Together stamp set. I finished it off with some rhinestones and it's ready to fill with some favorite teas.
What do you think? I love it too! I can't wait to make more and have these ready for gifts to give to some special people. Thanks for stoppin by Happy Stampin Steph 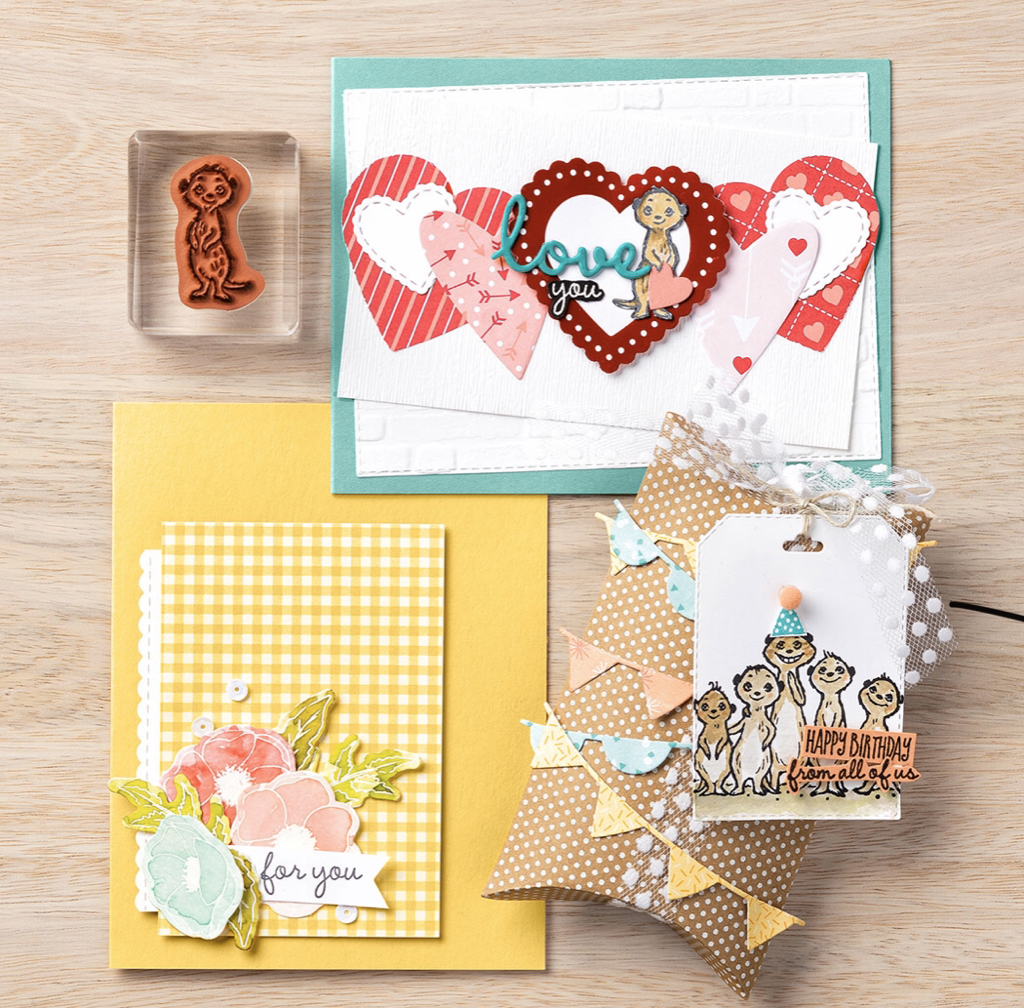 The Gang’s All Meer Stamp Set is a fun one to bring out the smiles and you can see its versatility with our projects here. To create a darling valentine, we paired the set with From My Heart Specialty Designer Series Paper, the Heart Punch Pack, and the Stitched Be Mine Dies. The beautiful For You card shows how to pair sentiments with embellishments, in this case, the Peaceful Poppies Elements. And on our cute birthday box, we combined the stamp set with the Bonanza Dies. There are so many ways to share creativity—and Sale-A-Bration!
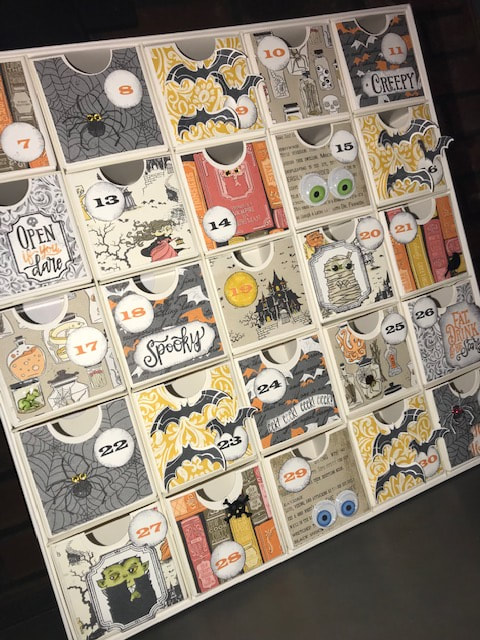
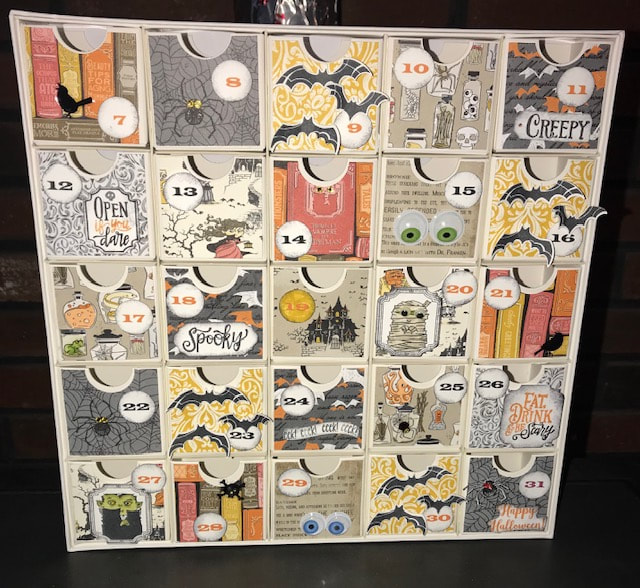
Be sure to contact me for your new catalogs Happy Stampin Steph  I made 23 pencil boxes for my son's 4th grade class to hand out for Halloween. We can not hand out candy and Halloween really isn't celebrated in schools any more. But I was able to still give a little treat to each of his classmates! My daughters are too old in school now that they just don't want to share gifts anymore and they switch classes so there would be too many to make even if I wanted to!! :-(
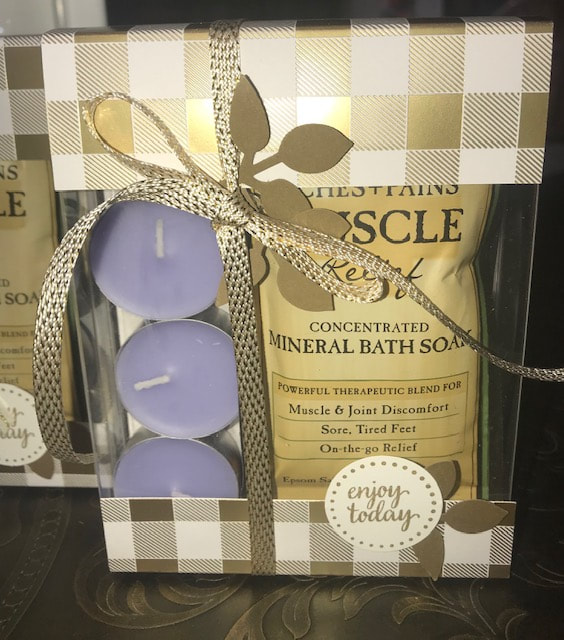
I wanted something simple, and I know kids can always use pencils! I found directions for the box on Pinterest. I followed the directions by crafter The Stampin B, you can find the directions here. I used retired Stampin Up products to decorate! My son was so excited to bring them into school today!!! I can't wait to hear all about it when he gets home! Happy Halloween & Happy Stampin Steph 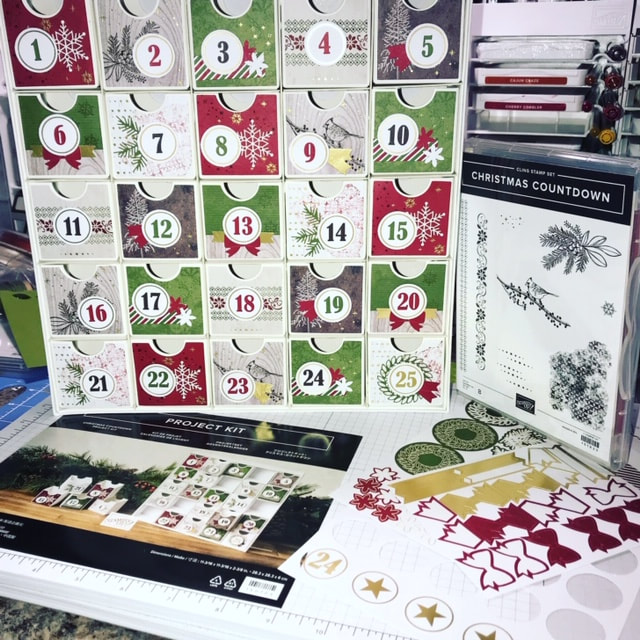 Who has time to create things from scratch this time of year? Me that's for sure!!! Stampin Up knows how busy this time of year is for us! We scramble to get cards addressed, gift purchased and the house the decorated! And that is why they have created their holiday kits. The Christmas Countdown is by far the best kit I have seen with Stampin Up! It's fun It's functional and It's versatile. The boxes are undecorated so you can use this for so much more than just Christmas. I have viewed many ideas on Pinterest! The possibilities are endless! But why stress out....I can help you get ready for the Holiday Season with a hand-crafted advent décor! Fill the small boxes with treats for the kids/grandkids, give as a fun gift, and let the countdowns begin! I am offering the new Stampin Up Christmas Countdown kit as a workshop! What is in included? The Christmas Countdown by Stampin Up created a kit that includes enough supplies to create 25 mini boxes, plus a sturdy outer box to hold them all. November 3 at 9am Cost - $35 I have created an additional kit so you can decorate the reverse side for Halloween. See pictures below......While it maybe too late to enjoy the Halloween side this year...You will be ahead of the game for next year! Halloween Add-on is $15 I will provide the stamps and ink! Please be sure to bring adhesives (Tombow liquid glue, dimensionals and snail) & scissors! TO REGISTER NO LATER THAN 10/25, please click on this link to pay https://www/paypal.me/StephanieJandrow View and RSVP the event on Facebook and stay up-to-date with any updates I provide. Thanks for stopping by Hope to see you soon Happy Stampin Steph The holiday season is almost upon us and we will soon find ourselves scrambling to find the perfect gifts for our family & friends. Let me take away some of the stress and provide you with a fun event as you create fun gift packaging. Not only will your family/friends be excited to open their gifts....they will be super impressed that you created the packaging! I do the hard part...the cutting and preparation. You do the fun part...putting it all together! We will be creating a variety of Holiday Gift Tags, Gift Boxes/Bags and Money/Gift Card Holders. A total of 24 projects! Yes, 24.....10 bags/boxes, 4 money holders, 4 gift card holders and 6 gift tags! (Stampin Up designer paper may vary from what is shown based on current product availability) Come on by December 1 at 9am! Workshop fee is $30 this includes all the precut materials to complete each project. You may also add on additional projects please contact me for details. Can't make? Contact me about my to go option! To secure your seat, please register and pay at https://www.paypal.me/StephanieJandrow Stay up-to-date with event information by RSVP'ing to the Facebook Event. Click here to view the event. I look forward to seeing you Happy Stampin Steph 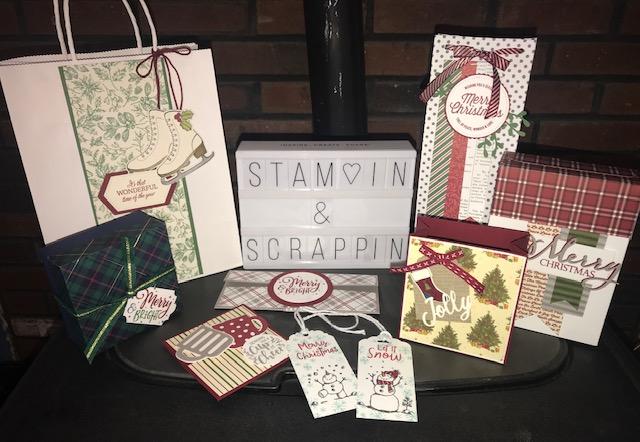 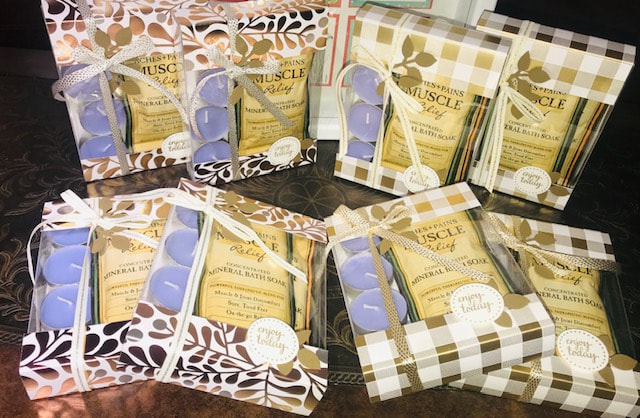 With Teacher Appreciation being celebrated and the end of the school year around the corner, it's time to think about what to give! Most of the time I plan a gift card! I feel the teachers really appreciate that, and they can choose what ever they really need or want rather than receiving 20 novelty gifts that they may not have use for year after year! But I like to dress it up! Recently, I had the opportunity to display my projects at a Spring Pop-Up shop event. I worked on several projects for Mother's Day, Spring/Summer and Father's Day, I am hoping to post so more as the days go by. But this is the spa set I put together!
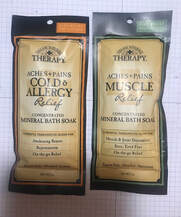 I found the boxes, lavender tealights and 2 types of bath soaks on Amazon. I was able to plan my project, order the supplies and have them here in a day! PERFECT! They are the perfect sizes for this project. And...teachers are their feet all day and dealing with germs! The definitely need some relaxation!!! Acetate Boxes Lavender Tealights Cold & Allergy Relief Aches & Pain Muscle Relief To make the wrap of the box, you will need a piece of paper 4 1/2"x10 1/2" and you will score on the 10 1/2" side at 1", 2 1/8", 8 1/8" and 9 1/8". I used a little bit of adhesive to hold the paper in place as I wrapped it around the box. Make sure you add your candles and soaks to the box before wrapping. The paper I used is called Year of Cheer Specialty Designer Series. It's now retired! Are you like me, I buy paper and I have to save it until I find the perfect project to use it on??? I felt this project was just right! I added the leaves from the Leaf Punch in Soft Suede, greeting from the Eastern Beauty stamp set was stamped in Soft Suede and then punched out with a 1 1/4" circle punch. Then finally I wrapped the box with a piece of Metallic gold or silver ribbon. The ribbon was about 30" long but you can probably go a little bit shorter, depending on the size of the bow you'd like to finish with. I am very pleased with this project and so happy have come across it! I feel like with a project like this, the possibilities are endless on what they can be used for!!! What do you think?? Feel free to leave a comment! Thanks for stopping by Happy Stampin Steph 
Oh My Goodness! Wasn't Barbara Welch's projects amazing! Barbara is so talented! It's very exciting to follow after her in our Blog Hop!
This month, I am sharing a really fun, and super easy, gift giving project! For this month's hop, we have a Thanksgiving Theme. My project is more of a Fall/Winter Survival kit. As we head into the colder months, it's fun to give a little pick-me-up or someone who might be feeling a little down or under the weather. And well, there is just so many items you could add to this kit. So before I get started, we have 13 crafters this month (including myself) so be sure to check out everyone's blog. Leave a comment about what you LOVED about my projects and include #SFbloghop2017 on your comment! And we will choose 1 lucky winner at the end!! Scroll down to see the blog hop prize!!! Sue Lovejoy was the the winner of last months hop! Congratulations! If you get lost along the way or not sure whose blogs you may have missed, a full list of participants are at the end of my post. 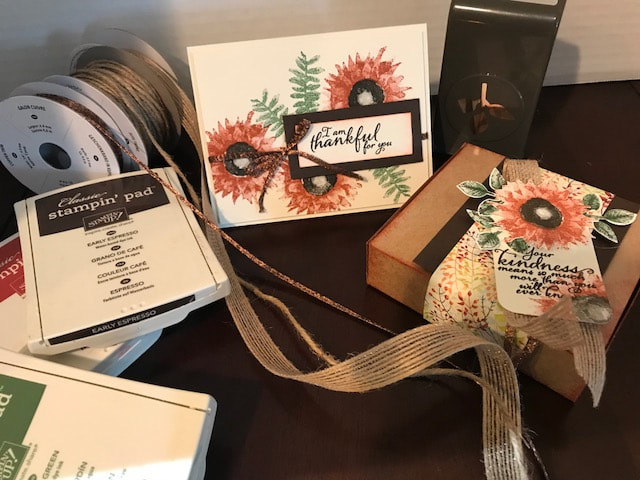
Stampin' Up's Painted Harvest Suite has been one of my favorite line of products in the Holiday Catalog!!! The images on the Painted Autumn DSP is just amazing! The designs just pop off the paper! My projects feature products from this suite! I used Very Vanilla and Early Espresso cardstock along with Early Espresso, Cajun Craze and Garden Green Ink pads. I knew I wanted to put together a little pick me up kit. I included a hand sanitizer, a couple packs of herbal tea, candy and a lip balm. I thought great I will use the new pizza boxes only to realize it was too small!! So I made my own box. 
I will admit, I typically can not come up with the measurements to make a box to save my life! But this time I was focused and figured it out! I am sure there are many boxes like mine...but I designed this size specifically for my contents.
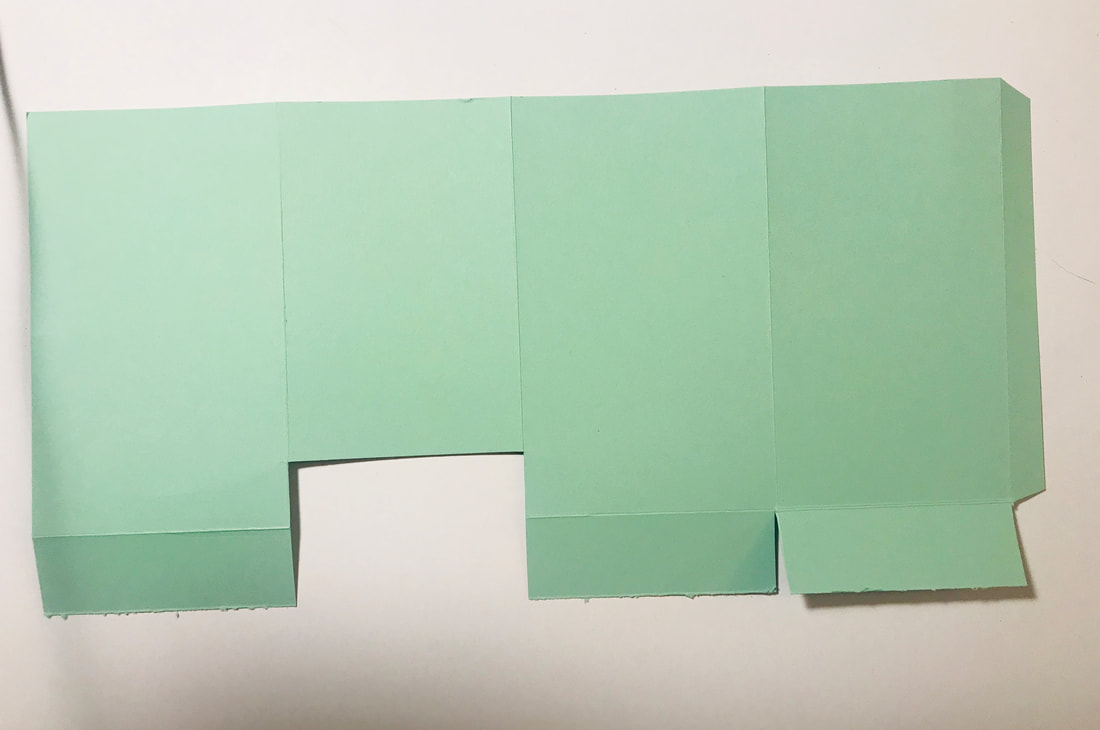
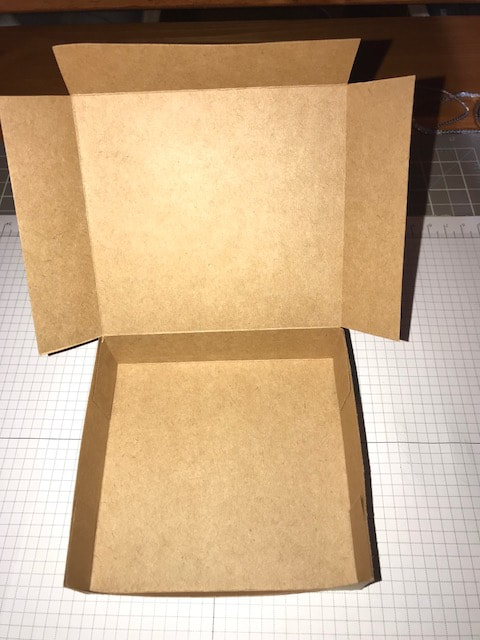
So, what do you need? A piece of cardstock that measures 7x12. I used kraft paper because of the color and weight! With the 12" side horizontal, score at 1 1/4, 5 1/2, 6 3/4 and 11. Turn the paper so the 7" side is on top and score at 1 1/4 & 5 3/4. As you can see on the picture to the left, you will need to fold and burnish your score lines. You will notice there is one end that is a 1" fold and the other end isa 1 1/4". The 1" end will be your lid.
It will tuck in when the box is closed so it won't matter that it is 1/4 shorter. Remove the 2 outer edges from the 1" edge. Cut up on your score lines and add adhesive to the outside of your flaps. And assemble the bottom of your box. Tuck the lid closed. See pictures below.
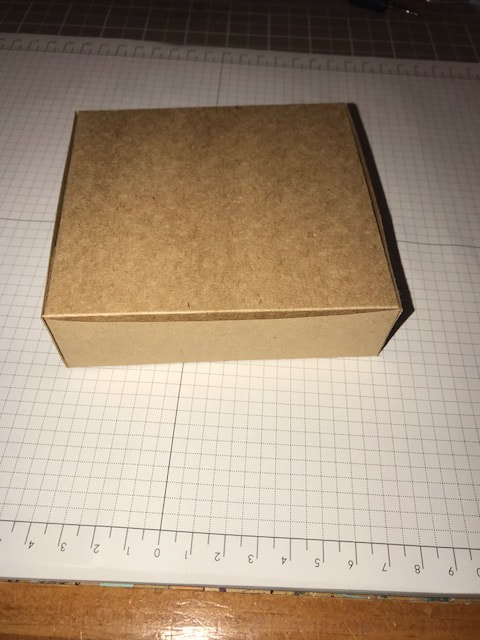
I sponged the edges of the box in Cajun Craze just to add color. To keep the box closed, although it will stay closed without it, I made a simple belly band to go around.
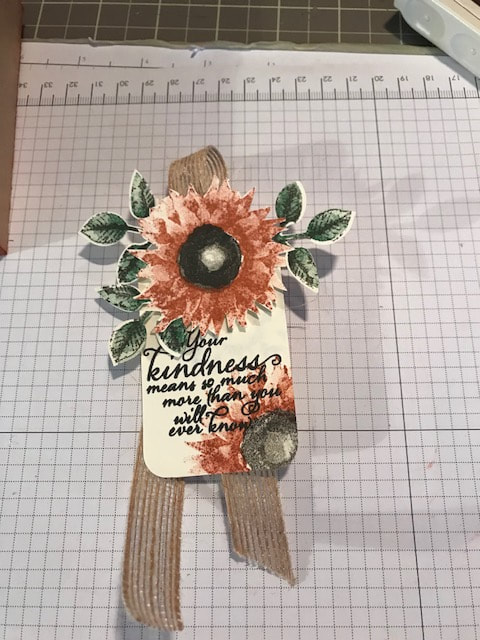
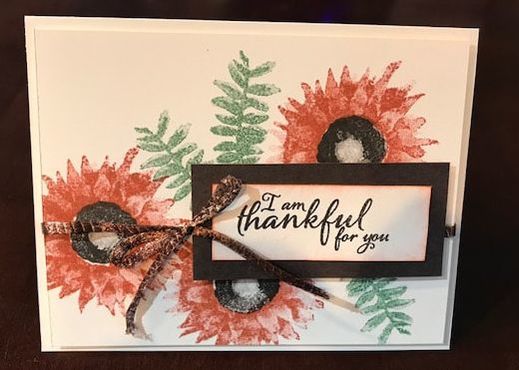
I cut a piece of DSP 2x12 and added a piece of cardstock that was 3x4 under it. I stamped the flower in Cajun Craze, I stamped of before stampin each layer of the image. I fussy-cut the flower out. Then I stamped 3 leaves in Garden Green and added the veins in Early Espresso, punched them out with the Leaf Punch. Cut a 2" strip of Very Vanilla for the tag. Trim it to the length you want. I repeated the flower at the end of the tag and rounded the corners. I used a piece of 5/8 Burlap Ribbon and Copper Trim to sit behind the tag before adhering to the belly band.
The thankful sentiment is stamped on a piece of Very Vanilla that measure 1x2 1/2, layered on a piece of Early Espresso that measures 1 1/2x3. Adhere to the card with dimensionals.
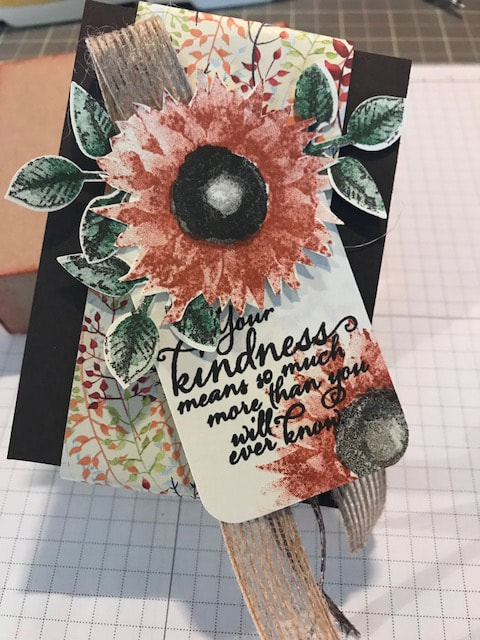
And there you have it. My projects for the Thanksgiving Blog Hop by Stampin Friends. I hope you Loved it. 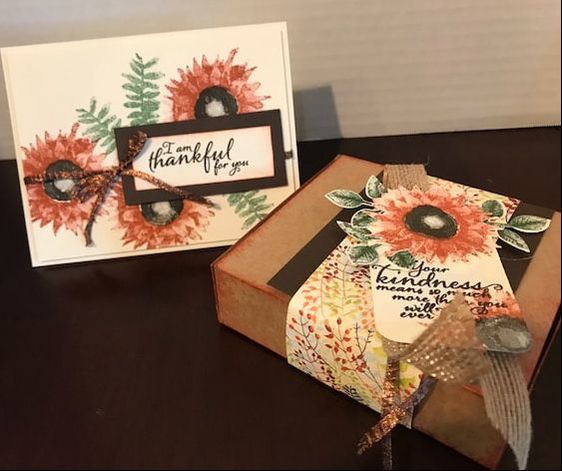
Be sure to leave a comment telling me what you LOVED about my projects and include #SFbloghop2017 and you will be entered for your chance to winner the Many Merry Star Simply Created Kit. WOW how amazing is that??
Thanks so much for joining us! I hope you had a great time! Happy Stampin Steph 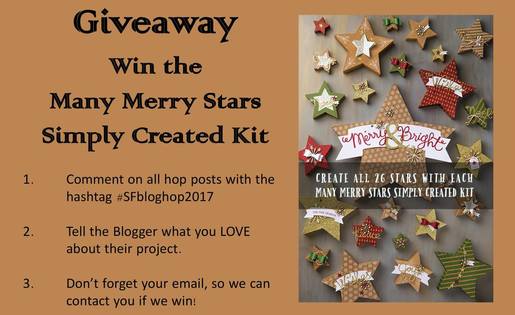
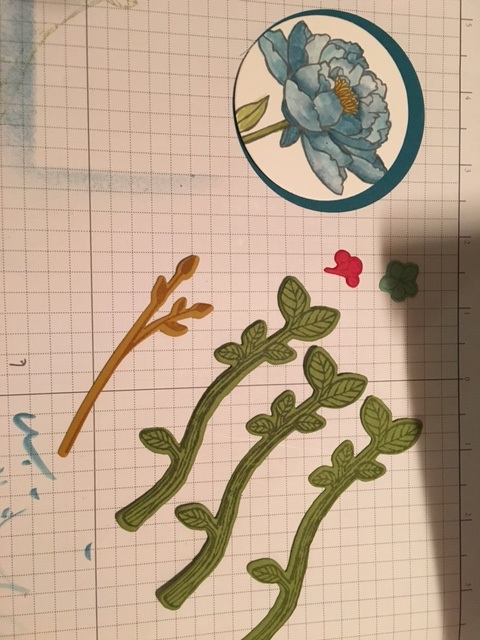
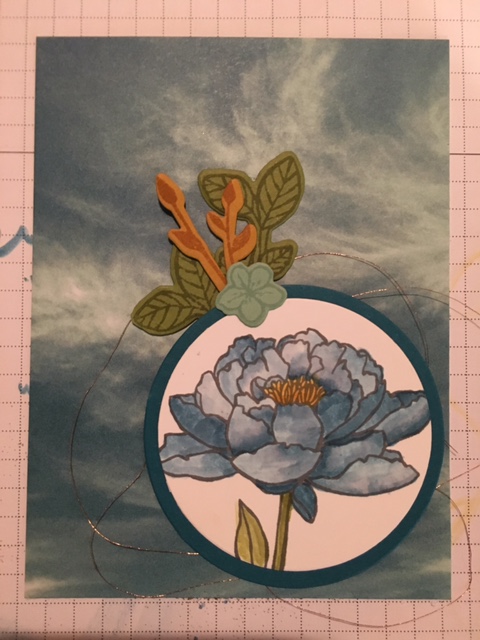
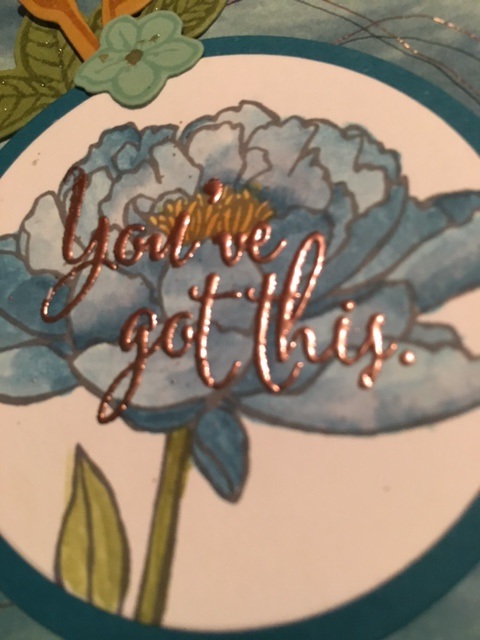
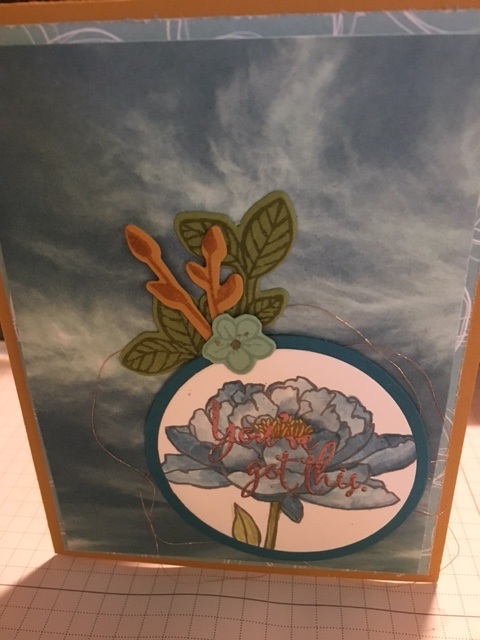
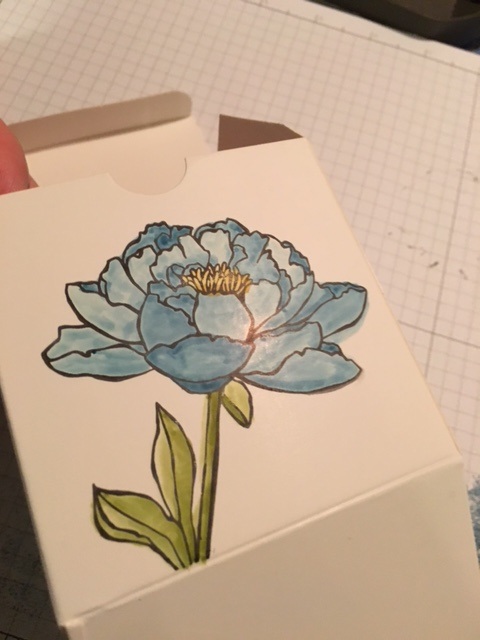
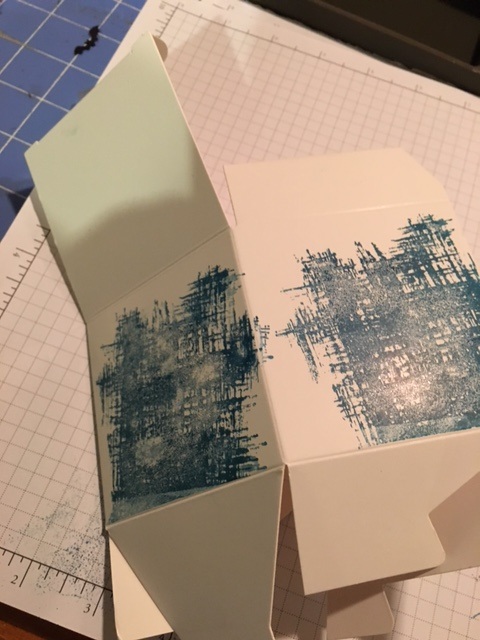
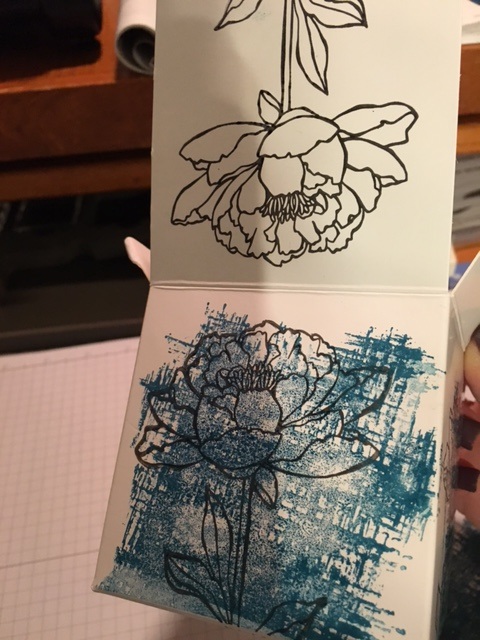
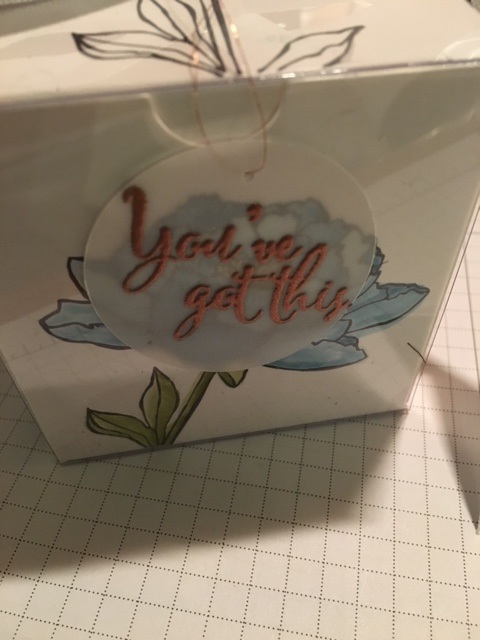
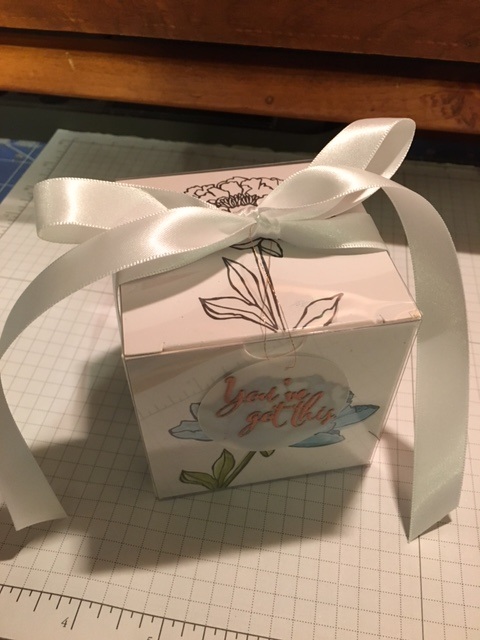
 Welcome to our Stampin Friends August Hope Fun Blog Hop! I'm so excited that you have decided to stop by. We have 14 amazingly talented crafters this month. You're going to love this hop. So be sure to follow along and check out everyone's blogs and fabulous projects. Make sure to leave a comment to be entered in the Blog Hop raffle. Read each blog, scroll to the end, and leave a comment with #SFAugHop!! Each member and guest blogger, will randomly select a winner from our blog comments. We will then pool those together and randomly select the overall hop winner. I would love to hear some feedback and you will earn a chance to win some Blog Candy! Thank you for visiting my blog from Barbara Welch's blog, and thank you for continuing with the Blog Hop. Take a moment a check out my project and at the end click the NEXT button to continue to Melissa Thomas's Blog. Didn't come from Barbara's blog?? That's ok, just click the PREVIOUS button below or scroll to the end and click on Barbara Welch's name to visit her blog.  A big welcome to this month's guest hoppers Maureen Rauchfuss, Angela Lorenz and Kim Lamos 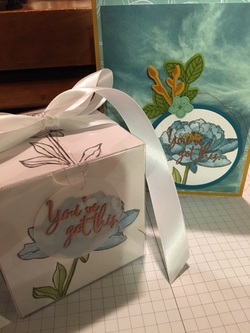 This month's Blog Hop is Hope. Hope can mean so many different things to different people. When you need strength, courage to move on, prayers it works out in the end etc and sometimes you need a little encouragement or just a quick cheering up. I used a stamp set that in a way says it all. It can be a powerful statement!!! So I chose the set by Stampin Up, YOU'VE GOT THIS!!! I love this set. I've used it so many times and I seem to go back to it whenever I need to send out a card to someone going through something, even if what they are going through is a positive thing. I "hope" you like what I came up with. So let's get started with my card. I used a few different stamp sets and techniques to make this card. The stamp sets are Best Birds, Jar of Love and You've Got This. The paper used is, Delightful Dijon, Island Indigo, Old Olive and a scrap of Pool Party Cardstock and Serene Scenery DSP. The ink used is the same color as the cardstock and I used the Archival Basic Gray to stamp the flower images. My cardbase is Delightful Dijon with 2 layers of DSP from the Serene Scenery DSP stack. I completed all the stamping first. I stamped the leaves in the matching ink colors and cut out with the coordinating framelits.The Old Olive Leaves and Pool Party flower are from the Best Birds stamp set and framelits. The Delightful Dijon Leaves are from the Jar of Love stamp set and Everyday Jars framelits. I cut the circles using the Layering Circles framelits. The flower was stampin Basic Gray and I used a Blender Pen to color and shade with Island Indigo, Delightful Dijon and Old Olive Inks. I did not use Watercolor Paper so be careful you do not over color in one spot, it will damage the paper. I stamped the You've Got This sentiment is Versamark and added the NEW Copper embossing powder. LOVE IT!!!! To put it all together, I made a few loops under the circle in the Copper Thread. As you can see by the photos below I was going to add more leaves and some berries. But when I when to assemble I preferred less. My gift is simple and sweet! The new White Gift Boxes featured in our new Holiday Catalog, were perfect. I didn't have to fuss with making a box to the right size or dealing with scoring and cutting. These boxes were just right. And you do not need to worry about the box opening and the contents spilling out, they come with a clear acetate sleeve that keeps all nice and tight. I whipped this gift box together in NO time. I wanted to tie the box and card together, so I stamped the flower on the front panel, gave it a moment to dry and them colored with the blender pen and inks. I thought of just leaving the flower on this panel as my only decoration....but well the rest seemed to blanked. So I stamped on 3 sides of the box using the background image from You've Got This set in Island Indigo. Before stamping, I stamped off the ink a couple times to lightening the color a bit. Then once the ink seemed drying I stamping the flower in Archival Gray over the backgrounds. I also stamped the flower on the lid of the box, but I did not color it in. I again stamped this You've Got This sentiment with Versamark, this time on Vellum. I added the Copper Embossing Powder and heated it. I punched it out with a 1 3/4" Circle Punch. Punch a hole with the 1/16" Circle Punch. I used the Copper Thread to tie the tag onto the box. So, depending on what someone was going through the contents of the box might be different. But for this project, I decided to fill the box with some sweet candy. I used the new gusseted Cello bags in the Annual Catalog and filled it with different hard candies. I was going to use chocolates, but um well, those didn't last! But I think the hard candies are just fine, the box can be left open on someones desk while they enjoy a piece of candy while they work! I tied the box with the Whisper White Satin Ribbon, between ribbon. Sometimes I such a hoarder with ribbon and embellishments, I don't want to use something because it's so nice....but this year, I vowed to use all my products and not buy it until I'm outta of it....we shall see how this goes. But anyway, I thought this ribbon was simple but gave an elegant touch to the gift. I fed the Copper thread through the knot in the sating ribbon and tied it so it hung just over the flower. I then finished the satin ribbon in a bow. I "hope" you liked my projects and I appreciate you stopping by. If you are need of the Annual Catalog or Holiday Message please let me know and I will gladly send one to you. US only. Be sure to leave a comment on my blog with #SFAUGHOP (see below for details) and click the Next button to visit Melissa Thomas's Blog. Thank you so much Happy Stampin Steph  Make sure to leave a comment to be entered in the Blog Hop raffle. Read each blog, scroll to the end, and leave a comment with #SFAugHop!! Each member and guest blogger, will randomly select a winner from our blog comments. We will then pool those together and randomly select the overall hop winner. I would love to hear some feedback and you will earn a chance to win some Blog Candy! 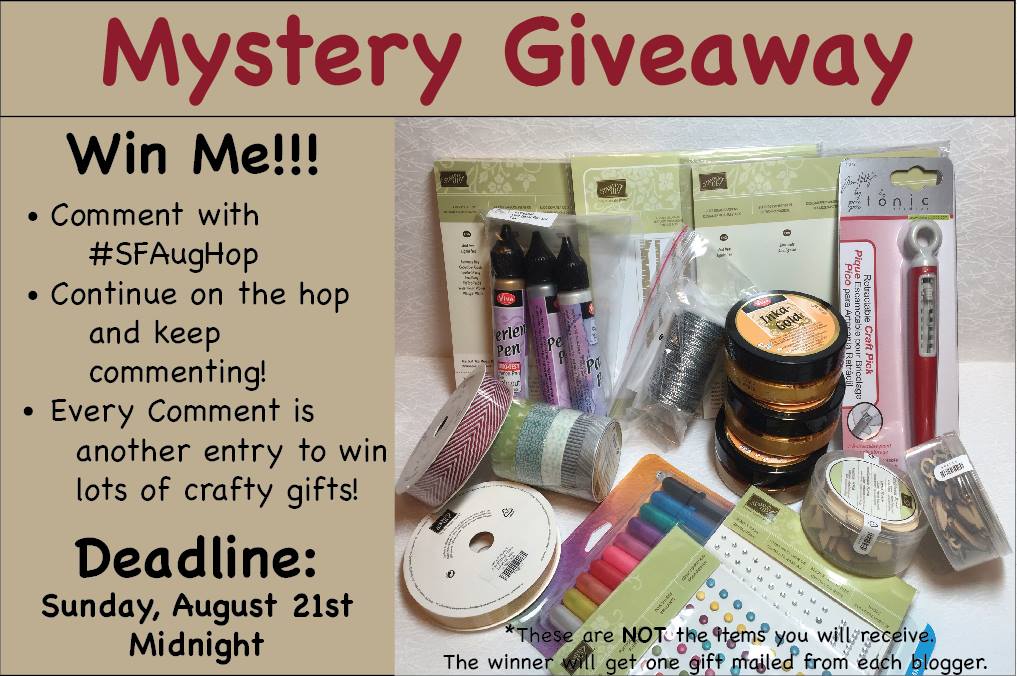 Got Lost along the way? Here is a list of our Stampin Friends Hoppers.
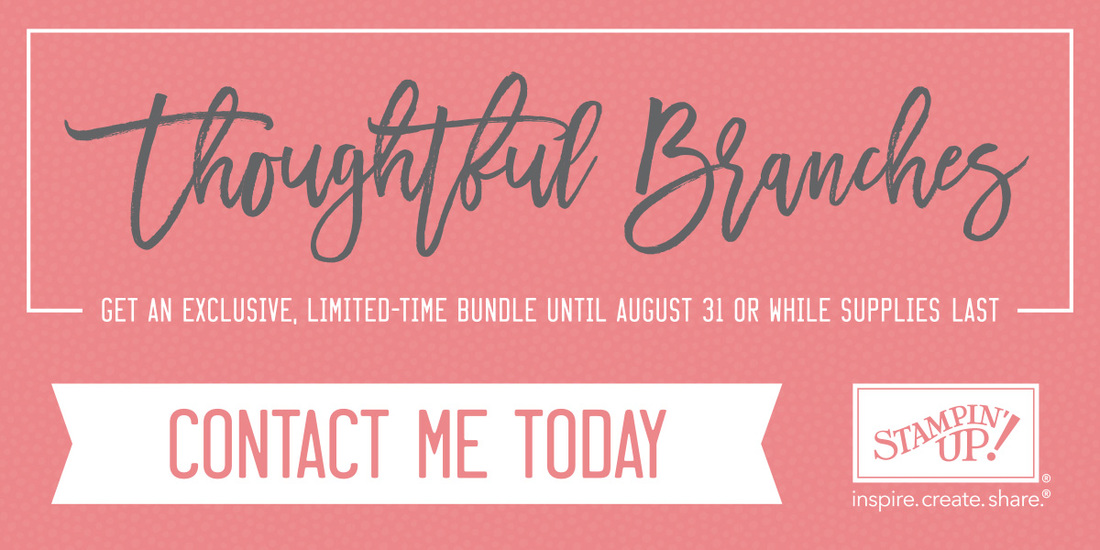 For a limited time, you can get the exclusive Thoughtful Branches bundle. If you preorder a bundle for yourself between July 7 and 31, you’ll qualify for a Bonus Days coupon that you can use between August 2 and 31. But wait, just by ordering this exclusive bundle you are invited to a free workshop!!!! I will provide the supplies and you will be able to make 3 projects using this Bundle. (picture on the event does not reflect the projects we will be making) I have two timeslots available on September 11th. To view event details, visit my Facebook Page and click on Events Please RSVP today Bundle cost is $52 plus tax and shipping The details of the bundle is listed in the document below. Please note the pictures listed in this document does not reflect the projects we will be making at the workshop. Can't make it to the workshop, no problem. I will provide you with a pdf of the project details. Happy Stampin Steph |


Categories
All
Archives
May 2024
|


 RSS Feed