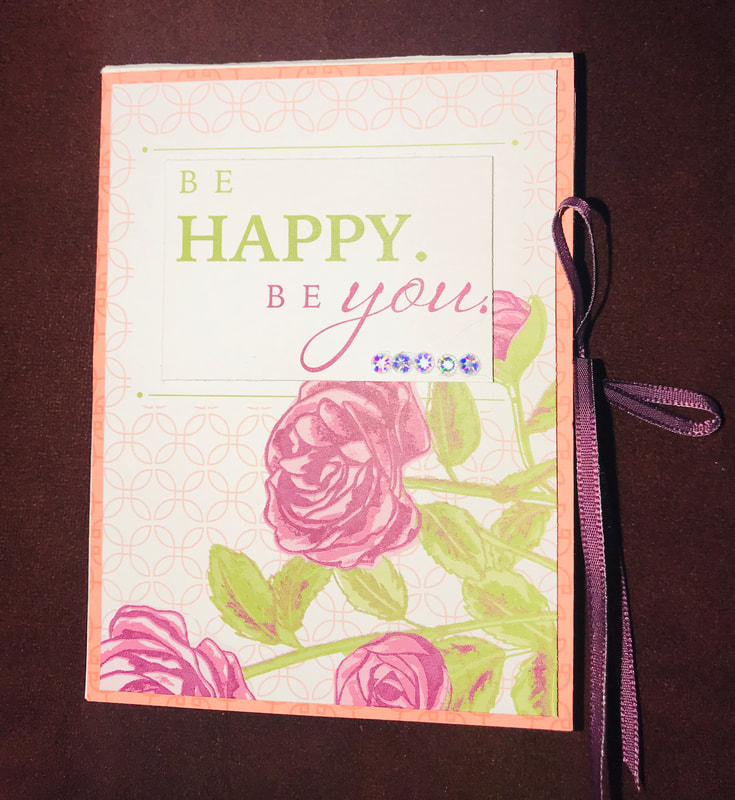
 I've been working on keeping busy here. Homeschooling has had it's challenges and keeping our family doing some form of normal has been crazy....There's never a dull moment but we are doing our best. I find when I can being creative helps to keep my mind from wondering into all those "what if" thoughts! I am sure many of you can relate! Working on 3-D types of projects has always been a little bit of a challenge, finding the time and patience and sometimes supplies can hinder the projects. But now I seem to have nothing but time! And using what I have on hand has been great! Today I am going to share with you a really pretty, super easy photo brag book. I design this with my teenage daughter in-mind. She has several friends turning 16 this year, and having to be away from each other has been tough, but I thought she could put together a little memory book for them! So let's get started. This project used very little paper supplies. You could make this with one-sheet of designer paper, but I chose to use Whisper White as the background to add a little stability. I also used a retired Stampin Up paper set called Petal Garden DSP and the Petal Garden Memories and More Cards, coordinating ribbon in Fresh Fig. And I have to say, I did not stamp anything when I made the project!! And here's what you need:
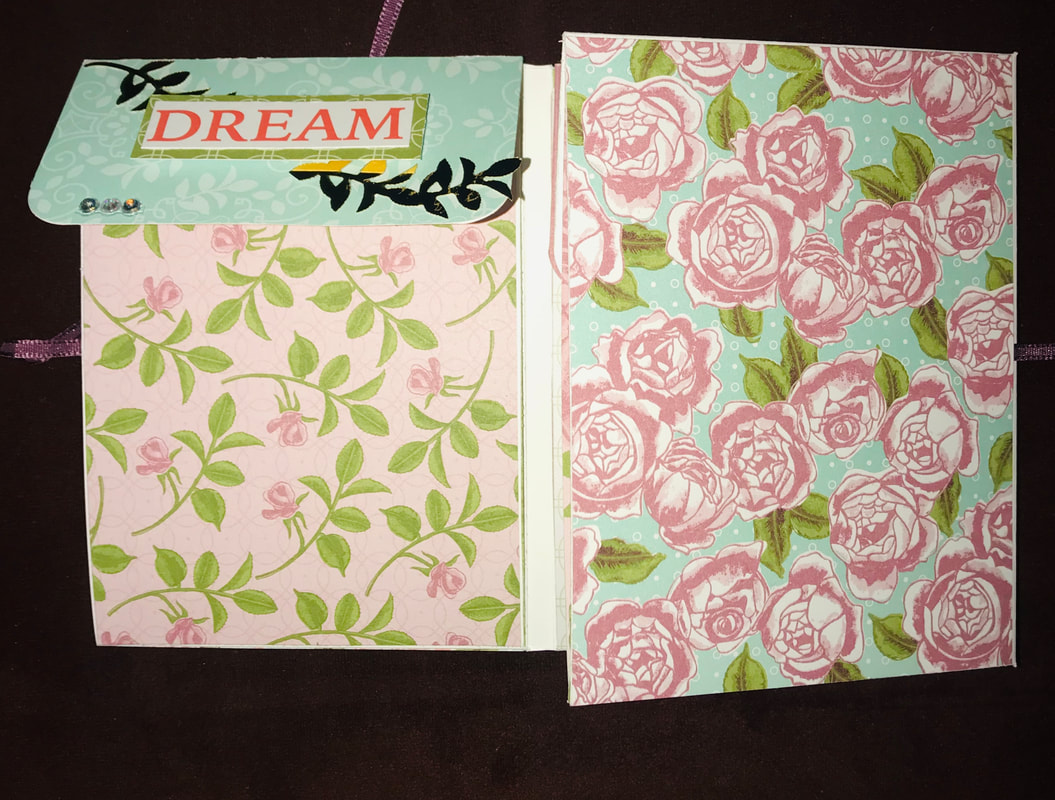
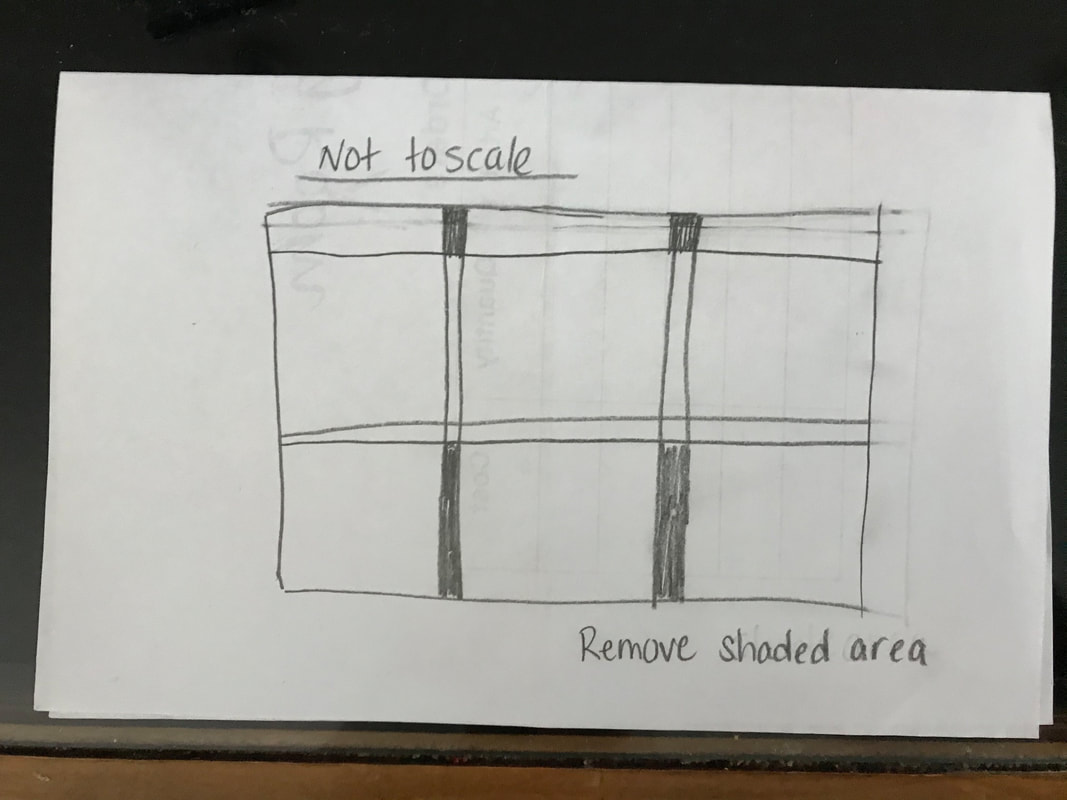
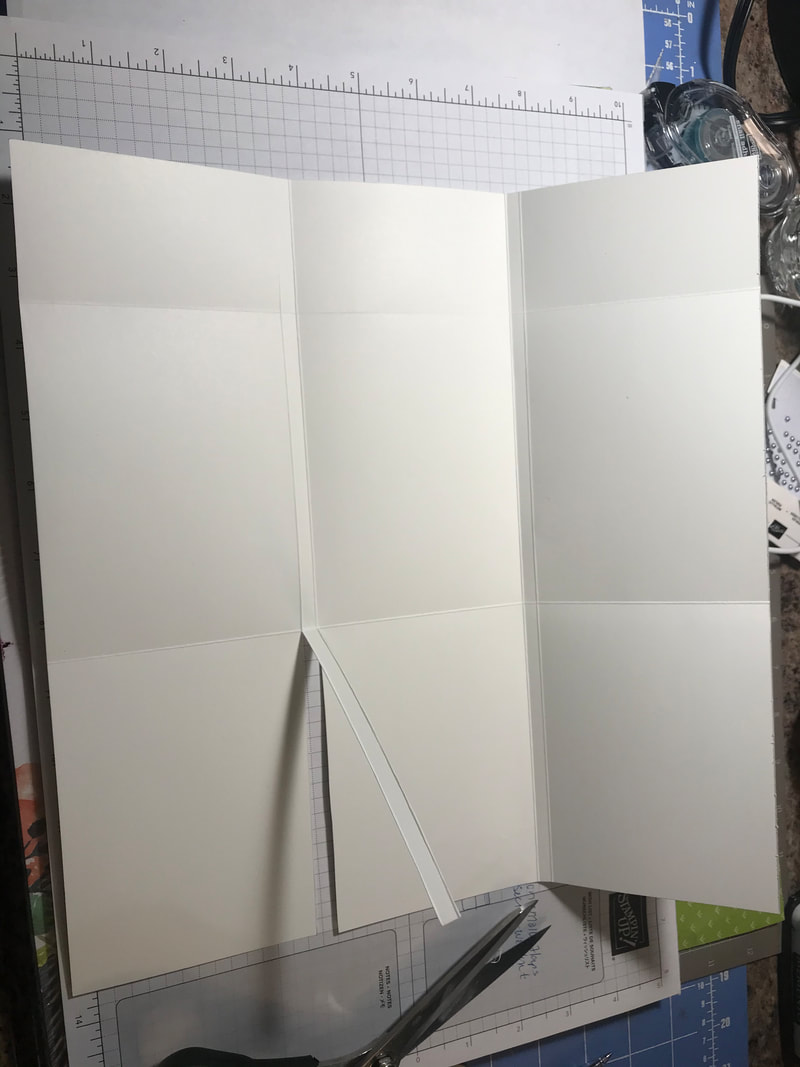
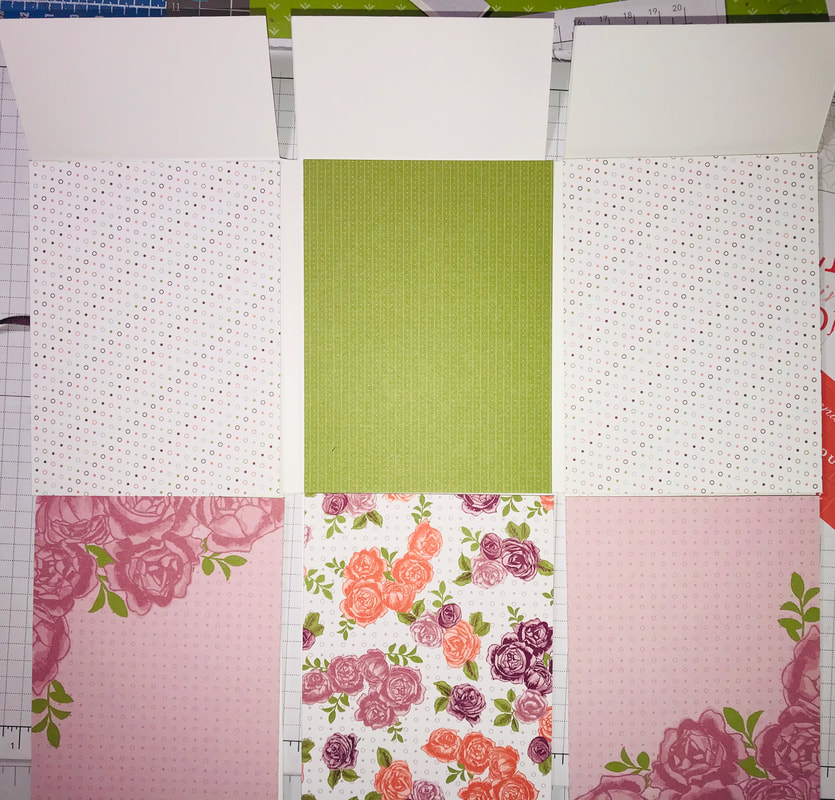
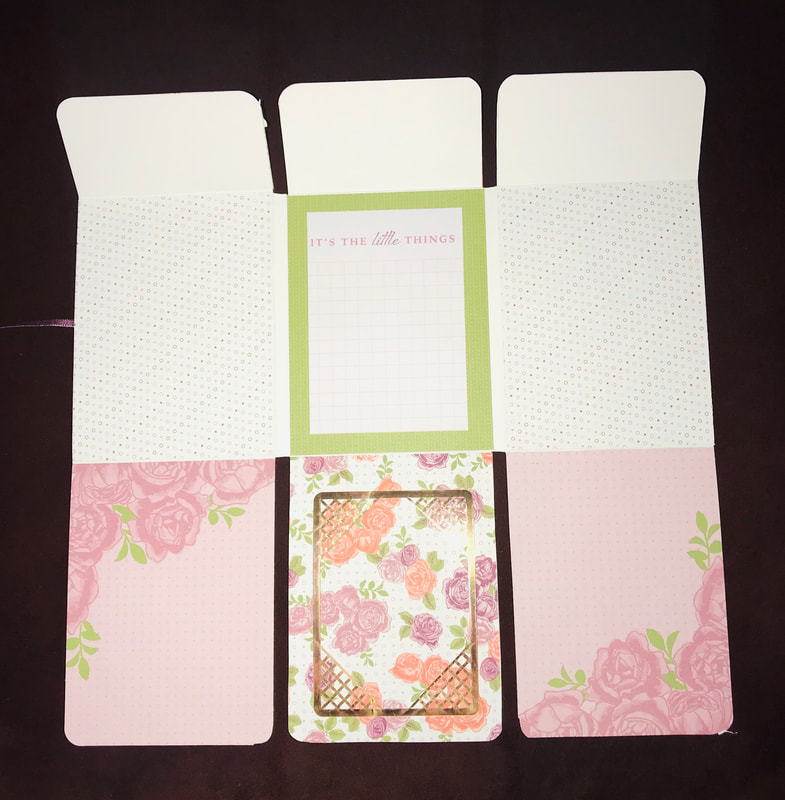
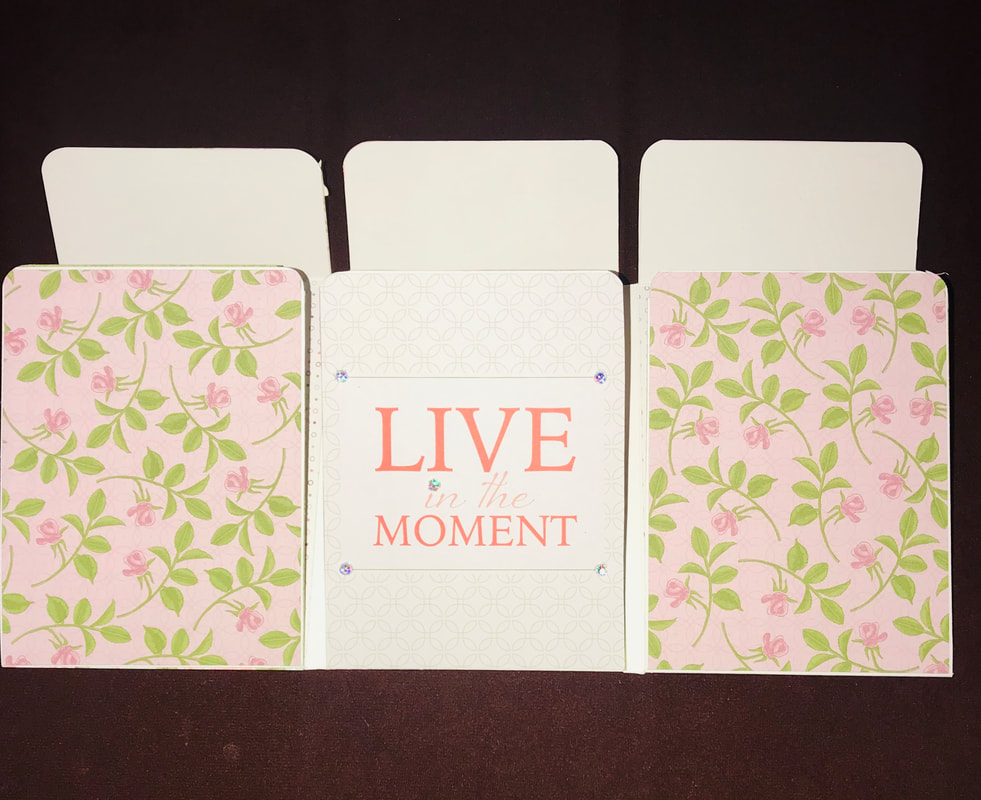
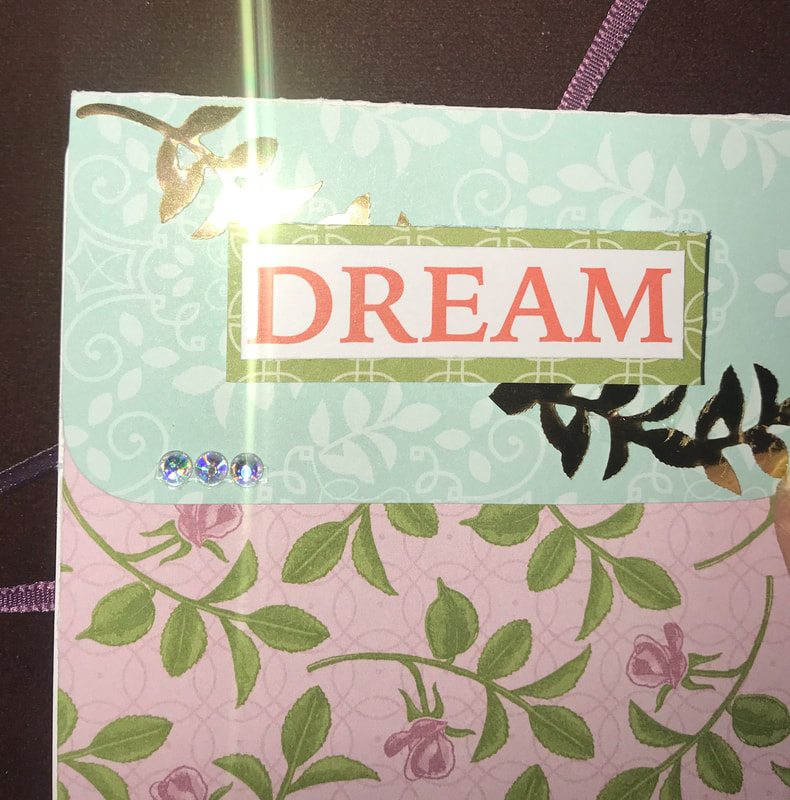
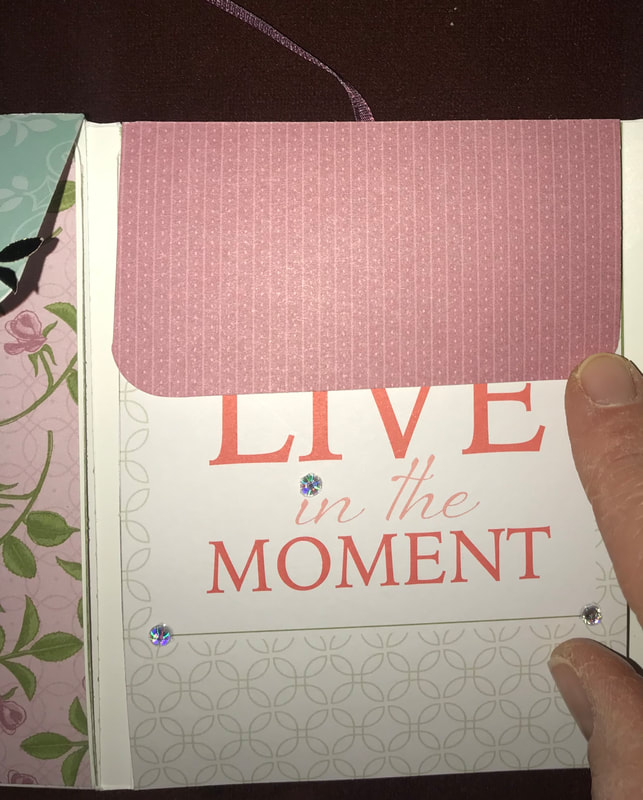
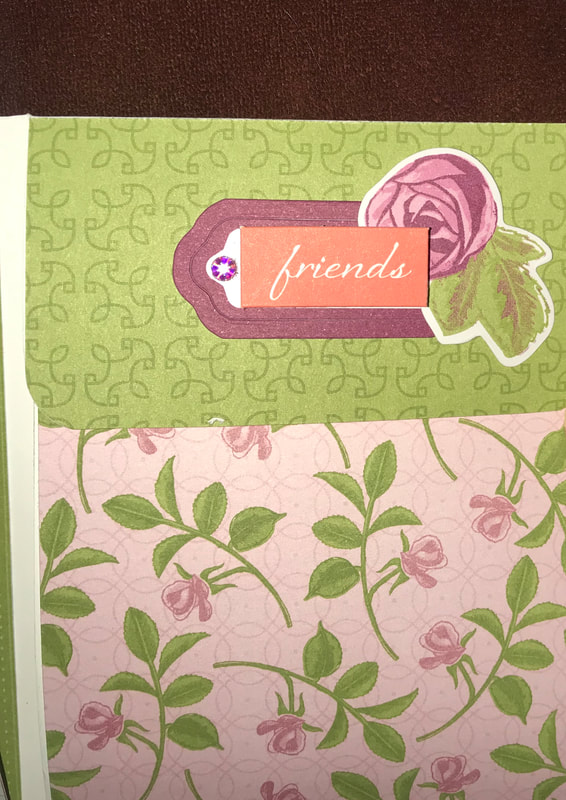
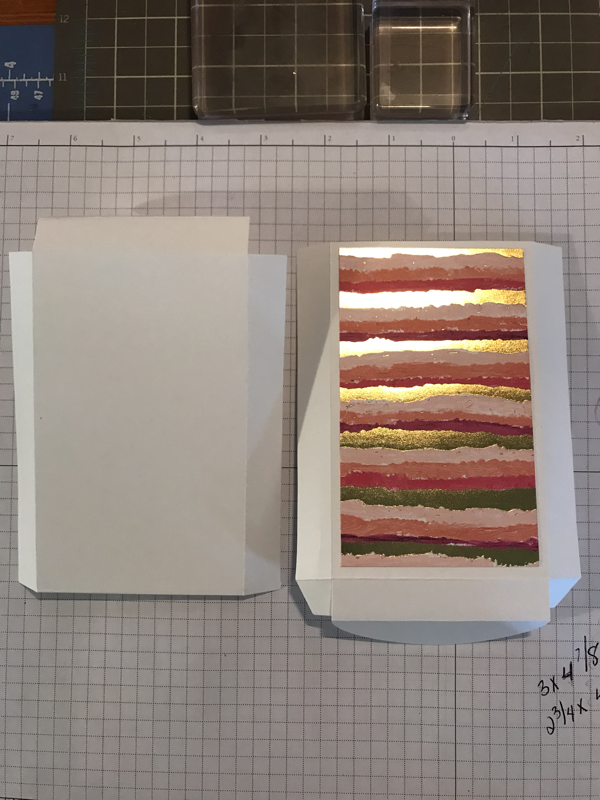
With your scoring tool and the 11 3/4" edge of the paper at the top Score at 3 3/4", 4", 7 3/4" and 8" Turn once to the 12" side and score at 5" and 10" Fold on all the score lines. The top of the brag book, is the small section, then there's the middle and the bottom The score lines are close together and create little rectangles, Remove the rectangles from the top section to the score line that begins the middle Do the same from the bottom, cut out the rectangles from the bottom up to the bottom score line of the middle section. I hope this makes sense, I have included a template so you see what I mean. Please note, my hand drawing is not to scale at all, it's just meant to give a visual of what needs to be cut. Now, we come to the fun part, the decorating! The big sections of the brag book measure approx. 3 3/4"x5". There are 12 sections; 6 on the inside and 6 on the outside (3 that fold in). I started with the front cover, first attach approx 10" piece of ribbon. Then lay the DSP on top, this is the front tie for the book. I used DSP cut at 3 3/4"x5 and trimmed a memories more card to about 3 5/8'x 4 7/8" and I also trimmed a smaller memories more card down so that just the wording was framed out. So for the front, you need:
for the sections that appear on the backside, just like the front, cover the white cardstock edge to edge so you will need;
 The backside again, I left simple. Added the DSP and a small card to add a space to write or add a photo, etc 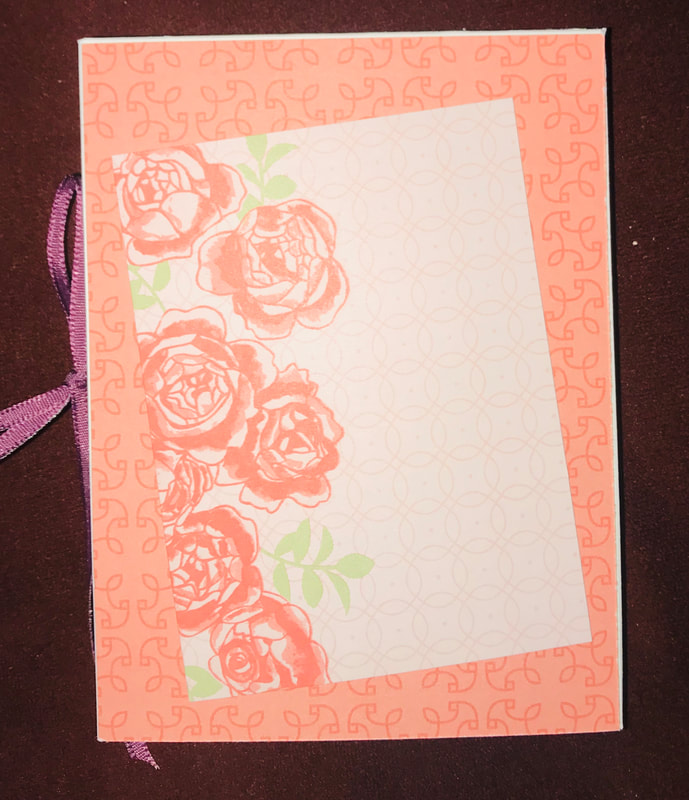 And just like that the brag book is finished. I'd say overall this took just a bit over an hour. That was probably spent decided what supplies I was going to use. But in the end this is one of those projects I am sure I will be making over and over because it's just so easy and makes a WOW projects when we are done!
I hope you enjoyed what I shared with you today! Thanks for stopping by Happy Stampin Steph
0 Comments
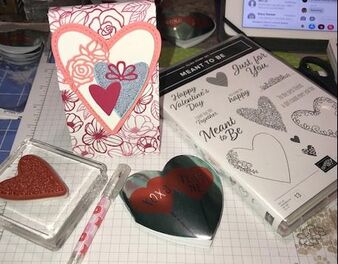
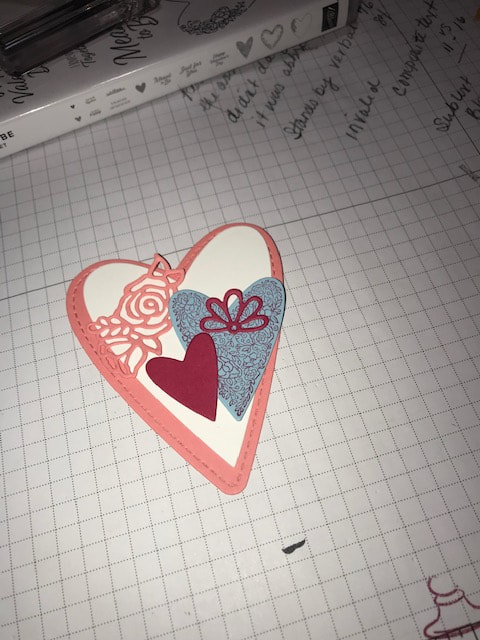
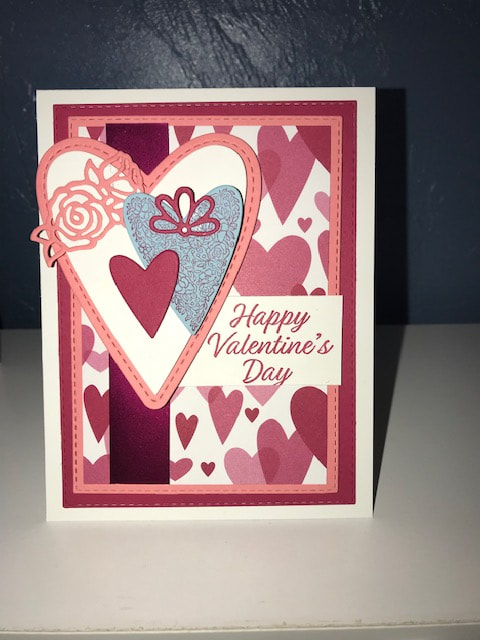
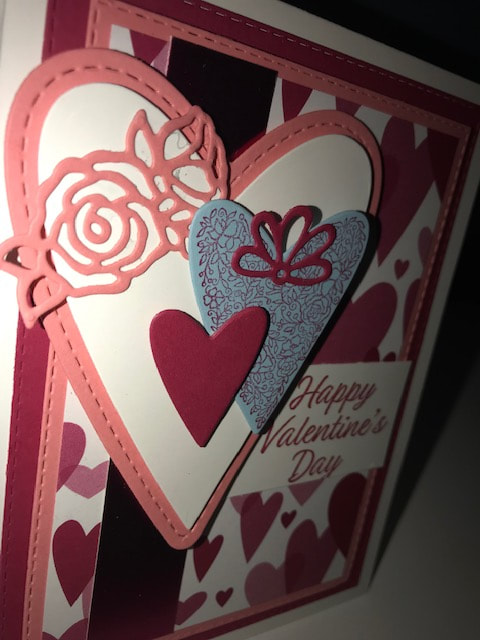
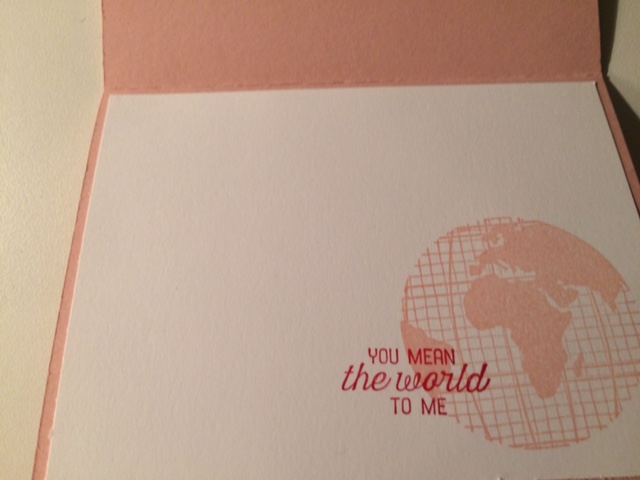
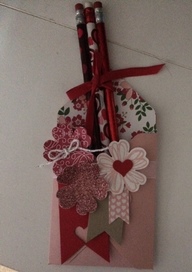
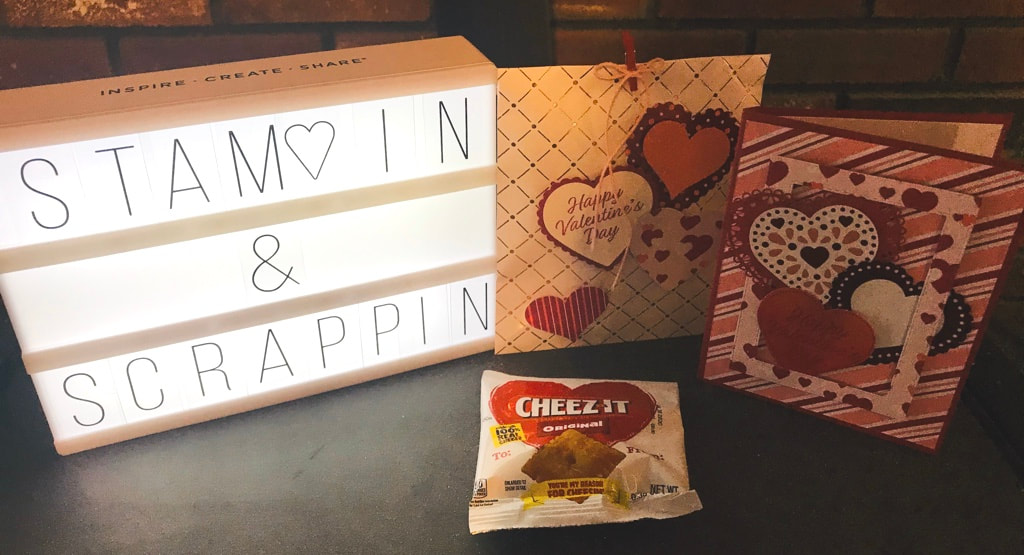 Today I created two fun projects for an upcoming card club! Since Valentine’s Day is a few weeks away, I wanted to focus and get a little head start. My projects feature Stampin Ups new From the Heart Suite! This gorgeous suite can be found in the new 2020 Mini Catalog! The DSP is beautiful and several of the sheets have a foiled appearance! And best of all you can use the Heart Punch Pack to punch out several of the hearts on the paper! 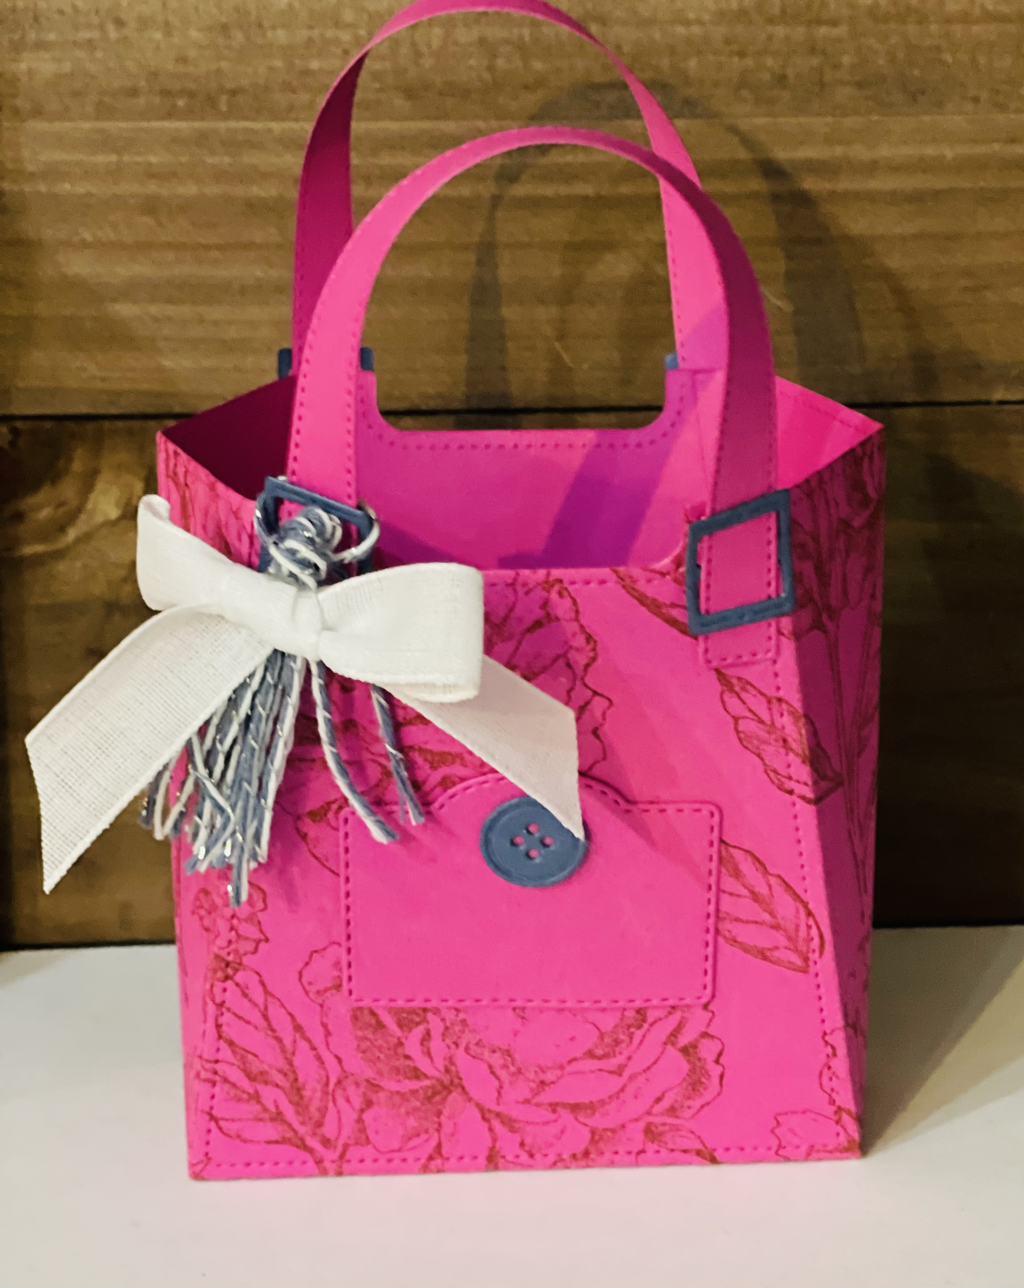 The card was created using a sheet of Real Red cardstock cut to 5.5x8.5 and scored on the 8.5 side at 4 1/4. I added a layer of DSP on top that measures 4x5 1/4 next I took another piece of DSP and cut a frame using 2 different sizes of the Rectangle Stitched Framelits. I cut out several hearts using the Heart Punch Pack. On one of the red hearts, I stamped the dotted outline from the Heartfelt Stamp set in Real Red, the punches it out nd 2 of the hearts are punched out right from the DSP! So easy! The Happy Valentines Day greeting is from the Meant to Be stamp set, which is in the current annual catalog! This card was so simple to make and so quick that I was Able to create multiples fast. 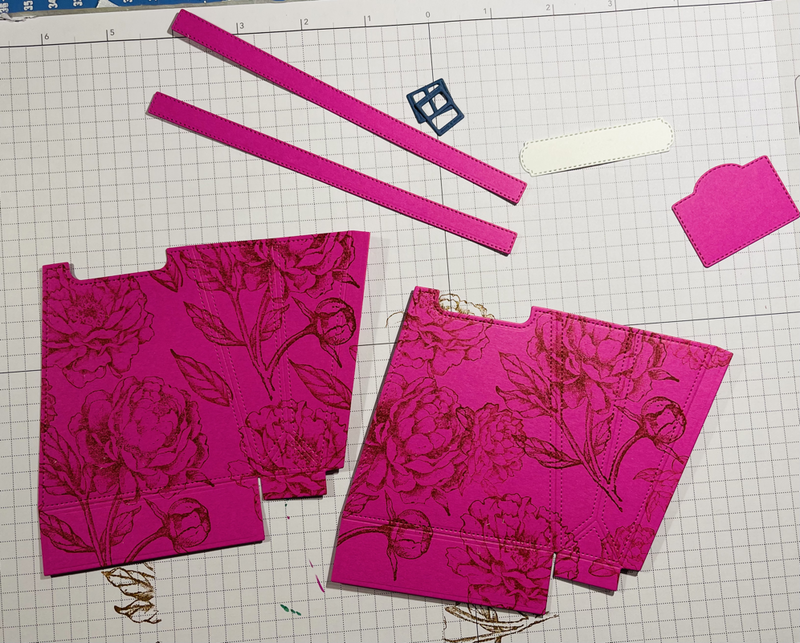 Have you tried the Copper Dotted Treat bags?? They are such pretty bags! I don’t know why I waited to use them! Similar to the card, I punched out a bunch of different hearts from the DSP and cardstock and I used the same greeting! I added a little Valentine Cheez-it snack that I found at Target. They are mini bags but so cute!!! Depending on who I give the bags to I might fill with candy or cookies too!! These bags are a great size at 4 3/4x 6 1/2 and are food safe!! I used a retired twine to make the bow and I came across these mini clothes pins I had on hand! I either purchased these at Walmart or A.C. Moore.
What do you think? Really cute and easy to make right?? Thanks for stopping by Happy Stampin Steph 
Welcome 2019 and welcome to the first Stampin Friends Blog Hop of the new year. I am so excited to be continuing as a regular hopper for the year. We have some great theme's planned so make sure to check us out each month!! This month's Stampin Friends theme is Love! So relax and enjoy all these amazing projects!! You are really going to love the projects shared this month!
We have 11 amazingly talented crafters participating in this month's hop, so be sure to follow along and check out everyone's blogs and fabulous projects. Wasn't Maureen's projects just wonderful???? Be sure to leave a comment on my blog post and I will enter you in to my personal raffle to make this project yourself!!!! Today I wanted to share with you 2 really fun projects made with new products from the Stampin Up Occasions catalog! My projects use the All About Love Designer Series Paper, the Meant to Be stamp set and the colors Lovely Lipstick, Flirty Flamingo, Whisper White and a pop of Balmy Blue.
To decorate the front of the bag, I used the new Be Mine Framelits in the new Occasions catalog. I layered the colors of Flirty Flamingo, Lovely Lipstick, Balmy Blue and Whisper White. I cut 2 of each out as I will used the second set when making the coordinating card.
What do you think??? I hope you like my projects!
Be sure to follow along to Melissa Thomas's blog, you can click on her name below and check out her projects!!! Thanks for stopping by Happy Stampin Steph 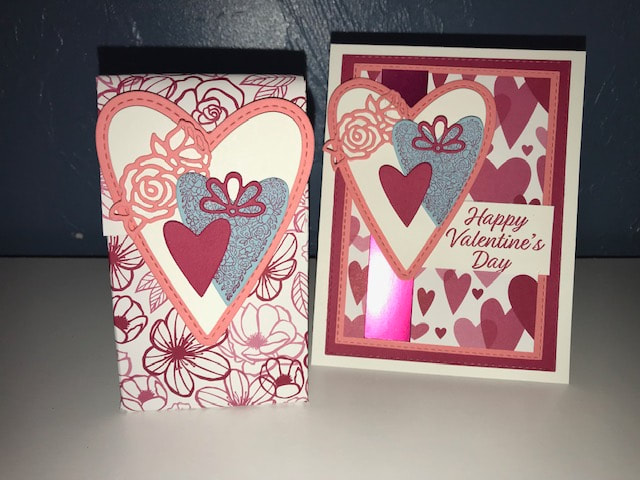
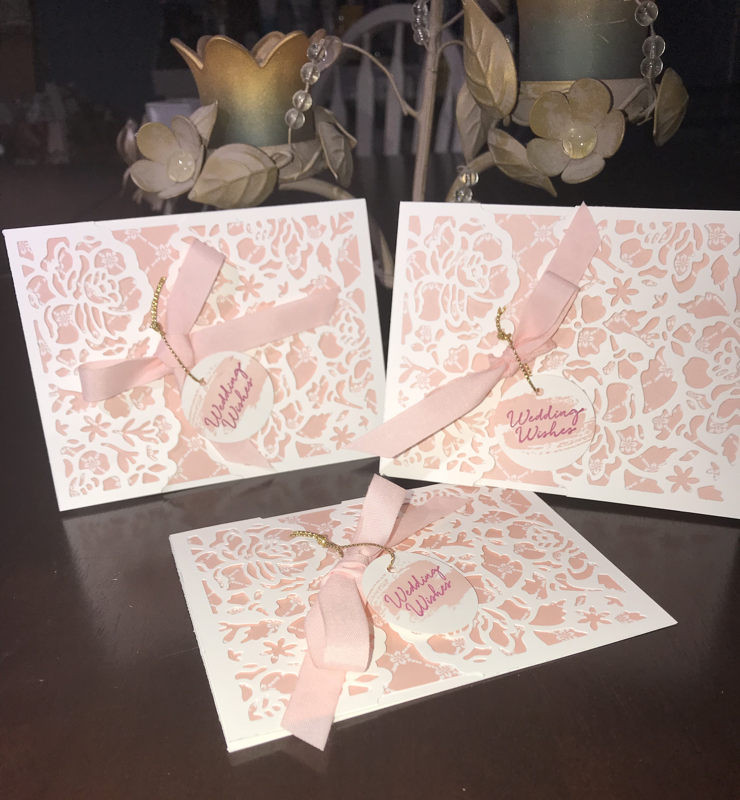
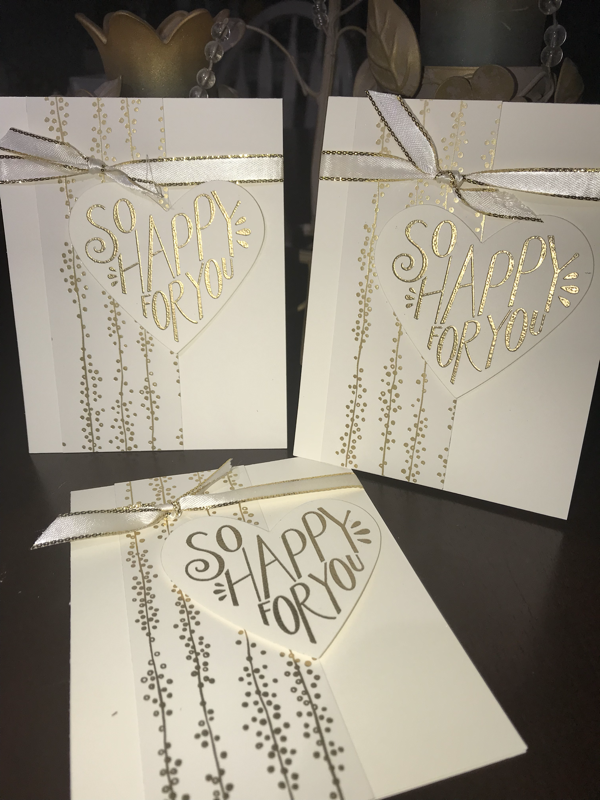
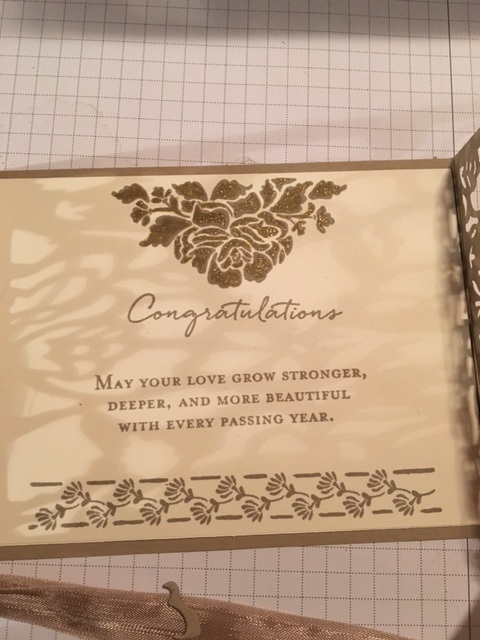
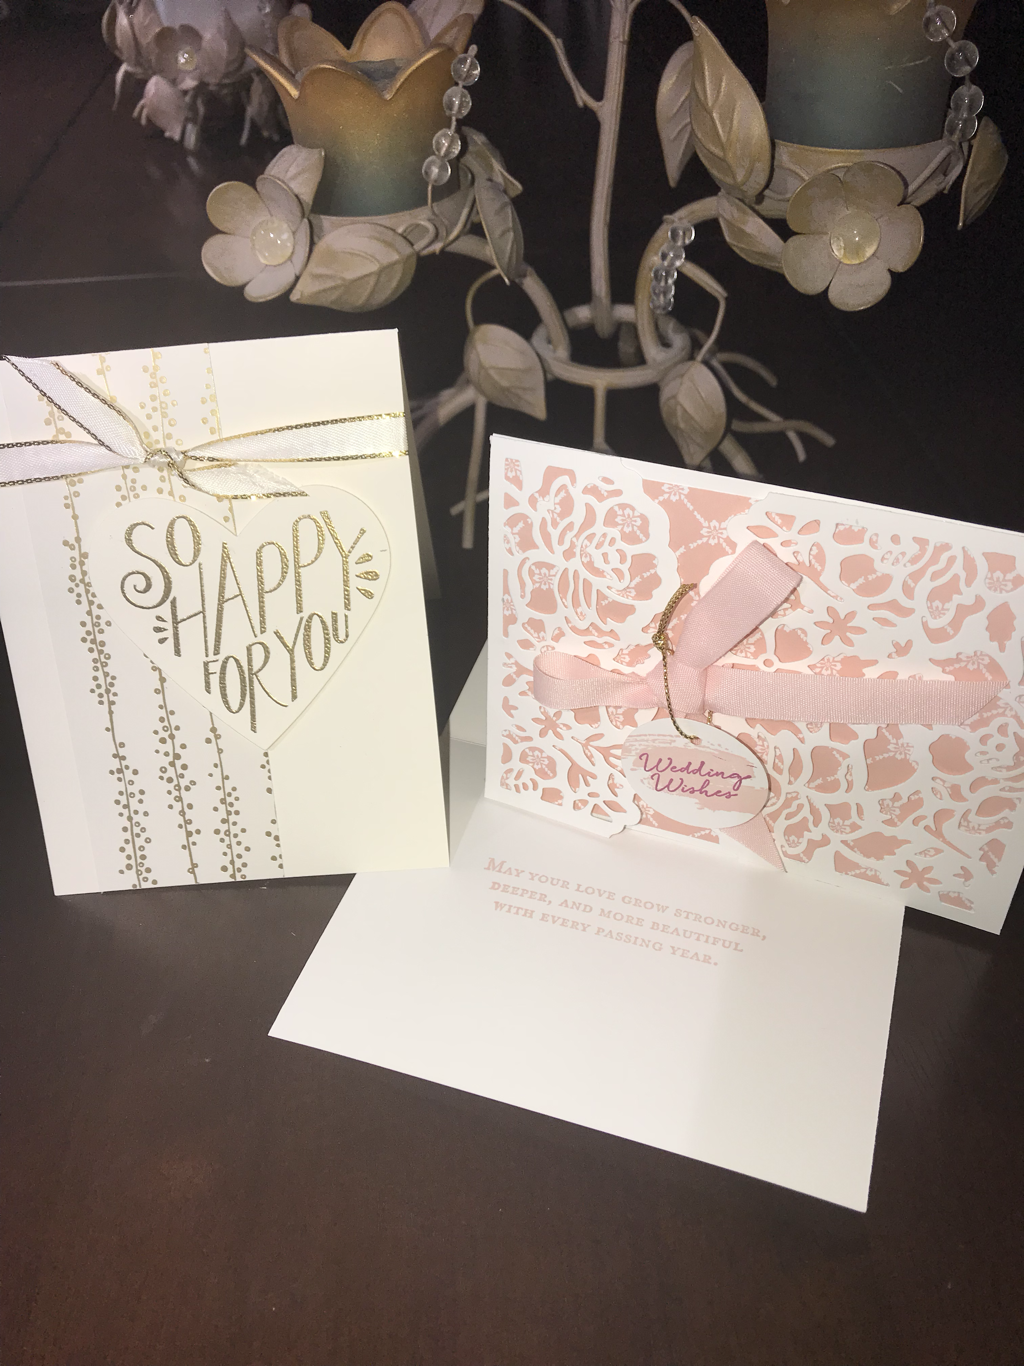 I had a request for wedding cards! So today’s cards focus on weddings and wedding showers. I chose two different designer series papers to build my cards around. The first design I chose was right out of our annual catalog. I used Fresh Florals Designer Series Paper, Detailed Floral Framelits and focused color was Powdered Pink. The second card I used the Born to be Loved stamp set, Sweet & Sassy Framelits and the Born to Be Loved Designer Series Paper. I embossed the stamped images in gold powder. I really love the Very Vanilla and Gold combination! So elegant! And perfect for a wedding shower! These cards definitely have the WOW factor and were super easy to make! Want to learn how? Join me on my next card club on February 27th @7pm Thanks for stopping by Happy Stampin Steph 
Welcome and thank you joining the first Blog Hop of 2018 by Stampin Friends! We have an amazing Hop for you this month!!! We have many new crafters that have joined the Stampin Friends Blog Hop for the 2018 year! YOU WILL NOT BE DISAPPOINTED!
Be sure to follow each blogger to see all the awesome projects that have been created and shared for you! If you get lost a long the way, there is a list of participants at the bottom of each of the blogs! I am #2 Stephanie Jandrow! Be sure to leave a comment ON MY BLOG for ,your chance at winning Blog candy! This month’s theme is All About Love! And what better products to use? The brand new Painted with Love by Stampin Up! 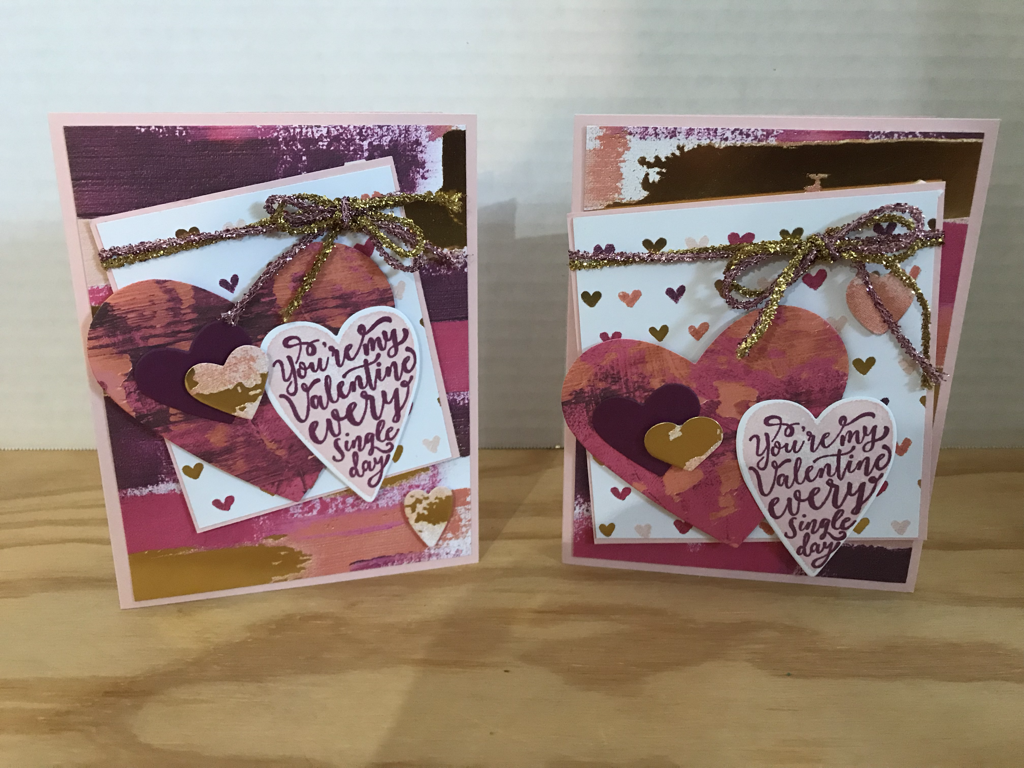
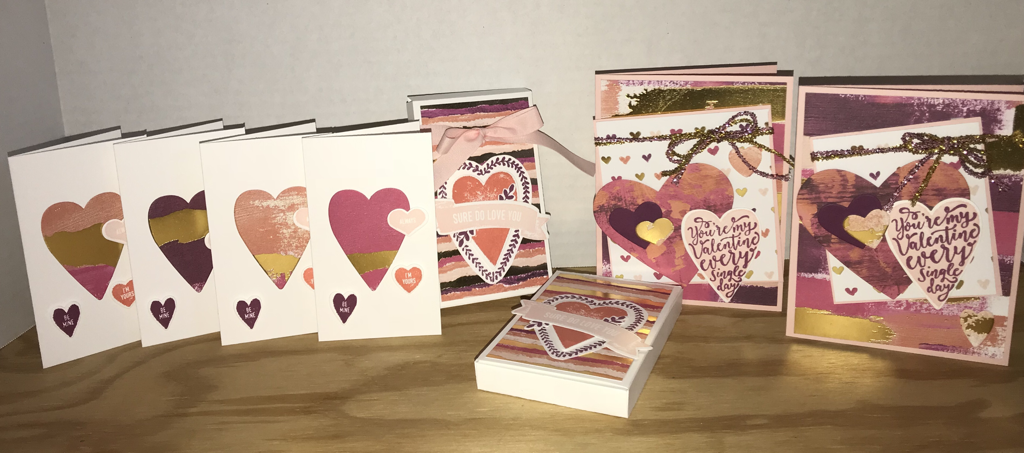
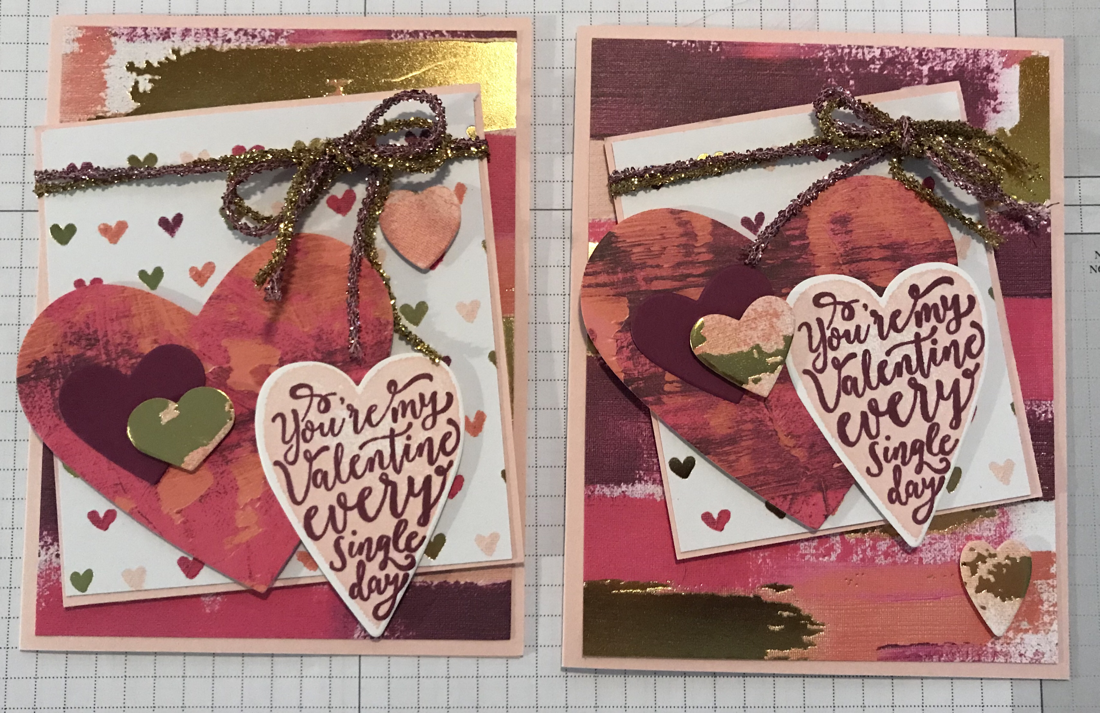
As I was designing my cards, I made each slightly different, using the same products! The Painted with Love Specialty DSP is gorgeous in person I don’t think picture do it justice!!! I used Rich Razzleberry and Powder Pink inks and cardstock.
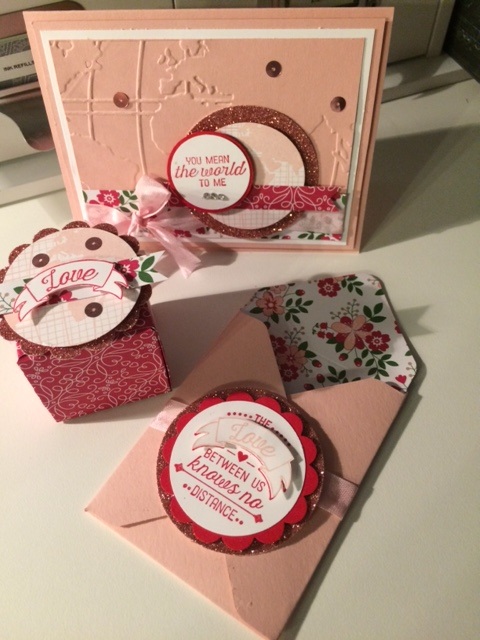
The cardbase is Powder Pink. I used the Lots to Love Box Framelits and Sure Do Love You stamp set. I chose 2 different patterns of the DSP for my layers and a 3rd for the larger heart, cut out with the Sweet & Sassy Framelits.. I added the Love Mini Tinsel Trim in a pretty bow at the top of each card! I think I’m more partial to the card on the left but I love both. This set is so much fun to use!
For my project, I used the Lots to Love Box Famelits. I created 2 boxes and decorated the front! I wasn’t sure what to put in them. At first I thought candy, but then decided to make some notecards!
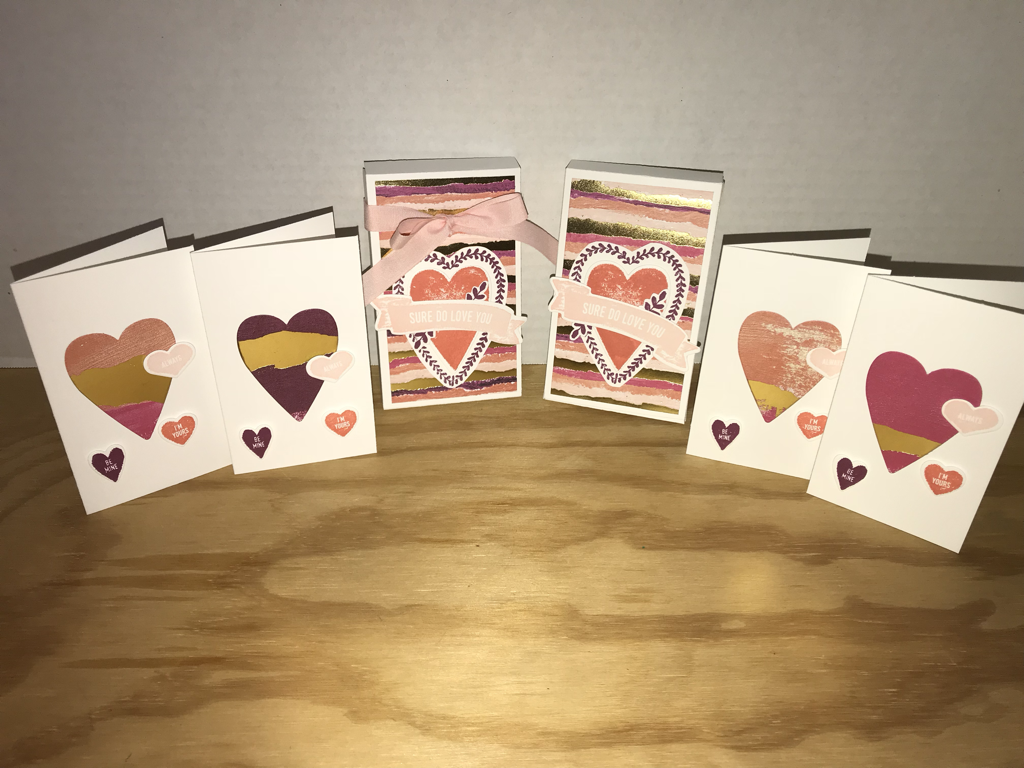
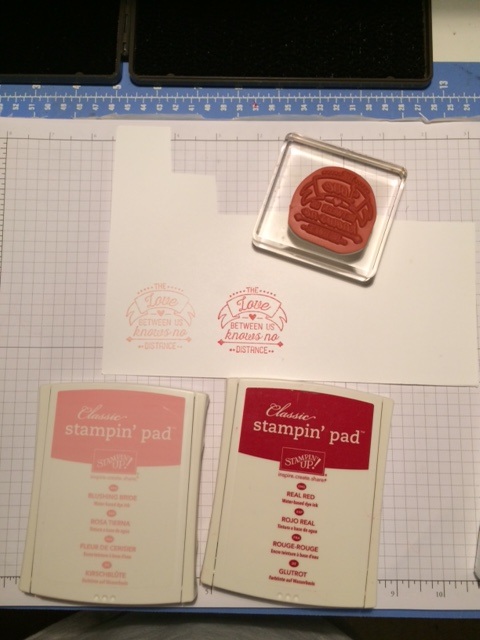
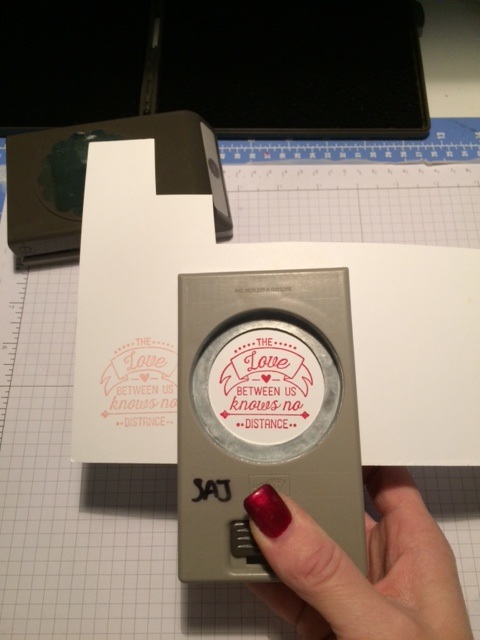
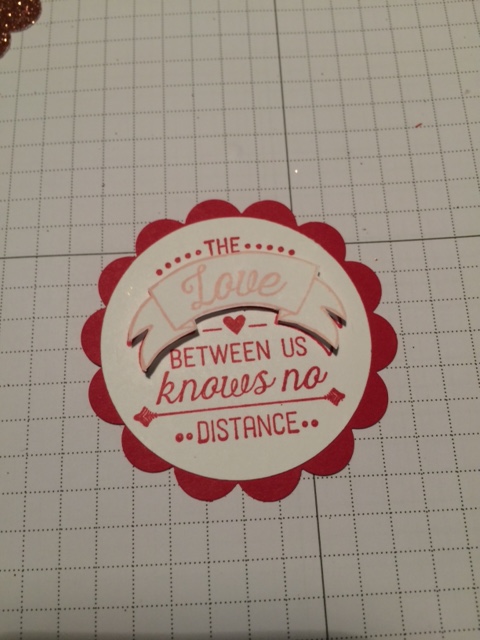
The notecards are simple and super easy to make! 4 5/8 x 5 1/2 and on the 5 1/2 side score at 2 3/4. Walla! I kept them simple and not over-decorated as I wanted the box to be the focal point! I stamped the "candy" heart images in Rich Razzleberry, Powder Pink and Calypso Coral. Then I chose the DSP pattern and used the Heart dies in the Lots to Love Box framelits to cut them out. Simple, right! But I think the cards have a big look!
As I was prepping the decoration for the box, I couldn’t decide if I wanted the ribbon or not so I made one with and one without! I used Powder Pink, Calypso Coral and Rich Razzleberry for ink colors. The heart with the vine image does not have a matching framelits so I fussy cut it out. I also stamped the leaves to the inside of the heart to save paper, the cut outs won’t be seen as the Calypso Coral heart sticks over it! What do you think??!
I hope you like my projects for this Blog Hop.
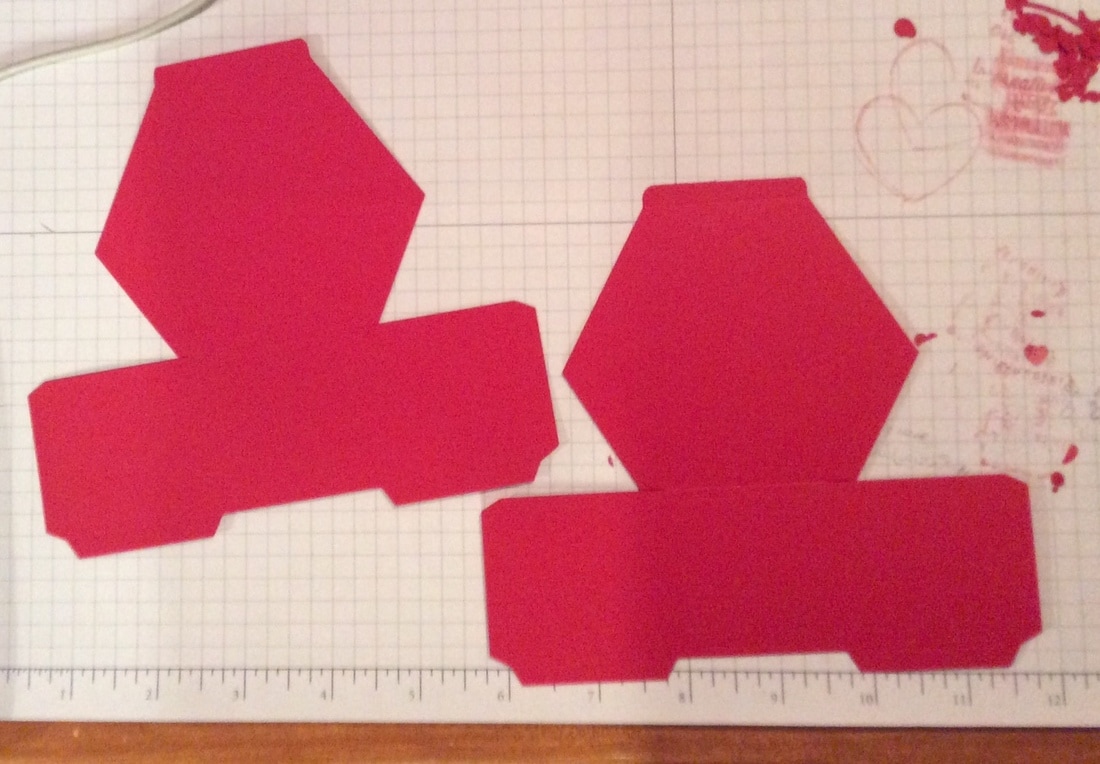
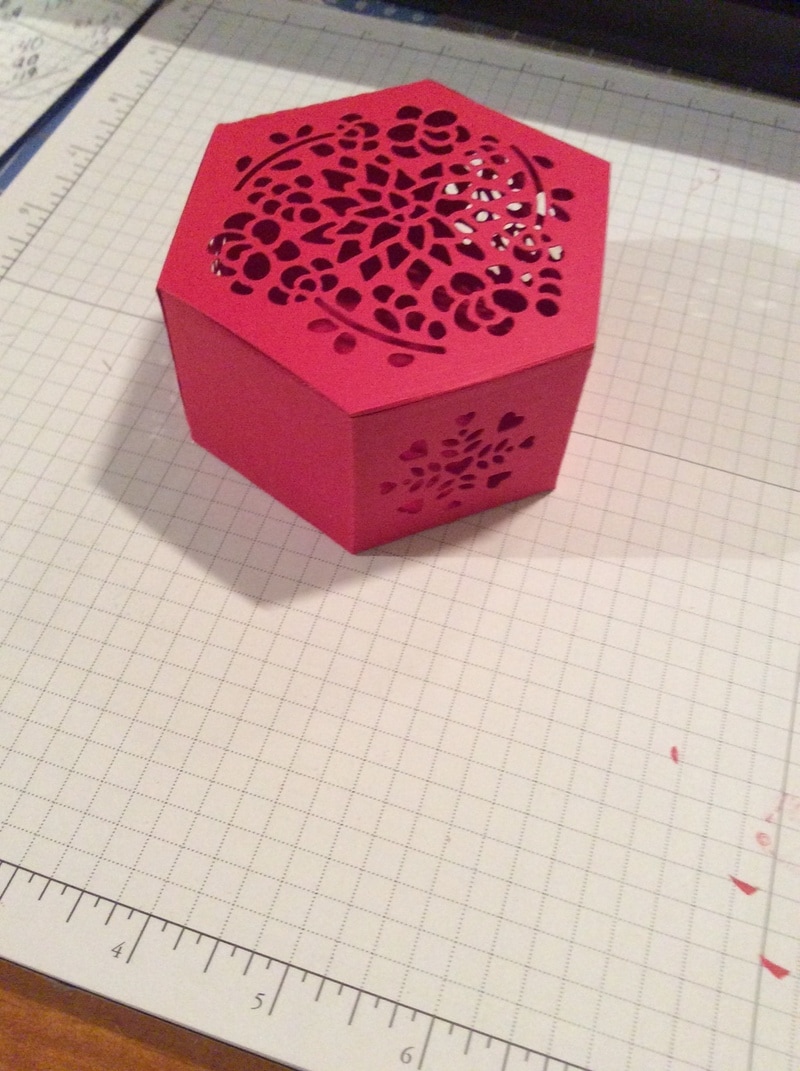
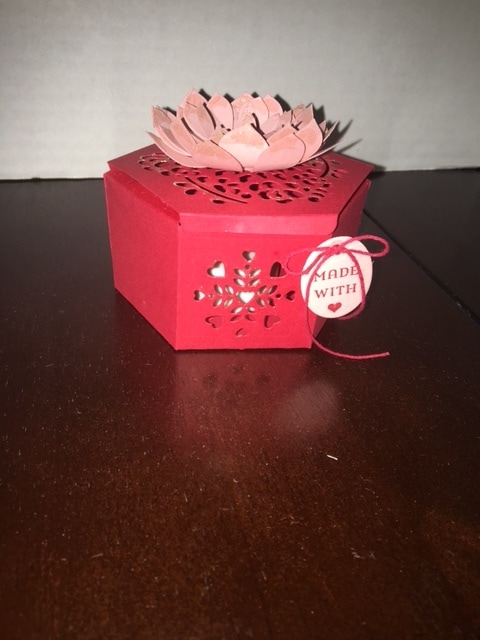
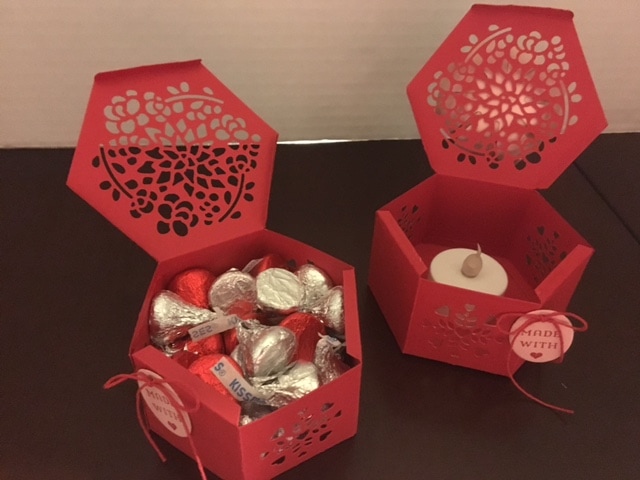
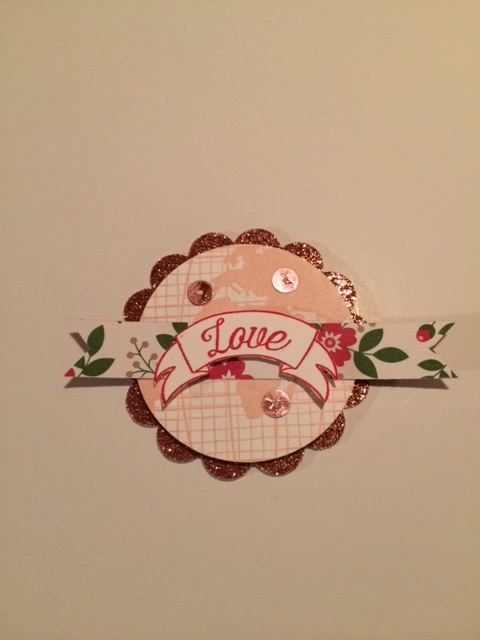
Be sure to leave a comment, as I will drawing my own Blog Candy for this Hop! Then click on Katja Ettig name at the #3 on the list to follow along! Thanks for stopping by Happy Stampin Steph  Welcome to the first hop of the 2017 year. I am so excited to be continuing as a regular hopper for the year. We have some great theme's planned so make sure to check us out each month!! This month's Stampin Friends theme is Love and Valentine's! So relax and enjoy all these amazing projects!! You are really going to love the projects shared this month! We have 15 amazingly talented crafters participating in this month's hop, so be sure to follow along and check out everyone's blogs and fabulous projects. Make sure to leave a comment on my blog to enter into my Blog Candy raffle. I will randomly select 1 lucky winner!!! Thank you for visiting my blog from Kirsteen Gill's site, and thank you for continuing with the Blog Hop. Take a minute or two to enjoy my card and project and at the end click the NEXT button to continue to Lynn Streifert's blog! Didn't come from Kirsteen's blog?? That's ok, just click the PREVIOUS button or scroll to the end and click on Kirsteen's name to visit her blog.  So the card I made is CASEd from the new Stampin Up Occasions catalog on page 14. I changed a few things, but it is pretty close. I used the Sealed with Love stamp set and Love Notes Framelits. Don't you just love the Heart cutouts on the edge?? I do not send out many Valentine Cards so I kept it pretty simple. We also will make this card at an upcoming Card Club. 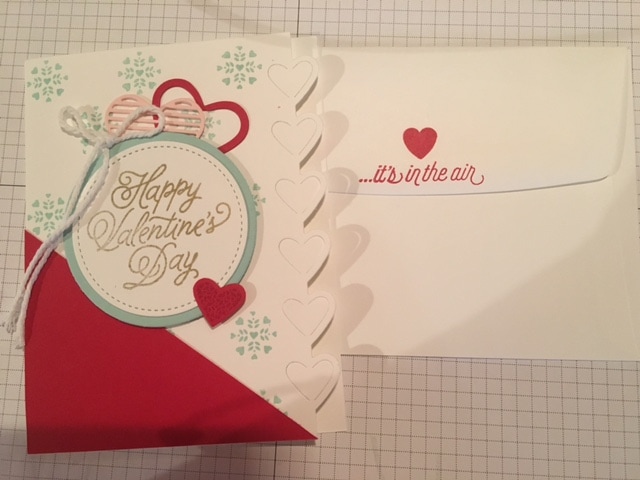 My project using the new Window Box Thinlits Die and Window Shopping Stamp set, along with the Oh So Succulent Stamp set and Succulent Framelits dies. All these iitems are available in the new Stampin Up Occasions Catalog. Stampin Up has a great video on YouTube showing how to assemble and use the piece of the Window Shopping Framelits. I found it best to watch the video before assembling. It really helps! I cut 2 pieces of the Window box and then cutout the details. Once I assembled the box I wasn't sure what I wanted to do with it. I added Hershey kisses to it and the little tag that comes with the framelits and the stamp is from the Window shopping set. I saw on Pinterest a few of the boxes as tealight holders and I wanted to see how that would look on my own. It's beautiful. So I then cut out 2 of each size shape from the Succulent Framelits in Blushing Bride, stamp the tips on both sides, use your bone folder to add a curve to the petals and layer. It's really easy. I then added Wink of Stella to the tips of the flowers, as well as, the cutouts on the boxes, it looks so pretty when the candle reflects on the glitter. It's really hard to see in the pictures. But I asure you, it's lovely! 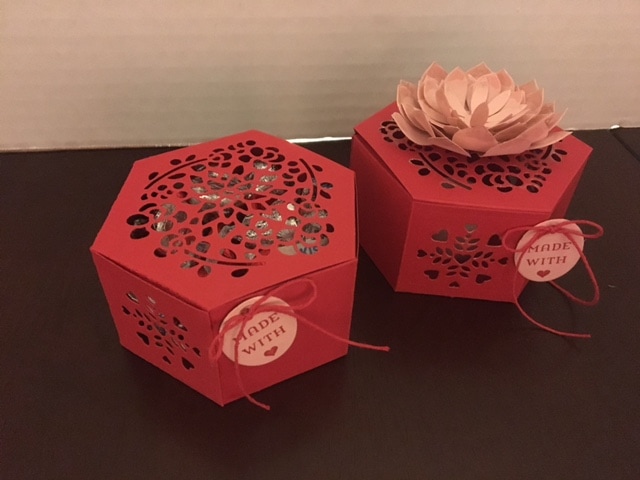 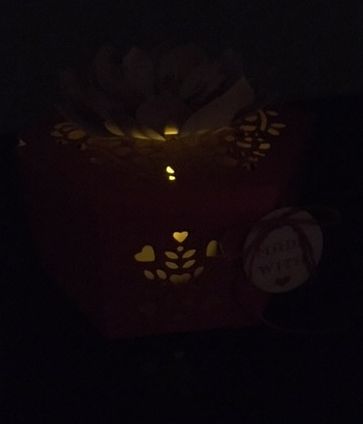 I hope you enjoyed my card and project. Be sure to leave a comment for my Blog Candy. And click the Next Button to visit Lynn Streifert's Blog and continue with the Blog Hop If you are interested in any of these products, please feel free to contact me. Happy Valentine's Happy Stampin Steph 
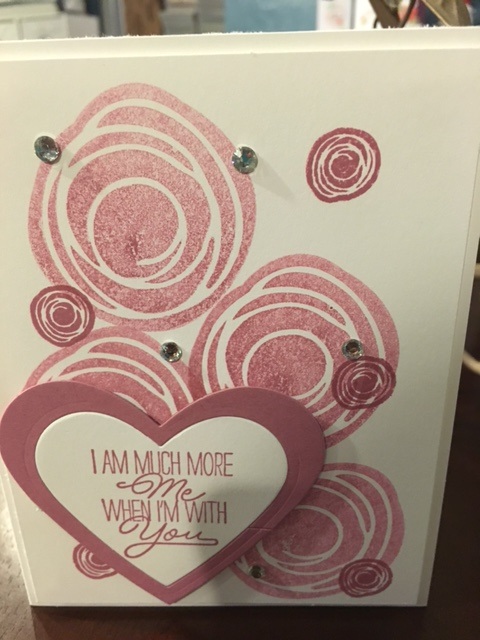
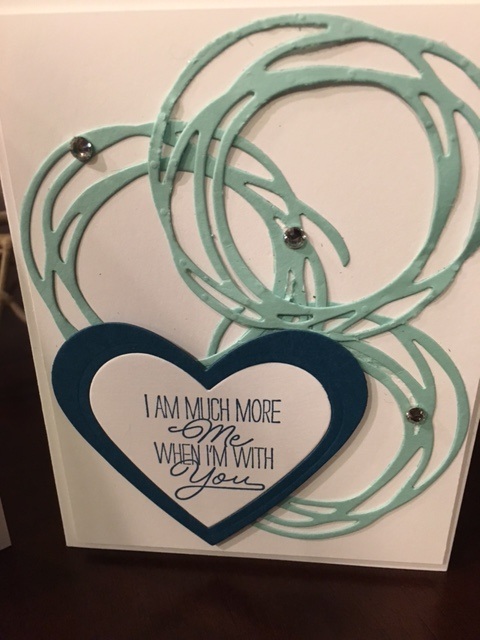
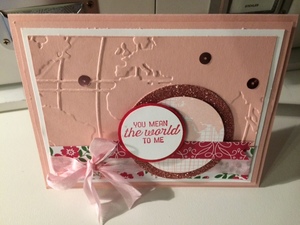
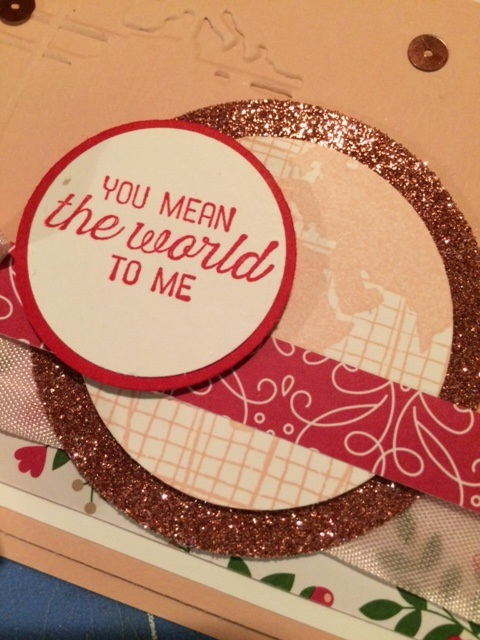
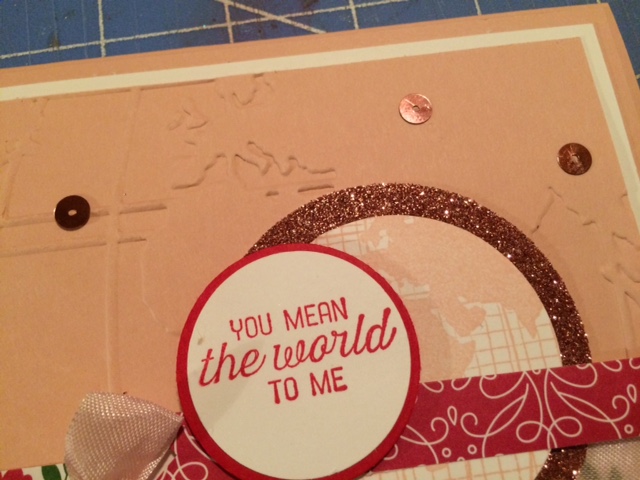
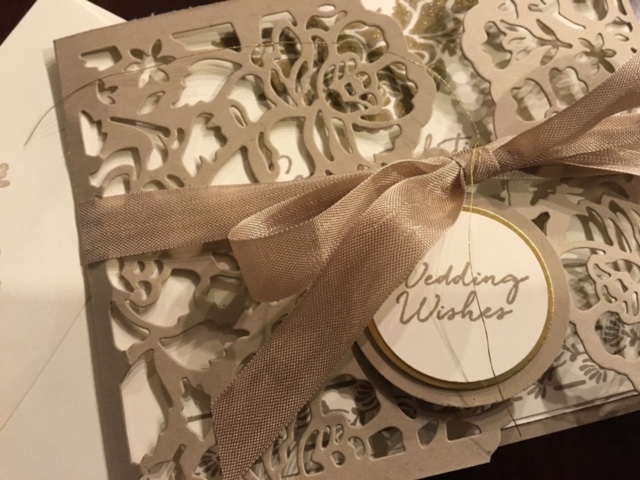 I recently had a wedding to attend for a very special couple. And I knew as soon as I saw this bundle in the Annual Catalog, that they were the perfect products to use! I decided to use Crumb Cake and Very Vanilla Cardstock. I chose these colors because the wedding invitation used similar colors as well. I was inspired by all the cards I saw on Pinterest. So you may have seen something like this already. It was a little tricky at first and too me a few attempts to get the card just right. I used a 4 1/4x 11 sheet of Crumb Cake cardstock on the left side I used the large floral thinlit and edge and made sure it was as close to the edge as possible when running through Big Shot. Then I used the small floral thinlit and edge on the right side, make sure I was cutting on the correct side (so when folding you see the rightside of the diecut).I cut a piece of Very Vanilla to 4 x 5 1/4 and centered it between the diecuts and adhere it down. Once I did that, I that folding the left and right sides in. There may be an easier way to do this, but that is what I did to create my card. I stamped the greetings and flower in Crumb Cake ink and lightly colored the flower with the Gold Wink of Stella. I also created a little tag to hang with Gold Floss. I just stamped and cut each layer with the circle punches. The Crumb Cake Seam Binding ribbon, is not retired, but it was perfect to use on this card. I hope you like it Thanks for stopping by Happy Stampin Steph  Here's a pair of cards I made using the Layering Love stamp set and Sweet and Sassy Framelits. Sweet and simple to make! I love the new In Colors. I really enjoyed playing around with them today. For the cards, I used Whisper White as the cardbase. Top layer is 4 x5 1/4. On the left, I chose the Sweet Sugarplum ink. I used 2 stamp sets, Swirly Bird and Layering Love. I stamped off before stamping the swirl background just to make the sugarplum a shade lighter. I stamped the little swirls in the full color. On the right card, I cut the Swirly Scribble Thinlits in Pool Party.. I stamped the sentiment from Layering Love, in Sweet Sugarplum (left) and Dapper Denim (right). I used the Sweet & Sassy Framelits to cut it out. Then I used the same color cardstock as the ink using the next size up heart to create the frame. I added rhinestones here and there to finish it off. Each 4 x 5 1/4 white layer is attached to the cardbase using dimensionals. I hope you like it! Feel free to contact me if you are interested in any products used. Happy Stampin Steph 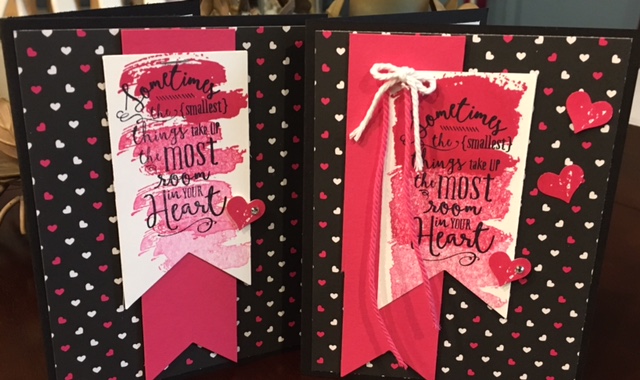 As I anxiously await my new catalog order to arrive. I decided to continue to play with my pre-order products.
I made the cards using the new Pop of Pink Designer Series Paper. This paper is black and white..with pops of Melon Mambo. I stamped the sentiment from Layering Love. Now I will admit I wasn't sure what direction I was going in when I started making the cards. I wanted to showcase the Melon Mambo. Not sure if it's too much or not. I stamped the image from Work of Art in Melon Mambo and continued to stamp without re-inking so the shade of Melon Mambo would get lighter and lighter. The hearts were also from the Work of Art. Stamped in Melon Mambo and punched out from the Itty Bitty Punch pack! oops retired sorry. I used the Banner Framelits to cut out the sentiments. The card on the left, I cut the Melon Mambo cardstock to 1 1/2" and only cut the tip of the paper with the framelit smaller than the one used for the sentiment. You do this by feeding the paper from the top. The card on the right, I did the same with the Banner Framelits. I also added a bow made from the new Thick Whisper White Baker's Twine and Melon Mambo tails. What do you think? Feel free to contact me to order any of the products featured in these cards! Have you received your new catalog yet? What products are on your wish list?? Happy Stampin Steph 
Welcome to the Lots of Love Stampin Friends Blog Hop! I'm really excited to be back again as a guest Hopper for Stampin Friends. There are 14 amazing crafters involved in hop, along with 3 Guest Hoppers. And like I said I've very proud an excited to be back as a guest.
Please, make sure you check everyone's blogs out. After reading the blog, scroll to the end, and make sure to leave a comment with #SFJanHop at each blog!!! I would love to hear some feedback and you will earn a chance to win some Blog Candy! If you have visited my blog from Elizabeth's site, thanks so much for continuing with the Blog Hop. Make sure to check out my blog and at the end click the NEXT button to continue with the Blog Hop and visit Leanne Johnson's Blog. Didn't come from Elizabeth's blog?? Make sure to click the PREVIOUS button or scroll to the end of the post to and click on Elizabeth's name to visit her blog. 
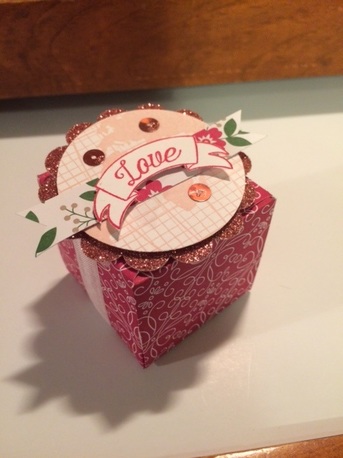
This month's Blog Hop theme is Lots of Love. I knew exactly what products I wanted to use for the blog. NEW! Of Course! NEW items from Stampin Up's Occasions catalog!! I will be showing you 2 projects and 1 card for the blog hop. It may seem like alot of products were used. But it really isn't. I used the same colors, DSP and stamp set throughout the projects and cards. So if you do not have alot on hand, this is great, because we are just using same products,in different way. What I decided to make is SUPER easy projects that I can make multiples, in a breeze. As a busy mom of 3, I need to accomplish the most, in what appears to be a very short amount of time. I'm all about coordination!!!!
So here we go....I hope you enjoy what I've prepared for you! I look forward to hearing your feedback!!!
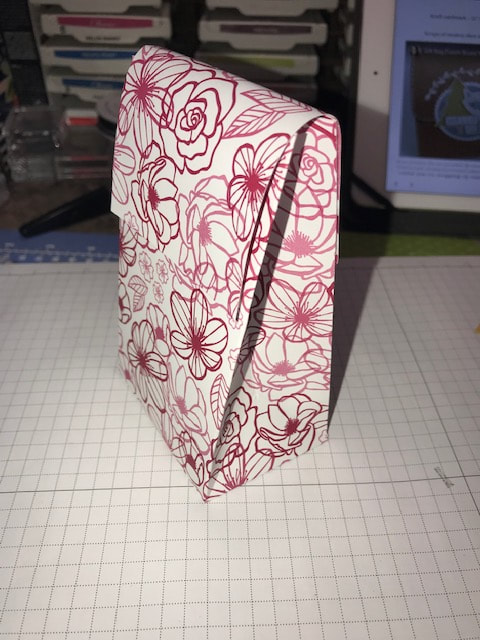
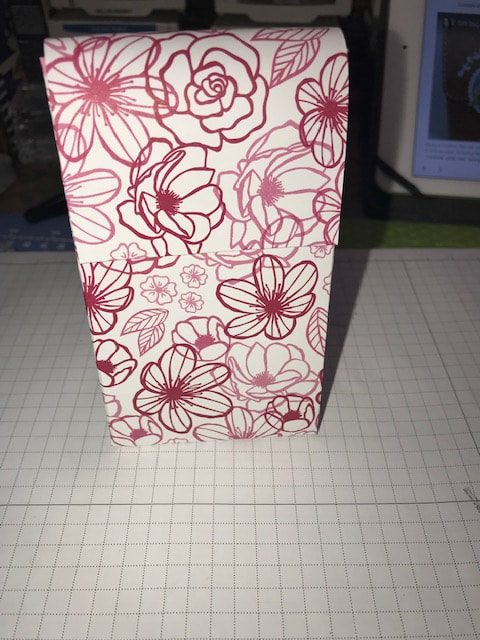
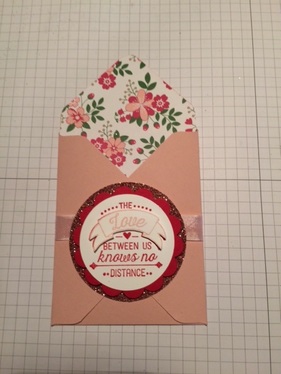
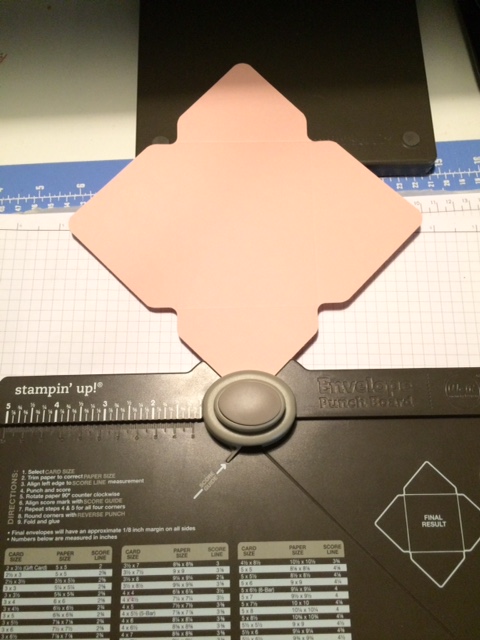
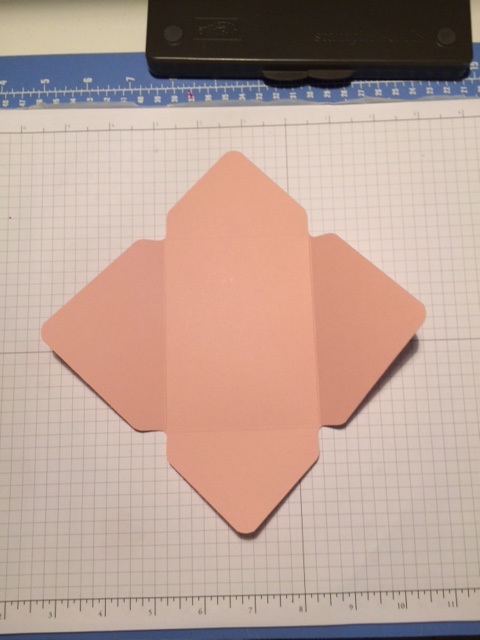
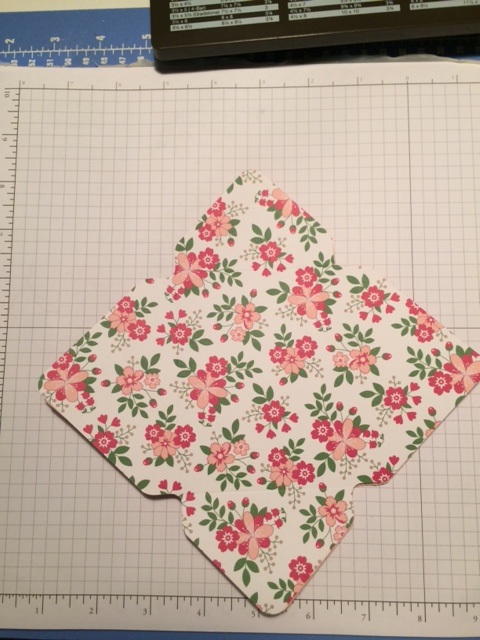
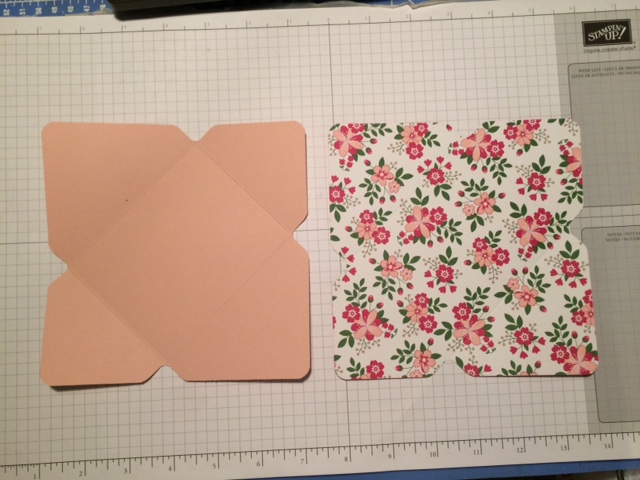
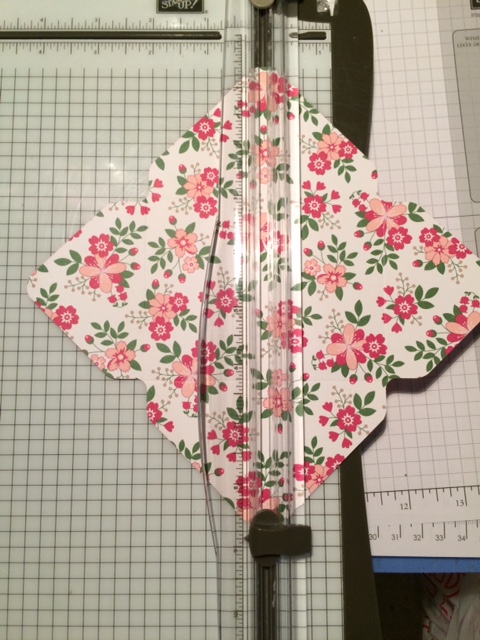
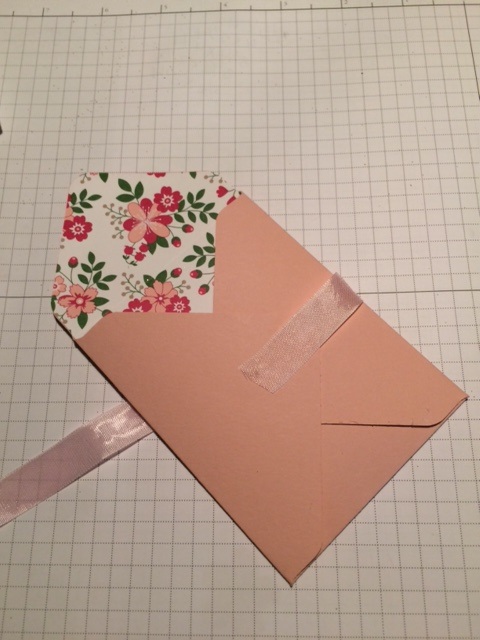
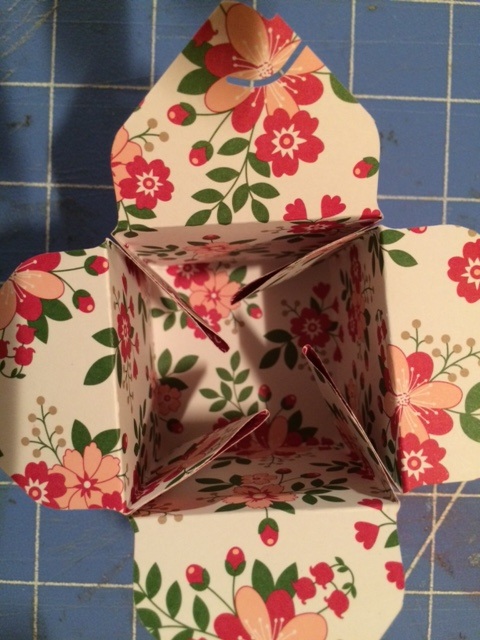
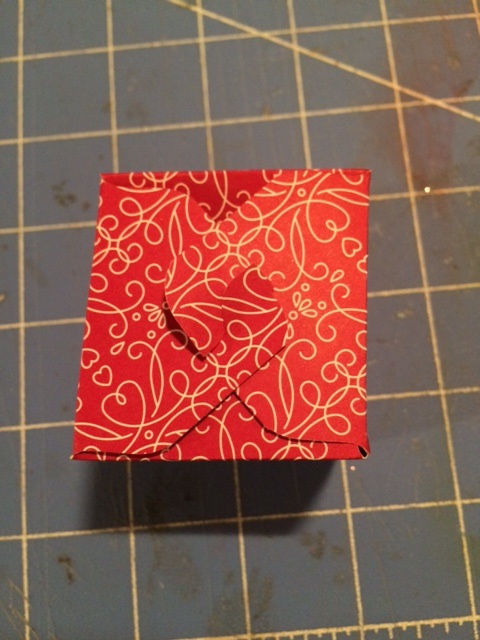
This project was really easy and uses a small amount of paper. The stamping/punches and glimmer could be scraps on hand! But whats better, is the project can be easily duplicated, if you needed to make a lot, it will take no time!!! The envelopes are not very deep, so this treat package would be perfect for a regular Hershey bar or another thin candy bar, a gift card, perhaps a note, as well. You could also add a couple pencils or pens for a school gift. I am debating whether or not to make for my elementary school kids Valentine Swaps...hmmm there's plenty of time to decide...Right??
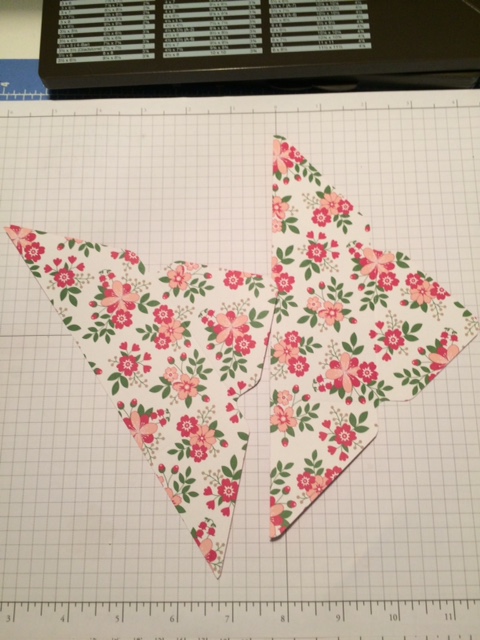
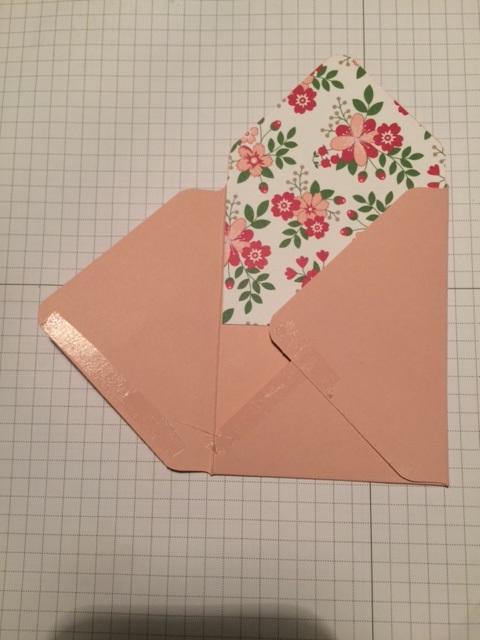
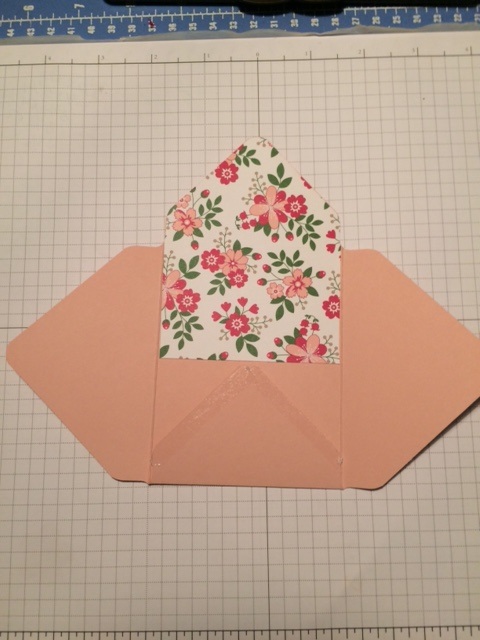
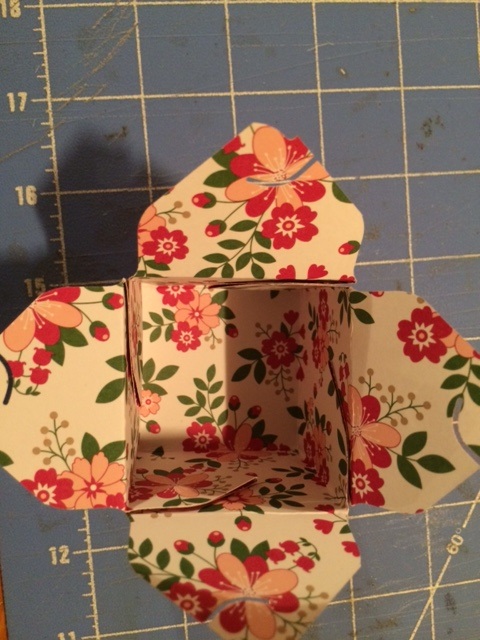
You can see in the second picture below, that once you fold the sides in, there are these little corners that stick out into the middle of the box. That is because the box will open flat. No worries. Just take a few glue dots and stick them to the sides. Wala, they are out of the way. You can fill the box with little treats...maybe a special piece of jewelry!!

Built for Free Using: My Stampin Blog
|


Categories
All
Archives
May 2024
|


 RSS Feed