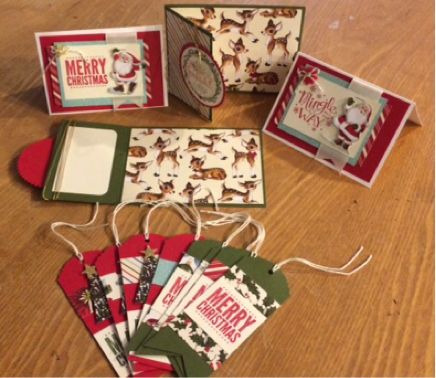
For this week card club I decided to get in the holiday spirit. Normally my card club consist of 4 cards, 2 each design. But instead I've included 2 notecards, 2 gift card holders and 8 coordinating tags all projects use the DSP Home for Christmas
Built for Free Using: My Stampin Blog
0 Comments
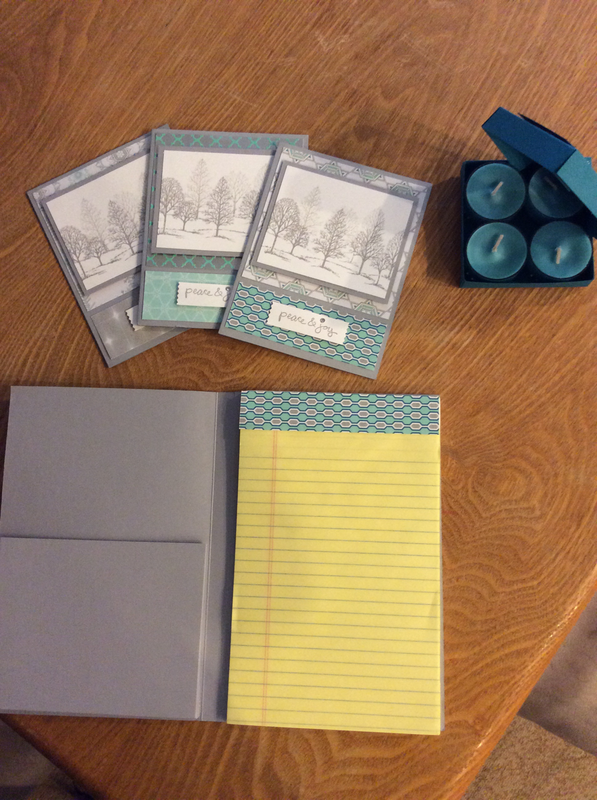
So I've had several requests to post the instructions for the notebook set I posted a few days back.
So here you go, it's very simple: Notebook: You will need 1 sheet of card stock 8 1/2 x 11. With the 11" side on the top score at 5 1/4" and 5 3/4". Fold on the score lines. To create the pocket on the inside, cut a piece of card stock to 6 1/2 x 4 3/4. Score at 1/2" & 3/4" on 3 sides. Fold on the score lines, you will need to cut up to the 3/4" score lines at the bottom of you pocket. Use a strong adhesive to glue to inside left of the cover. The pocket will measure 5 x 4 when done. On the inside right you can glue the 5x8 notepad. Depending on how you choose to decorate the front cover is up to you. Tealight box: You will need to cut 2 pieces of card stock for base 4 3/8" x 4 3/8" & for the lid 4 7/16" x 4 7/16" Using the Simply Scored scoring tool, Score st 5/8" on all 4 sides of the base and lid. To create the hinge on the lid. Take the lid piece and score at 2" down to the 5/8" mark. Turn it over and make sure the 2" scored line you made, lines up to the 2" mark on the left side of your simply scored tool. Now on the top measurements score at 2" again down to the 5/8" mark. Fold on all score lines on base and lid. You do not need to fold the 2" scored lines. Before you assemble, cut the circle opening with the Circle Framelits on the lid. I then too a pieces of the window sheet and cut the next size up with the frame,it and glued it on the inside. I took a piece of DSP cut it to 3x3. Cut a circle (slighter bigger than the size on the lid) and adhere on top. Take lid and a ruler and line up the edge to the 2" marks and using a stylus or bone folder score a diagonal line. Cut up on score lines to create the box. Also cut up the 2" lines and fold the diagonal opposite this will hinge the box. Assemble the lid and base. You then want to glue that corner piece onto the card base. I punched the bow using the Bow maker punch with same card stock and used reverse side.
Built for Free Using: My Stampin Blog
Today I finalized my Christmas card design. I'm so happy! Once I figured out what I wanted to do I was on a roll. I'll give a sneak peak, but you'll have to wait for Christmas to see the cards. I will share that I used the Home for Christmas DSP. Love this paper!! I prepped as much as I could and stamped enough for 100 cards. But I had to place an order for supplies. I can't wait for the order to come in so I can keep going. Just need to print out our family picture. And when it's all prepped, assembled! Wah-la!!! Definitely feeling accomplished today!
Built for Free Using: My Stampin Blog
It's been awhile since I've had an opportunity to blog. Unfortunately juggling different projects sometimes gets in the way. But, no worries, I've been busy Stampin, creating projects and scheduling events. Be sure to check out my Facebook page or Stampin Up website to see what's going on. Come on by to my Stamp-A-Stack. I have several dates schedule so check it out!!!!! 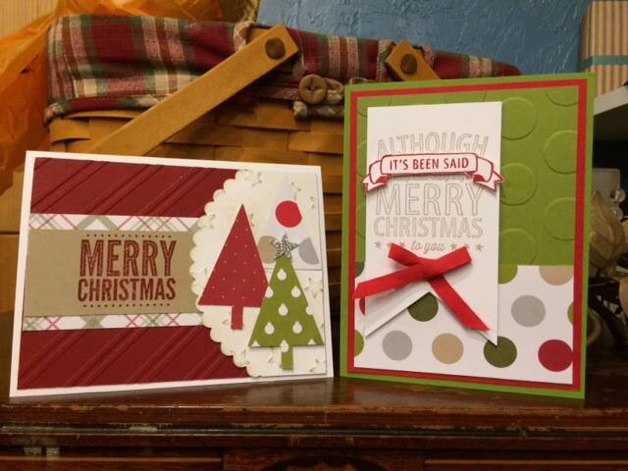 It's the most wonderful time of the year when we get to run around preparing for the holidays. Why not get a head start on some handmade cards. What's better than receiving a handmade card in the mail???
Join me on my first Holiday Stamp a Stack. Make as many cards you would like. These cards are quick easy. A quick stamping and you're ready for assembly. You will be able to choose from 2 designs. The more you make the cheaper they will be. Cards will include envelopes. For every 10 more you make, you will save 10% off. 50 or more cards save 20% off 100 or more save 30% (that's crazy, under .90 per card) Cost of cards 20 for $25 30 for $33.75 40 for $45 50 for $50 Please let me know at time of RSVP roughly how many cards you think you might make. Please make sure to RSVP on time do I can have the materials ready for you!! Hope to see you there!! Happy Stampin Steph |


Categories
All
Archives
May 2024
|


 RSS Feed