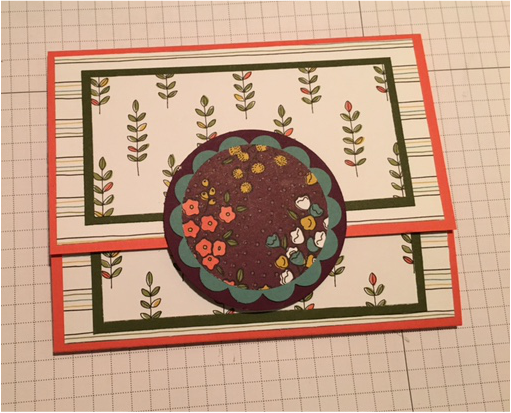
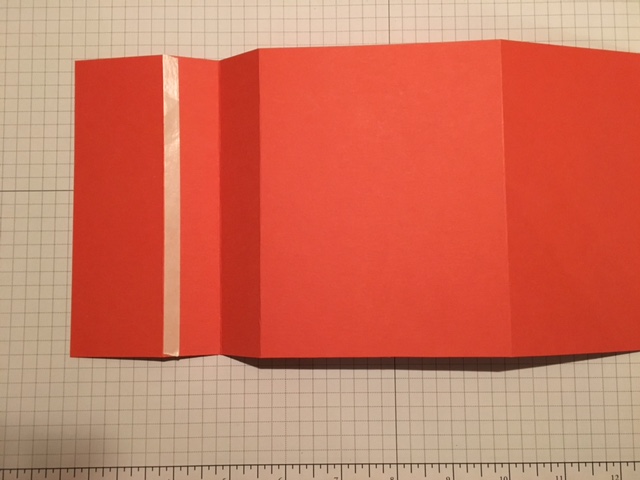
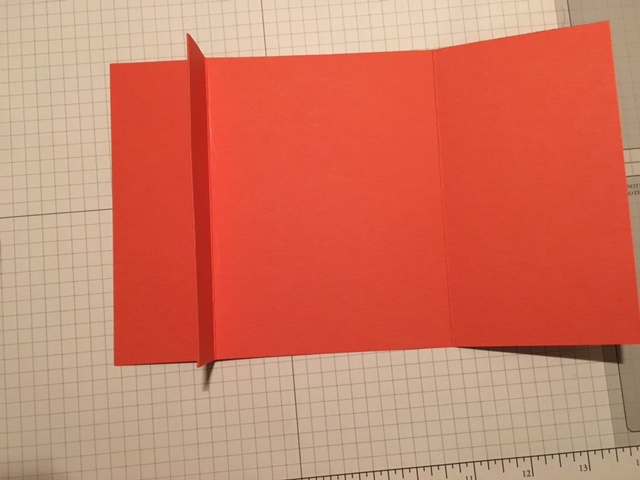
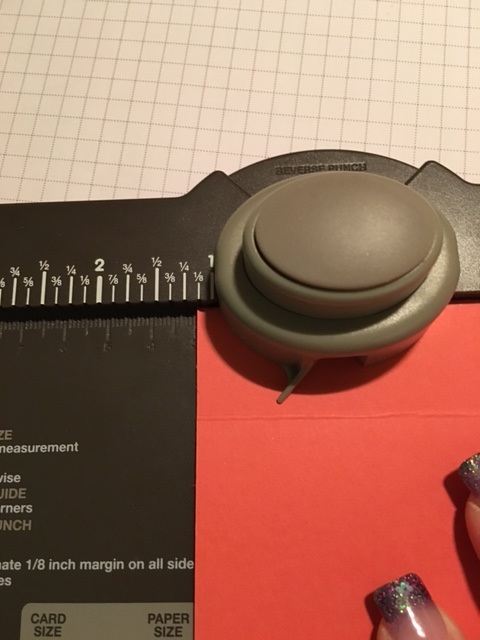
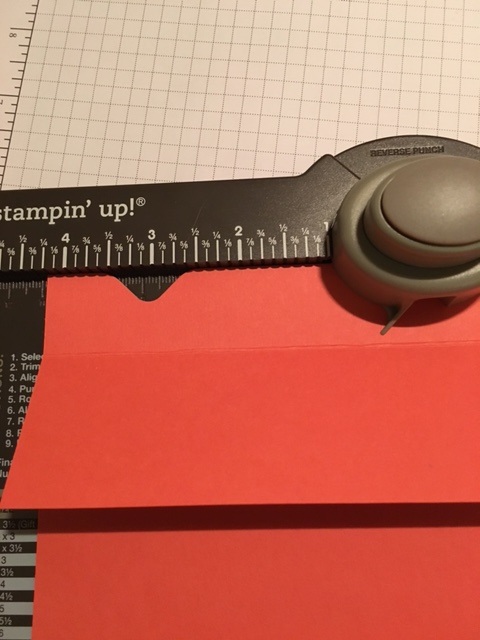
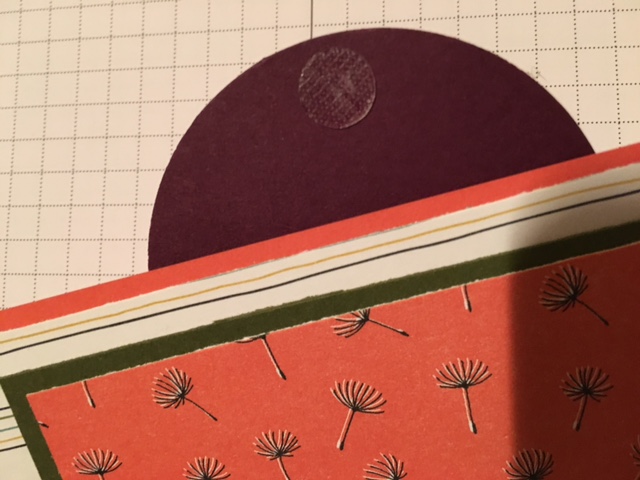
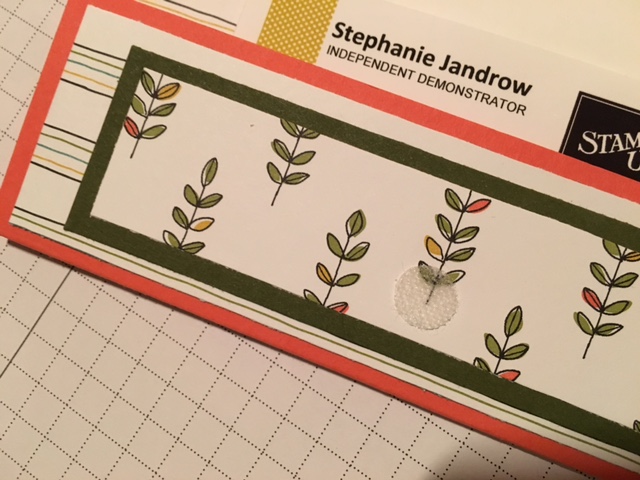
 Day 5 - Last but not least. To end Teacher Week I decided to stick with a gift card. Perfect, the teachers can use the card for themselves. I came across this Giftcard Card while I was scrolling through Pinterest. The original design was from Lea Denton of The Crafty Spark. Her design uses measurements for a sheet of A4 paper. I modified it to work for a standard sheet of 8 1/2x11 cardstock in the US. You could use a sheet of 12x12 and use Lea's measurements if you preferred. You can view Lea's design here. So I started with a sheet of Calypso Coral 8 1/2x11 cardstock and cut it to 5 1/2x11. I used my Simply Scored Scoring tool. Place the 11" side at the top and score at 1 3/4, 2 3/4, 3 3/4 and 8. 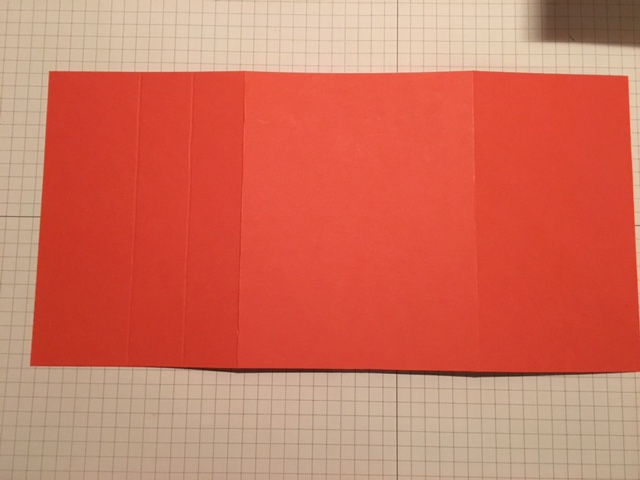 Fold on the score lines. Except on the 2 3/4 score line you are going to fold it in the opposite direction. 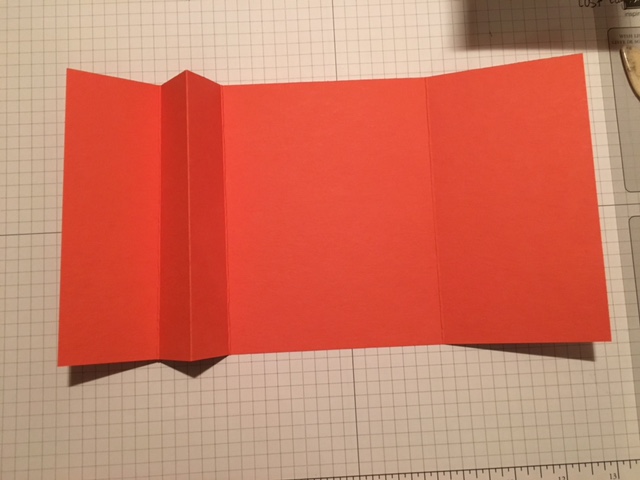 Then you will need to turn over you paper and add a strip of adhesive at the 1 3/4 score line. Make sure to add adhesive as close to the score line as possible. You will seal this together at the 3 3/4 score. Turn it over, this section will become the pocket to hold the giftcard. To make the giftcard pocket, you will need to use the Envelope Punch Board. You will not be scoring, just creating the 2 notches. Take the section you just glued (folded side up) and line up the left side at 1 1/8" and punch. Move it over to 4 1/4" and punch again. Boom that's done. Next, with your trimmer, line up the edge of the pocket (the side that's folded) and trim off just a smidge to open the pocket. Don't go too far down. You want to make sure there is enough to hold the gift card in. 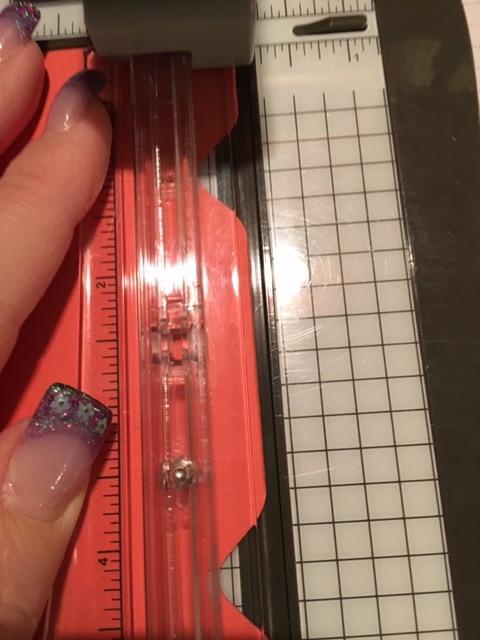 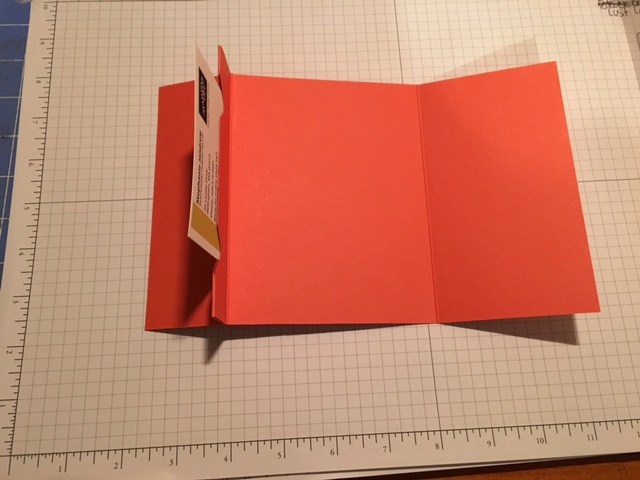 Ok, lets decorate. I had enough of the Wildflower Fields DSP to finish up the week. Yeah I like when that happens. Now I am no longer sitting on retired paper I am wondering what I'll do with it. Starting with the inside. I layered the DSP Inside top flap DSP: 5 1/4 x 2 3/4 CS: 4 1/2x 2 1/4 DSP: 4 1/4x2 Inside: DSP: 5 1/4 x 4 CS: 3 1/8x3 1/8 WW: 3x3 Inside Bottom Flap DSP: 5 1/4 x 1 1/2 CS: 4 1/2x1 1/4 DSP: 4 1/4x 1 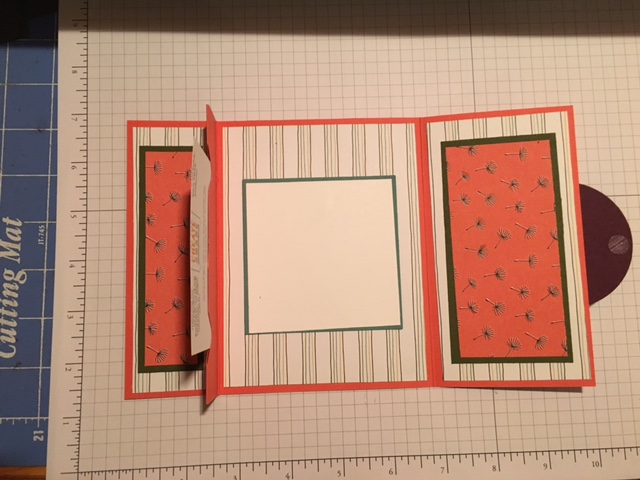 Now for the outside of the card: Same process except you do not need to decorate the middle section since this becomes the back of the card Outside top flap DSP: 5 1/4 x 2 3/4 CS: 4 1/2x 2 1/4 DSP: 4 1/4x2 Outside Bottom Flap DSP: 5 1/4 x 1 1/2 CS: 4 1/2x1 1/4 DSP: 4 1/4x 1 The I used contrasting colors from the DSP pack to make the closure. Punch a 2 1/2 circle in Blackberry Bliss Punch a 2 3/8 scallop circle in Lost Lagoon Punch a 2" circle with the DSP in a different pattern. Adhere on the front only at the top half. We will add Velcro to keep the card shut. So what I did was added both the top and bottom pieces of Velcro onto the back of the circle. Then close the card, and press, the bottom part of the Velcro will stick to the card. Just add giftcard and it's all done. Love it!!
Hope you enjoy this week's projects. Feel free to contact me with any questions! Happy Stampin Steph
0 Comments
Leave a Reply. |


Categories
All
Archives
May 2024
|
 RSS Feed