Stampin & Scrappin with Steph
  • Home
  • About Me
  • Contact Me
  • Products
  • Paper Pumpkin
  • Catalogs
  • Join the Fun
  • Paper Crafting
    • Card Ideas
    • Calendar Projects
    • Paper Projects
    • Scrapbook Layouts
  • Retired Products for Sale

One-Sheet Photo Brag Book

4/4/2020

0 Comments

 
Picture
I've been working on keeping busy here. Homeschooling has had it's challenges and keeping our family doing some form of normal has been crazy....There's never a dull moment but we are doing our best. I find when I can being creative helps to keep my mind from wondering into all those "what if" thoughts! I am sure many of you can relate!
Working on 3-D types of projects has always been a little bit of a challenge, finding the time and patience and sometimes supplies can hinder the projects. But now I seem to have nothing but time! And using what I have on hand has been great!
Today I am going to share with you a really pretty, super easy photo brag book. I design this with my teenage daughter in-mind. She has several friends turning 16 this year, and having to be away from each other has been tough, but I thought she could put together a little memory book for them!
So let's get started. This project used very little paper supplies.
You could make this with one-sheet of designer paper, but I chose to use Whisper White as the background to add a little stability. I also used a retired Stampin Up paper set called Petal Garden DSP and the Petal Garden Memories and More Cards, coordinating ribbon in Fresh Fig. And I have to say, I did not stamp anything when I made the project!!
And here's what you need:
  •  1 sheet of Cardstock that measures 12"x11 3/4"
  • Decorative DSP one pattern or several
  • Embellishments
  • Ribbon about 20"
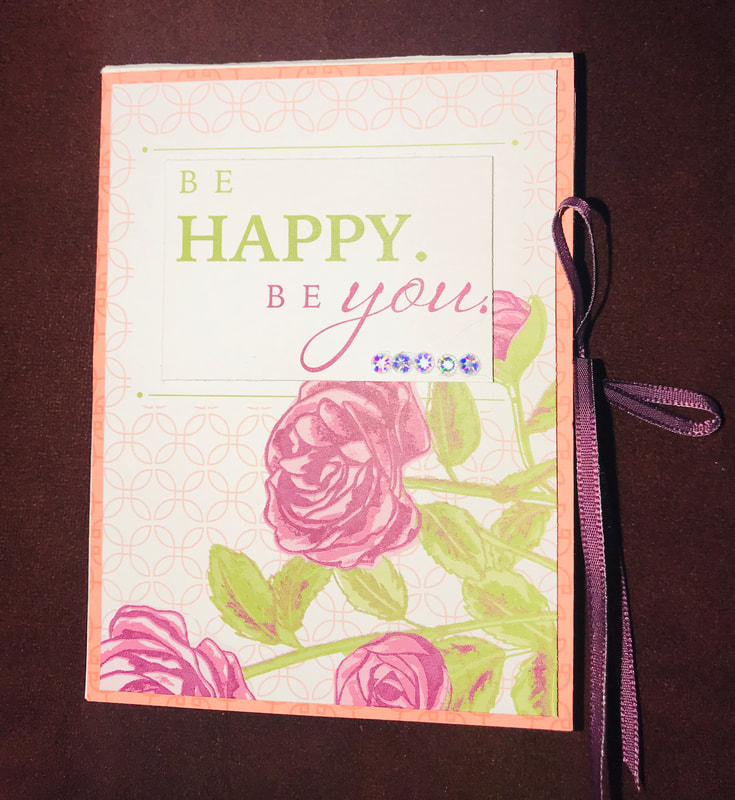
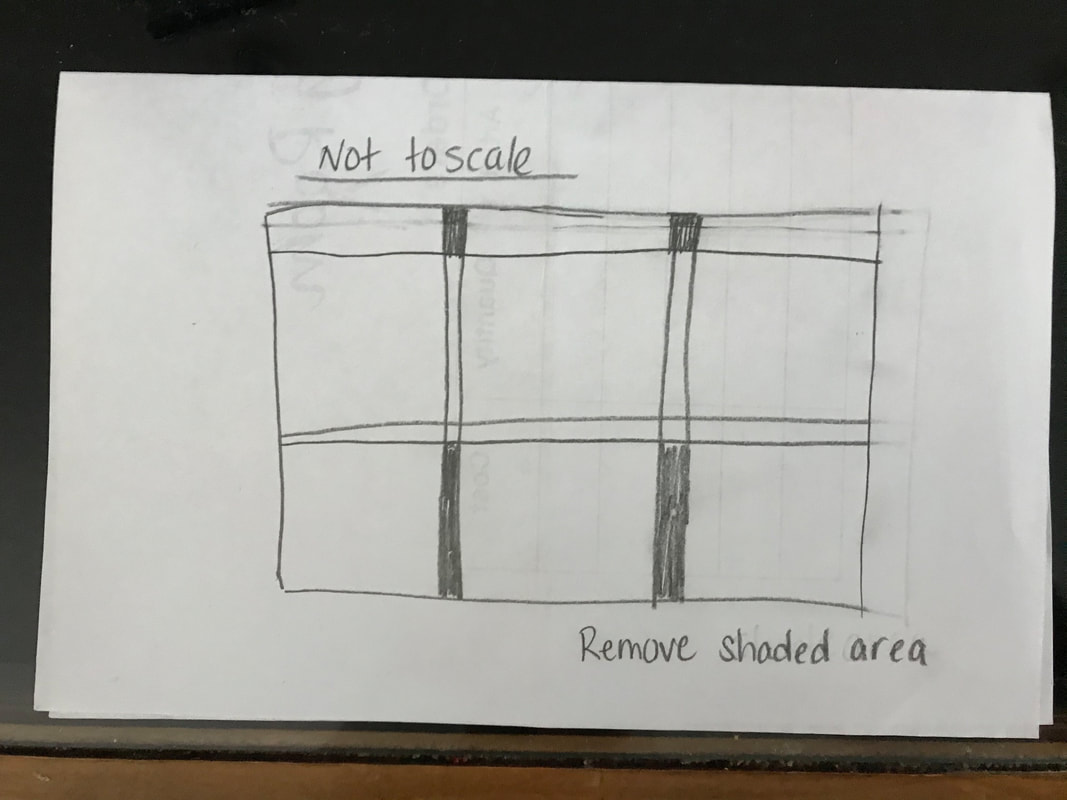
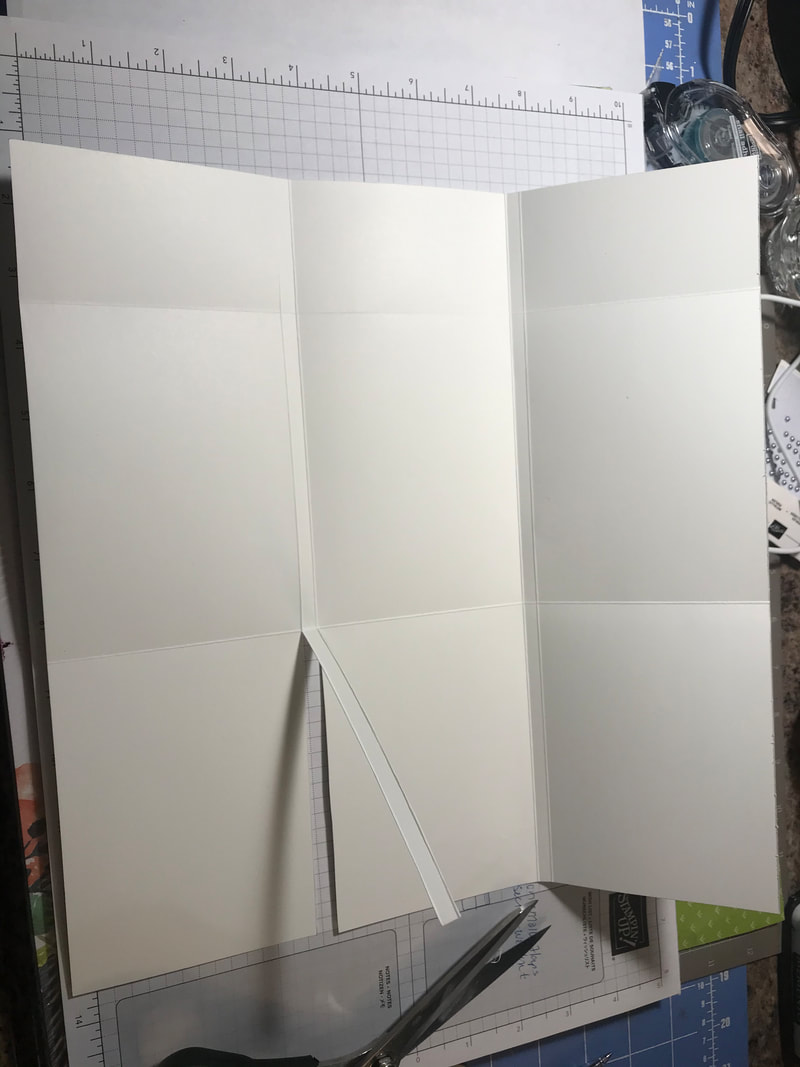
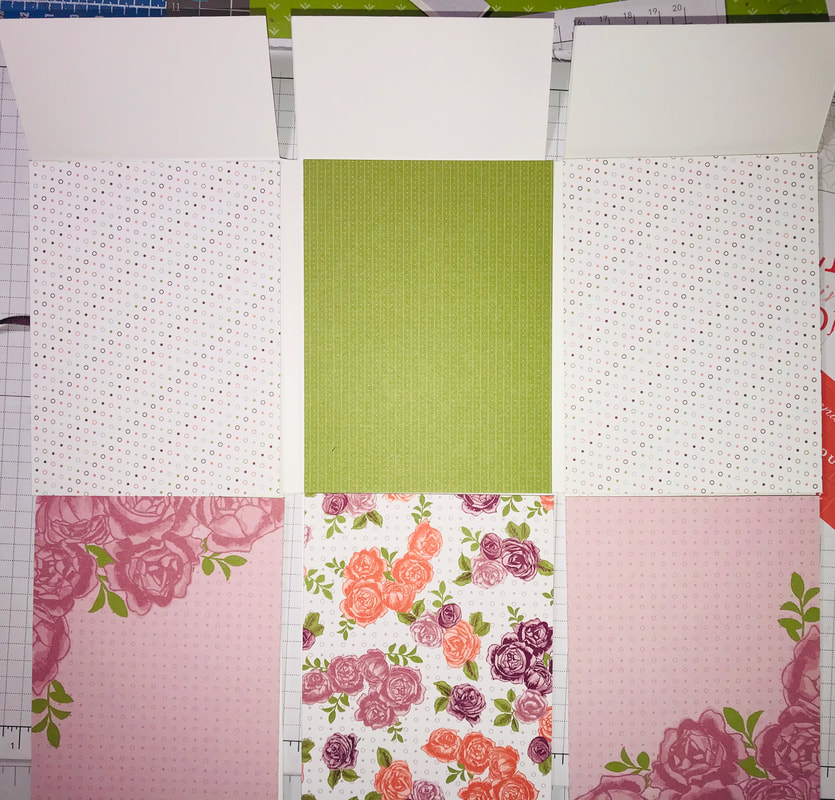
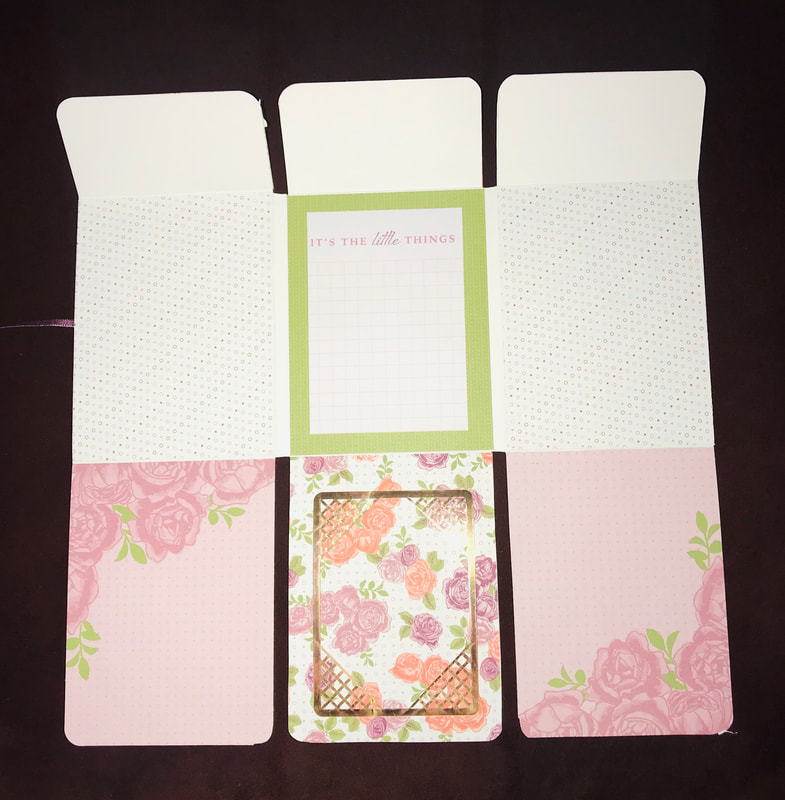
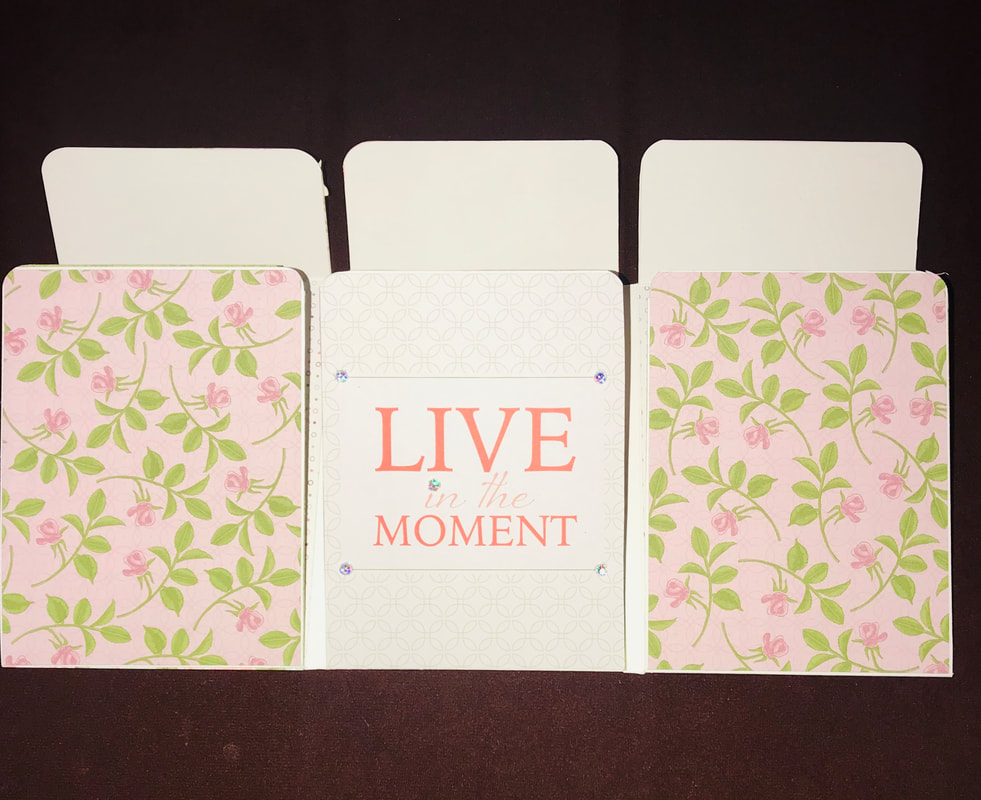
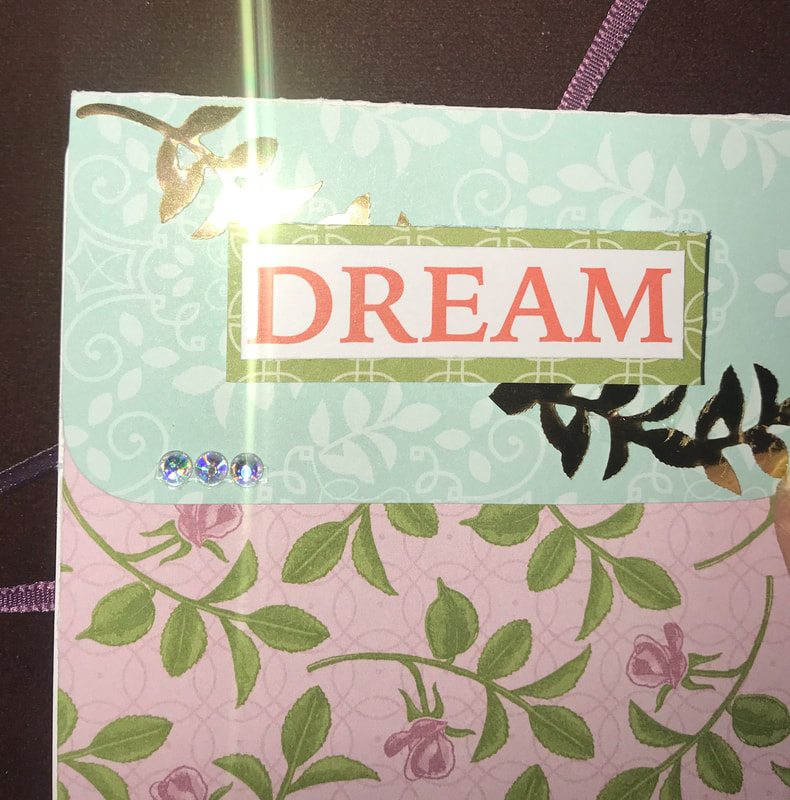
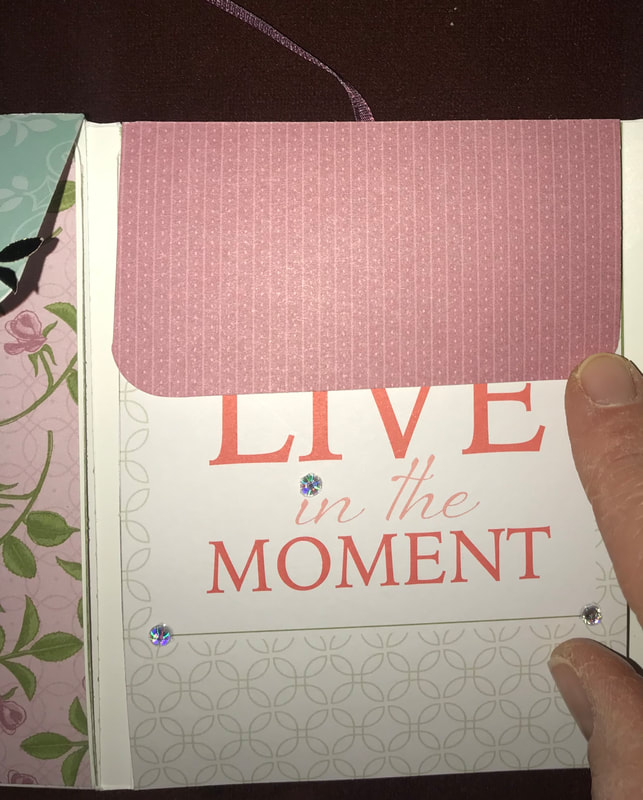
With your scoring tool and the 11 3/4" edge of the paper at the top
Score at 3 3/4", 4", 7 3/4" and 8"
Turn once to the 12" side and score at 5" and 10"
Fold on all the score lines.
The top of the brag book, is the small section, then there's the middle and the bottom
The score lines are close together and create little rectangles,
Remove the rectangles from the top section to the score line that begins the middle
Do the same from the bottom, cut out the rectangles from the bottom up to the bottom score line of the middle section.
I hope this makes sense, I have included a template so you see what I mean. Please note, my hand drawing is not to scale at all, it's just meant to give a visual of what needs to be cut.
Now, we come to the fun part, the decorating! The big sections of the brag book measure approx. 3 3/4"x5". There are 12 sections; 6 on the inside and 6 on the outside (3 that fold in).
I started with the front cover, first attach approx 10" piece of ribbon. Then lay the DSP on top, this is the front tie for the book. I used DSP cut at 3 3/4"x5 and trimmed a memories more card to about 3 5/8'x 4 7/8" and I also trimmed a smaller memories more card down so that just the wording was framed out.
So for the front, you need:
  • Adhere 10" strip of ribbon
  • DSP cut to 3 3/4"x5" glued ontop of the ribbon
  • Decorative layer cut to 3 5/8"x4 7/8"
  • Inside 6 piece of DSP that measure 3 5/8"x4 7/8" (I made them slightly smaller so the scores lines are free from any paper and will fold freely)
  • Top flap, 3 pieces of DSP that measures 2"x3 3/4" I only decorated the outside (the part that is visible when folded down). I left the underneath part white so it can be used for journaling.
  • Add decorative elements, I used various cards from the memories and more pack.
  • For the sections that fold in, I kept the measurements the same with being slightly smaller at 3 5/8"x4 7/8"
You can see from the pictures below how I design the brag book.
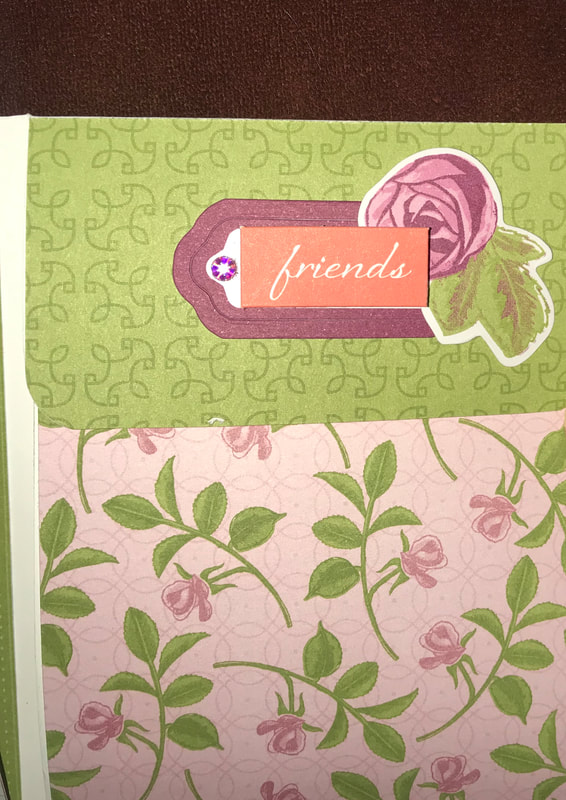
for the sections that appear on the backside, just like the front, cover the white cardstock edge to edge so you will need;
  • 2 pieces of DSP that measure 3 3/4"x5"
  • Piece of ribbon that measure 10"
The ribbon needs to be adhered down first, just like the front cover. You need to add it the side that folds in, see picture below, and the ribbon so come out on the right side of the fold! Once the ribbon is in place add the DSP ontop, I did not add any extra decorative embellishments. I figured depending on pictures, this can be added after.
Picture
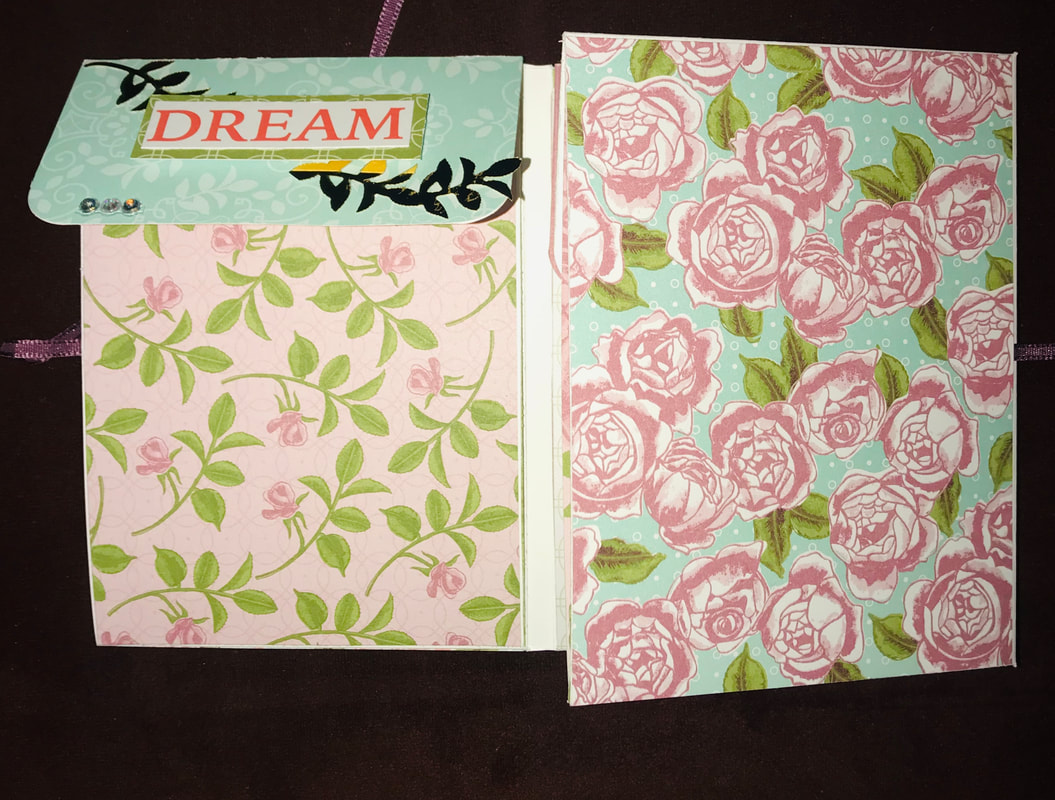
The backside again, I left simple. Added the DSP and a small card to add a space to write or add a photo, etc
Picture
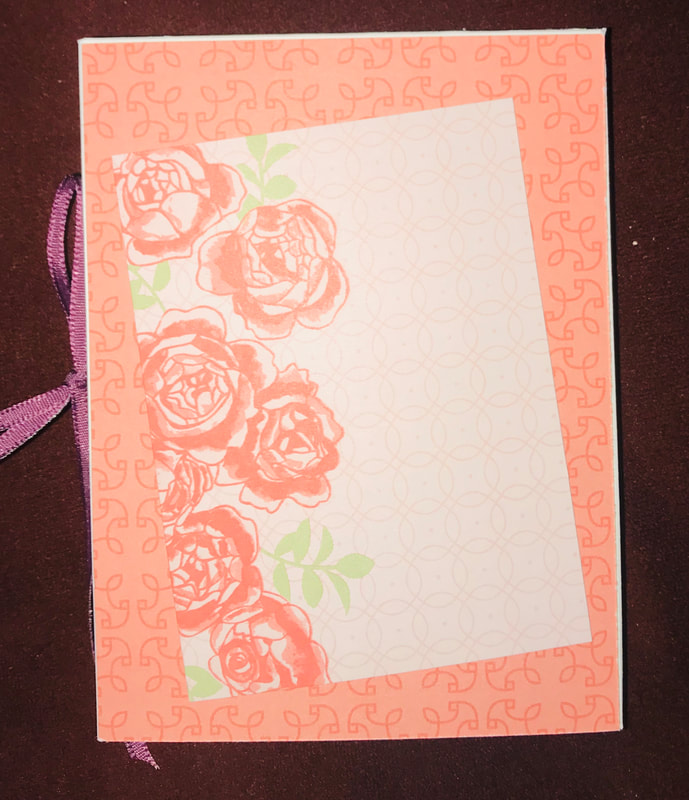
And just like that the brag book is finished. I'd say overall this took just a bit over an hour. That was probably spent decided what supplies I was going to use. But in the end this is one of those projects I am sure I will be making over and over because it's just so easy and makes a WOW projects when we are done!
I hope you enjoyed what I shared with you today!
Thanks for stopping by
Happy Stampin
Steph

0 Comments


Leave a Reply.

    Picture
    Watch me on YouTube
    Picture
    New 2022-2023 Stampin Up Annual Catalog
    Picture
    Picture
    Kits Collection
    Picture
    All the Little Things by Paper Pumpkin
    Picture
    Join today
    Picture
    Retired Products for Sale

    Categories

    All
    3 D Projects
    Become A Demonstrator
    Berry Basket
    Birthdays
    Blog
    Boxes
    Calendar
    Candle Holder
    Card Club
    Challenge
    Christmas Cards
    Fall
    Gift Bags
    Gift Sets
    Gift Tags
    Halloween
    Holiday
    Homemade
    #imbringingbirthdaysback
    Kits
    Love
    Mini Treat Bag
    New
    Occasions
    Paper Pumpkin
    Punches
    Sale
    Samplers
    Stamp A Stack
    Stamp Of The Month
    Summer
    Thanksgiving
    Thank You
    Valentine
    Workshop

    Archives

    March 2023
    February 2023
    January 2023
    November 2022
    October 2022
    September 2022
    August 2022
    July 2022
    June 2022
    May 2022
    April 2022
    March 2022
    February 2022
    January 2022
    December 2021
    November 2021
    October 2021
    September 2021
    August 2021
    July 2021
    June 2021
    May 2021
    April 2021
    March 2021
    February 2021
    January 2021
    December 2020
    November 2020
    October 2020
    September 2020
    August 2020
    July 2020
    June 2020
    May 2020
    April 2020
    March 2020
    February 2020
    January 2020
    November 2019
    October 2019
    September 2019
    July 2019
    June 2019
    May 2019
    April 2019
    March 2019
    January 2019
    November 2018
    October 2018
    September 2018
    August 2018
    June 2018
    May 2018
    April 2018
    March 2018
    February 2018
    January 2018
    December 2017
    November 2017
    October 2017
    September 2017
    August 2017
    July 2017
    June 2017
    May 2017
    April 2017
    March 2017
    February 2017
    January 2017
    December 2016
    November 2016
    October 2016
    September 2016
    August 2016
    July 2016
    June 2016
    May 2016
    April 2016
    March 2016
    February 2016
    January 2016
    December 2015
    November 2015
    October 2015
    September 2015
    August 2015
    July 2015
    June 2015
    May 2015
    April 2015
    March 2015
    February 2015
    January 2015

    RSS Feed

    Enter your email address:

    Delivered by FeedBurner


    Question? Contact Me

Submit
  • Home
  • About Me
  • Contact Me
  • Products
  • Paper Pumpkin
  • Catalogs
  • Join the Fun
  • Paper Crafting
    • Card Ideas
    • Calendar Projects
    • Paper Projects
    • Scrapbook Layouts
  • Retired Products for Sale