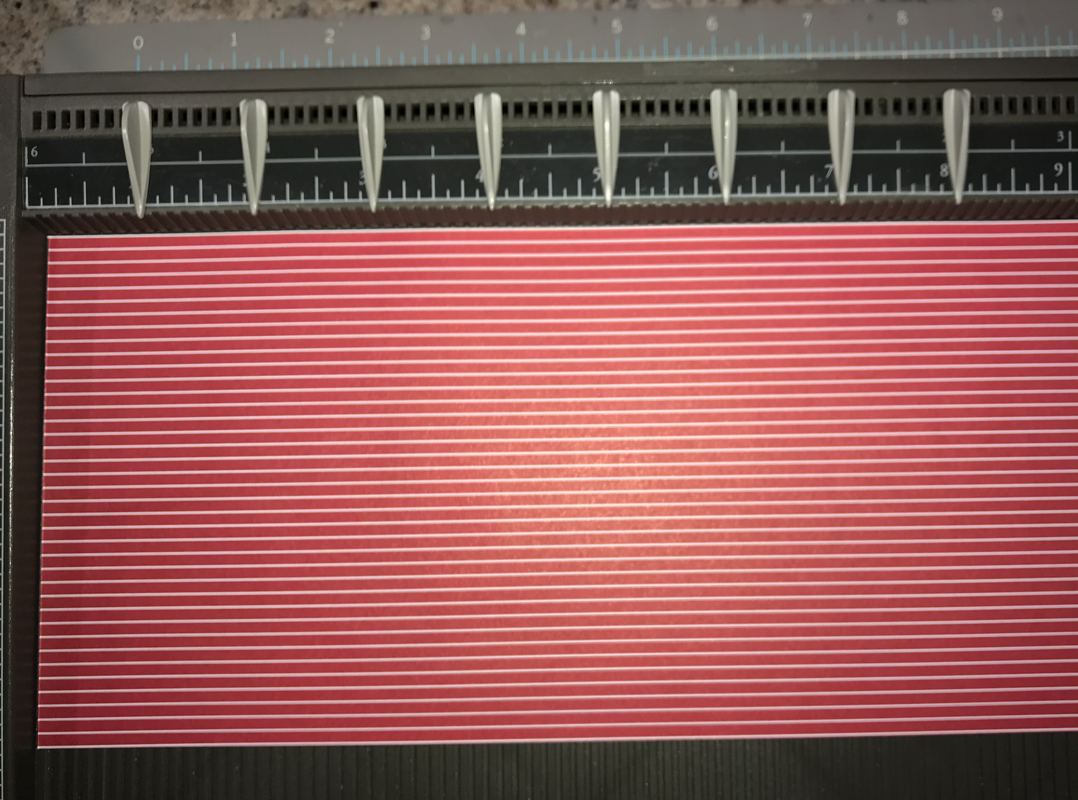
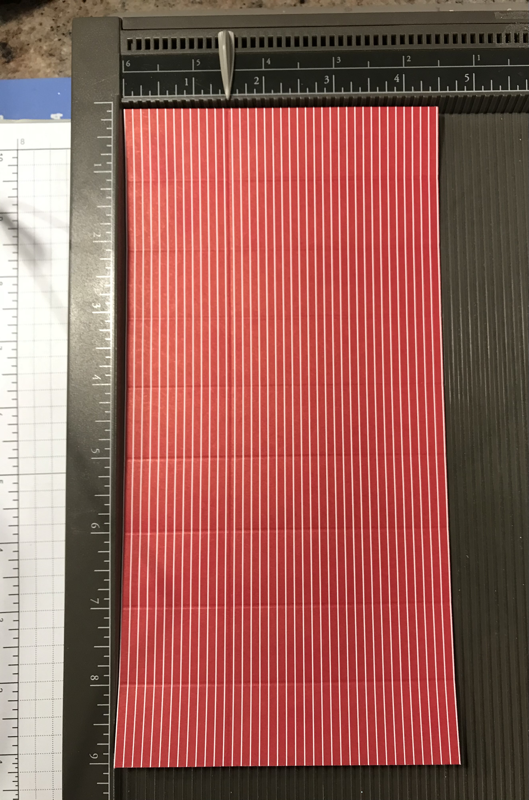
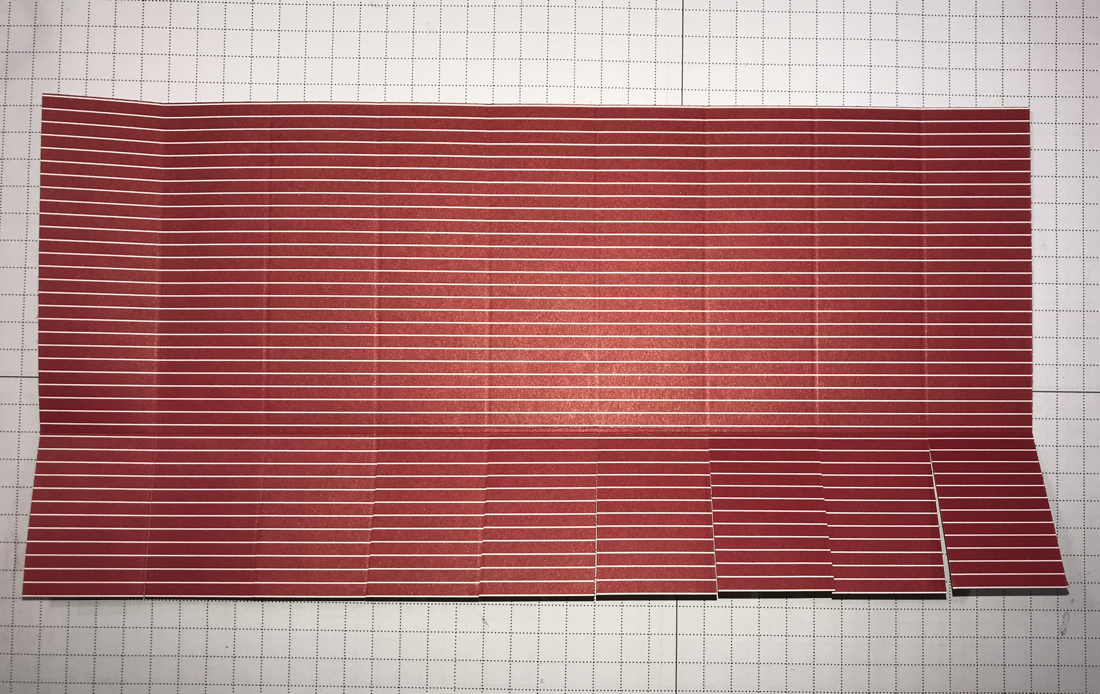
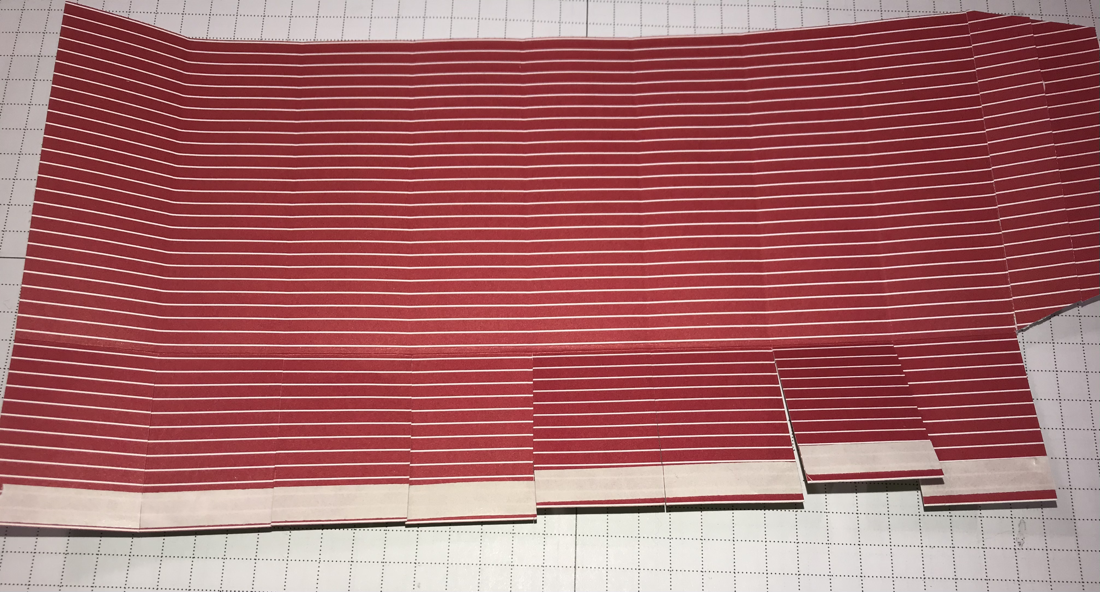
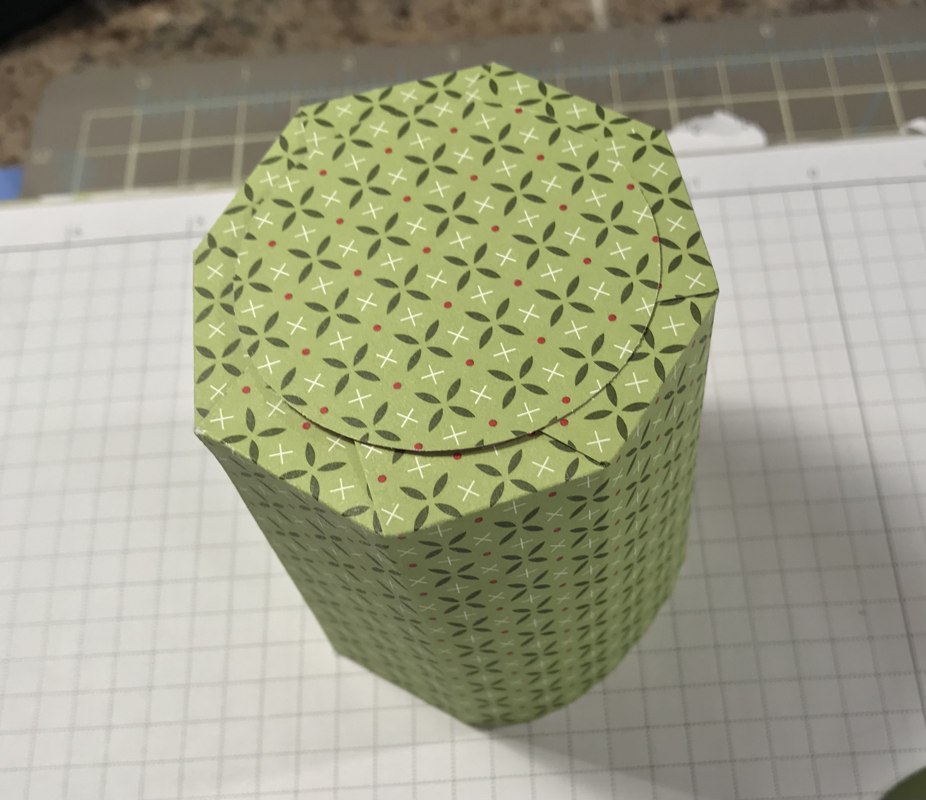
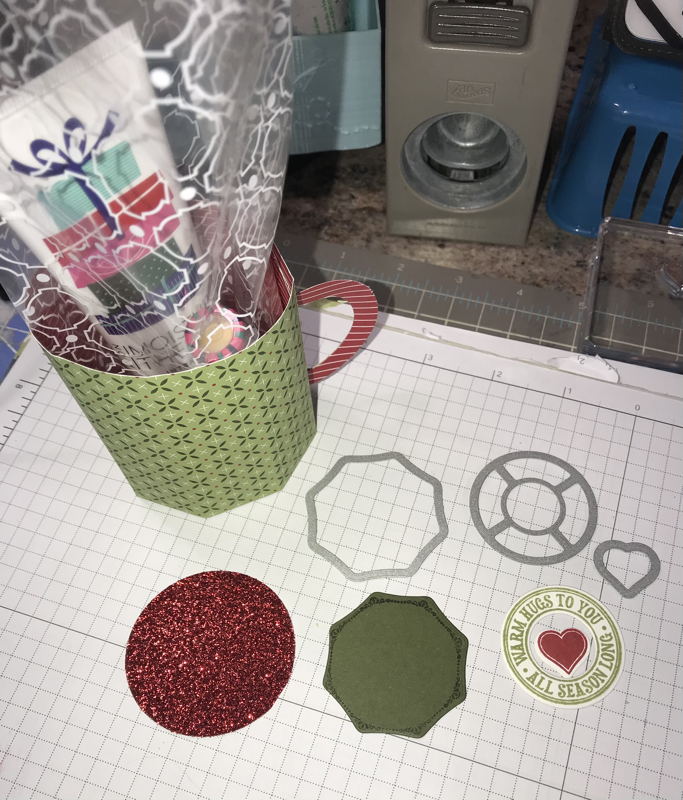
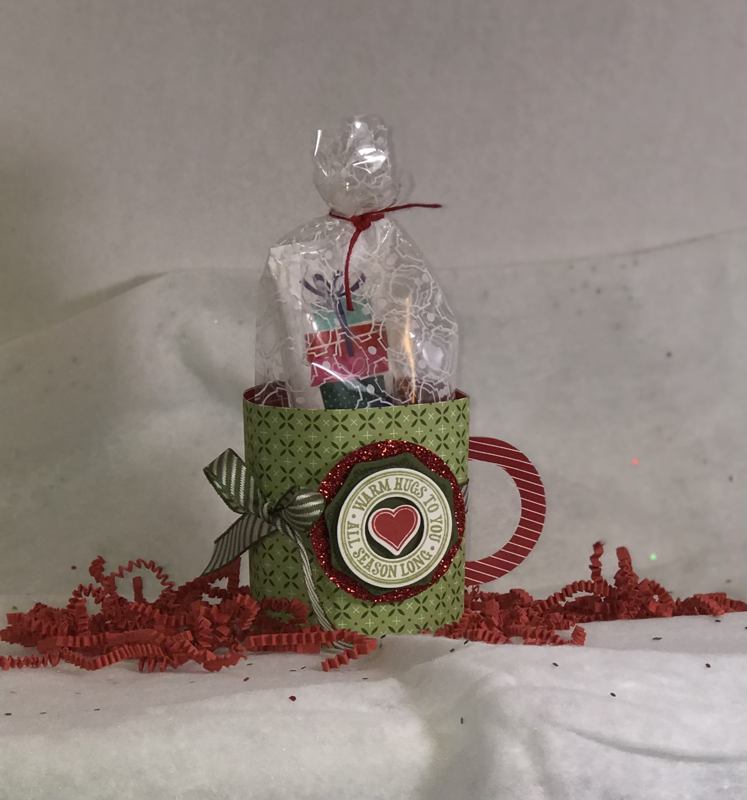
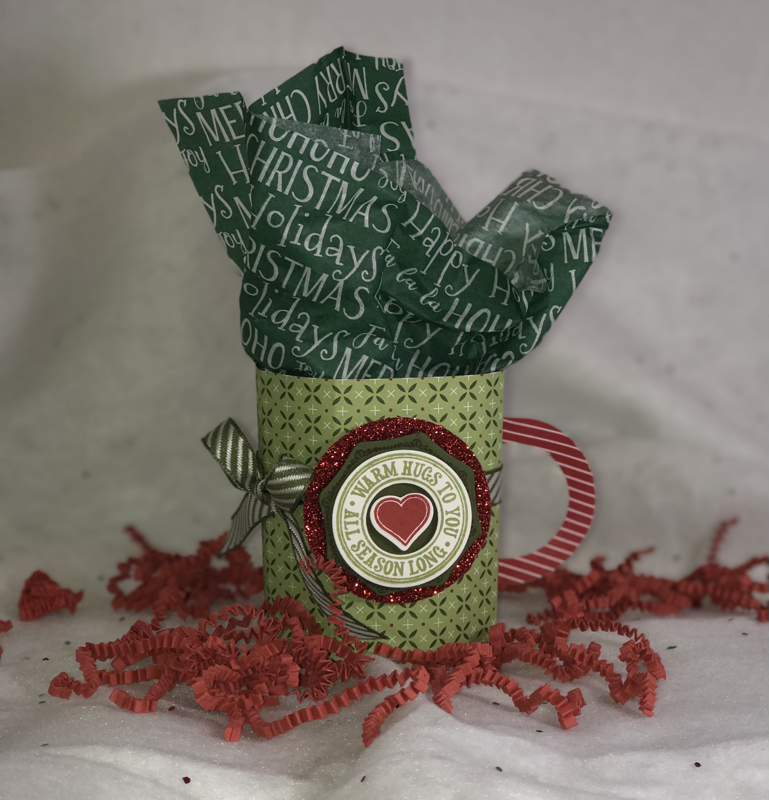
 Welcome to the Stampin Friends November Blog Hop! You will notice as you hop along our theme is Happy Holidays! Make sure to view all of this months hoppers! You’re guaranteed to be in the holiday spirit with some crafting inspiration!!!! This is our last hop of 2020, don’t worry we will be back in January 2021. With all the craziness this year has brought us, I am so happy to be a part of this blog hop! As I look back over the last several years, I love how my crafting has evolved and improved!! I truly feel honored to be a part of this group! It’s so fun each month to stay creating, to be inspired and to continue to be challenged! And for me the best of it all, is seeing all the beautiful projects that are shared!! I look forward to each month! It’s just so exciting to hop along aside these amazing and talented ladies from all over the US, UK, Australia and Germany! If you’re a paper-crafter, with a blog, and you’re interested in joining us, please contact me! I hope you are following along with our blog hop and you came from I just love her projects, or if you're just getting started with me, you can find the full list of hoppers at the end of this post. Once you finish with my blog, be sure to continue to Tiziana Milano's Blog and make sure to leave comments so we know you visited!! We love to hear from you!! 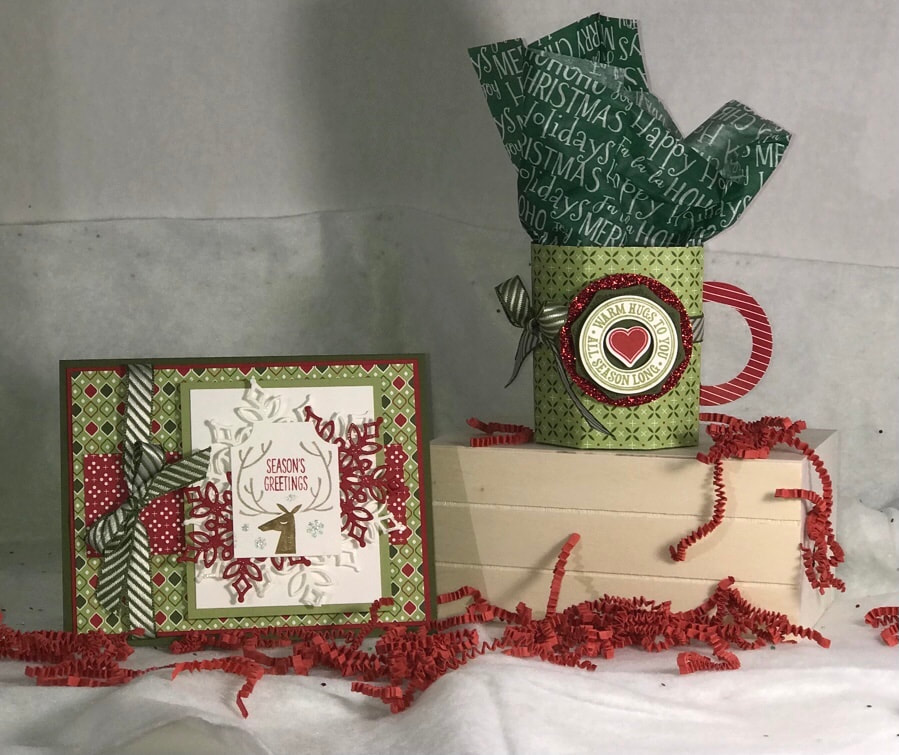 My project this month features a paper mug. I’ve been noticing these paper mugs all over Pinterest as I was searching for some packaging inspiration! I immediately shared this project with a friend who has been working endlessly on making Hot Chocolate Bombs!!! So fun and such a cute way to package a yummy treat! I used products from the Heartwarming Hugs Suite. I have also included a video showing you how to make the mug! To make the paper mug; you will need a piece of card stock or designer paper that measures 4 1/2” x 9” I used the Heartwarming Hug DSP. Now if you are using a piece of designer paper you want to have the side that is the inside of your mug face up on your Simply Scored Scoring Board. Start with the 9” side along the top and score every inch at 1”, 2”, 3”, 4”, 5”, 6”, 7”, & 8” Then turn the paper to the 4 1/4” side and score at 1 1/2” NOTE: before you score, make sure if your paper has a directional pattern that the pattern is facing the right way on the score board, the 1 1/2” line is the bottom of the mug! So when it's assembled that larger section should be facing correctly. Hope this makes sense!! Continue to have paper for the inside of the mug face up Cut the 1” score lines up to the 1 1/2” line. Then remove the bottom right corner section from the 8” score line up to the 1 1/2” line and then cut the top section at an angle....see the 3rd picture below! Add adhesive to the bottom tabs, flip over to the outside of the mug and then adhesive along that tab! Now lightly fold on the score lines as you roll the paper to adhere the sides! Attach the bottom piece overlapping each other to form the bottom! I punched out 2 - 2” circles one for the bottom and one for the inside, you don’t have to do this but it makes it look finished to me and adds a-little more support to the mug! For the handle I just layered 2 different sizes circle dies I cut out 2 glued them together and cut the almost in half! Bend the ends alittle and glue them to the mug! You could also use ovals, as well! Fill with some candy or whatever treats you like! I added some lotion and lip balm in a pretty bag! I used the Warm Hugs Stamp and coordinating Warm Wraps dies to make the greeting on the front and I also cut the Real Red Glimmer paper using a 2” punch! You can refer to the pictures below for more details! What do you think?? So fun!!! And so EASY. In order to accomodate the size of the Hot Chocolate Bombs, I had to adjust my measurements, but I will show that as another post when I make the final version! I can’t wait to make a bunch for my friend to package her goodies in! And now my card!!! Super easy layers! I used the same paper pack Heartwarming Hugs DSP and chose a couple different patterns. Start with a Mossy Meadow card base 4x5 1/4 piece of Cherry Cobbler DSP that measures 3 7/8”x 5 1/8” DSP that measures 1 1/2”x 4 3/4” 3”x3 1/2” piece of Pear Pizzazz 2 3/4”x3 1/4” of Whisper White Adhere the DSP onto the Cherry Cobbler add then add the DSP strip, wrap some Mossy Meadow Diaganol Striped Ribbon around the left side and tie in a bow, before adhering to the card base. I stamped using on a scrap piece of white using the Everything Essential stamp set. To get the different colors I used my Stamp n Write markers. I colored the stamp, the huffed on it to moisten and then stamp! So cool right? Then punched it out with the Tag Punch. I die cutted a few snowflakes from a retired set called Snowfall, I’m sorry I don’t have any news ones! And layered behind the tag before adhering to the card. 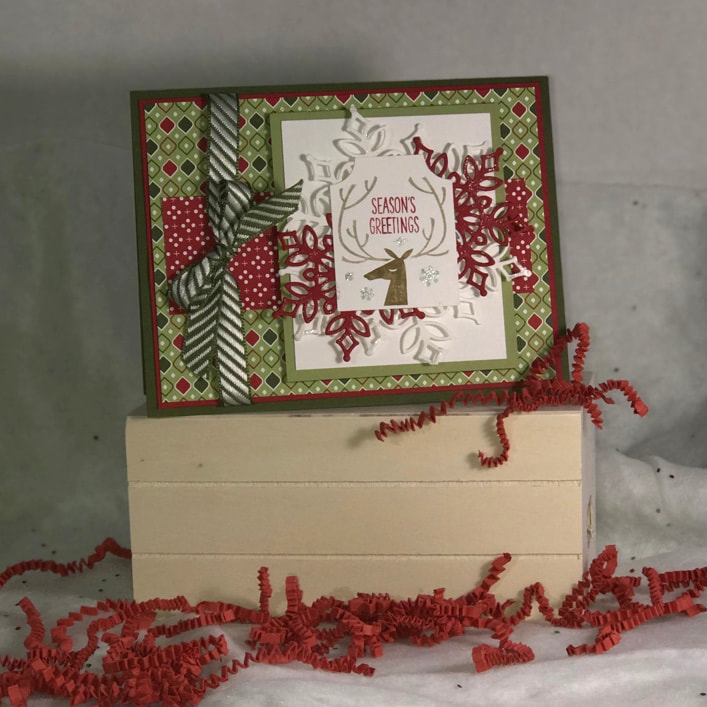 You can see below I have to cards, one with Real Red Braided Linen Thread and one with ribbon! Which one do you like better??? I can’t decide!!! 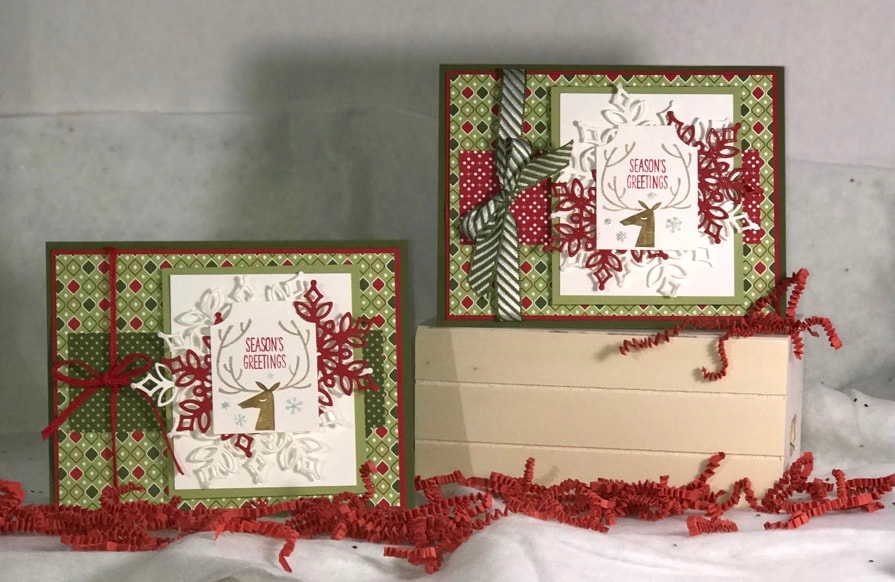 Thank you so much for joining me today!! I had so much fun creating my projects I hope you enjoyed them!!! Be sure to continue to Tiziana Milano’s blog for her awesome projects!!! Thank you again Happy Holidays & Happy Stampin Steph Below is a list of participants in this month’s Blog Hop. Be sure to visit everyone’s and leave a comment we love hearing from you!
8 Comments
Jean H Beaulieu
11/19/2020 08:09:31 am
Very nice! Another set added to my wish list! Thanks for organizing the blog. Happy Holidays! 11/19/2020 10:41:24 am
Super cute - I've seen those cups before - but I just have to make one!!
Barbara Welch
11/19/2020 03:33:06 pm
Cute paper mug. Thanks for the tutorial. 11/19/2020 10:36:25 pm
Oh my goodness, is that little mug adorable, or what? Love, love, love that idea and can't wait to make some for holiday gifts. Thanks for sharing the tutorial! Hope you have a very Happy Thanksgiving!
Tiziana
11/23/2020 03:40:08 pm
That mug is so stinkin' cute!!! I know what will be at my Christmas table this year!! Thank you so much for sharing such a fun project and beautiful card! Leave a Reply. |

New 2023-2024 Stampin Up Annual Catalog


Kits Collection


Join today

Categories
All
Archives
January 2024
|


 RSS Feed