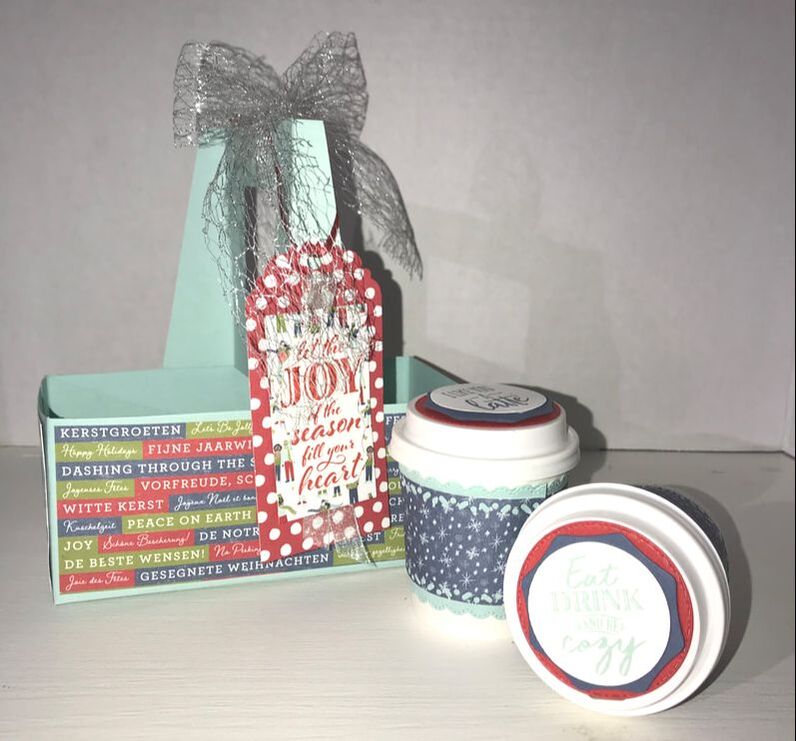
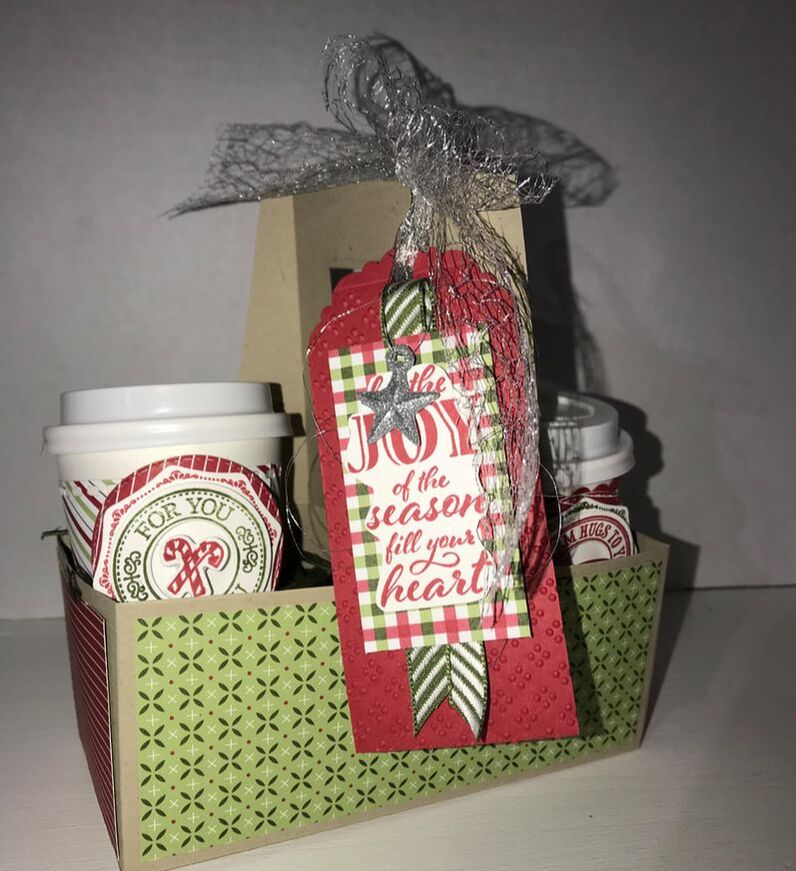
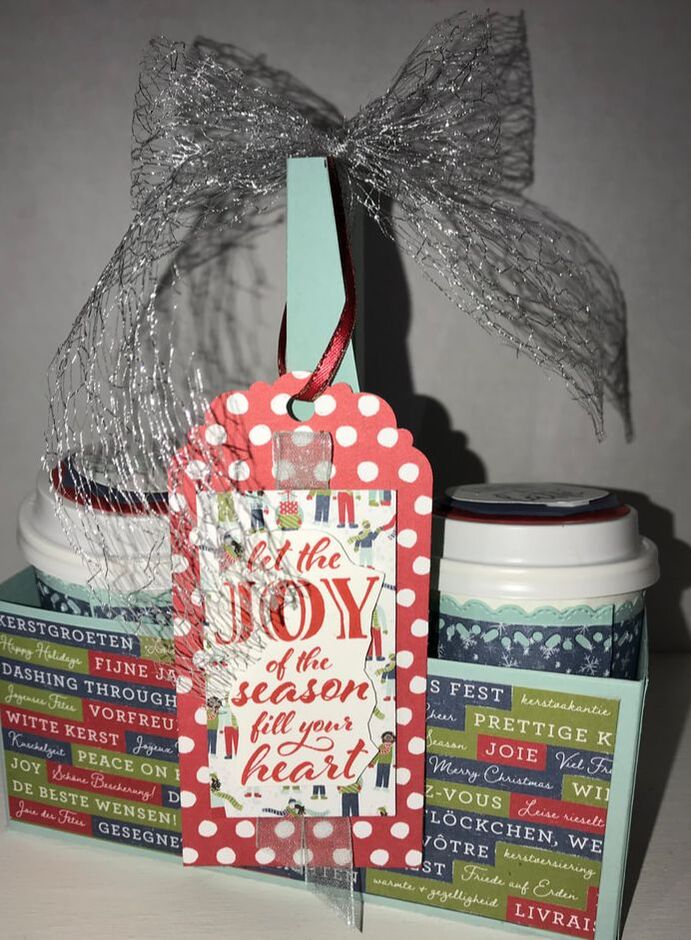
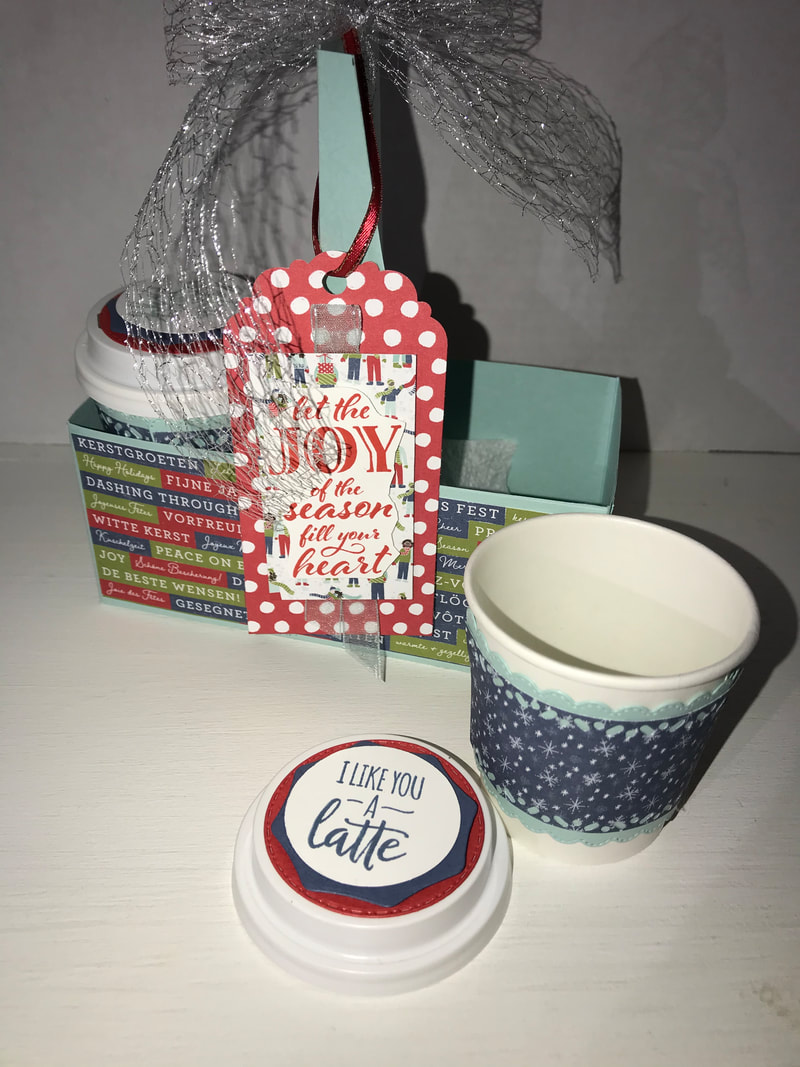
 OH My Goodness! I had so much fun creating my own Coffee Carrier! I just love love love it! It's so stickin cute! If you follow me on my Facebook Page Stampin and Scrapping with Steph, you would have seen Facebook Live where I shared with you how I made the carrier. Stampin Up has a pack of 8 Coffee Carriers in the Holiday Mini Catalog and I just LOVE them, but, I wanted to figure out how to make my own, so if, Stampin Up retires them in January, I can keep making them in any color I want! I just can't get enough of making them! I love the versatility! Decorate them anyway you want and fill them from anything from cards to makeup to candy...the skies the limit!
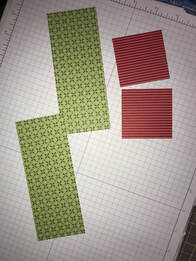
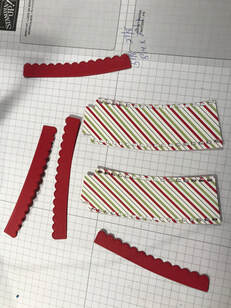
For the Tag, I used a piece of DSP that measures 2x 4 1/4" and then I used the Delightful Tag Topper Punch. I also used a piece of Pool Party Sheer Ribbon and another piece of DSP that measures 1 3/4" x 2 3/4". I will suggest, practicing on paper you don't care about and do a dry run before you start cutting your good cardstock :-) To make the carrier, use the Simply Scored Scoring Board or Stampin Trimmer to score your cardstock. Remember that you need to score and cut both pieces of the cardstock the same. With the 8 1/2" side at the top of you trimmer, score at 2 1/4" and 4 3/4" Turn the paper and place the 9 1/2" side at the top and score at 2 7/8" and 8 3/4" Line up the 2 7/8" score line onto 3" and add a score line from the top of the paper to the 4 3/4" score line. (refer to template) 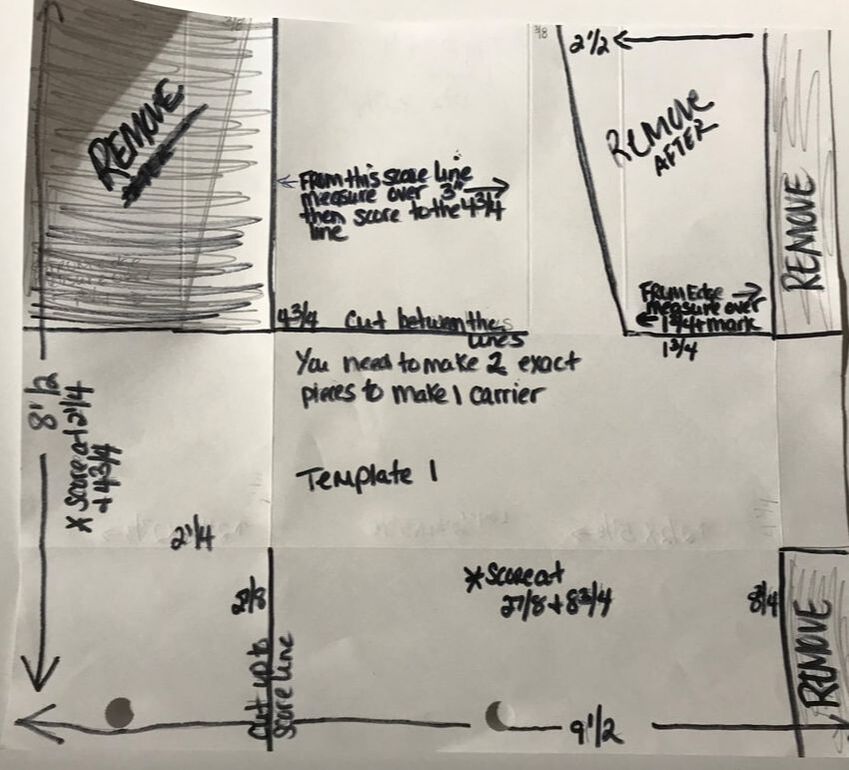 For the next step, I made sure the paper sits with the widest scored section is on the left, and the 1/2 section is on the right. Starting at the bottom, cut up on the score line at the first section then remove the 1/2 section up to the score line. Next, remove that 1/2 section at the top right. Measure 1 3/4 from the paper edge in, along the score line and make a mark. In that same section, move to the top and measure in from the paper edge, 2 1/2 and make a mark. Then draw a line that connects the 2 points. Remove that section up to the diagagnol line we just drew. Now, from the left side. Remove that section at the top-left going from that 4 3/4 and then up along that 2 7/8 line. 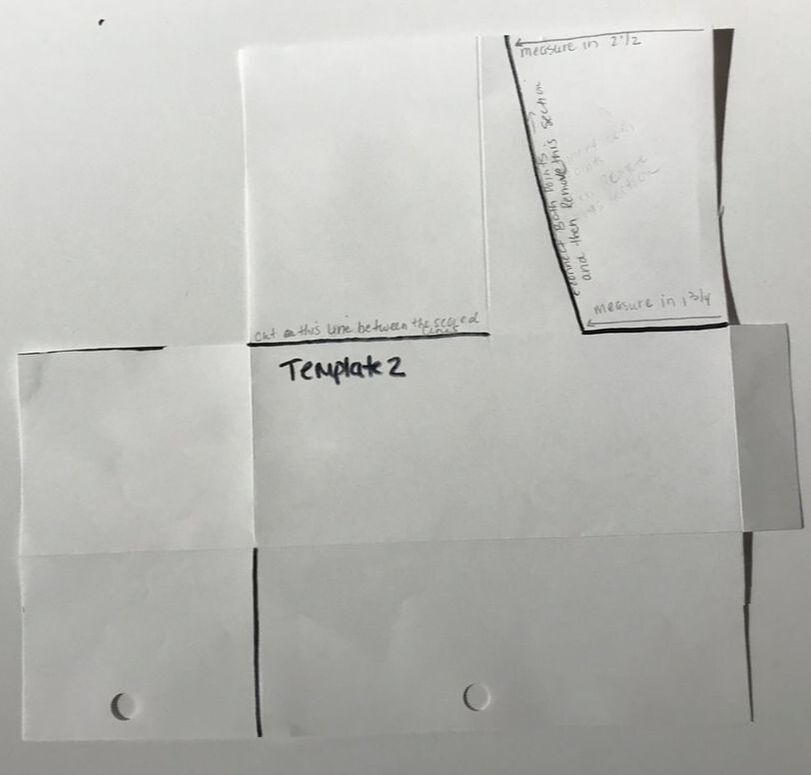 Please ignore the wholes at the bottom of my template above. I used 3-whole punch paper! Ok, so after following the steps above, you should have a piece that resembles the template above. The black lines represent the areas that were cut. I left on the section at the top right just to show again how that section was measured and then cut. You should have 2 pieces that look like the template below. Now from the edges of the paper, cut along that score line up to that triangle section. See below. 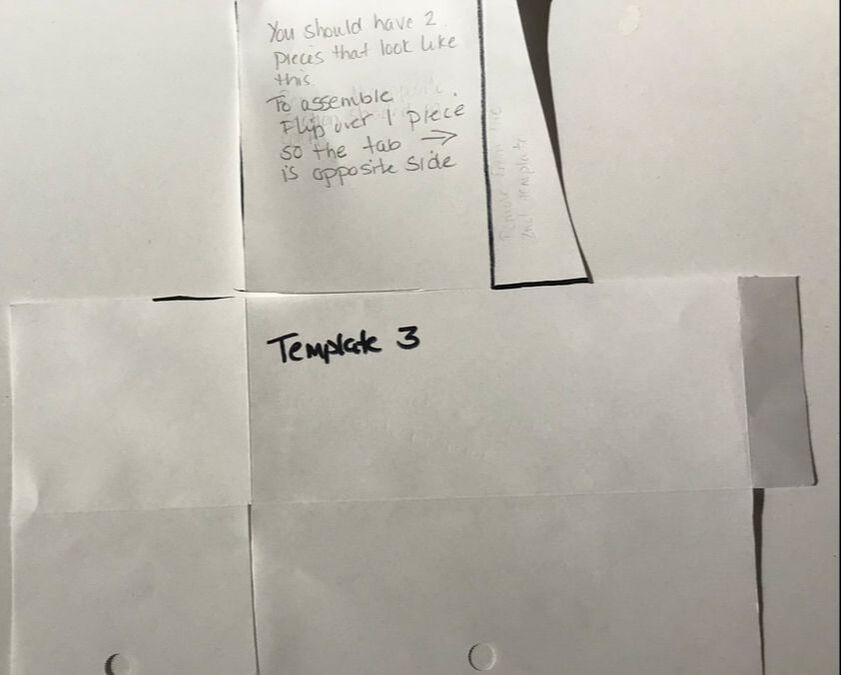 The section you just cut the score line on, measure 3/4 down and make a mark. Center a punch or die over that area and cut out a shape for the handle. I used a Square from the Layering Square Dies. Make sure for the second piece of cardstock, you turn the paper over so that 1/2 tab and that triangle section is on the left. Adhere the sections you just cut out the shape in. Decorate your carrier sides before attaching the carrier together. I found it easier to do that while that carrier is flat. Attach the sides to either sides of your carrier. And then fold the bottom flaps in and adhere to create the carrier bottom.
I hope my directions make sense, so feel to contact me with any questions!!!! I had fun sharing with you. If you have a chance to watch my Facebook Live, I demonstrate the steps I shared. Be nice, I am still a novice and learning, well surving the facebook Live challenges!!!!
I am hoping to share the video onto YouTube as well....so stay tuned I will share when I get that all set too!!!!! Thanks so much for stopping by! I'd love to hear what you think. Happy Stampin Steph
0 Comments
Leave a Reply. |


Categories
All
Archives
May 2024
|

 RSS Feed